I love finding inspiration for projects on pinterest. I love it even more when I find a project that I already own most or all of the supplies necessary to complete it! Lately, I've pinned a ton of string art projects like this one and this one.
I've been looking for something interesting and large to hang over the headboard in the master bedroom and decided that string art could be a good solution.
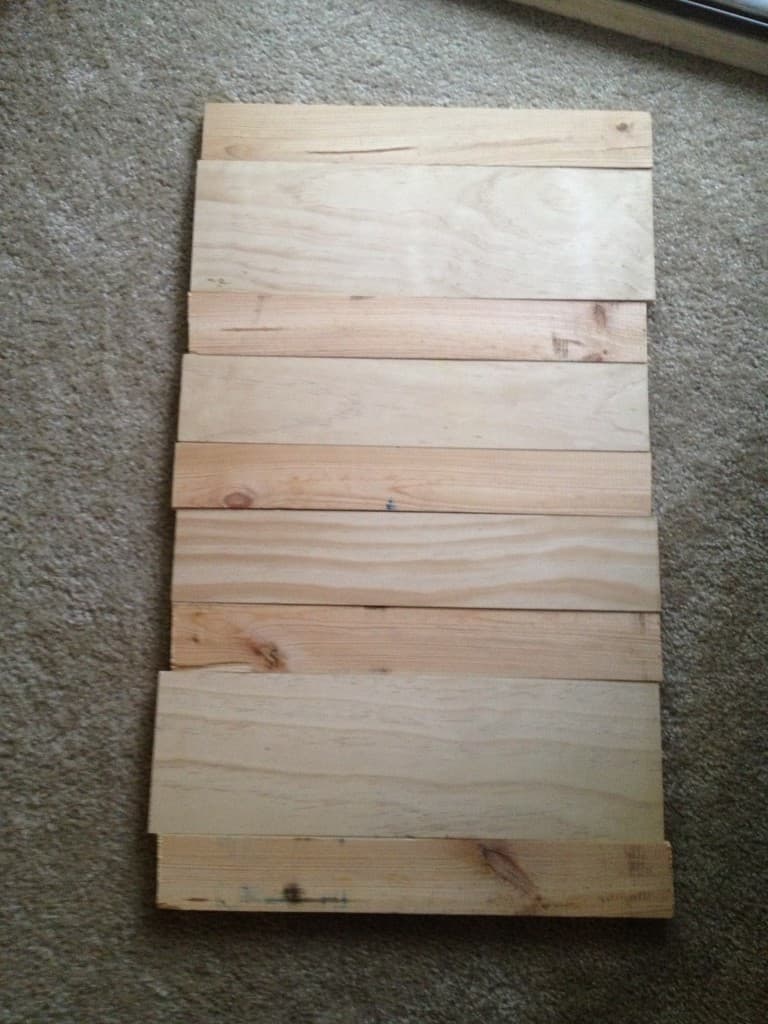
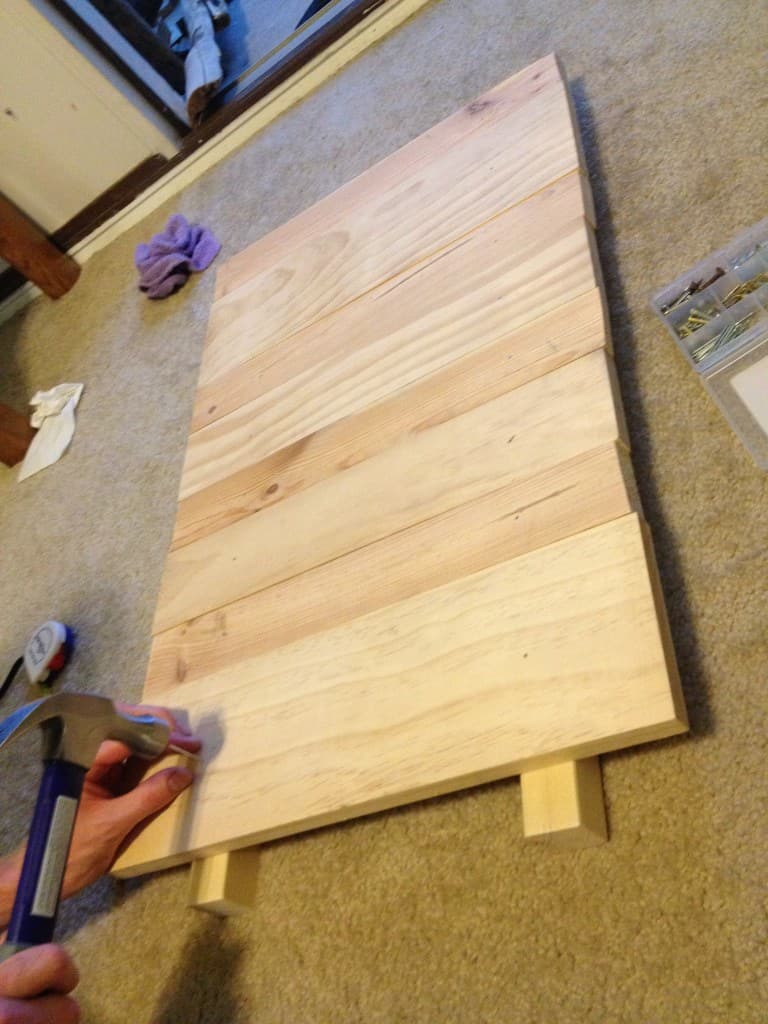
To start, I needed a wooden base. I wanted the base to have a rustic feel, so instead of going for one large square of wood, I decided to assemble several boards together to form a sort of "pallet" look. I didn't want the boards to all be the same width, wood, or even exactly the same length.
Luckily, I had a stash of hoarded wood in the storage shed. Some of it came with the condo and some of it Sean's been hoarding for years. We collected the pieces that were ½ an inch thick & Sean cut them in roughly-uniform lengths. They're about 18 inches wide, though not too exact.
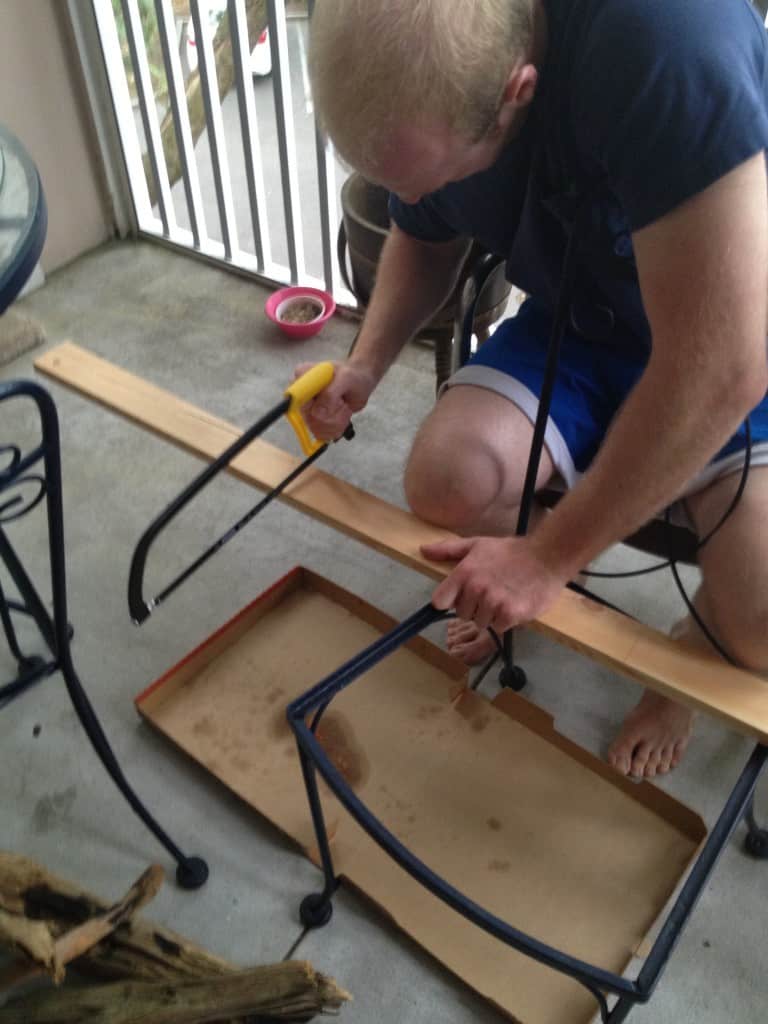
Sean used a simple bow saw to slice through the boards quickly.
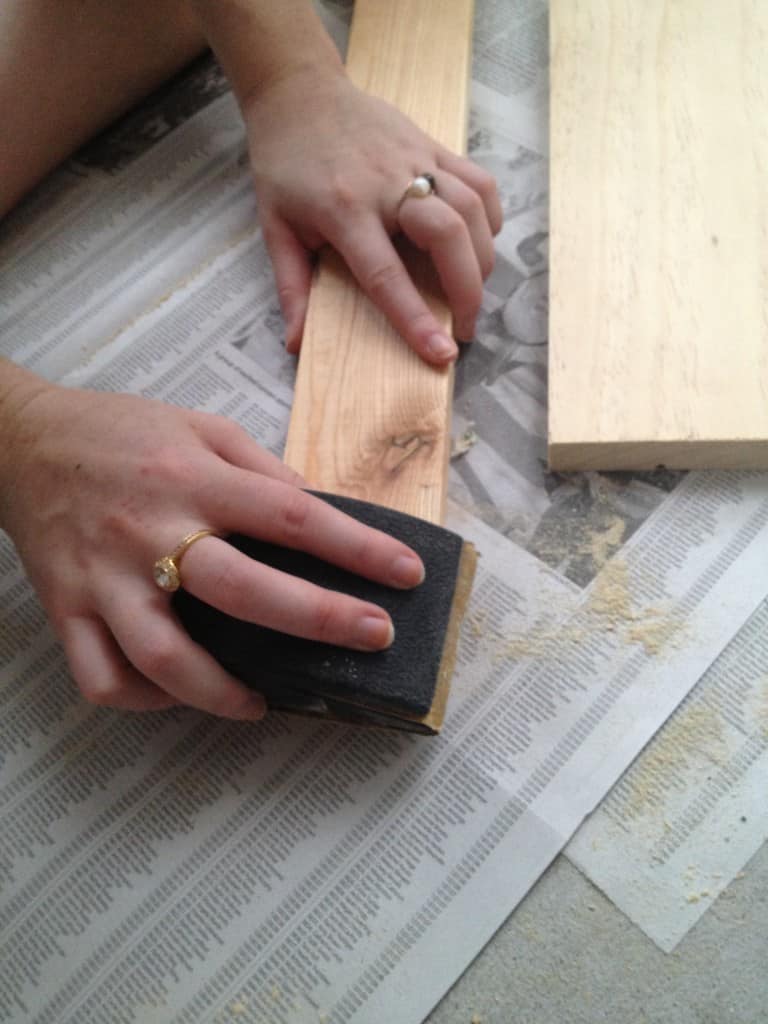
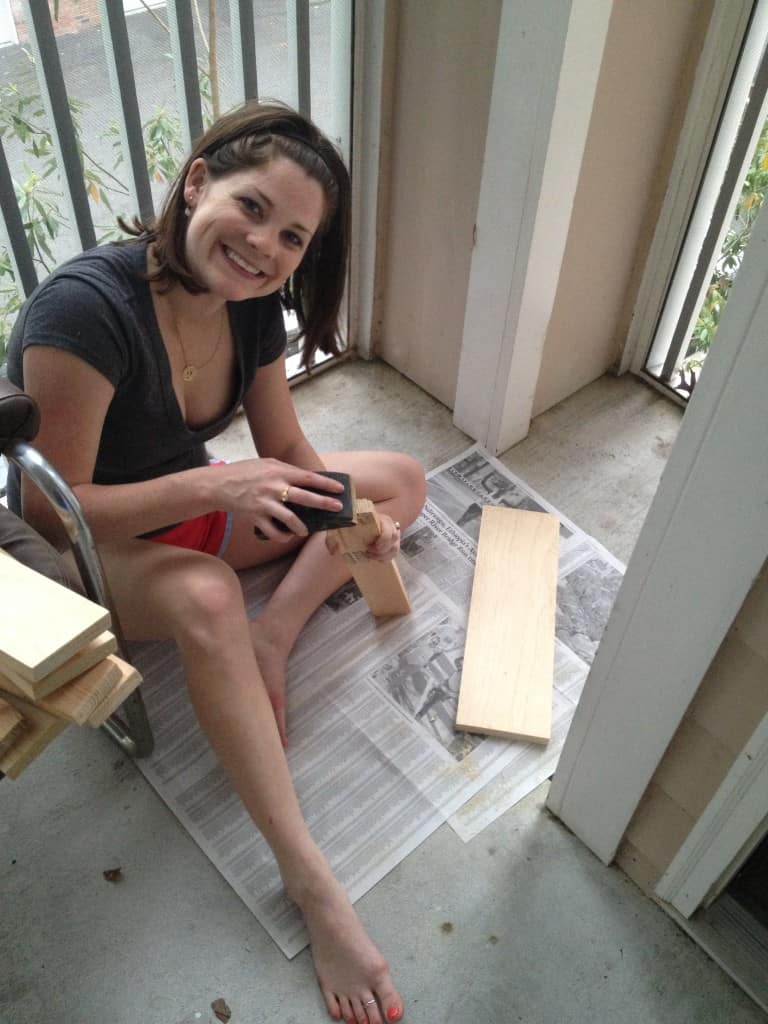
I used a sanding block to smooth the edges and sand the boards. Remember to sand with the grain of the wood!
Next, we laid out the boards to decide the pattern that we liked. I decided to go small, large, small, medium, small, medium, small, large, small. There wasn't really much reason except it was symmetrical and worked with the boards that we cut and the height that I wanted.
Next, Sean cut 2 1"x1" boards to make brackets to hold the boards together. He then nailed each board into each bracket. The larger boards took 2 nails on each side. He used really small paneling nails to minimize the exposed head.

Next, I dusted the whole thing off and got staining. I used the same Rustoleum dark walnut wood stain that we used to stain the side table that Sean found next to the dumpster.
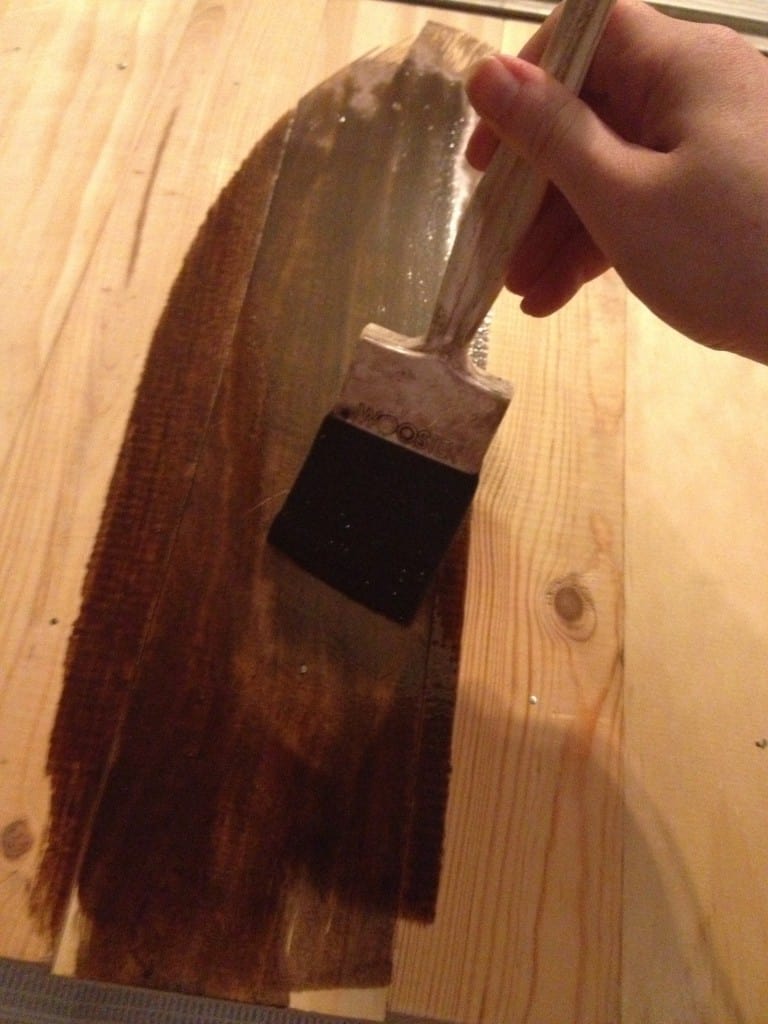
To apply the stain, I used a foam brush. Apply liberally in the direction of the grain, let sit for 5 minutes, and then wipe off excess with a rag. I let it dry for 30 minutes and then flipped it over and repeated on the backside.

Normally, we seal wood, but since this wouldn't be handled very often, I decided to skip that step. The boards turned out slightly different colors depending on the type of wood. I think this adds to the "rustic" look of the piece. If you don't like it, make sure that all of your boards are the same type of wood.
We let the "shield" (as Sean called it) dry over night.
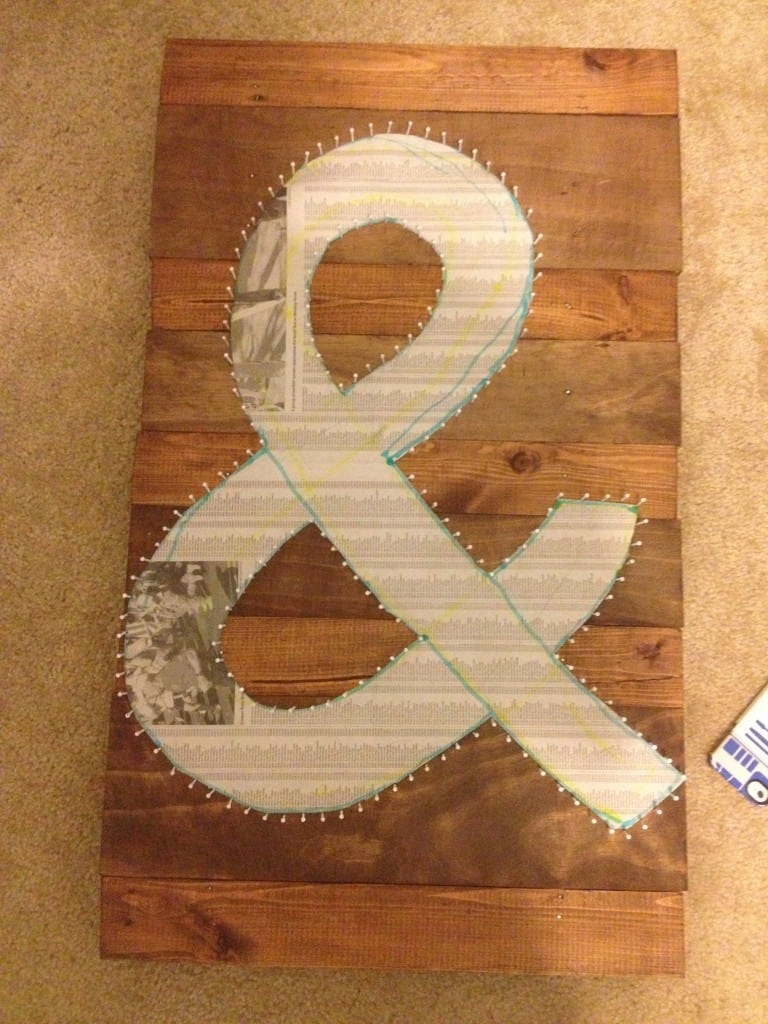
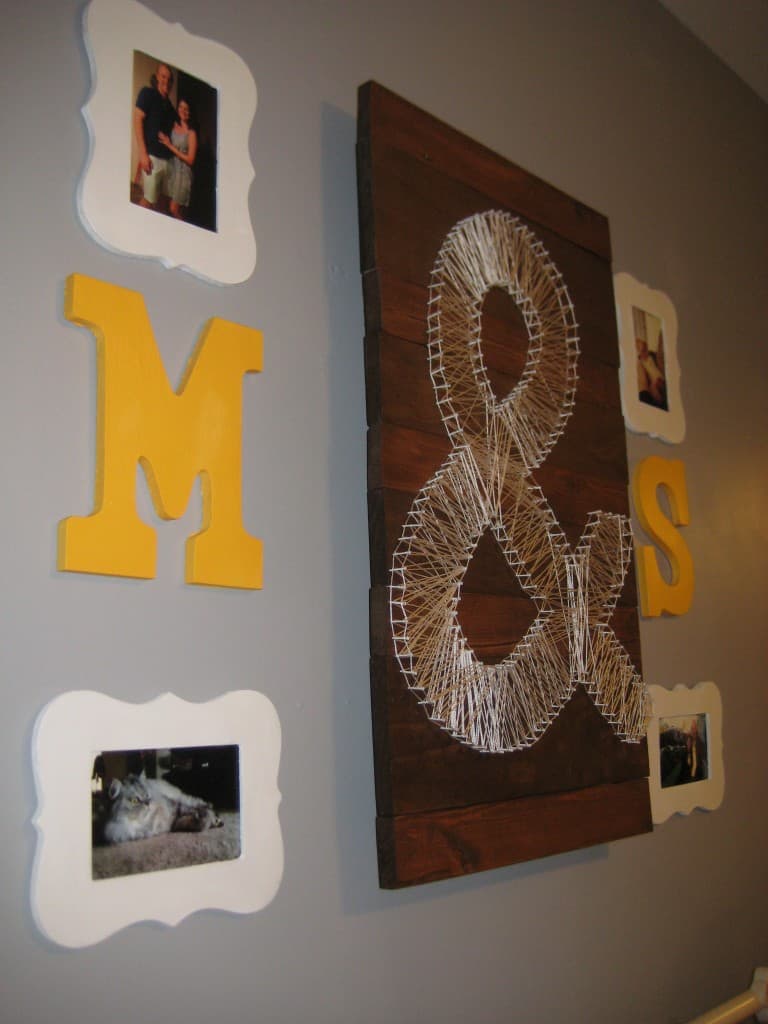
We thought about hearts, letters, or even the shape of a state, but in the end, we decided to go with an ampersand for our nail art (like this one). I think the word ampersand is awesome, as well as like the look AND what it symbolizes. It has a nice geometric, sharp shape and symbolizes love and friendship without being as corny as a heart.
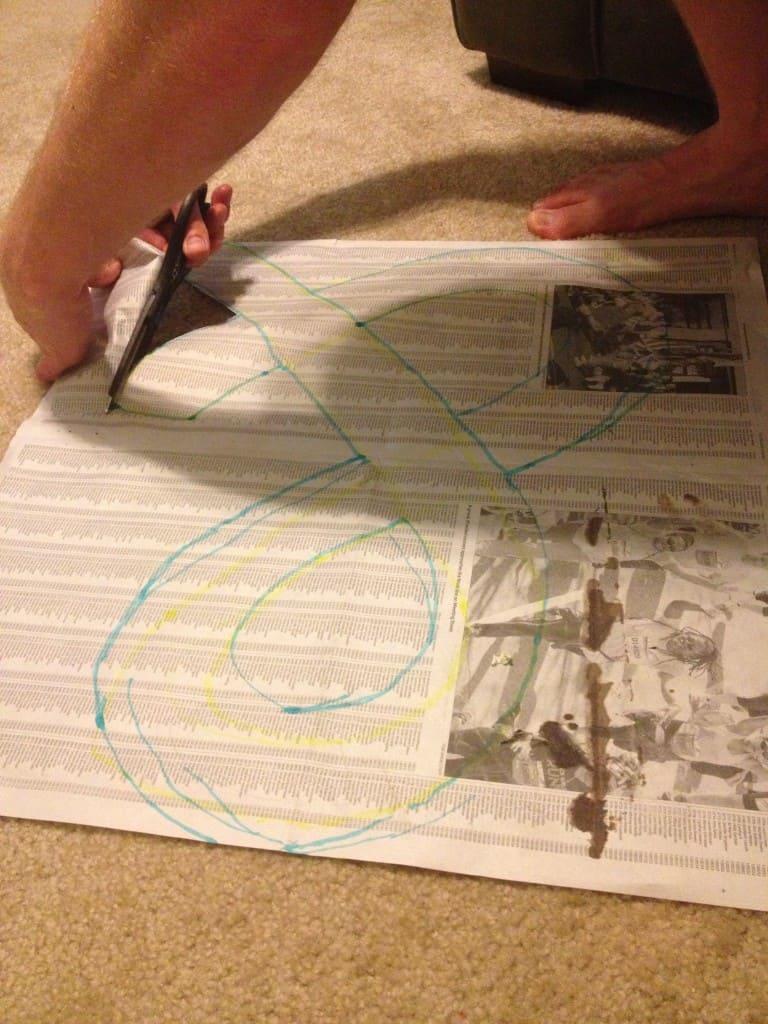
I printed off a size 700 font ampersand (in Arial) but it was still too small for the board. So, Sean free-handed one on a sheet of newspaper. We then used a ruler and drew it out for real using his guide and making it 3 inches wide in each section.
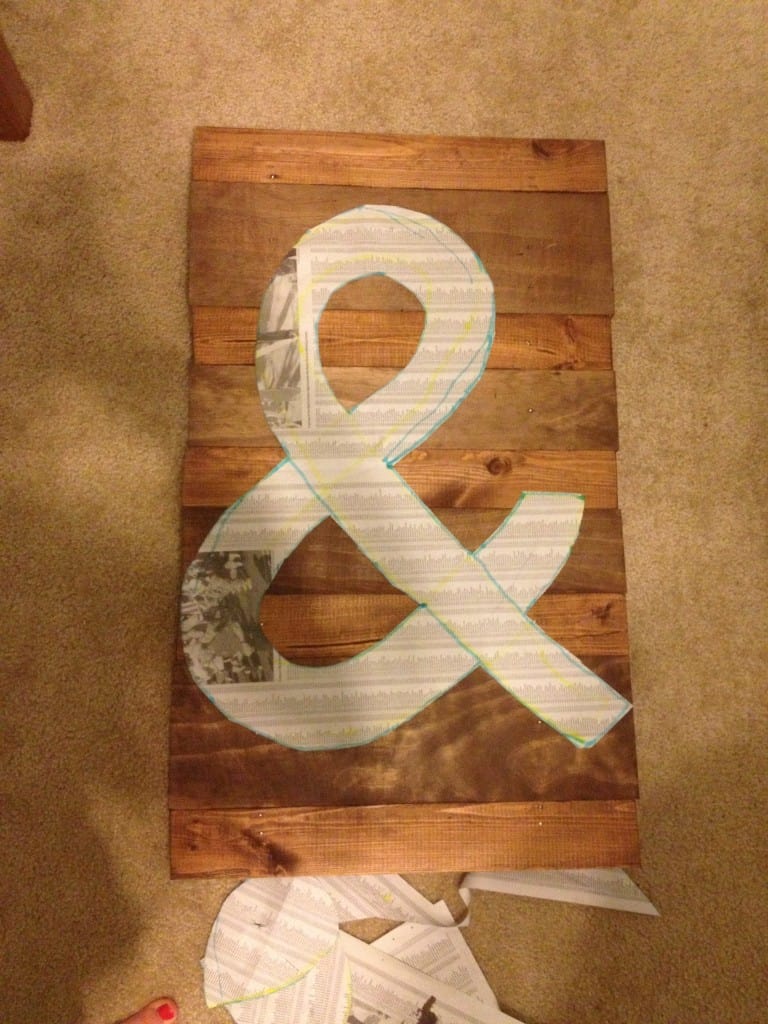
We then cut out the newspaper and placed it on the wood.
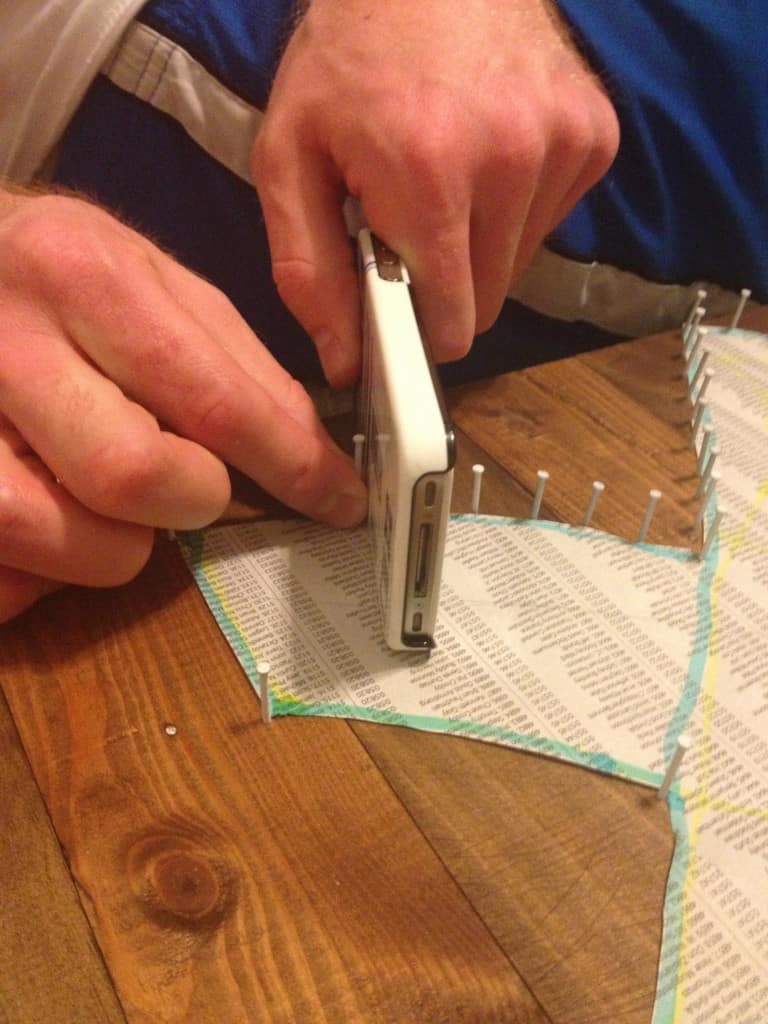
We then used the nails to start framing the newspaper. We used white nails from Lowes because I thought that they would blend with the string better. They also came in a 6oz package for less than $3, a great deal compared to some of the other small nails. Whatever you use, be sure they have enough of a head to keep string snug.
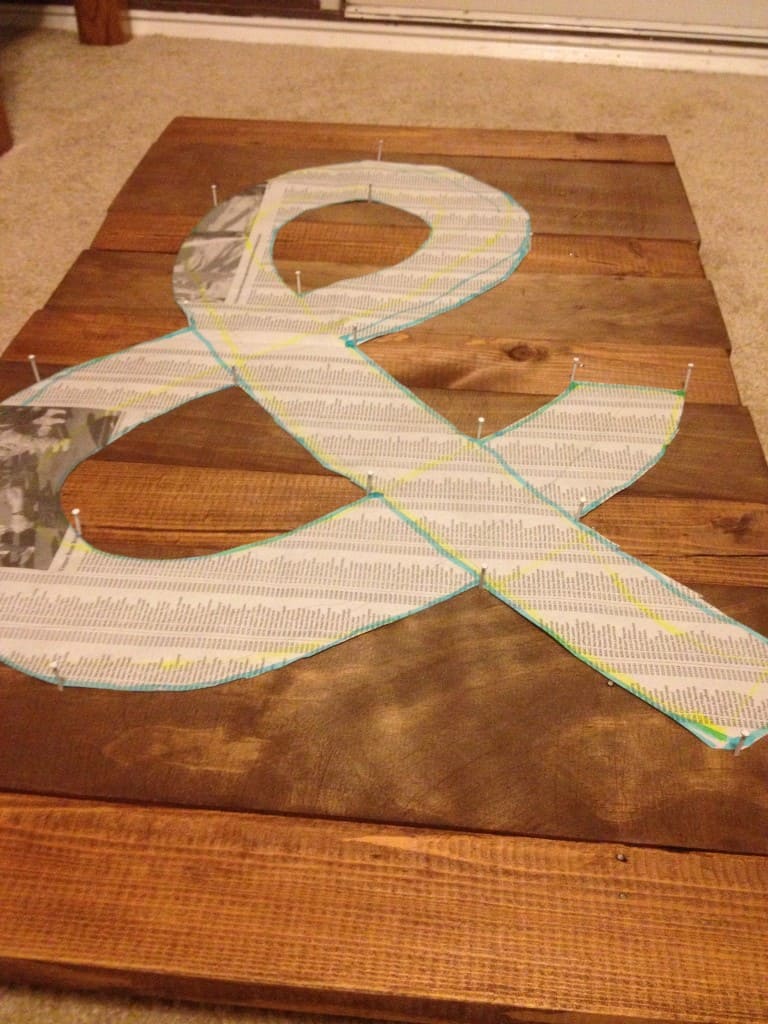
We started with a few nails in the key points and corners to set the placement of the design.

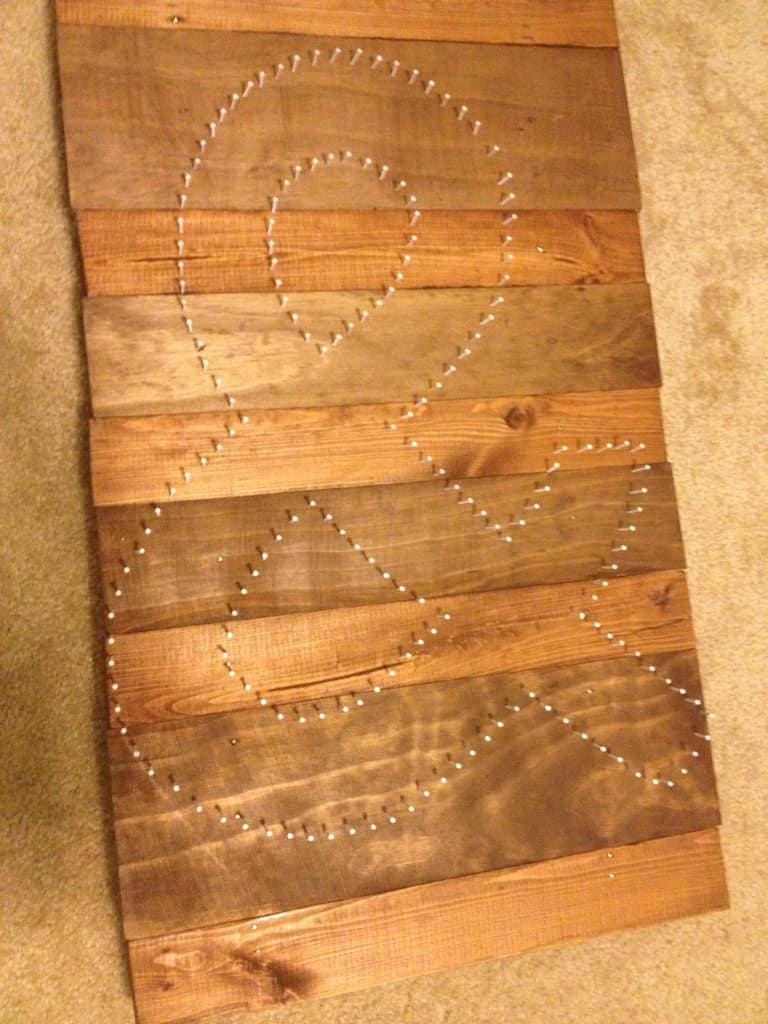
As far as nail placement goes, we actually used the thickness of an iphone as a measure of our spacing. It was easy, they were right there, and we could do two at once. We nailed them out gently & then went back around at then end to get them a uniform height.
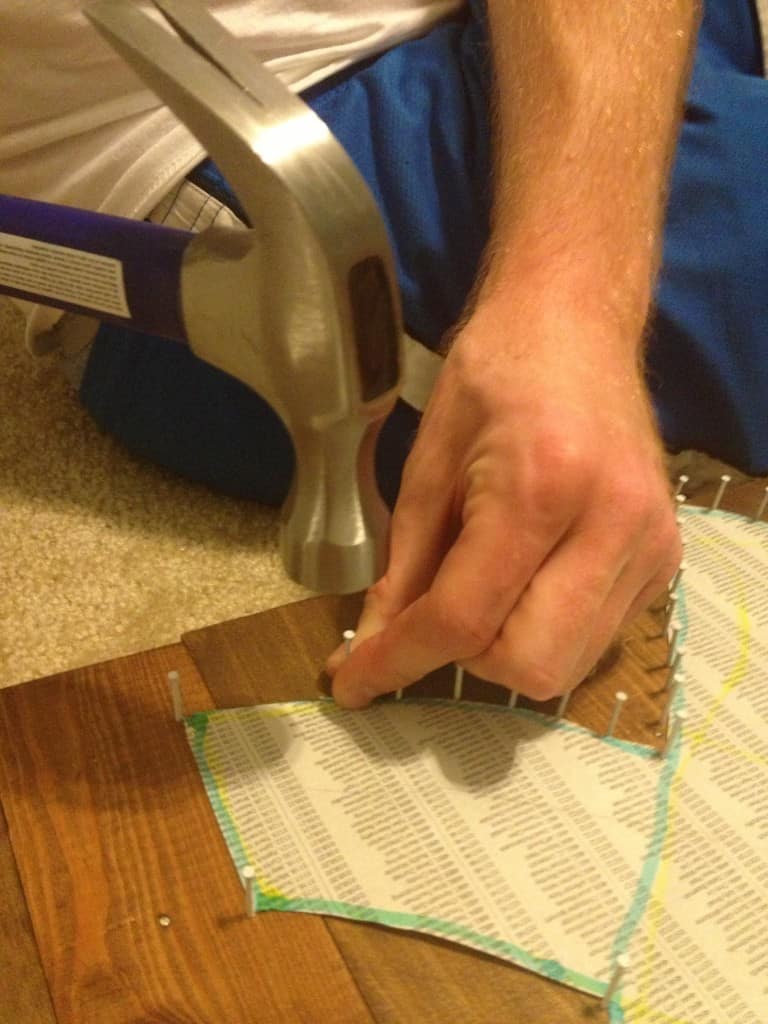
I thought that the nailing would take forever but with 2 people doing it, it took less than 10 minutes (while watching tv).
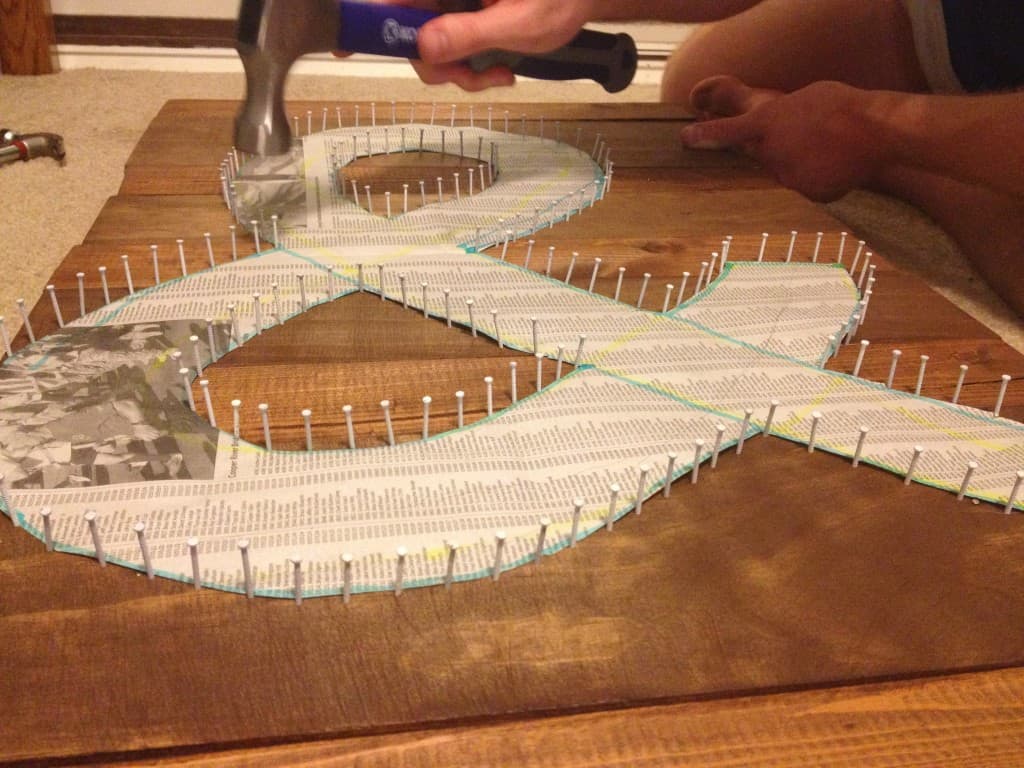

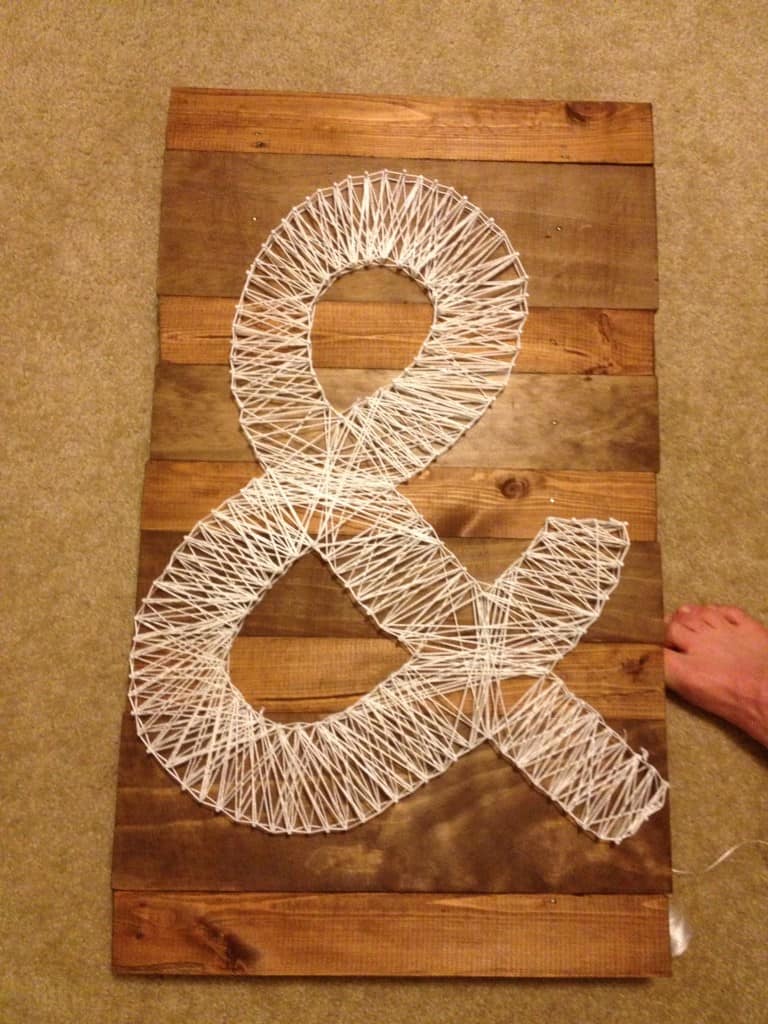
When we removed the newspaper, this is what we had:
The next step was the actual stringing. For string, we used a large spool of this white thread from Lowes.
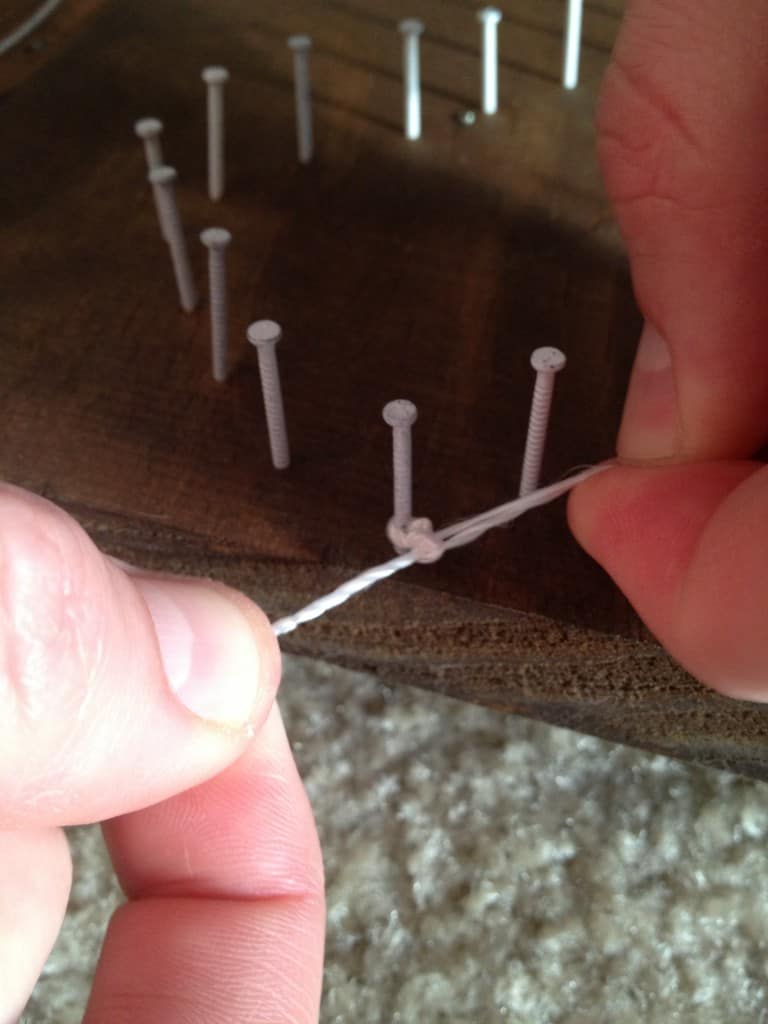
We started by stringing a border around the entire shape, to establish the ampersand shape.
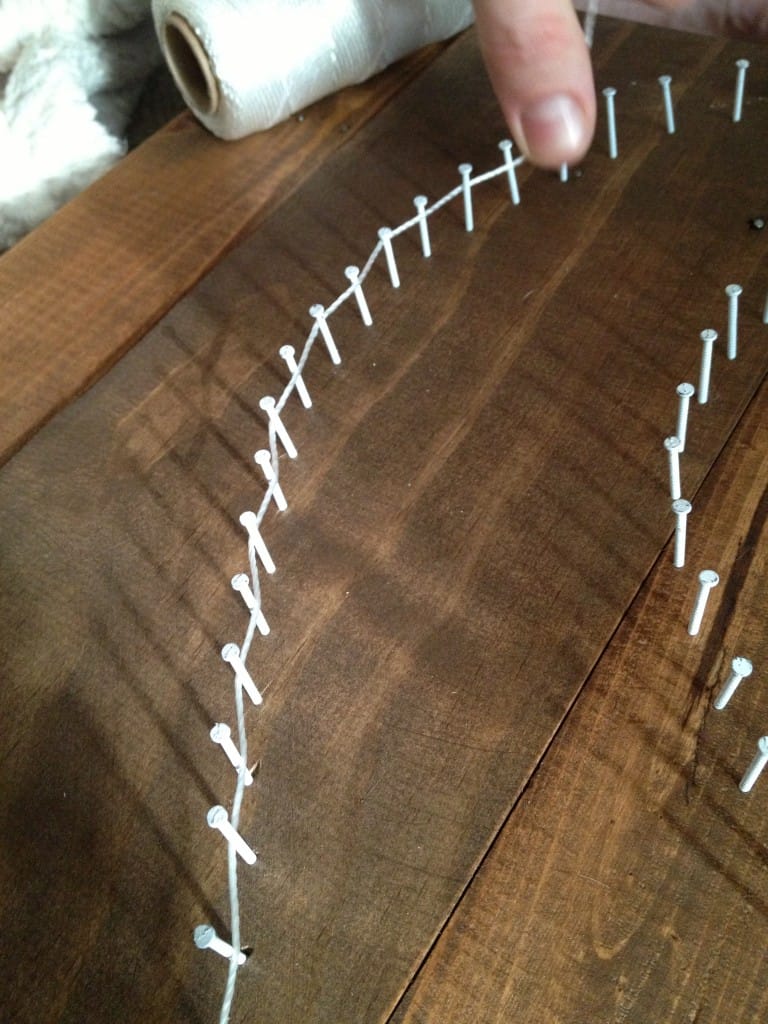
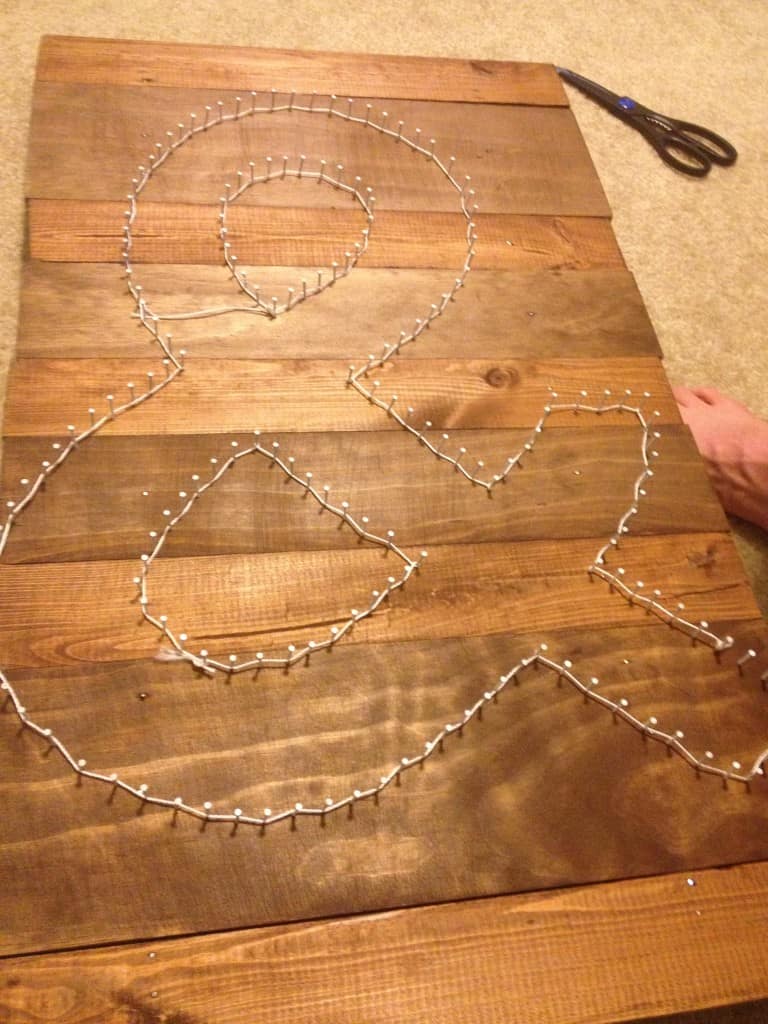
Then, we tied the string on to an end nail and began randomly going back and forth. We did about ten "layers" of string. For the final layer, we went back and forth between each and every nail to make sure we had great coverage.
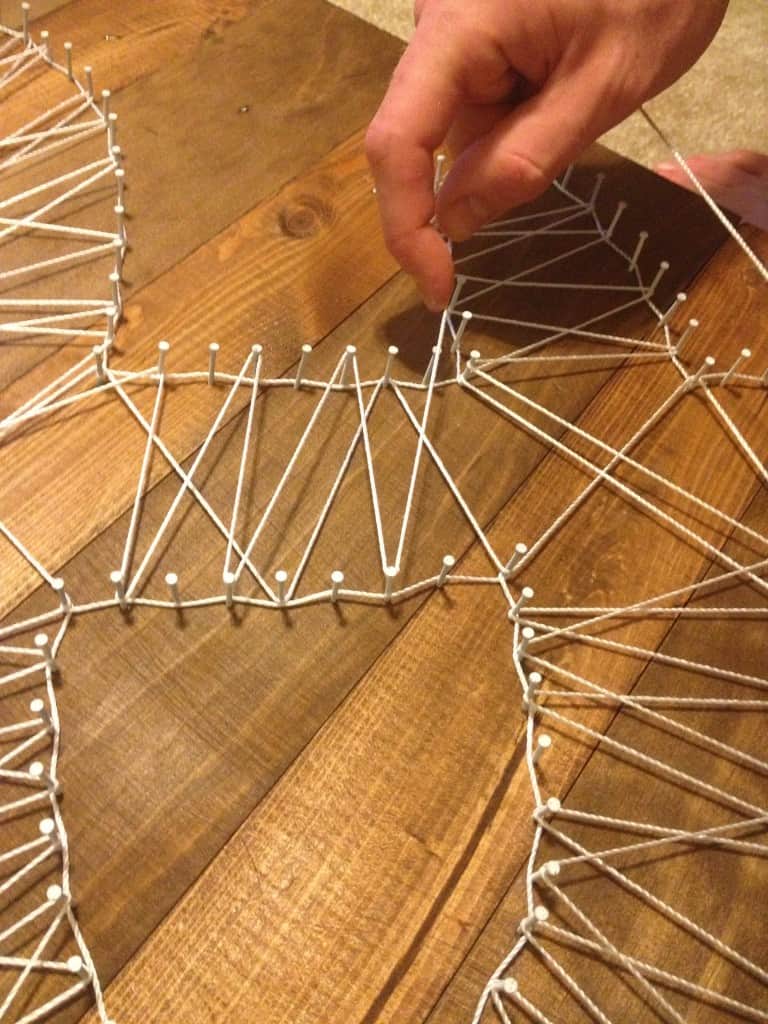
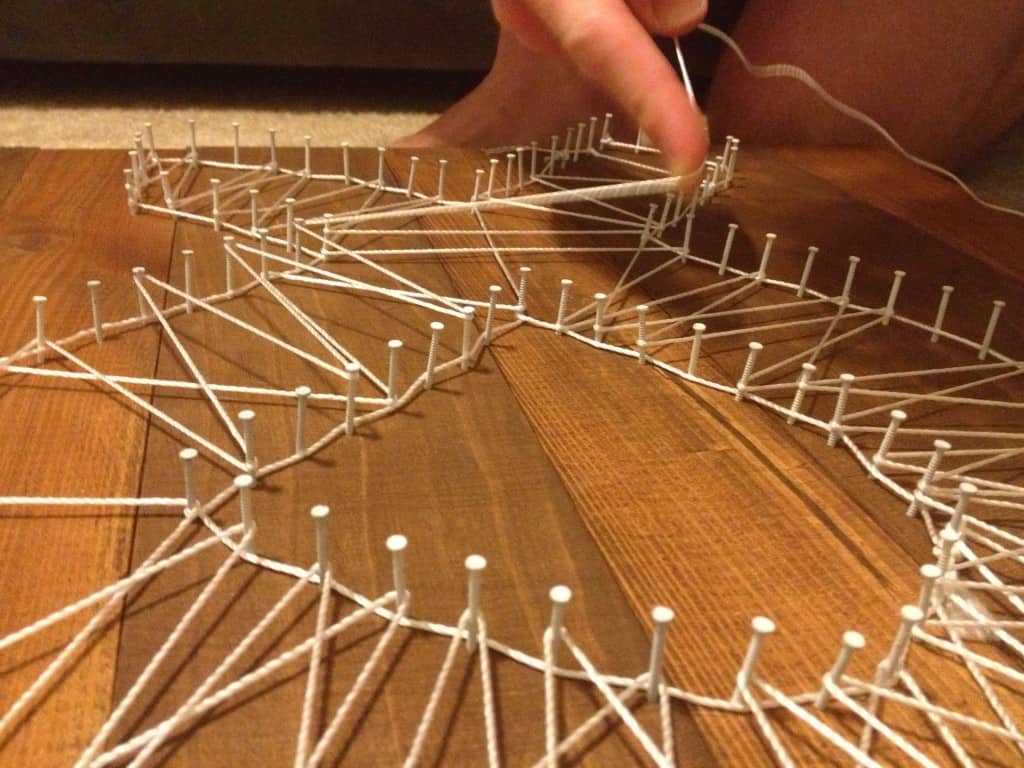
Finally, we did one more final loop around the entire border to "frame" the zig zags.
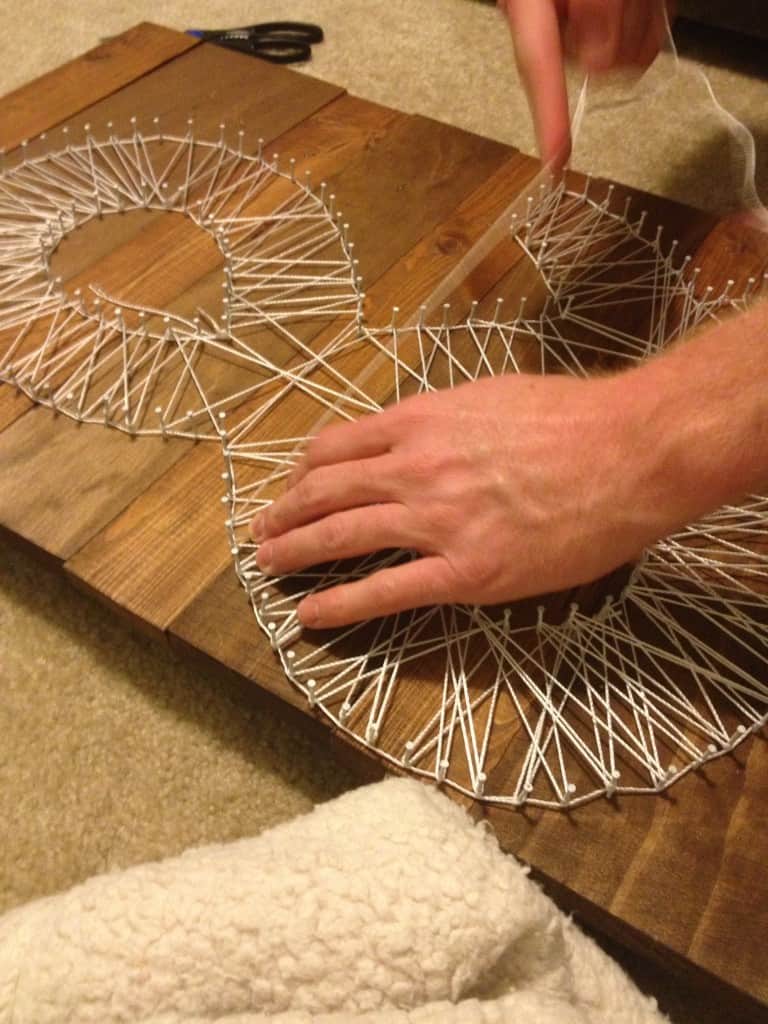
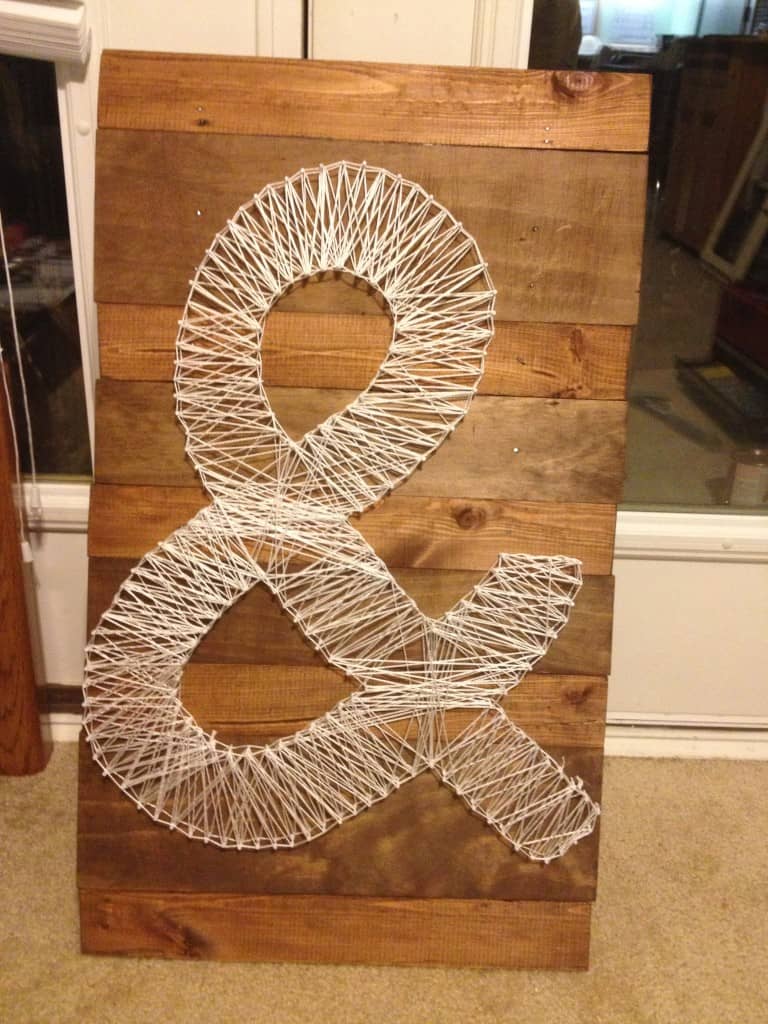
We tied a square knot in the end of the string and stood back and admired our work!
We hung it over the bed.
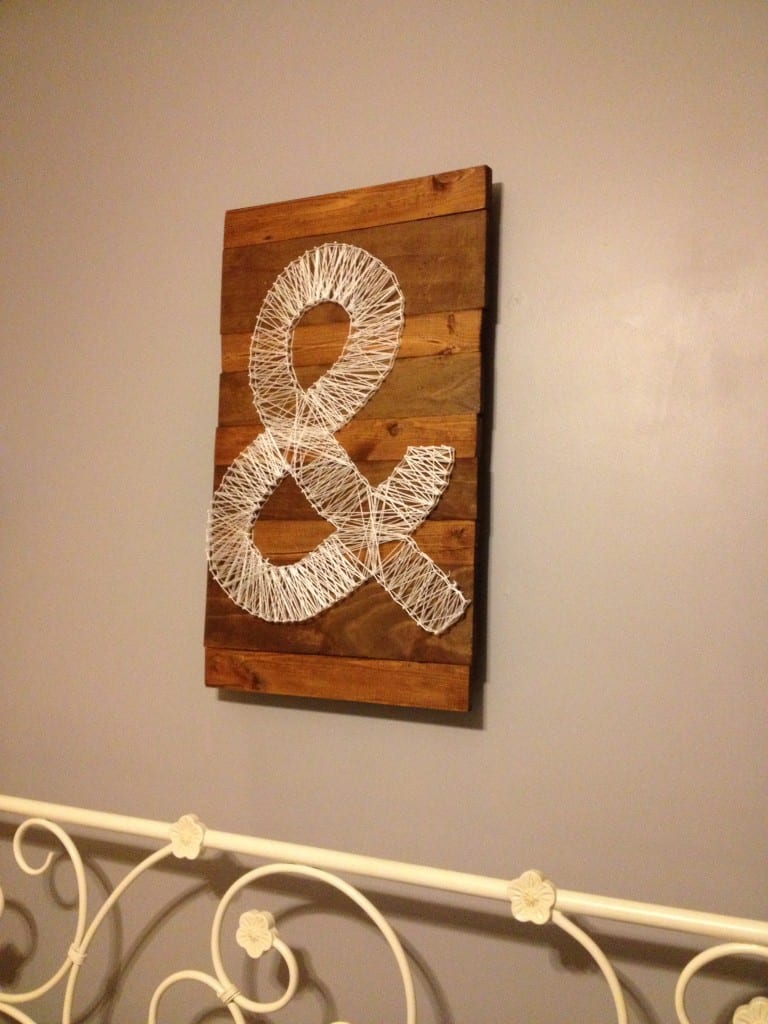
Sean attached a wire to the back and hung it from 2 picture frame hooks.
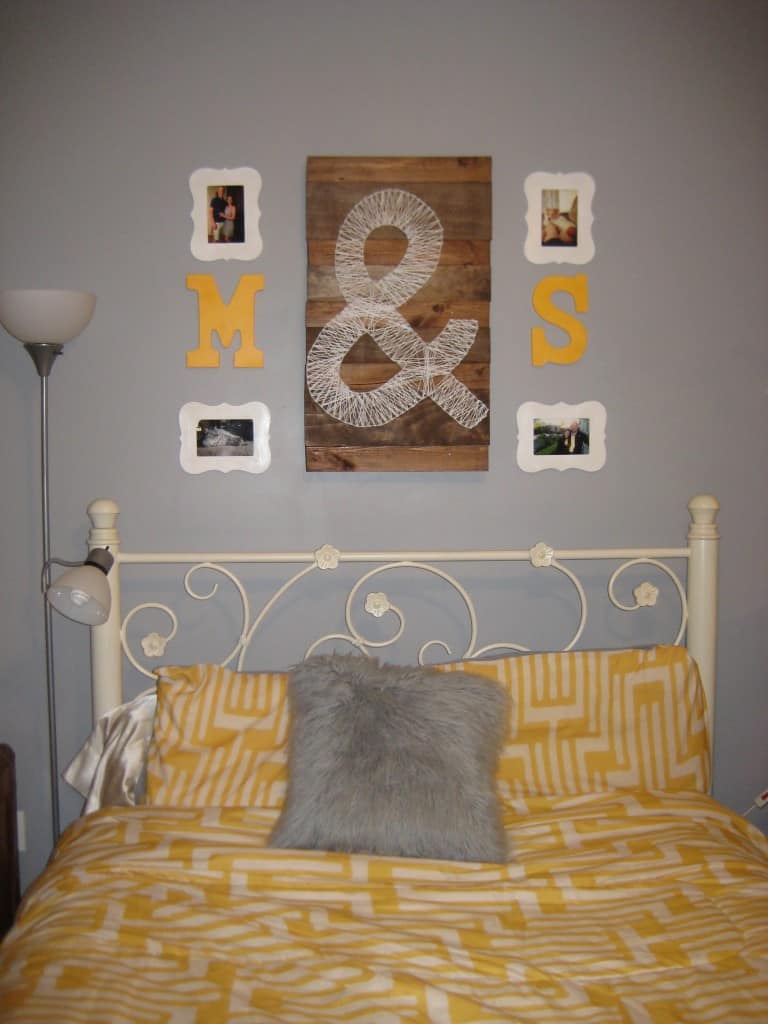
We sandwiched it between wooden letters & quatrefoil frames, both from Michaels and painted with 50 cent tubes of acrylic paint.

The only supplies that we purchased for this project was the string and the white nails, totaling less than $5! Pretty good deal to me!
Have you done any almost-free projects lately?

Hello, I'm Morgan, half of the creative force behind CharlestonCrafted.com! With a passion for DIY that dates back to 2012, I've transformed three homes and now I'm dedicated to helping others craft their dream spaces. Let's turn your house into a home together!


Trisha D. says
You were so right, ampersands are waaay less corny than a heart!! My favorite kind of string art are the ones who don't skimp on the string, like yours!!
Morgan says
haha thanks I love the ampersand! Too bad I can't write them (I always forget which way the loop goes unless im looking at a keyboard!) or I would use them all the time.
Brynne@TheGatheredHome says
Cute project! I love the string-art idea, I'm just not sure what I would do with it... I like the fact that you did yours on a rustic board background!
Teresa @ wherelovemeetslife says
How cute!! I recently did some string art as well. It is such an easy project with great impact! 🙂
I love what you did behind your bed... super cute!
Patty says
What size and type of nails did you use?
Sean says
Hey Patty! We just used white finishing nails! These gave us the color we were looking for and are easy for use since they are thin and can hold the string. These ones from Amazon are what I go with- https://amzn.to/2UTjo2o