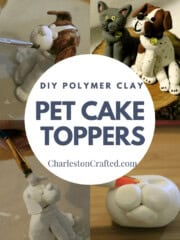
Here's how to make a DIY animal figurine using polymer clay! These make great cake toppers or decor pieces to show off your furry friends.
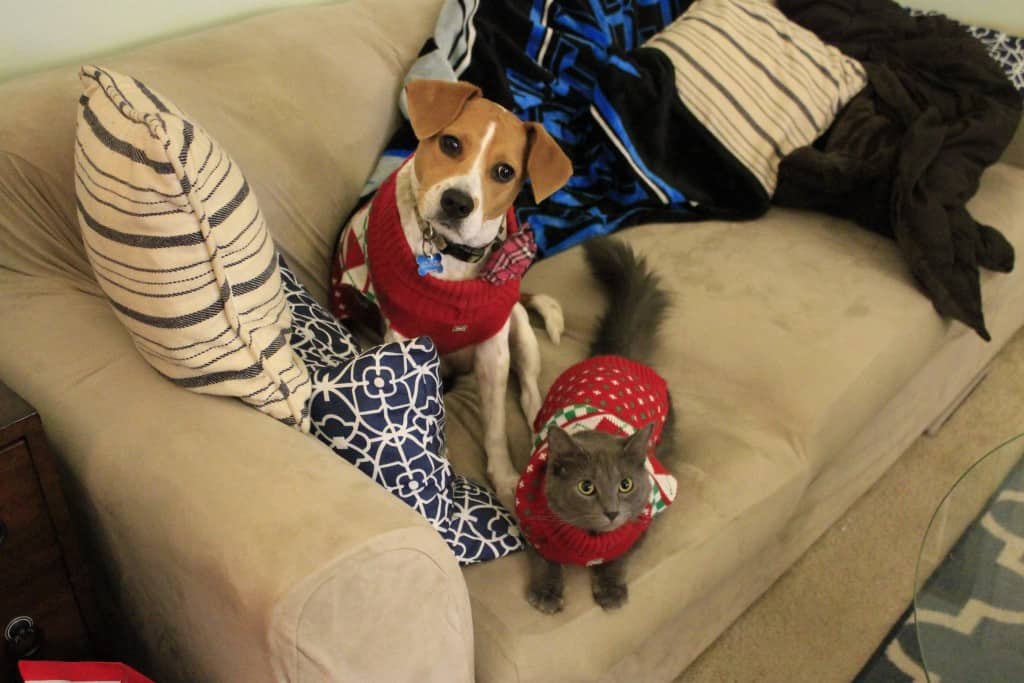
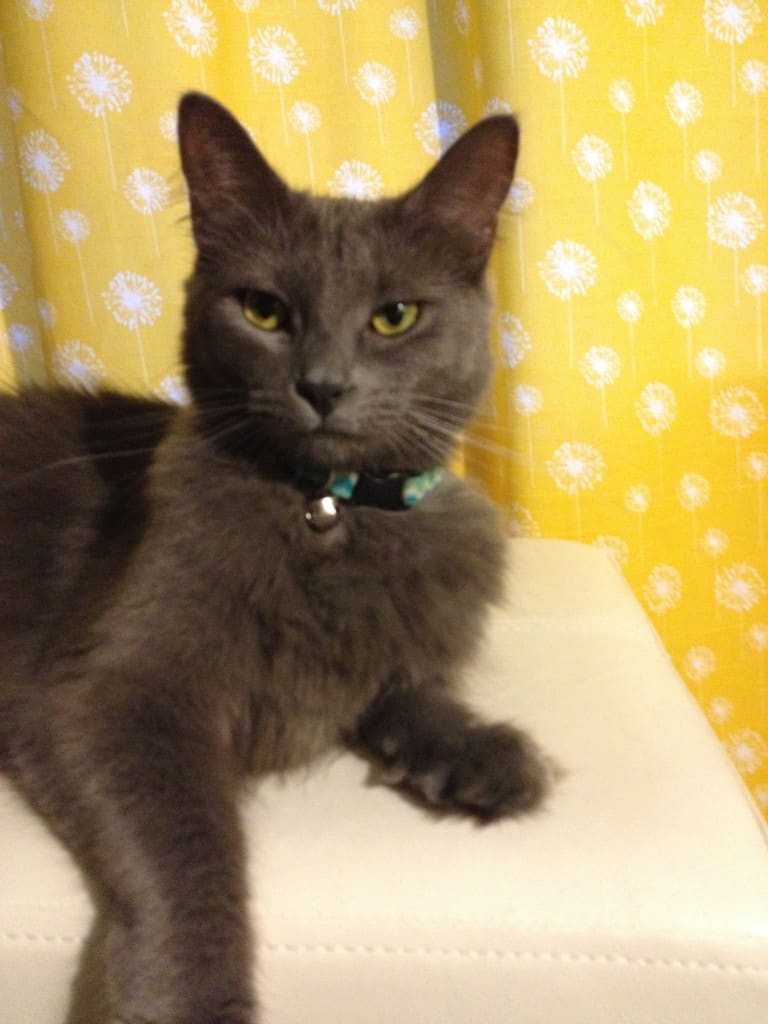
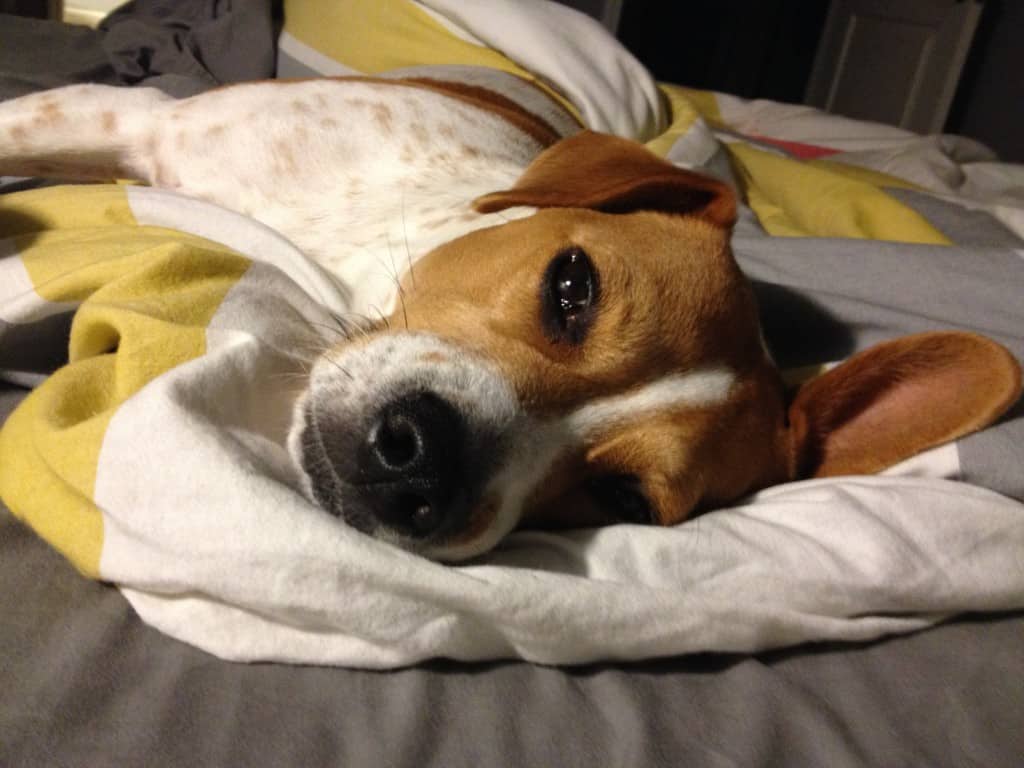
More than almost anything in my life, I love my sweet baby animals, Bear and CiCi. The unconditional love of an animal is just so sweet and so pure, I feel so lucky to get to have them in my life.
Like most pet owners, I think that I own the cutest cat and cutest dog in the whole world, and I really wanted to celebrate them at our wedding. So, I decided to make DIY pet polymer clay cake toppers!
DIY pet polymer clay cake toppers
Unfortunately, our venue does not allow animals. It is probably for the best, as it would be extra stressful to worry about CiCi being brought to and from the ceremony.
We are having a relative stay in our condo with them the night of the wedding and then they are going home with our parents for the duration of the honeymoon.
But, it was important to both Sean & I to find ways to incorporate them into our wedding. Something that came to mind pretty early in the wedding planning process was a cake topper.
We aren't having a traditional cake (we are doing a cupcake display, instead) but we would still like something to sit on top of... something.
I easily found several custom animal cake toppers on Etsy. However, at over $100 each, it was a bit of a budget stretch. Silly me, "custom cake topper" wasn't something that I had allotted for in our budget. The "other expenses" line is already growing exponentially, so I thought that I would give it the old college try and attempt to make a set of these myself.
Materials needed
I picked up the polymer clay at Michaels. Make sure (if you attempt this) you use the kind that is bakeable, not the never-dries. That would be weird to have a mushy cake topper.
I also grabbed a couple of tubes of cheapo acrylic craft paint. I wanted it to be cheap and watery so it would go on thin. I do a lot of painting (spray painting, wall painting, nail painting) and know that many thin coats give much better results than one thick, drippy coat.
I also know that you have to prime almost everything or it will take ten coats and you will be so annoyed that you glop it on thick and get drips and blobs. Get the colors you need plus white, for primer.
I already had small paintbrushes on hand, but if you don't, you can get a pack for cheap. The only other tools that I used were a kitchen knife, a pen (for indents) and a toothpick (for dots).
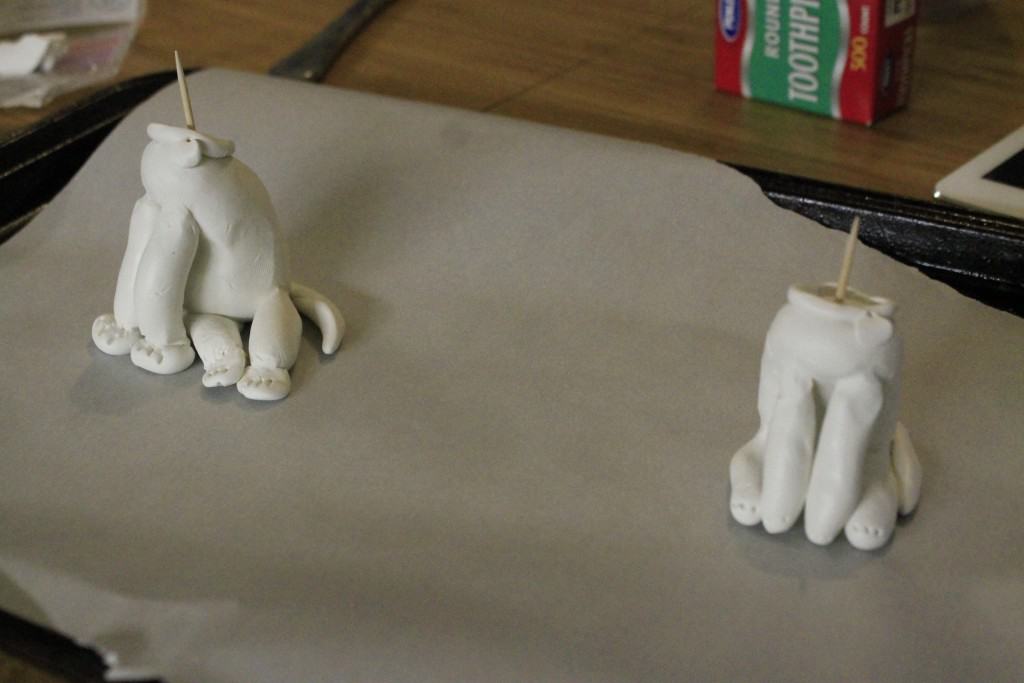
Step one: form pet head out of clay
Now here's how I handled the clay. Use a knife to slice off small sections at a time. Roll them in your hands or on a (clean) surface to form balls.
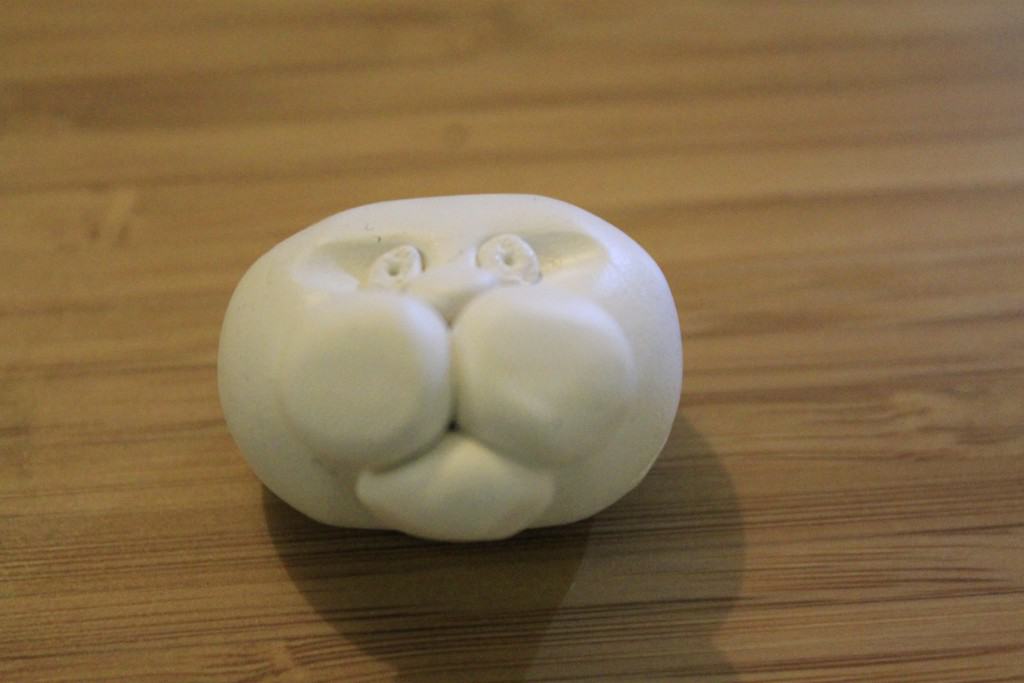
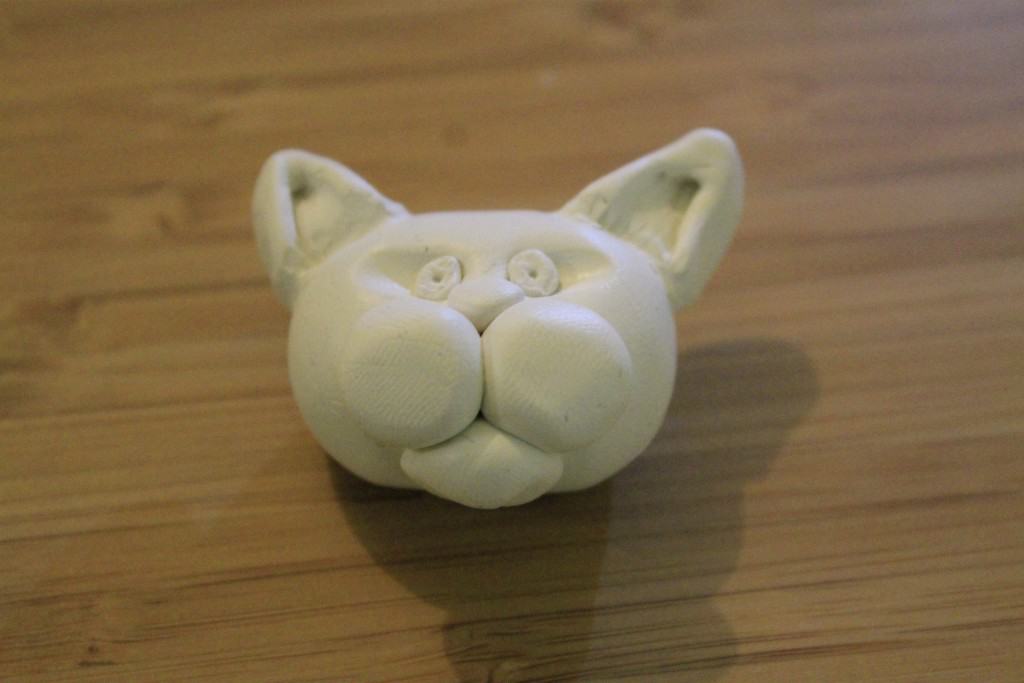
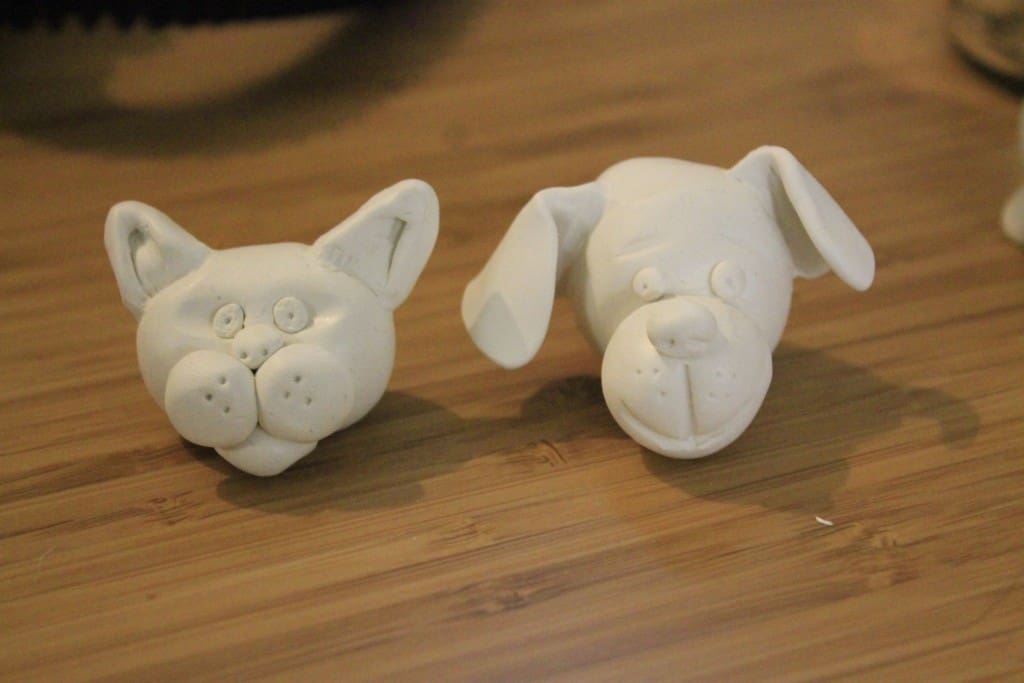
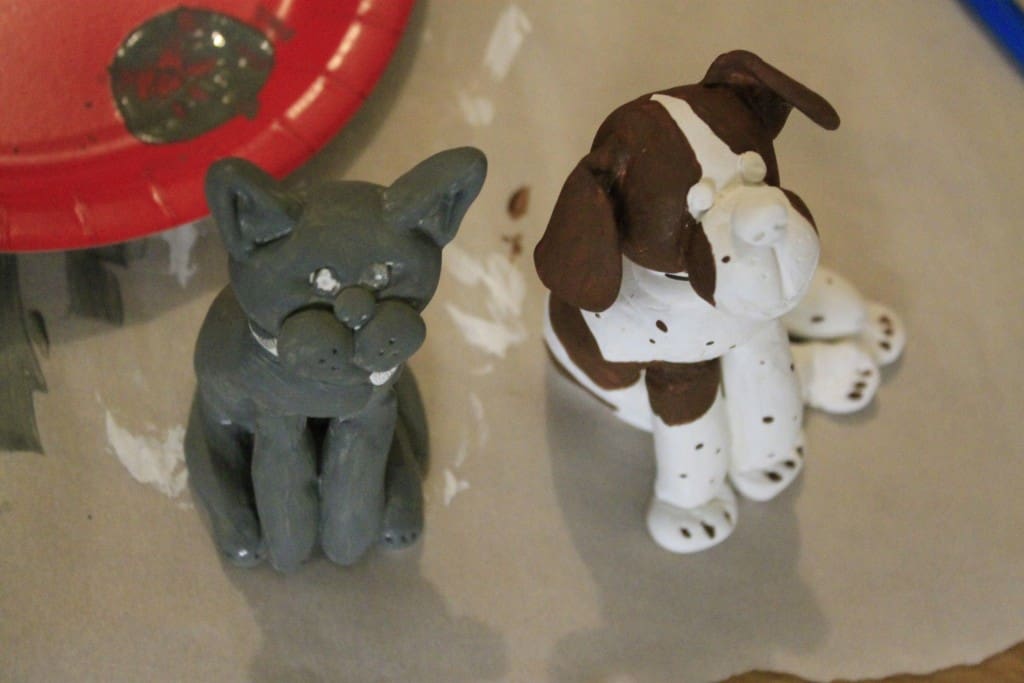
Now, make those balls into animals! I started with the cat head. It's one big ball (slightly flattened to an oval) plus three little balls for the face.
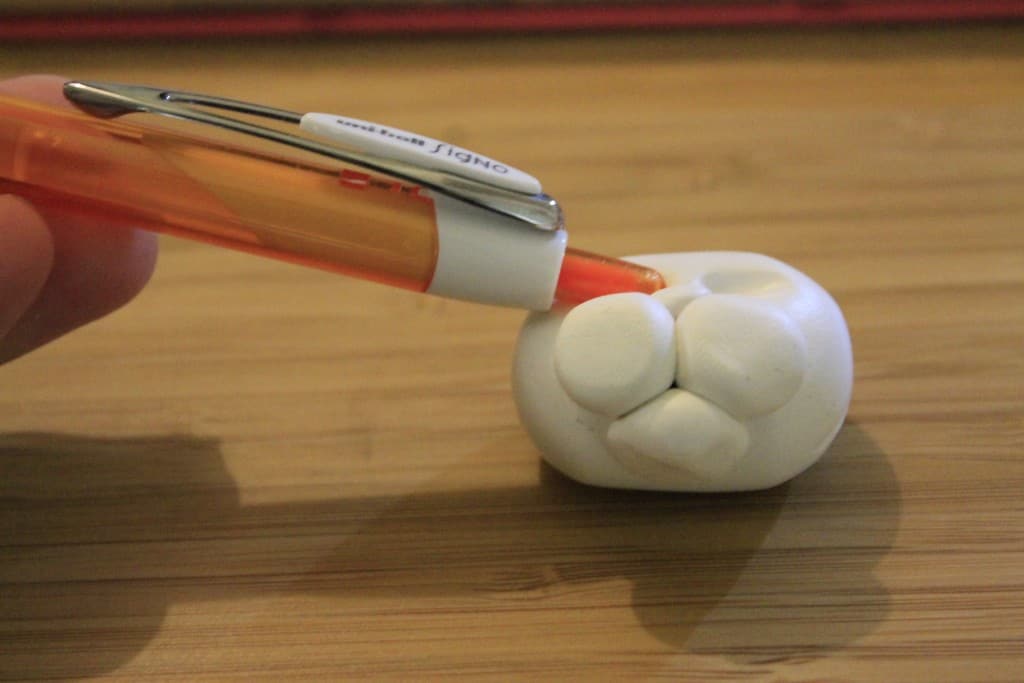
Just use a ball point pen, toothpick, and tiny balls of clay to give them features.
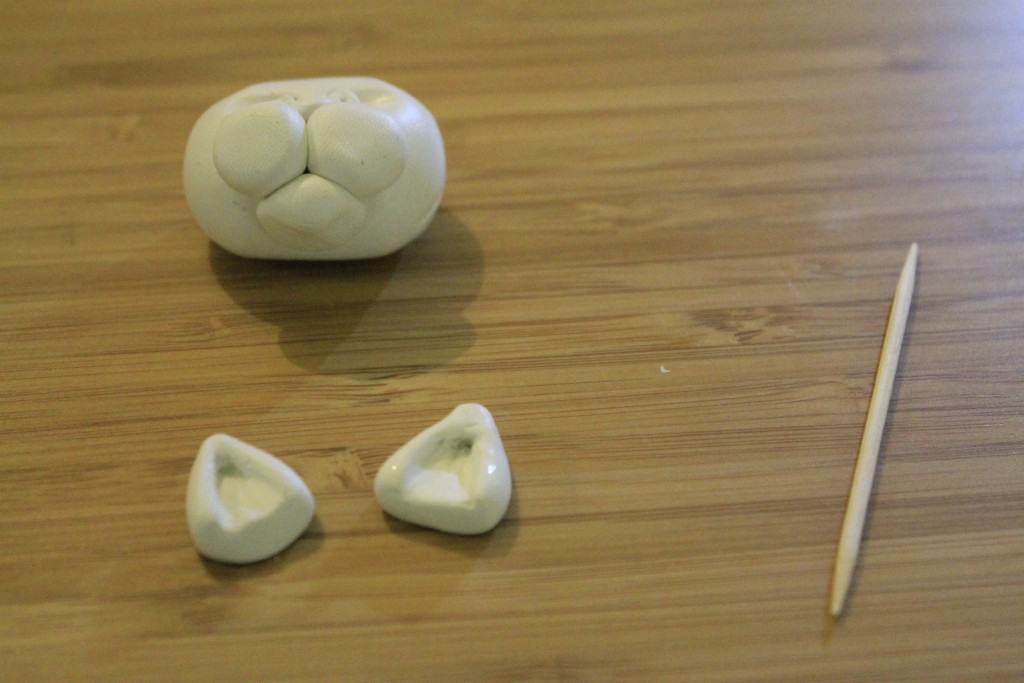
The ears were balls I flattened and made triangular with my fingers.
The dog head was two balls, plus some face detail. And of course, ears.
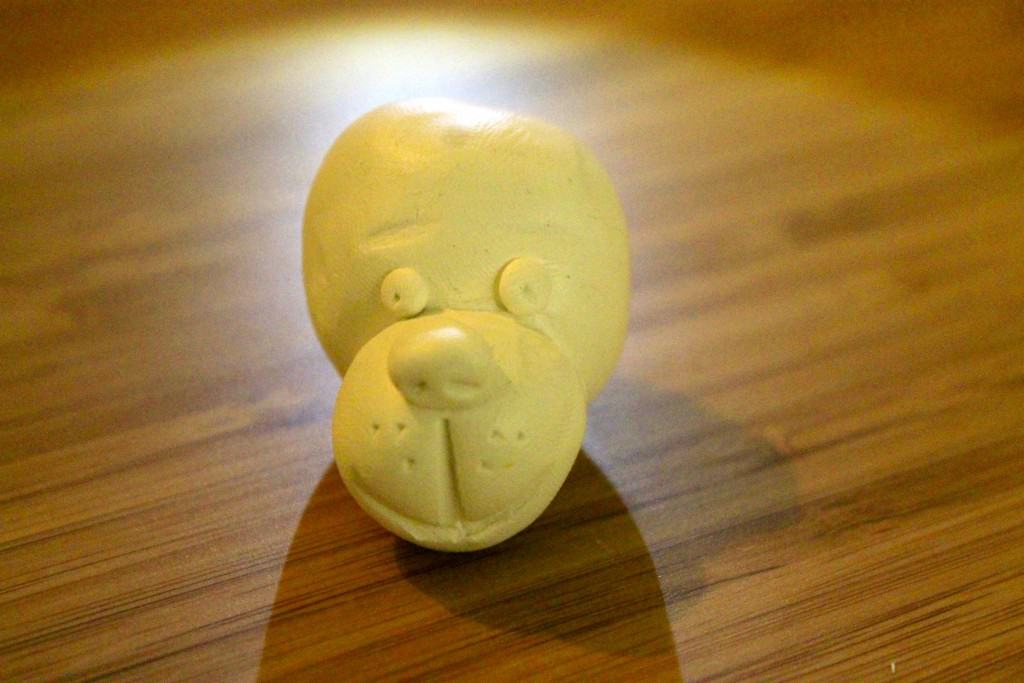
Note: my fingertip method left a lot of fingerprints. I just licked my finger and smeared them away. No big deal.
Step two: make pet bodies out of clay
The bodies were even bigger balls, rolled out like ovals. I added arms, legs, and tails. I also added little collars. Because, awwww.
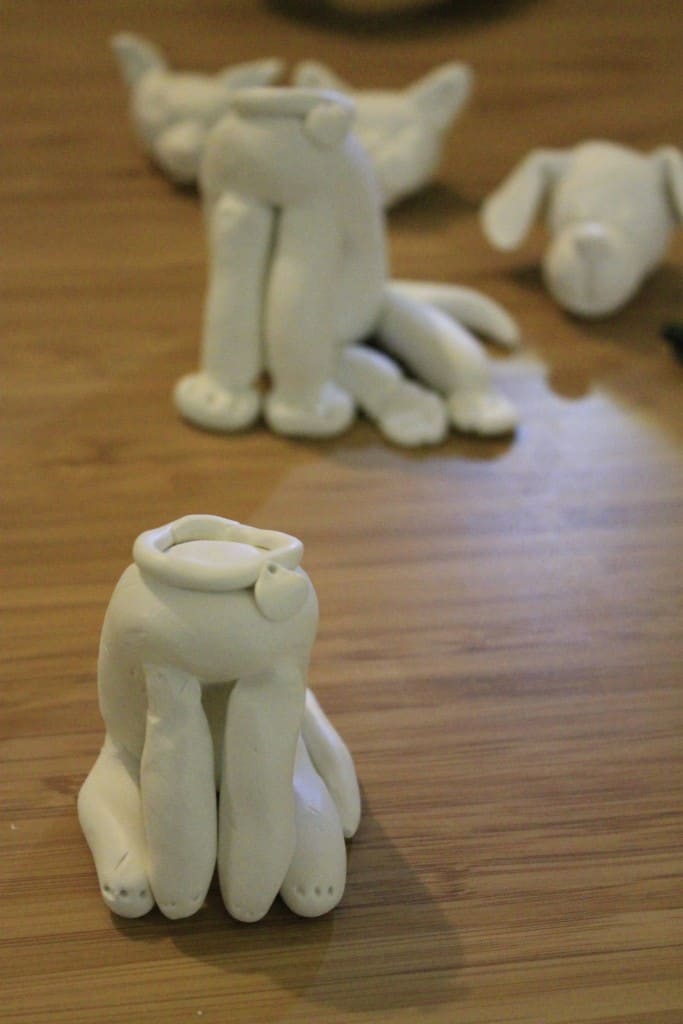
You can see two cat heads in the background. Bear's face is more pointy so I tried to re-do it and make it pointy but the second one turned out demonic looking so I just went with the first one. People will get the gist.
I used toothpicks to attach the heads to the bodies. Not gonna lie, I saw this online and suddenly worried if I should have used toothpicks to attach all the limbs. I didn't. It ended up ok.
Step three: bake clay in the oven
I then baked them at 275 degrees for an hour and a half. Follow the directions on your clay - mine said 15 minutes for each ¼ inch of thickness and the bodies are about 1.5 inches thick/wide.
Then I let them cool completely, over night.
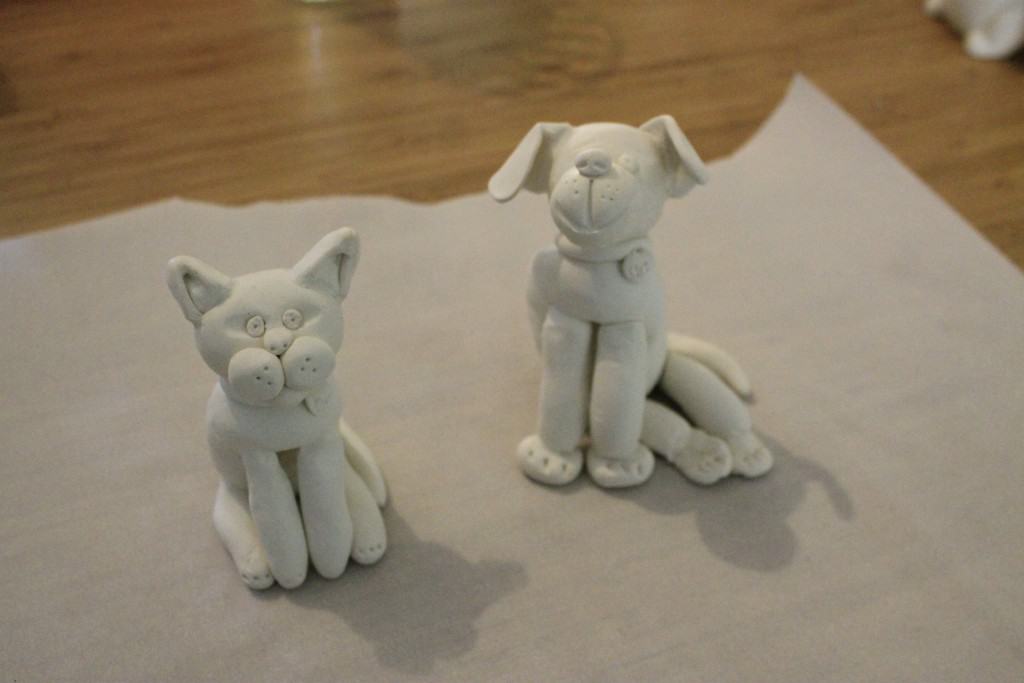
Step four: paint clay pets
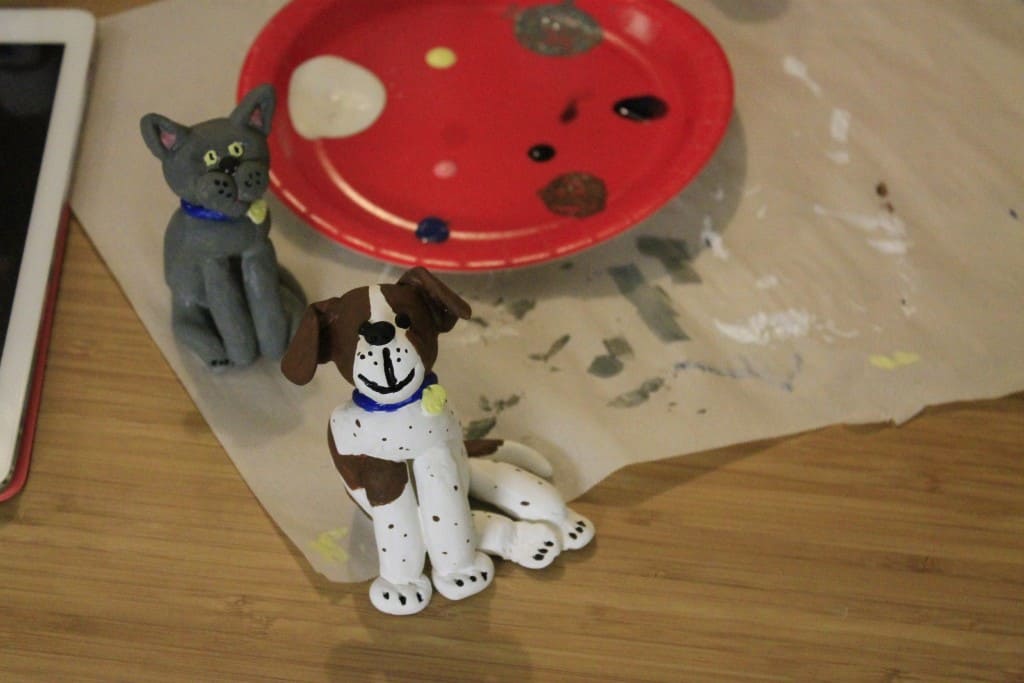
Finally, I painted them. Note: polymer clay comes in a ton of colors. The pros just sculpt with the colors and don't paint (or so I hear). I was too scared to do this, plus I didn't want to buy tons of colors of clay. So, I cheated.
I started with a coat of white paint on each. This is "primer". I was afraid that the darker colors (like Bear's grey) would soak into the clay and take many coats. The white acts as a base coat and cuts down on the amount of paint absorbed into the porous clay.
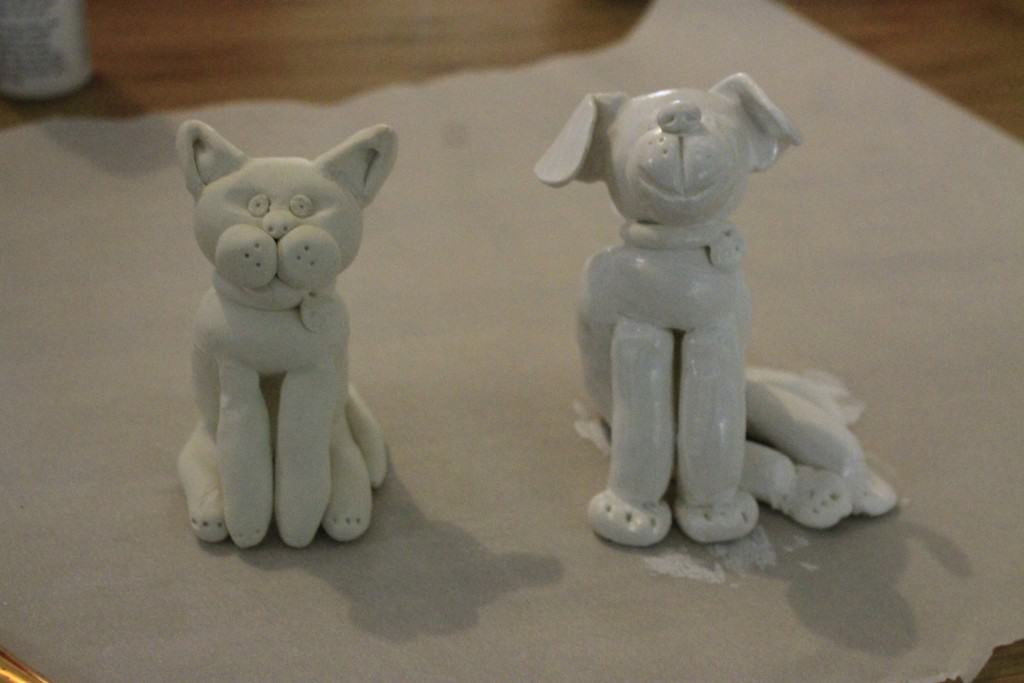
This shows CiCi (the dog) primed and Bear unprimed.
Each solid color took about 3 coats. I just used little brushes and acrylic craft paint. CiCi modeled so I could most accurately place her spots and splotches. Bear wasn't in the mood to model that day...
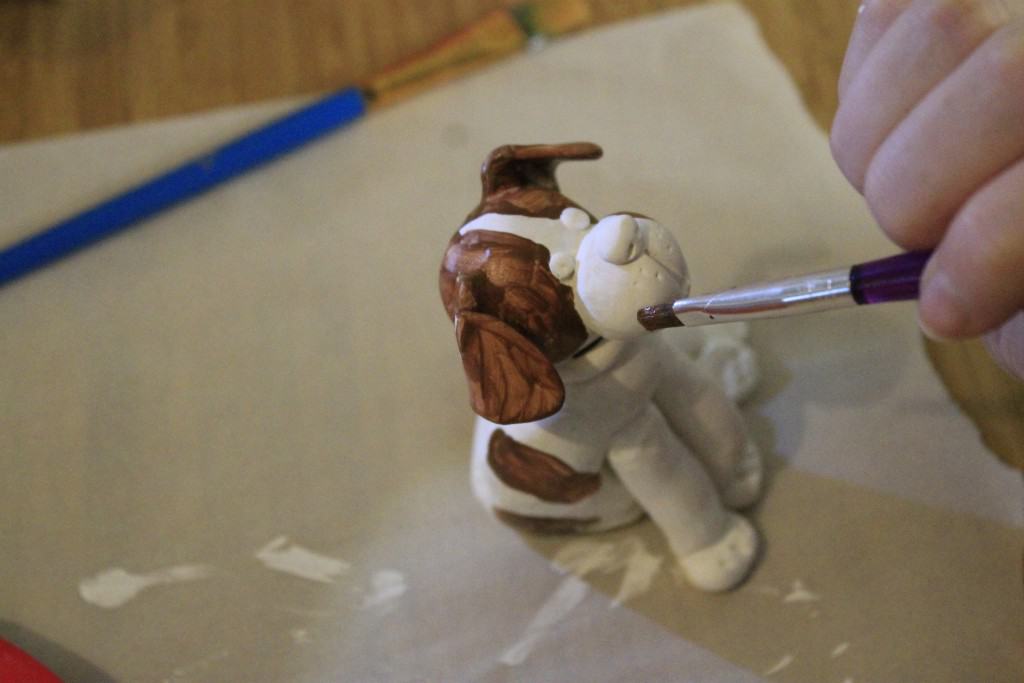
I did the fur colors first, then let that dry and followed up with colors for eyes, noses, and collars. Bear got a little pink in her ears, too.
Final DIY polymer clay animal figurines
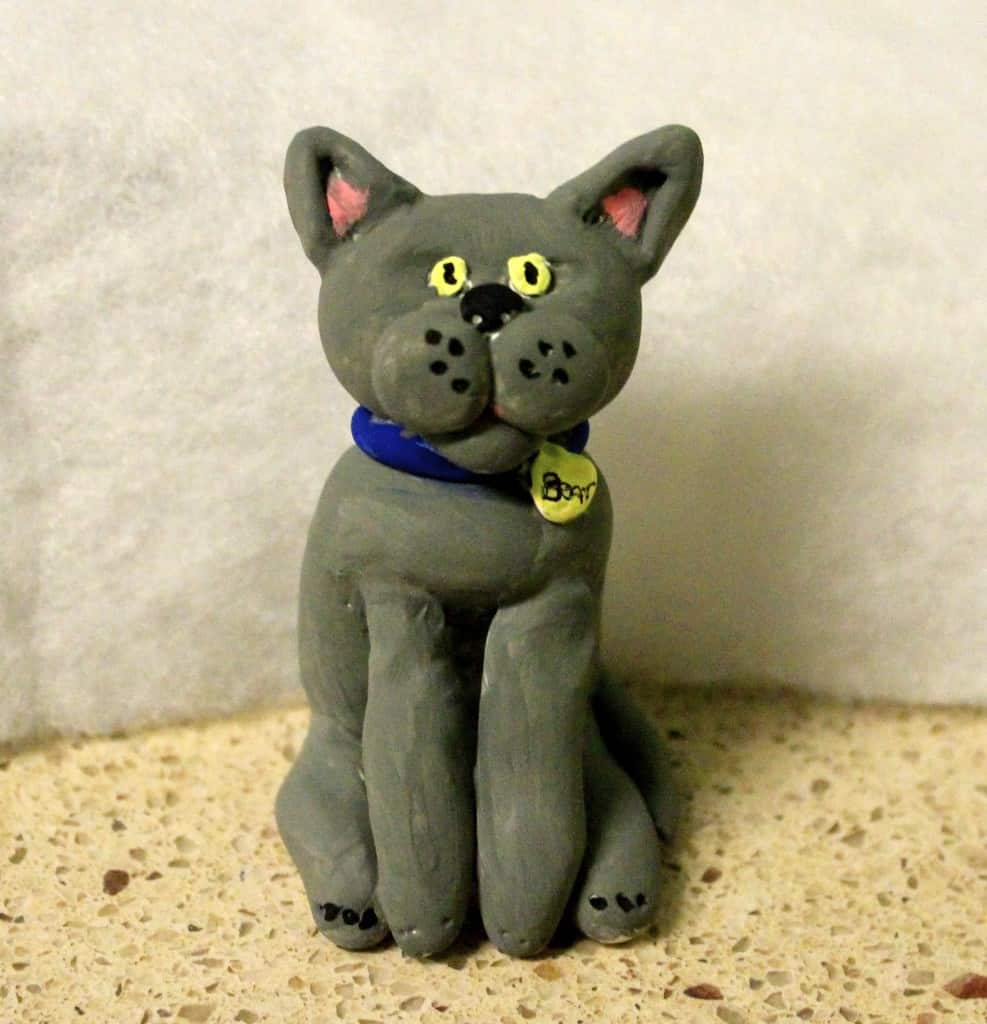
As a reminder, here is Bear next to her clay model:
And here is CiCi next to her clay model:
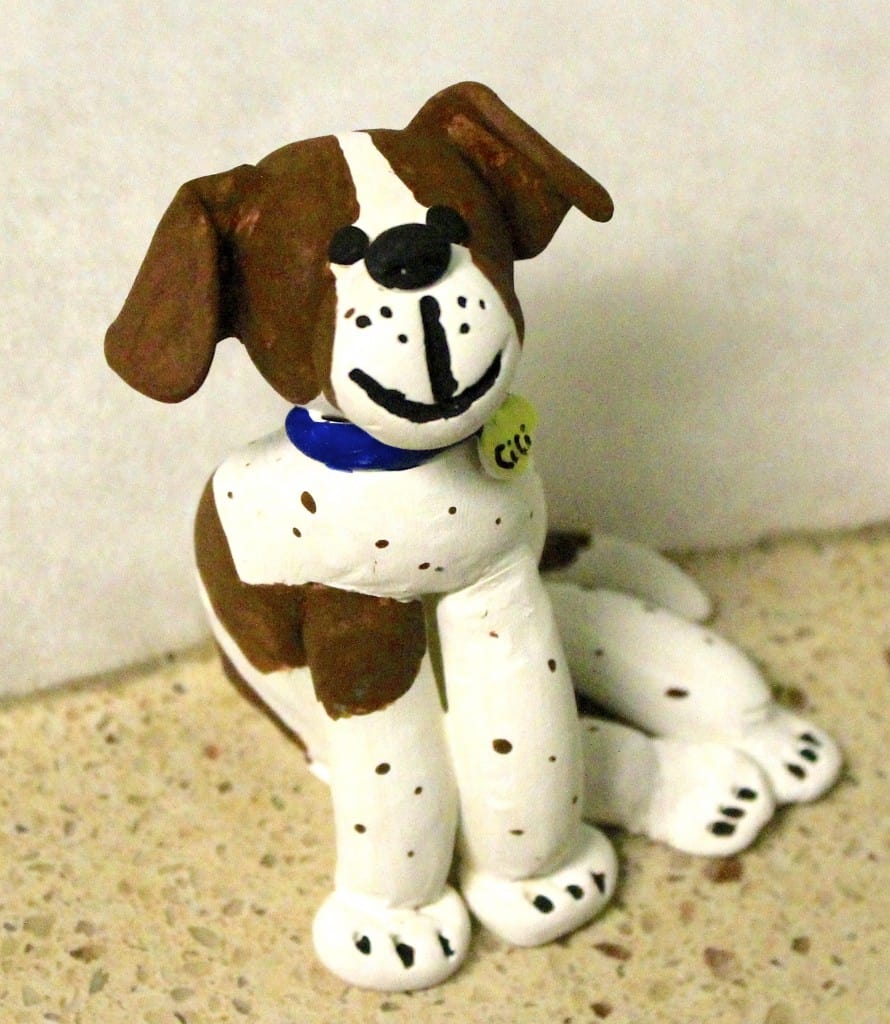
I think that they turned out adorably and truly didn't take long or much energy. They cost less than $10 (plus I have half a block of clay left) and I think they will add a personal touch to our wedding day! They definitely look handmade, but I think that they are charming.
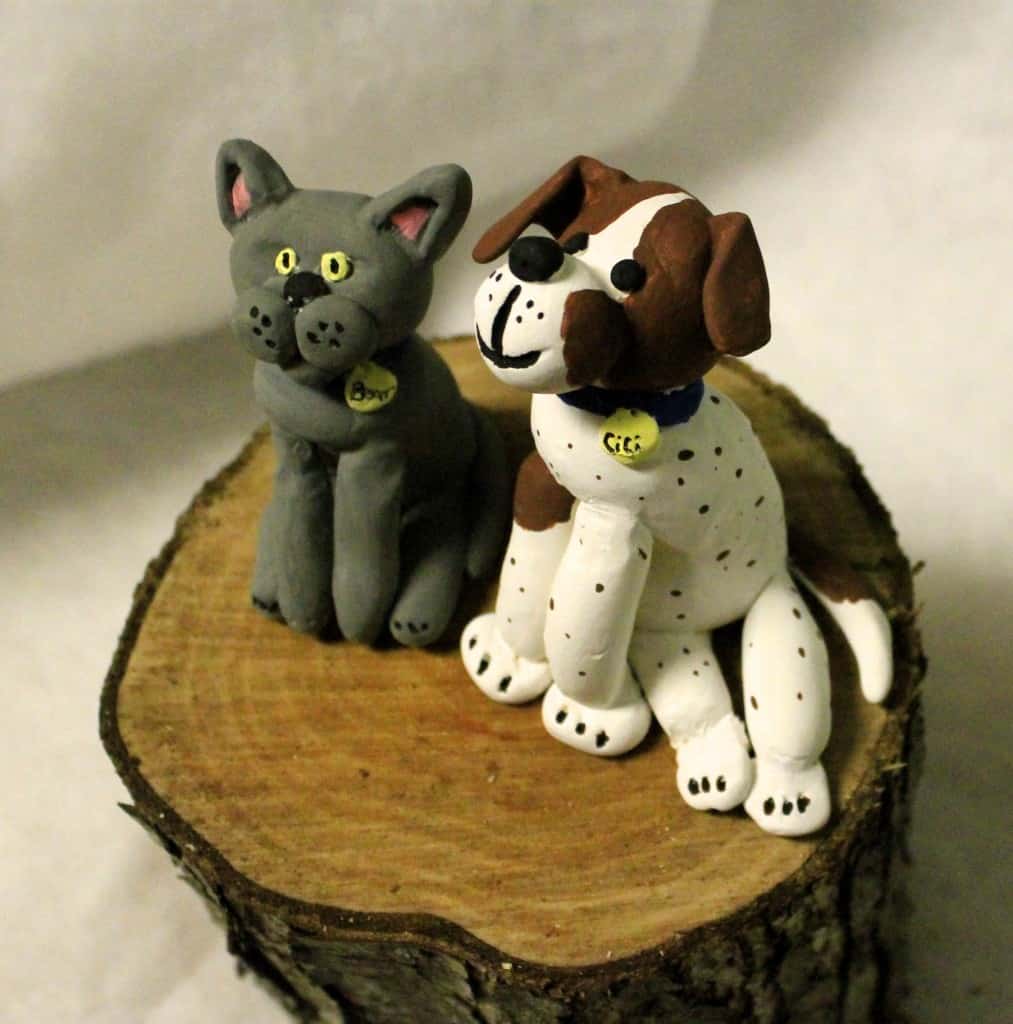
We don't have it set in stone yet (because we still haven't finalized the cupcake display) but they will probably be on a slice of wood. Pretend this piece is about an inch thick. And, you know, not super dirty looking.
How did you include your pets in your day?

Looking for something?
We've been doing this since 2012 so we have a LOT of blog posts!
Search stuff like: Ceiling Projects | DIY Plant Stands | Thrift Flips

Hello, I'm Morgan, half of the creative force behind CharlestonCrafted.com! With a passion for DIY that dates back to 2012, I've transformed three homes and now I'm dedicated to helping others craft their dream spaces. Let's turn your house into a home together!

Zoe Diaz-McLeese says
I love this! It turned out super cute. 🙂
Morgan says
Thanks and thank you for stopping by!
Karen says
Great job and such a sweet way to incorporate your fur babies!
Sean says
thank you!