Check out this simple DIY stool build that is made unique by using a heat gun to burn the wood!
Today we have a DIY wood burned stool for you that we're really excited to share.
This project turned out better than I expected and love how we got to try out two new tools that we've never used before, a Kreg R3 and a Wagner Studio Heat Gun.
I've been inspired by projects that are done using small amounts of material and that's where this project came from.
We found two eight foot 2x2's on the side of the road in our neighborhood and decided to turn them into a stool.
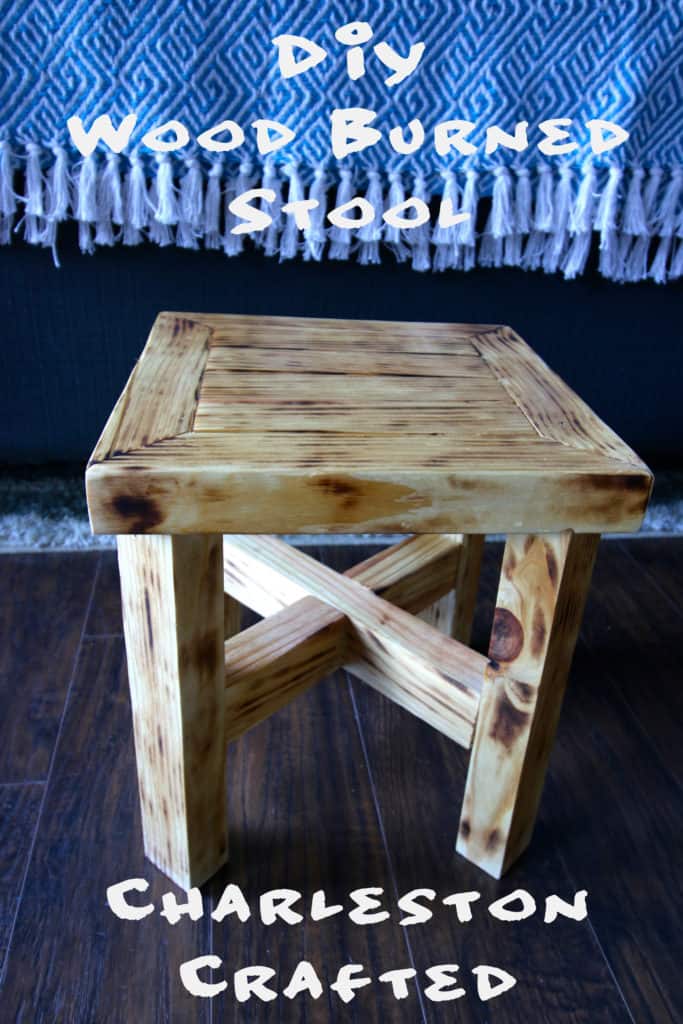
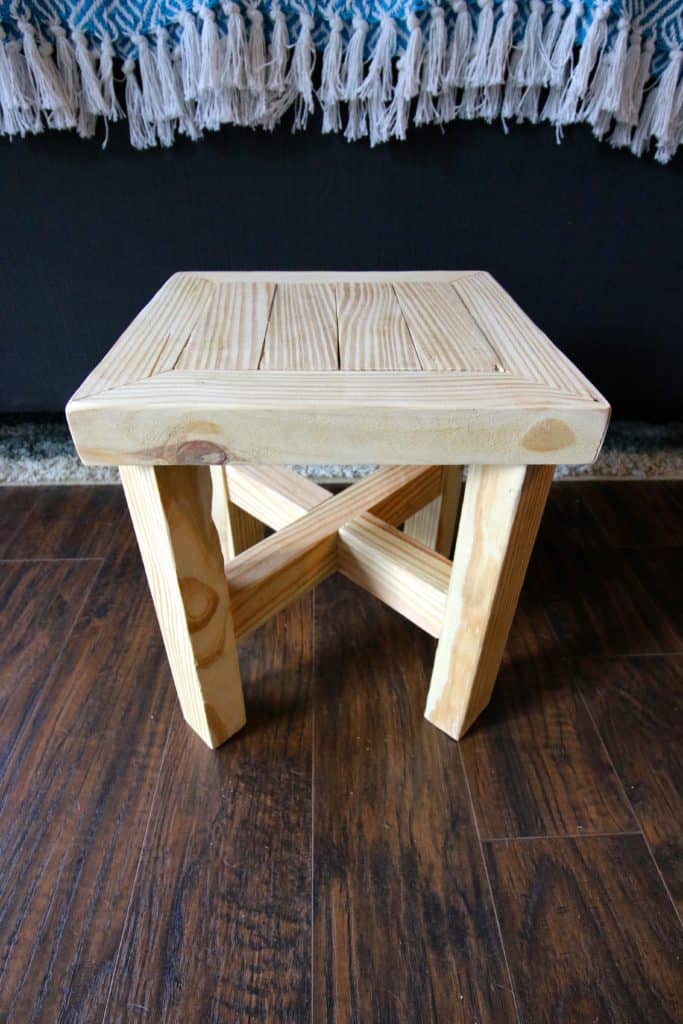
DIY Wood Burned Stool
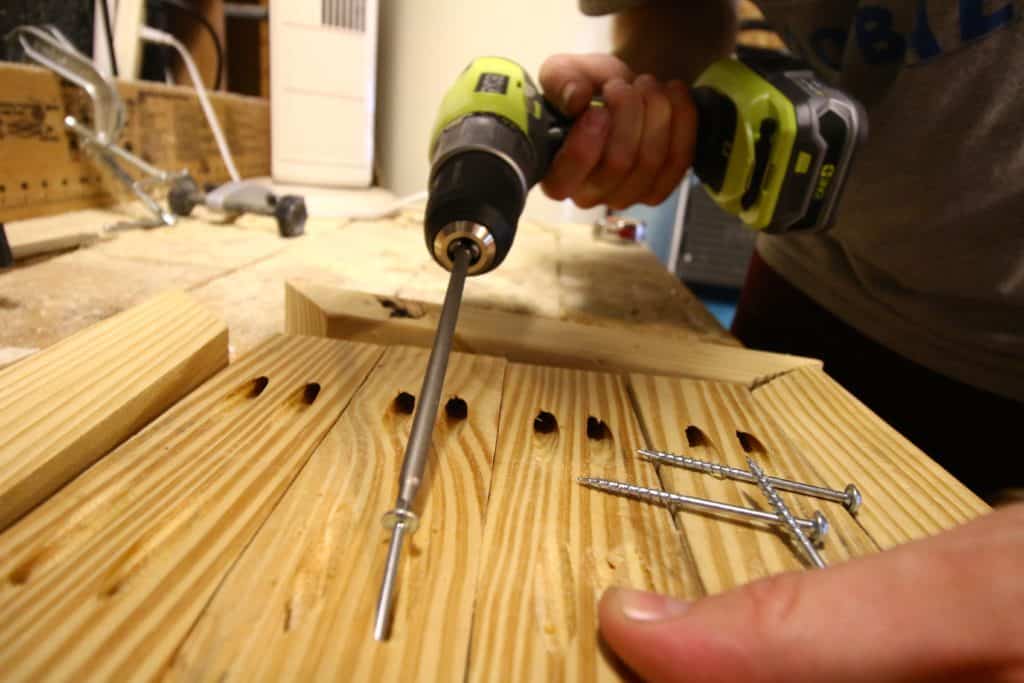
This whole project was constructed with the wood and Kreg screws (well, four small dabs of wood glue as well).
The fine people over at Kreg were nice enough to give us a Kreg R3 Pocket Hole Jig at the Haven Conference and we put it to use for the first time here. They have a lot of different systems, but the R3 was easy to just clamp onto the end of each piece of wood and drill the appropriate holes.
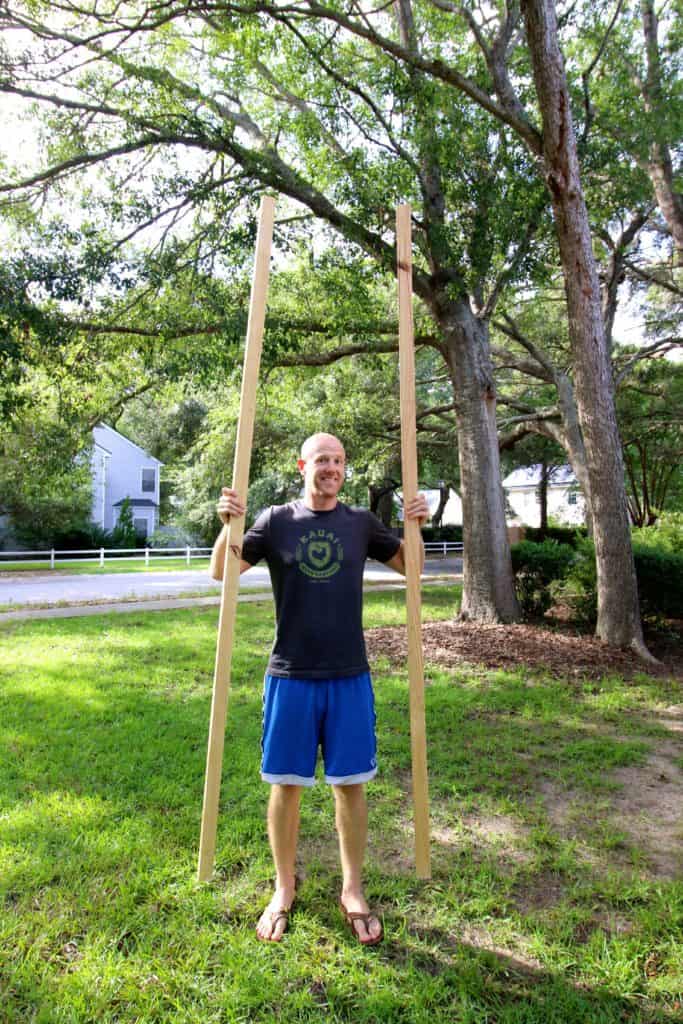
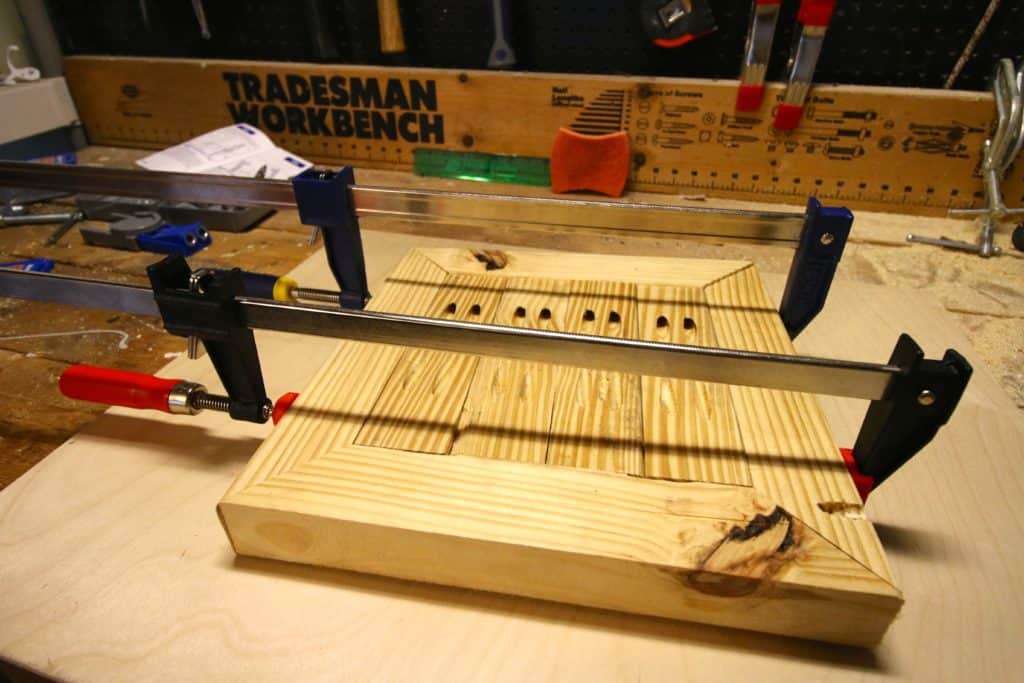
We started out by cutting the wood to the specifications we wanted, including the four legs that were 12 inches long, four 12 inch mitered pieces for the top, four 8 inch pieces for the middle of the top, and three cross-bracketing pieces.
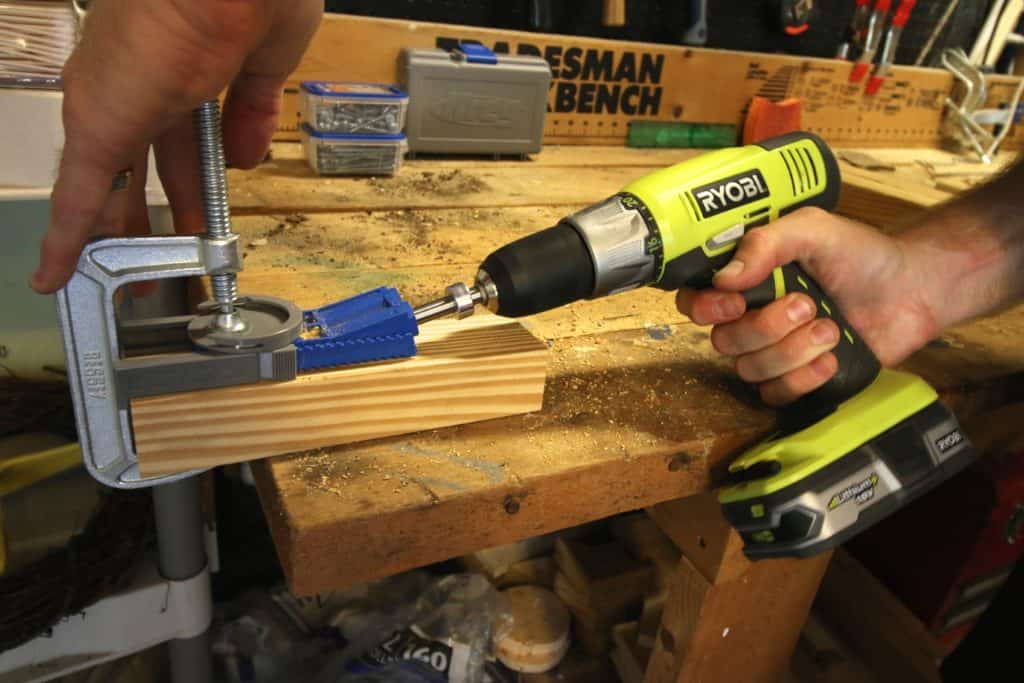
Construction with the Kreg R3 was super simple. I drilled two holes into each piece where they would connect to other pieces.
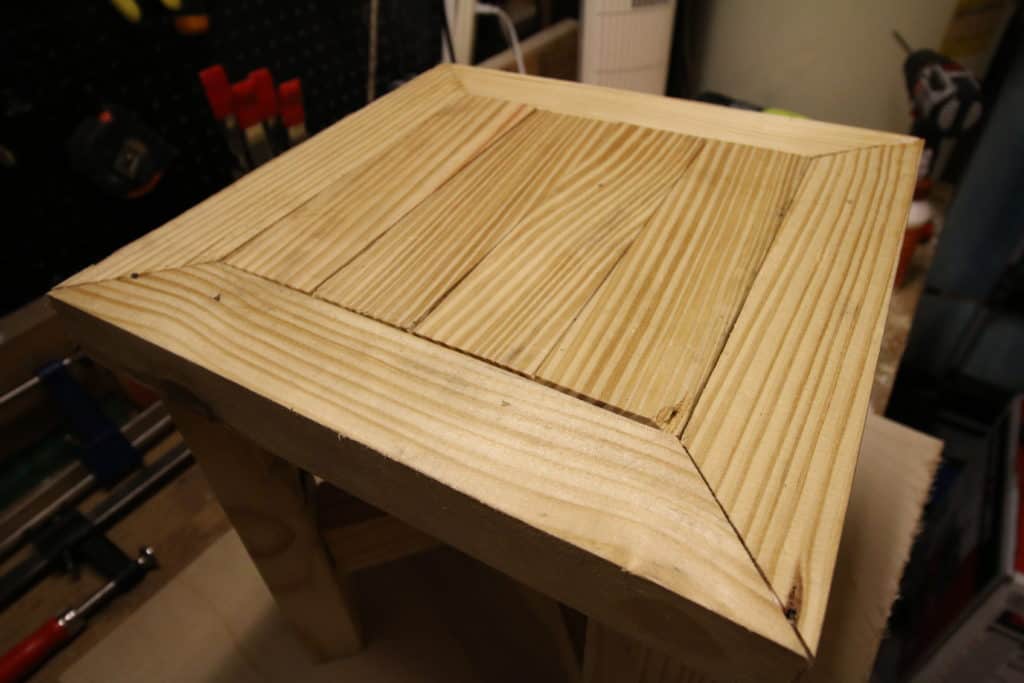
We started with constructing the top, connecting four pieces of wood to two sides of the top's edge and then using wood glue to connect the four corners of the top's edges.
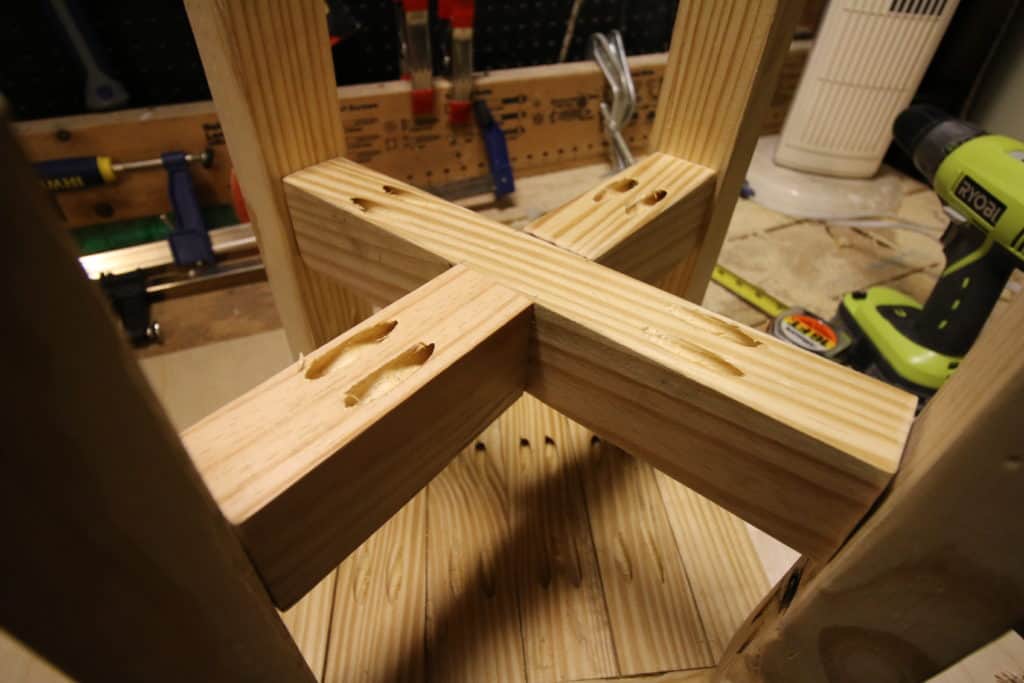
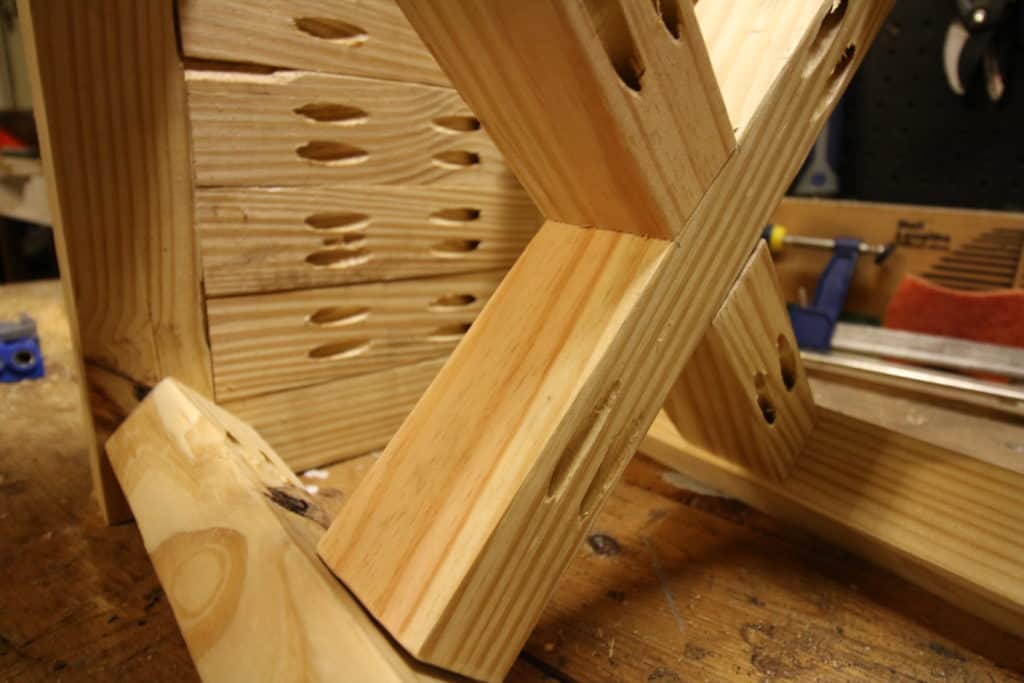
Then we connected the legs to the top. We faced the opposite legs leaving a 90 degree angle in each corner.
After the legs were on, we added one cross beam between two of the legs and then two shorter beams attached to the other two legs and the middle cross beam.
Just look at all these pocket holes. This stool is super sturdy.
If you would like to see the full plans with step by step instructions, cut list, materials list and measurements, you can check out the project on Kreg's BuildSomething website.
This was my first project that I've uploaded to their site and it was awesome. They have a great community of people there and you can search for all sorts of DIY plans to build any type of furniture.
After we finished constructing the stool, we got to use a new tool that we got from the nice people at the Wagner booth at the Haven Conference. The Wagner Studio Dual Temp Heat Gun can serve a wide variety of roles (which we'll be exploring all of them eventually), such as loosening paint, shrinking plastic wrap and much more, but we used it to put a light burn on our stool.
The Wagner Studio Dual Temp Heat Gun has the ability to give your wood a light tan or char it pretty good.
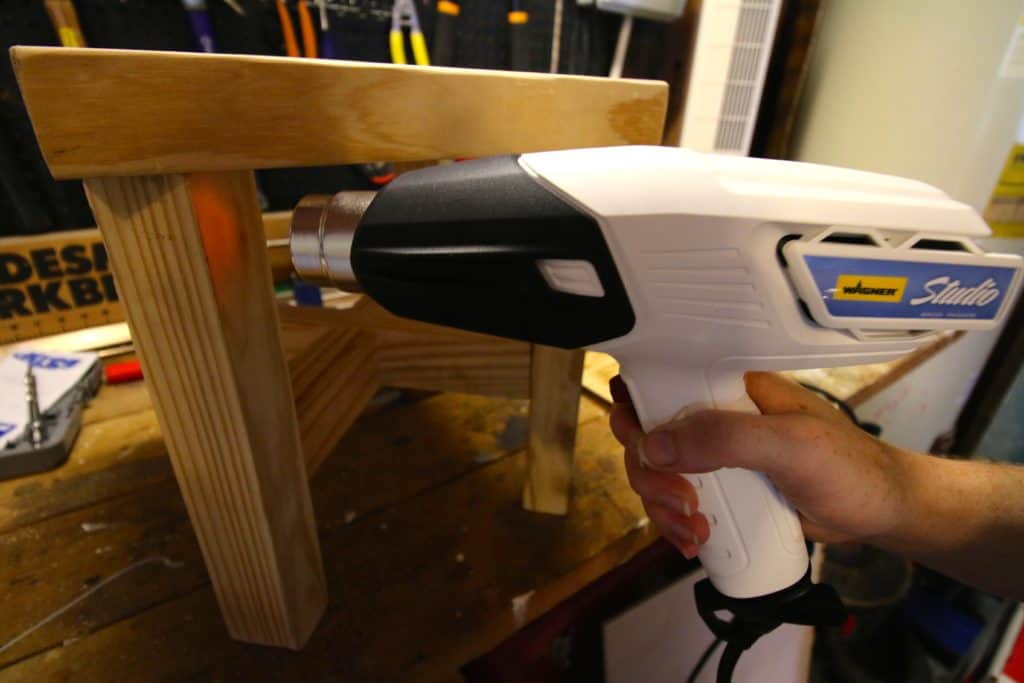
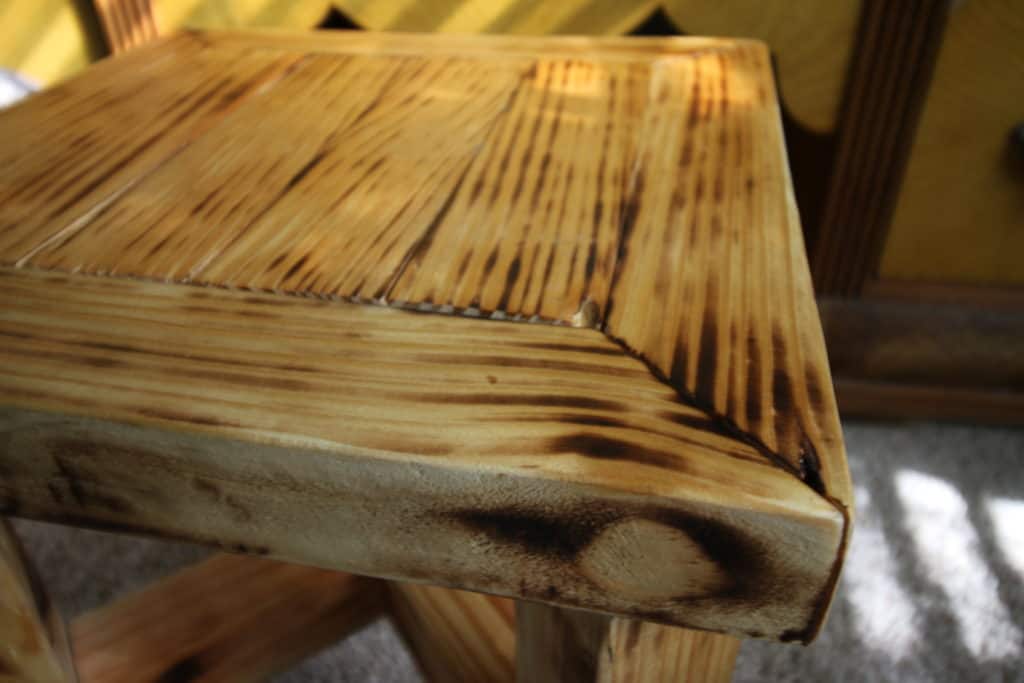
We did some tests, but it was great for giving a slow burn that really accentuated the grain and knots in the wood that gave the stool an awesome rustic look.
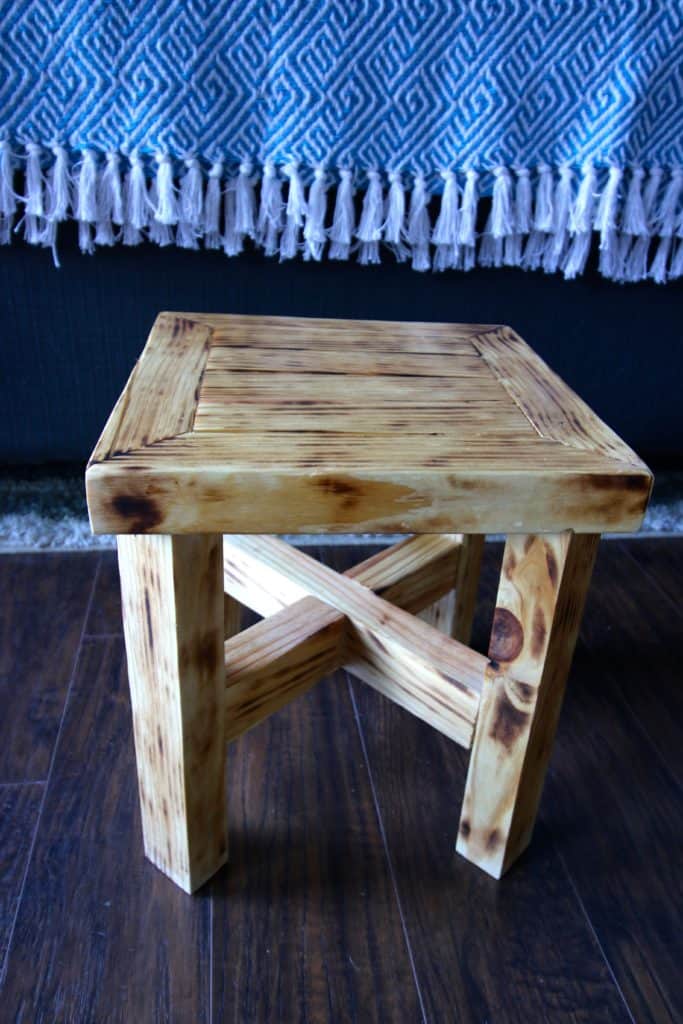
We're really excited to try our new Wagner heat gun on some other projects in the future, but we love the burned wood look that it was able to give. Just be sure you are careful when you use the gun and follow all of their safety precautions because it can put off some serious heat.
This DIY wood burned stool is a great addition to Morgan's vanity. It sits at the perfect height for her.
It was an easy build that is extremely sturdy thanks to the exclusive use of Kreg pocket holes and screws keeping it together. The burned wood look is unique and we can't wait to try more projects out like this!


Hey there, I'm Sean, the woodworking enthusiast and builder behind CharlestonCrafted.com! Since 2012, I've been sharing the magic of turning raw materials into beautiful creations. I love teaching others the art and satisfaction of woodworking and DIY. I try to inspire fellow crafters to make something extraordinary out of nothing at all.


Christopher Walker says
Please help me. I'm a total beginner (Retired at 66 years old--just got a miter saw and the Kreg K5 jig). I want to build the vanity stool. It is perfect to serve as a pedestal for my water cooler. But, as a total beginner, I have two questions that are not in the plans on the Kreg website. (1): What angle did you cut the X pattern supports for the legs. It is clear from your photo The are angled on the ends that connect to the legs; (2) As a total beginner, can I buy 1 & 1/2" by 2" lumber? It is clear also from the photos those are not 2" by 2" (really 1.5 X 1.5). Does this mean I need to rip cut a 2" X 2"? I know these sound funny to you. But, this will literally be my first ever wood project. Can you fill in the gaps of the plan found on the Kreg website? I would even be willing to speak with you if you don't mind. If you're willing, I can give you my phone number--or I'd be more than happy to call you.
Sean says
Hey Christopher! I'm so glad you chose this project to be your first ever! It's a great choice and is really simple to make! So let's see if I can help you out with these really good questions.
1)- There actually aren't any angles cut on the legs themselves. I just have them turned in to face the leg on the opposite side so that the leg supports can go straight across. The only actual angled cuts on this project are the for border pieces of the top, and those are easy 45 degree cuts.
2)- Yes, you can by 2x2 lumber at the store, depending where you are, but you can also cut down a 2x4 if that's all you have. 2x2 lumber is actually 1.5x1.5 as you figured out, which is why the dimensions are like they are in the post.
I hope these answer your questions. Feel free to reach out and ask anything else!