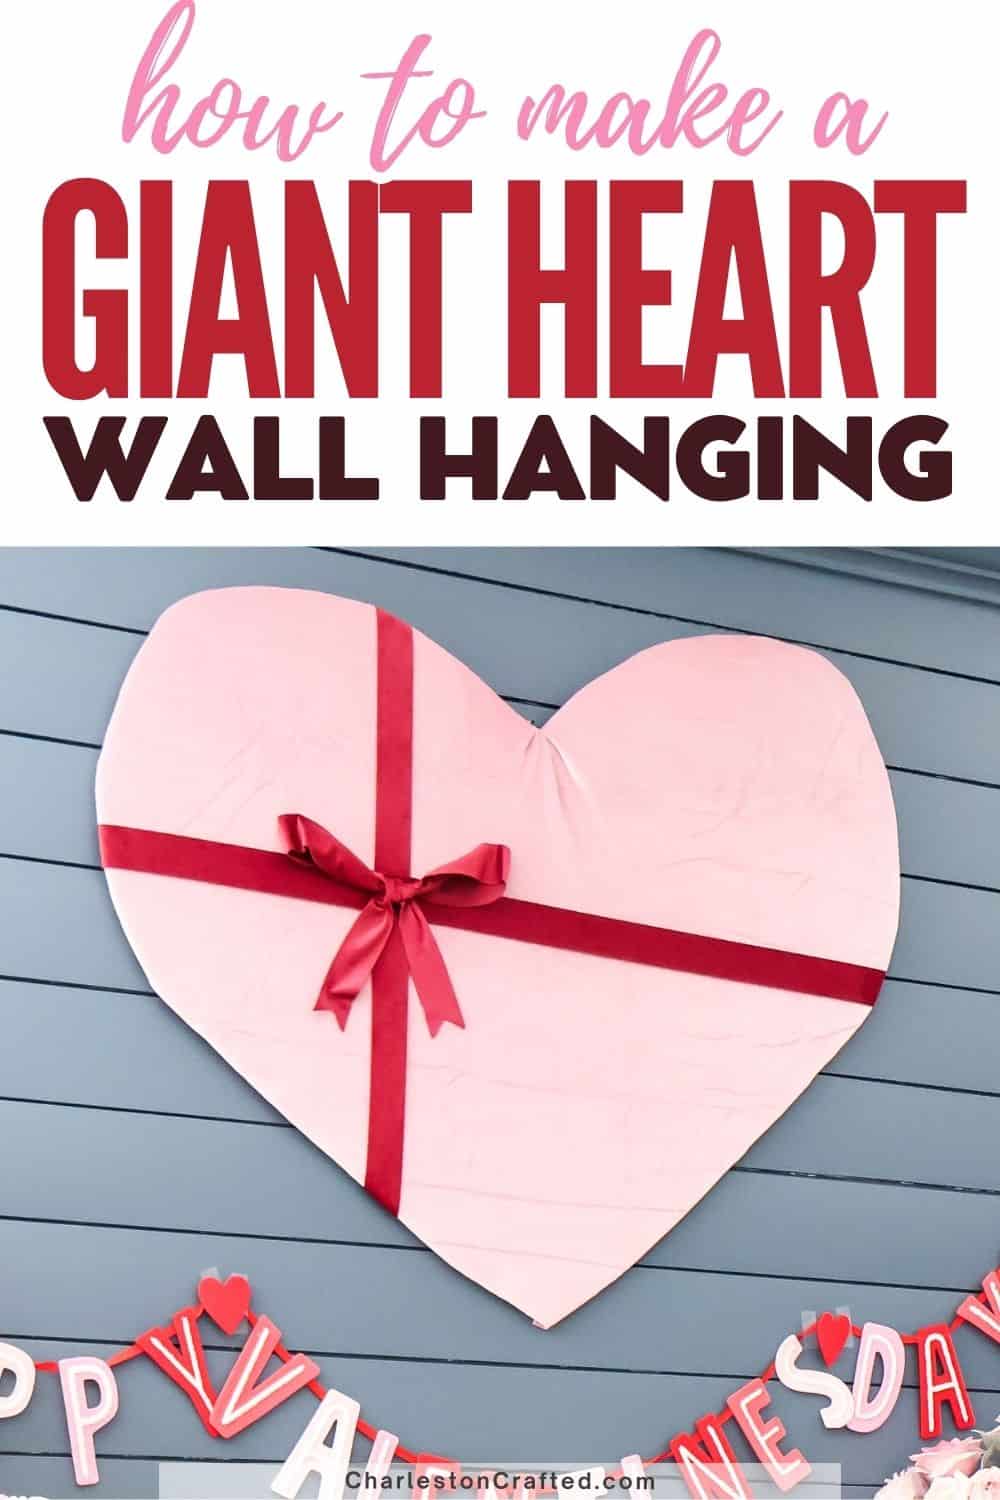
Want to add a GIANT wall hanging heart to your decor? Here is how to make a giant heart wall hanging for Valentines Day!
Honestly, Valentines Day is not a holiday that I have historically decorated for.
But, this year, my kids had so much fun with the Halloween and Christmas decorations, I just wanted to keep the fun going.
I didn't go too wild - but I did want to do a cute Valentines Day Mantel Display.
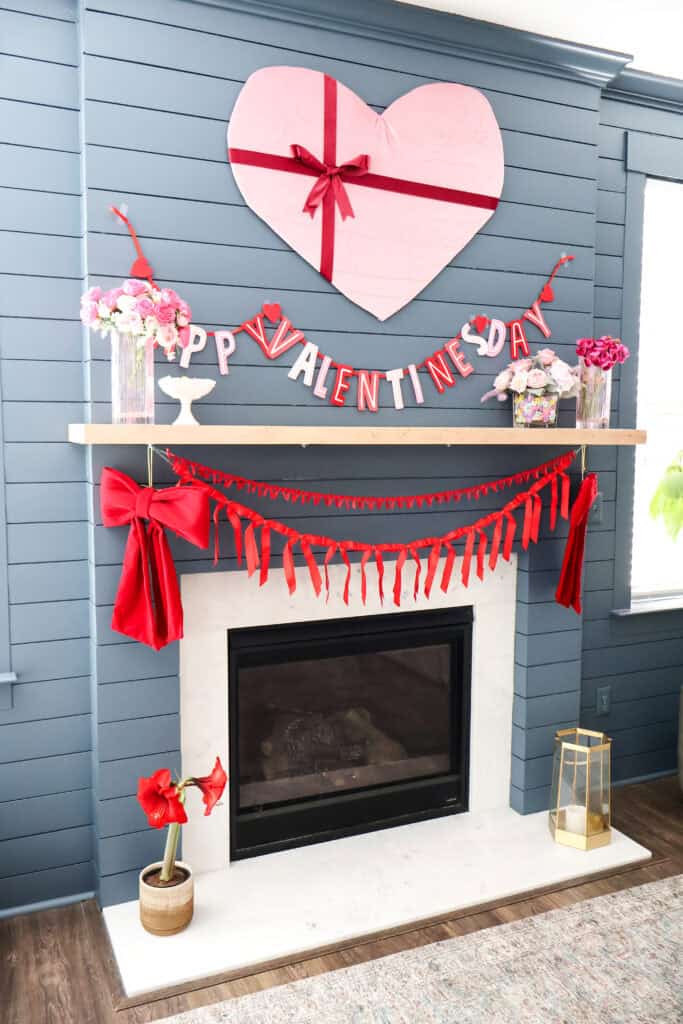
As a part of that, I wanted a giant heart to hang on the fireplace. I had the idea to make it look like a big box of chocolates.
This was actually fairly easy to make - once I figured it out. Luckily for you, I've done all the figuring out - so you can just copy my tutorial!

How to make a giant heart wall hanging for Valentines Day
Here's how I made this giant chocolate box Valentines day wall hanging!
Supplies needed:
- Foam core board - I used 30x40 inch, but you can size up or down as needed
- Pencil
- Pink fabric
- Batting
- Stapler
- Scissors
- Red Ribbon
- Hot Glue
- Pipe cleaner or wire (to make hanger, if hanging)
Steps to make:
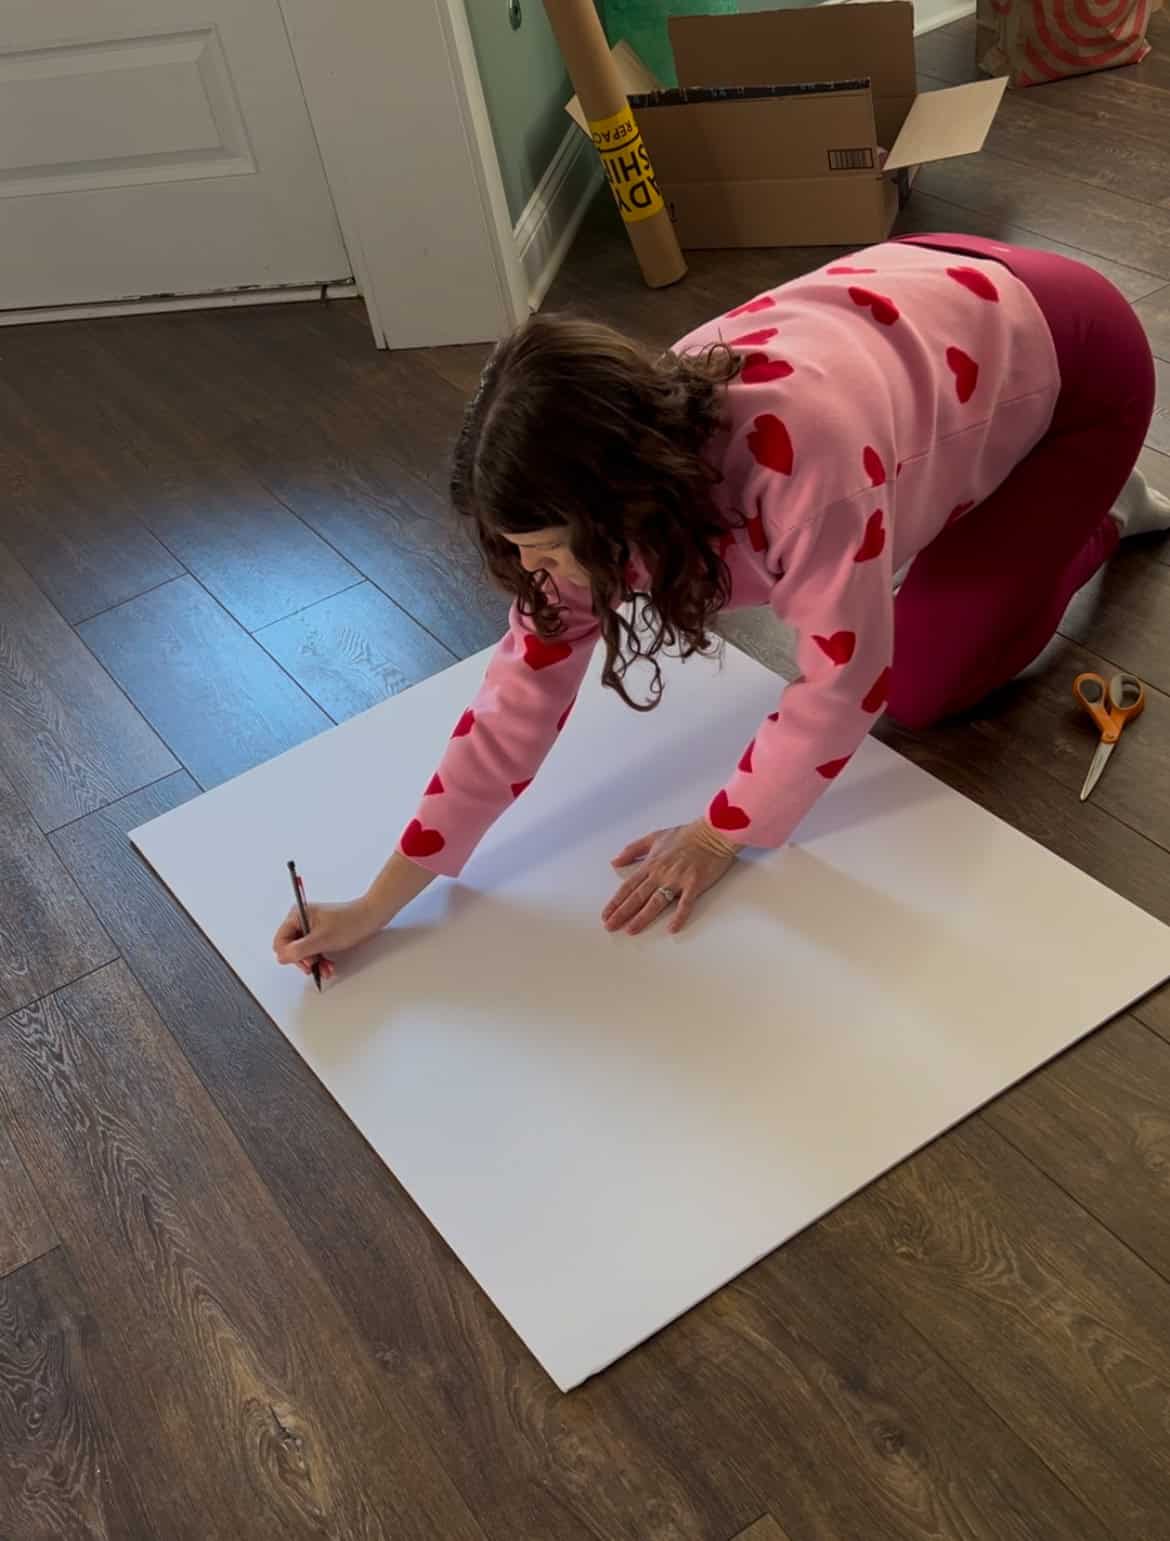
STEP 1: Trace and Cut Poster
Trace half of a heart shape onto your poster board. I measured the middle point, marked it at the top and bottom, and traced from there.
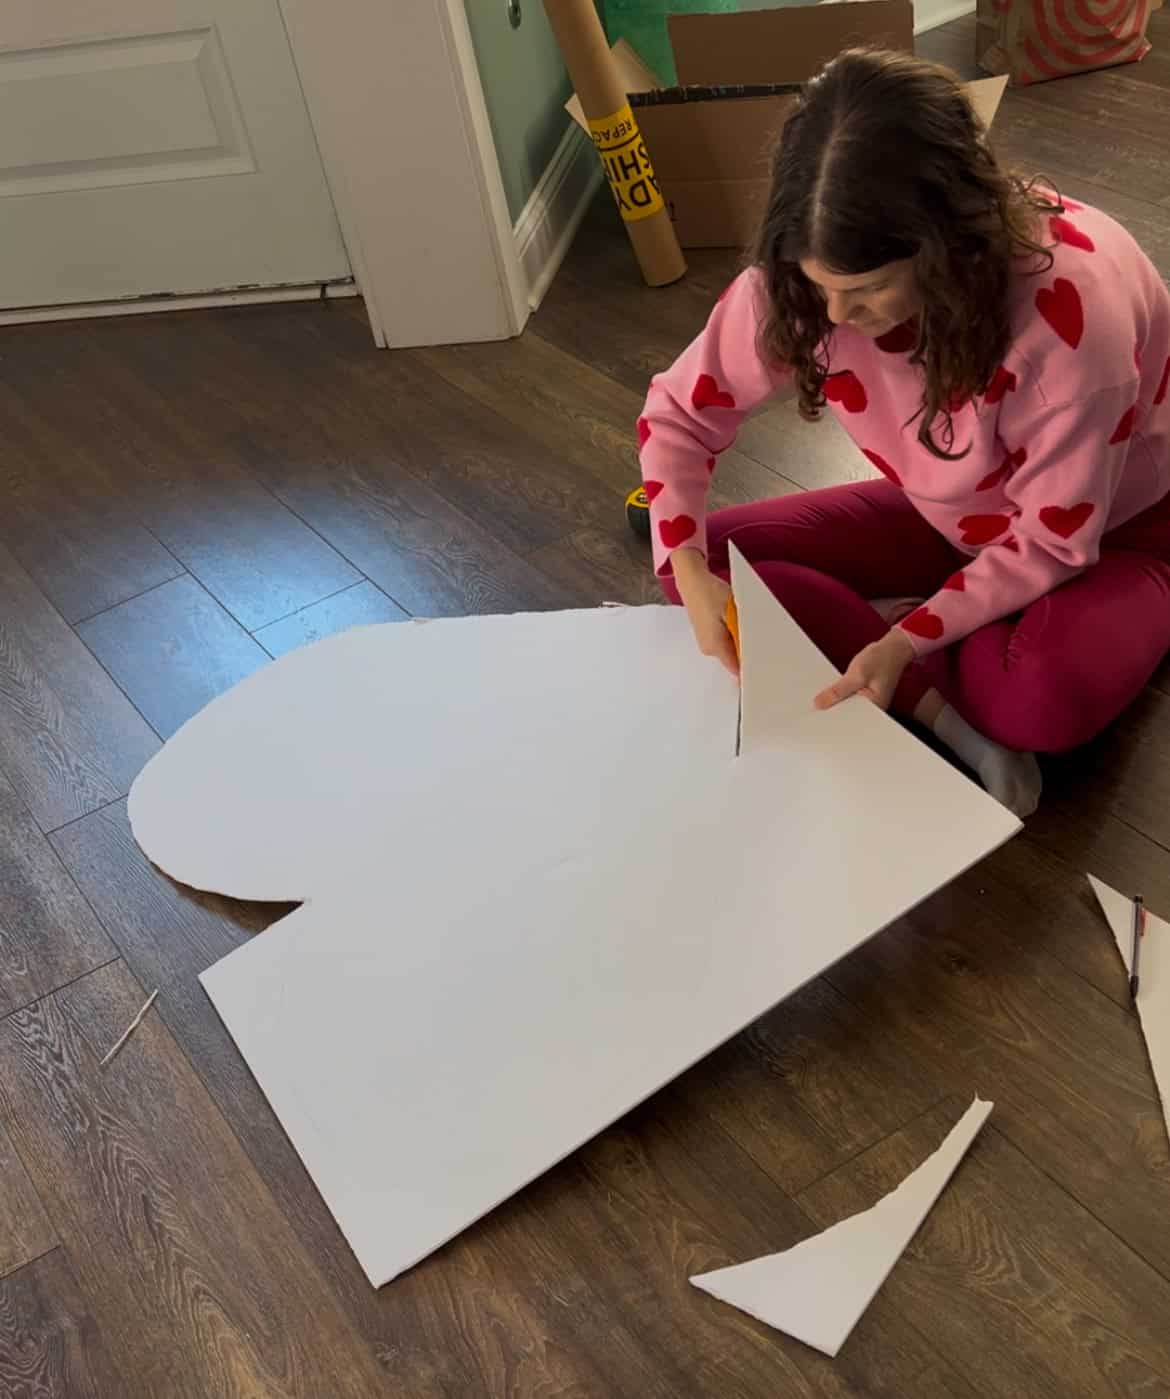
Cut out half the heart, leaving the 2nd half square.
Then, take your scrap/cut offs from that side, flip them so they are mirror image, and trace them to make the other side of the heart.
Cut out with scissors.
STEP 2: Lay out fabrics
Lay your fabric out on the ground - pink fabric first (good side down), batting on top, then lay your poster board on top of that.
NOTE: I recommend that you steam or iron your fabric to get rid of any creases, before doing this project!
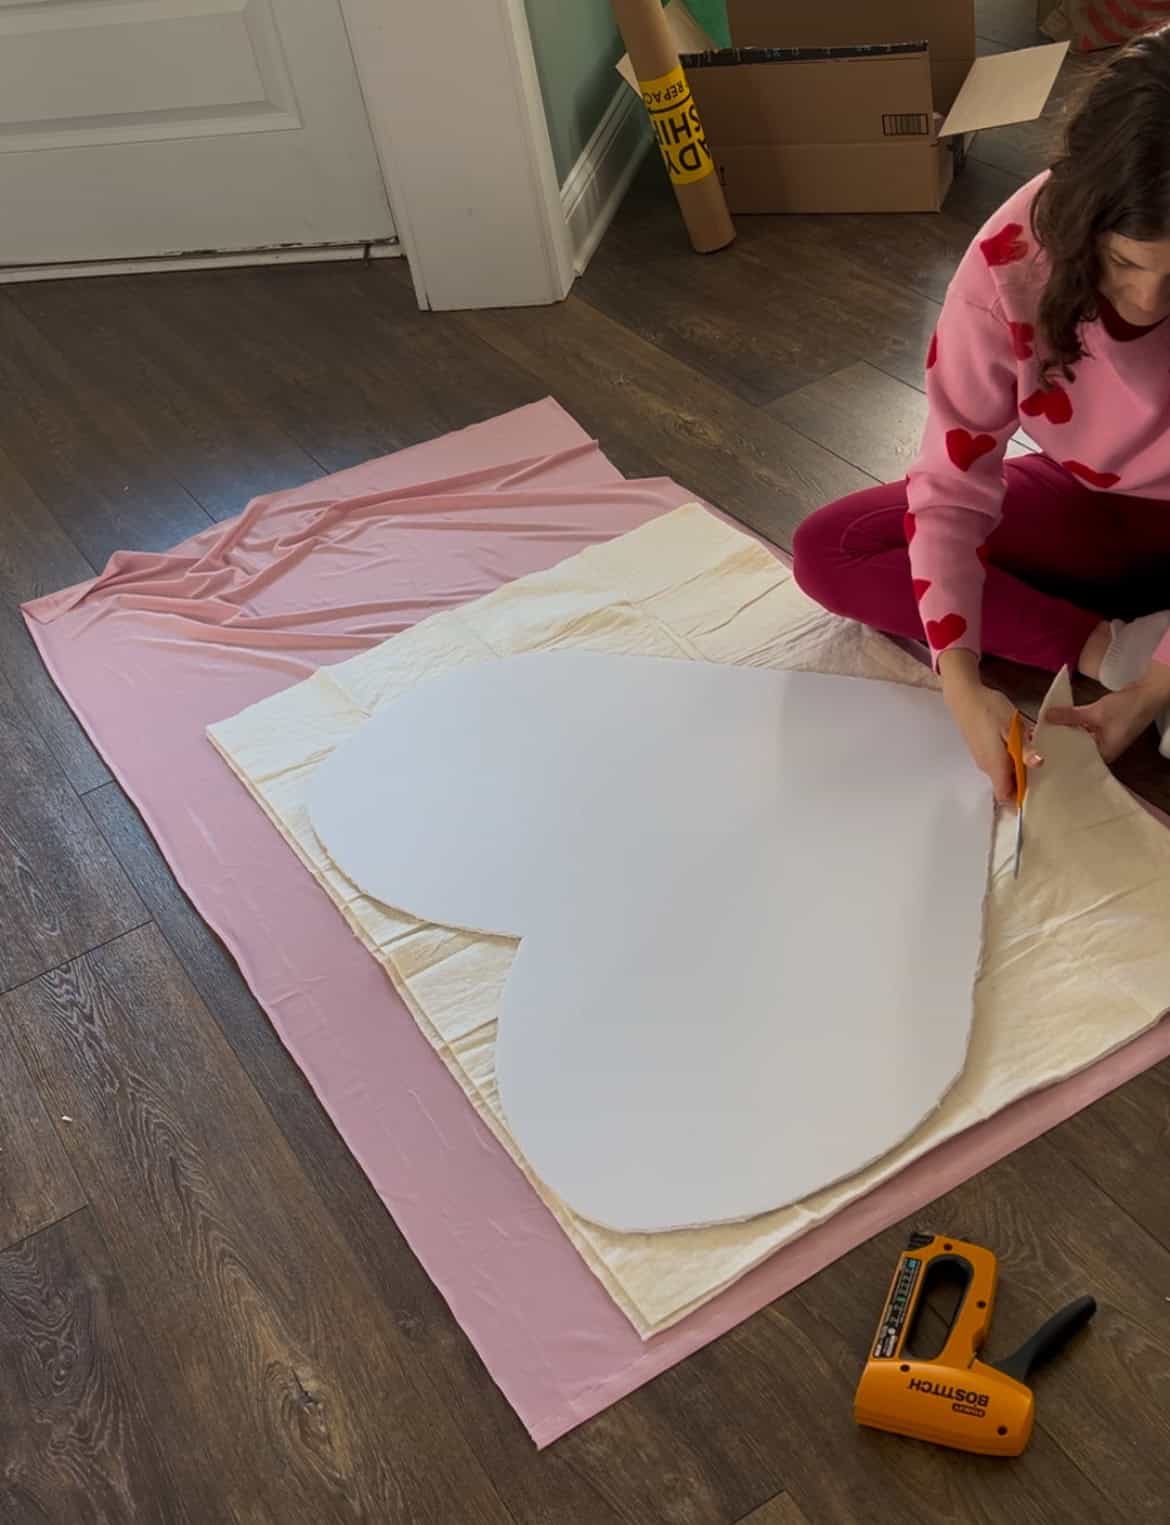
STEP 3: Trim fabric
Use scissors to trim excess fabric, leaving about 2 inches of fabric around the poster heart.
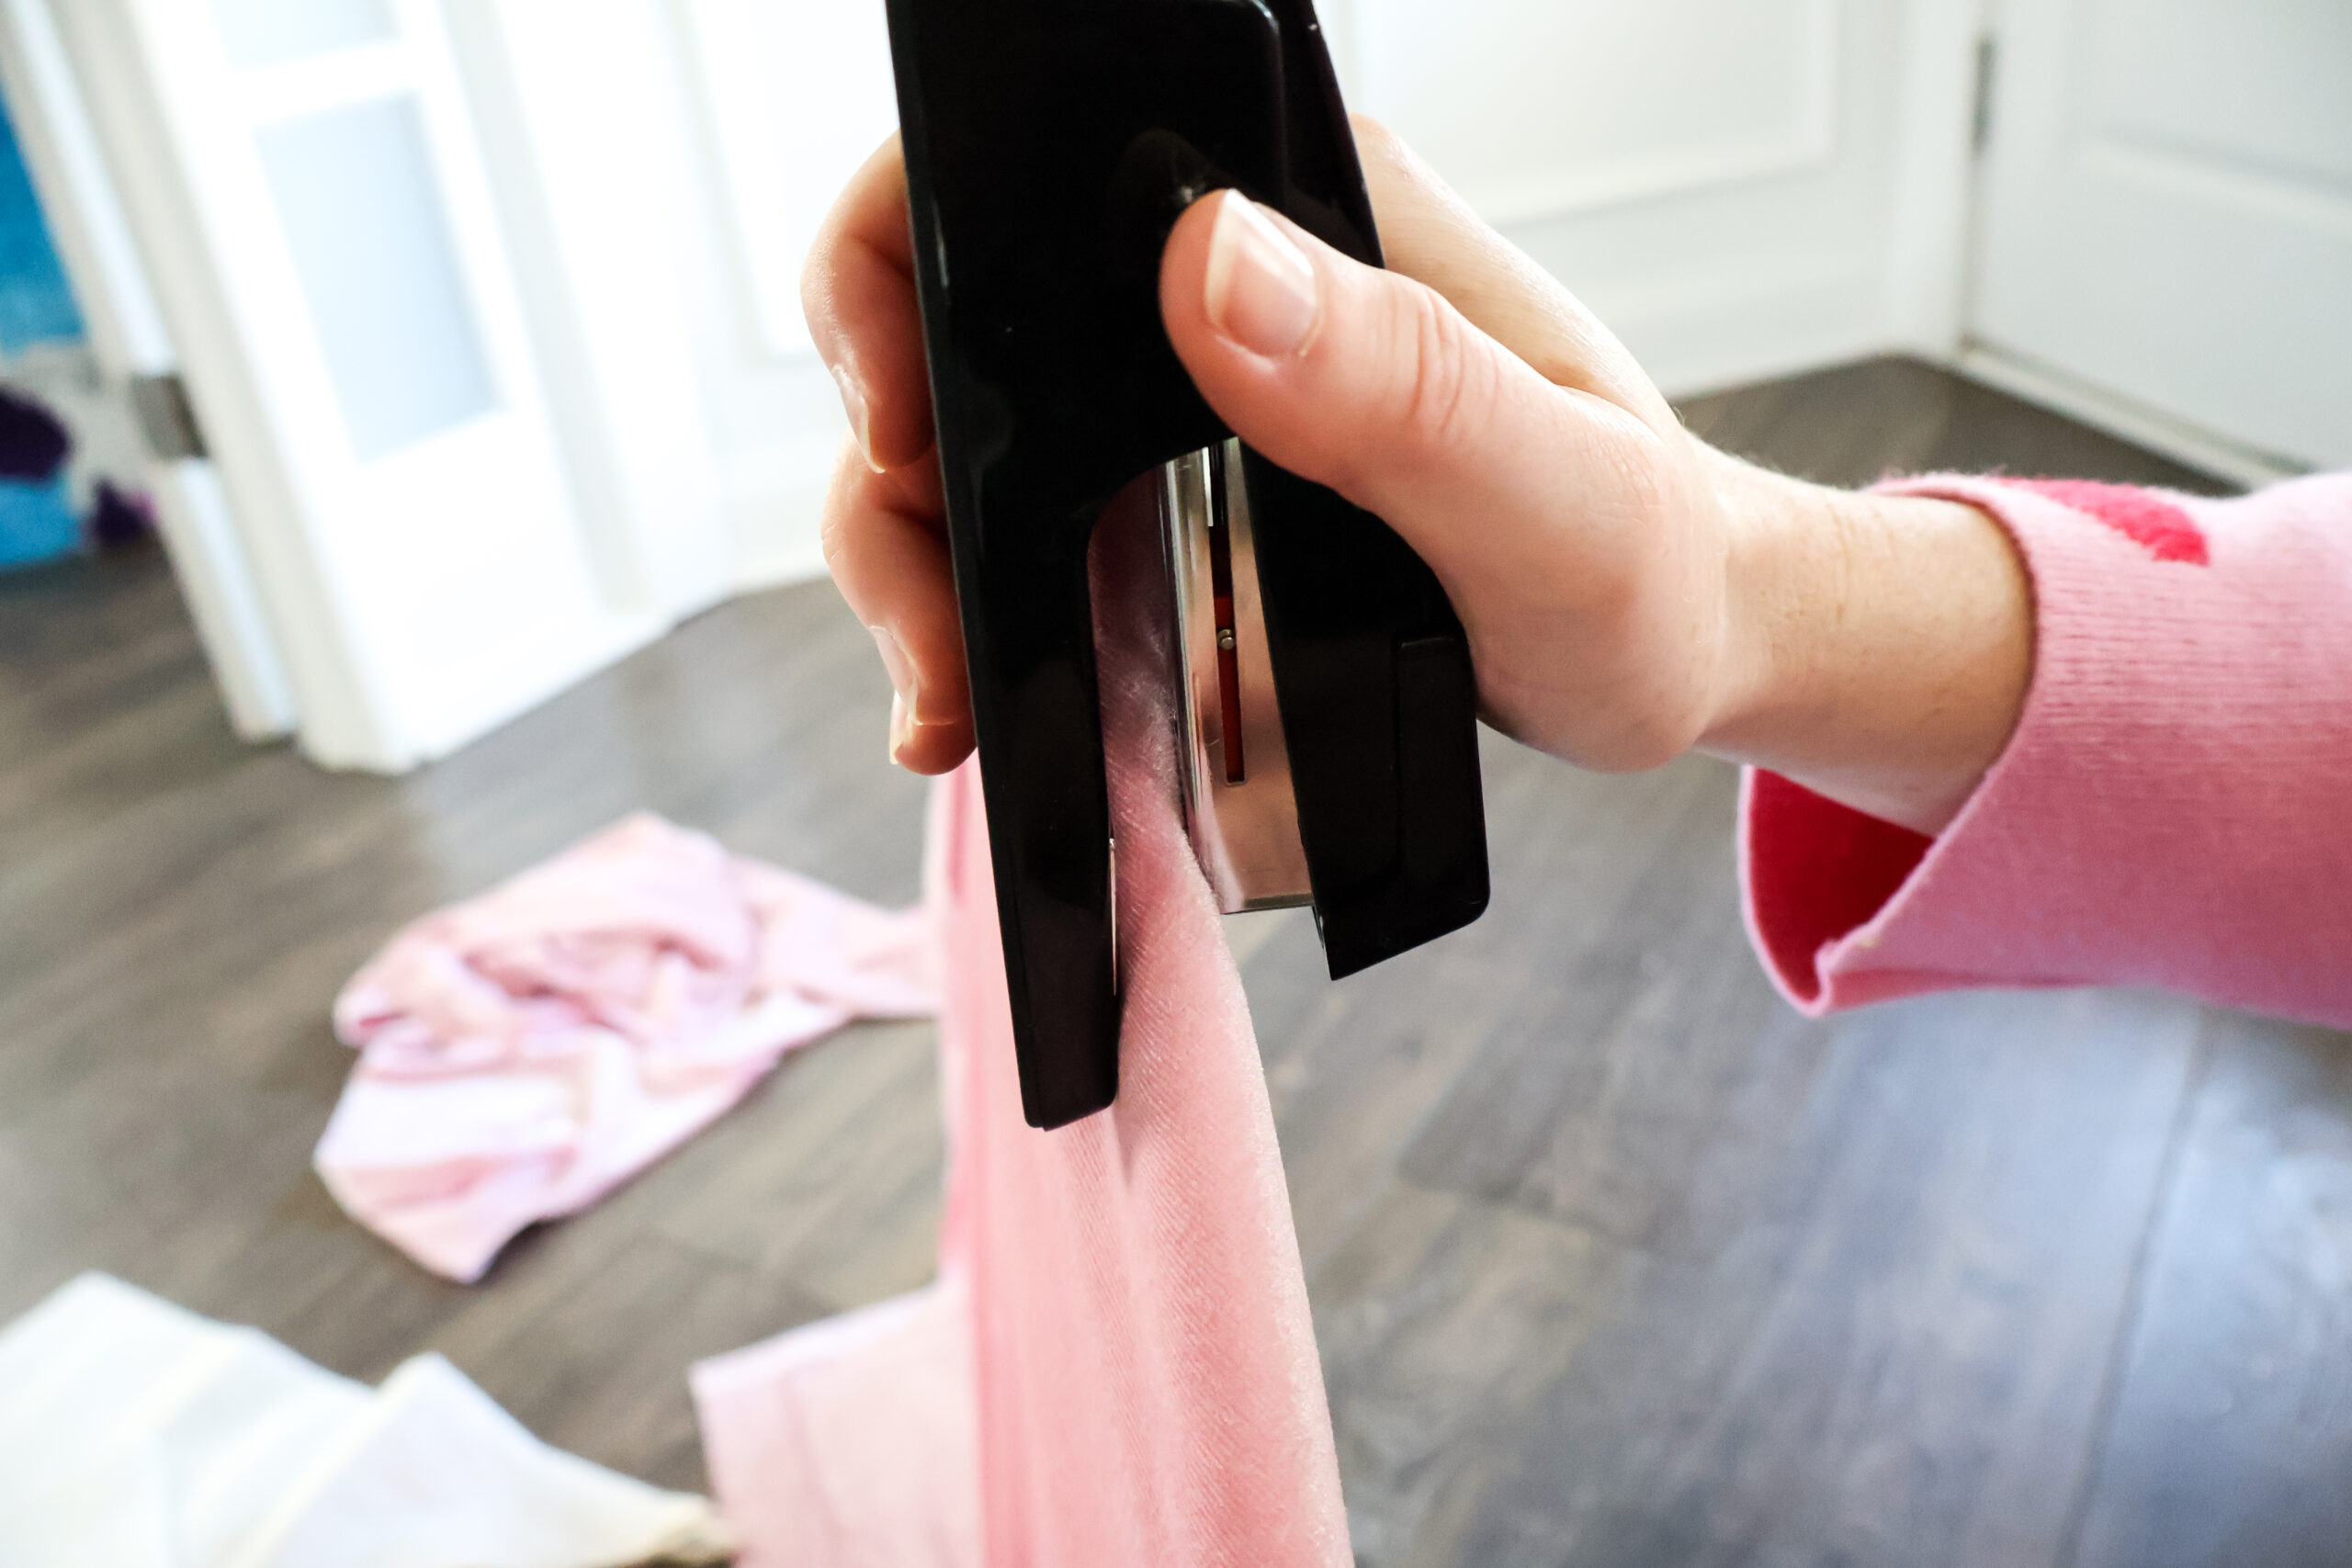
STEP 4: Wrap + Staple
Pull the edge of the fabric (both fabrics together) back over the back of the poster and staple in place.
Make sure your staples are on the back!
I started with an upholstery stapler. It was too strong and went through the heart, right into my floors!
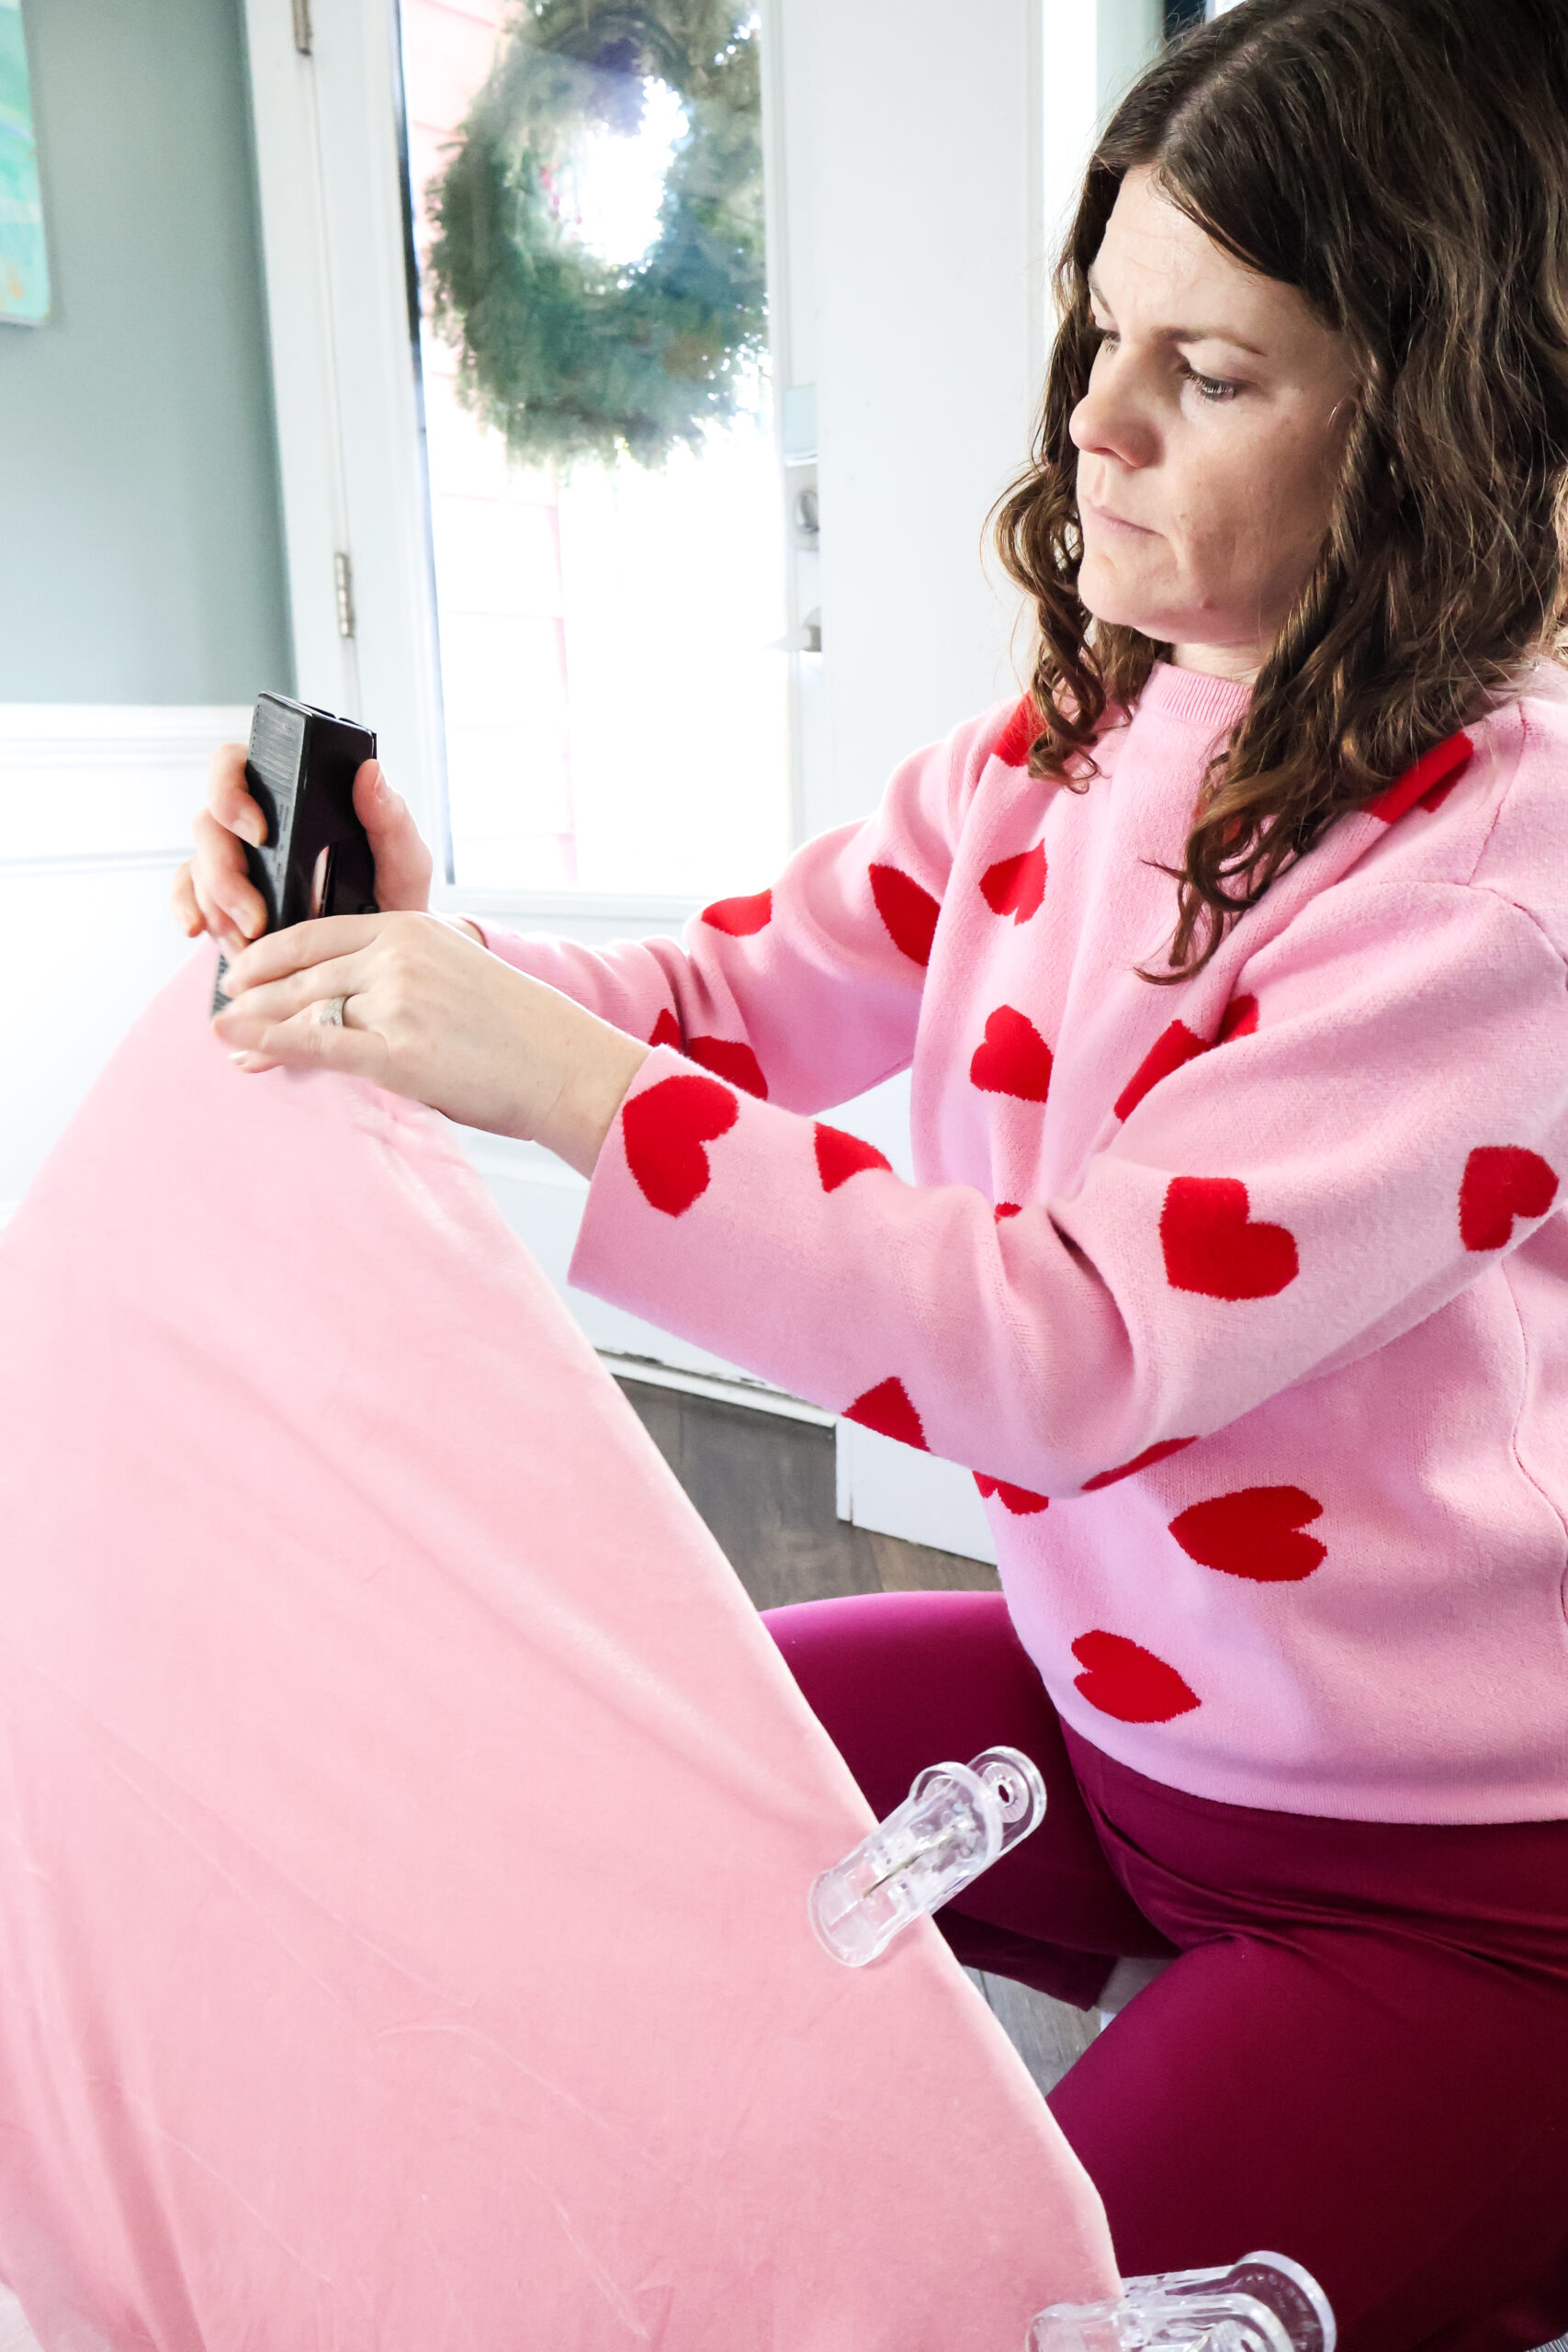
Instead, I switched to a normal, office supply stapler. It worked great and did not poke all the way through.
Your mileage may vary, but that was my experience.
Work your way around the heart, pulling the fabric tightly and stapling ever 1-2 inches.
I did cut a little slit in the fabric at the indent of the top of the heart, just to get it to lay right.
Trim any excess fabric.
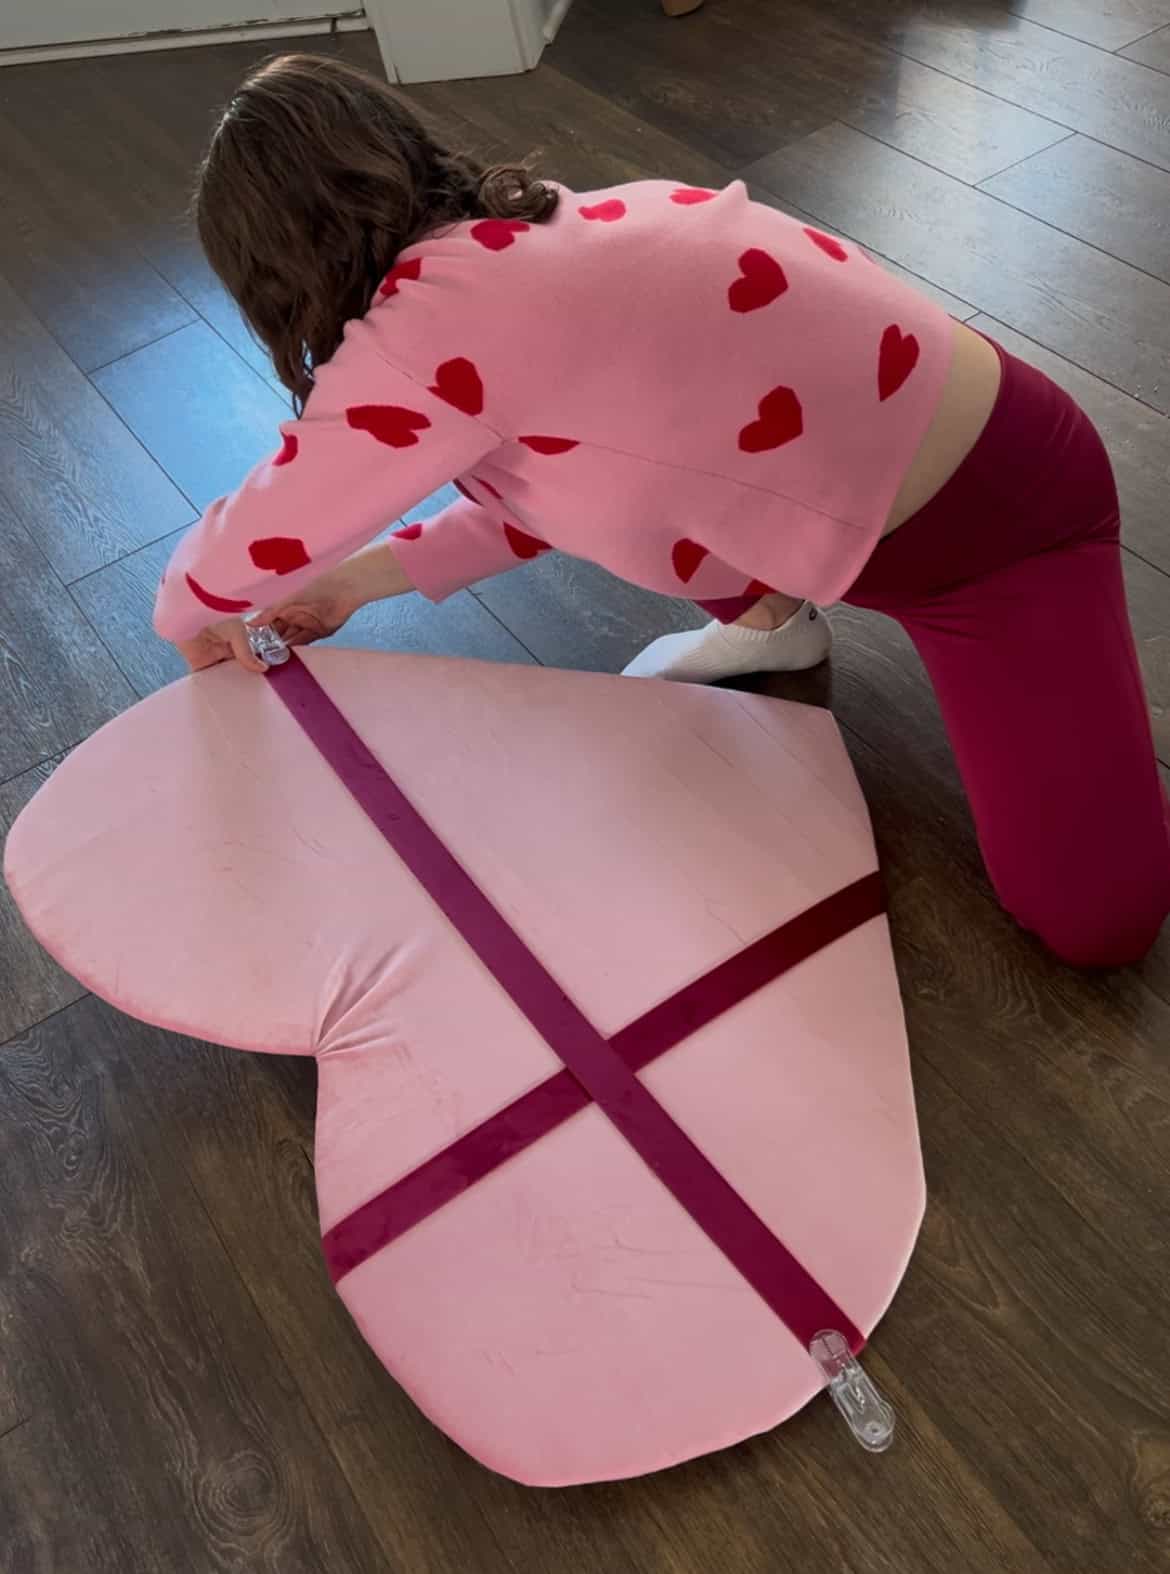
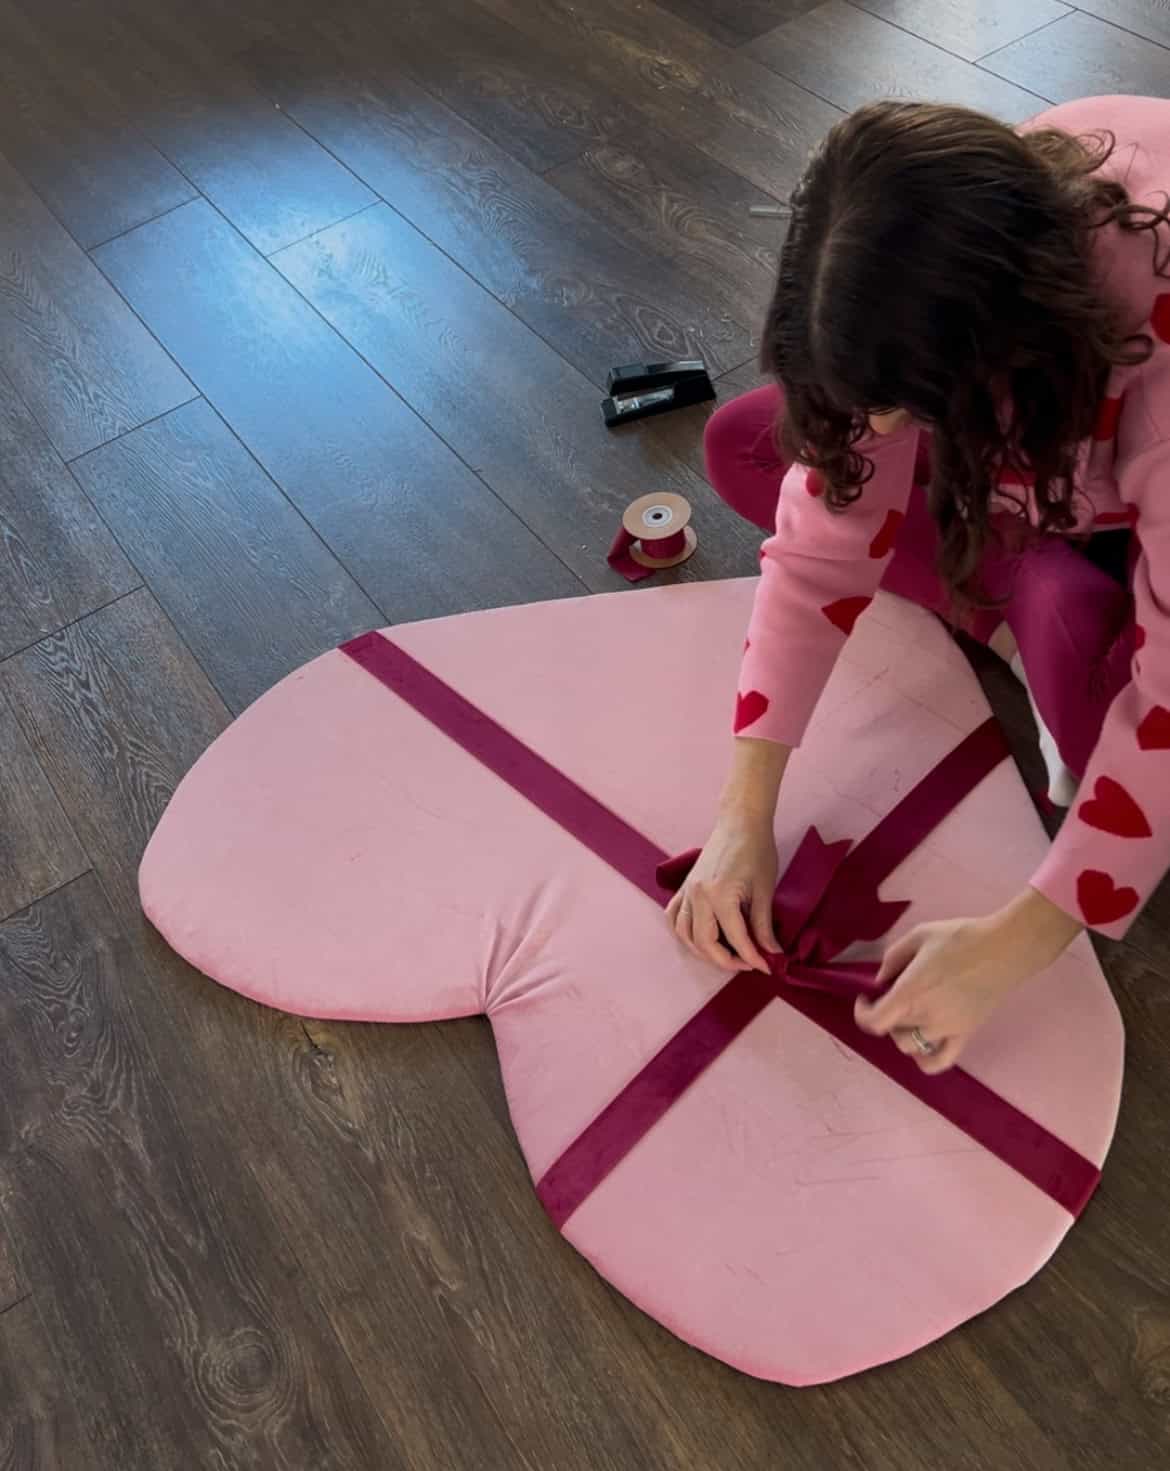
STEP 5: Add Ribbon
You could leave your heart plain, but adding ribbon is such a fun touch.
Measure how much ribbon you need in each direction to create an X. Cut to size.
I stapled in place from the back, just like I did the pink fabric.
Tie a bow from your ribbon. Use hot glue to attach it. I suggest adding glue to the back of the loops and ribbon ends to hold it exactly in place, or else it will flop down.
STEP 6: Add hanger
If you plan to hang your heart, you will need something to hang it by.
You could use a picture hanging hardware, but I made a loop of pipe cleaner, twisted the loop so it was secure, and hot glued it on the back.
Let the glue dry completely before hanging it!
STEP 7: Hang and enjoy!
Hang up your heart and enjoy displaying it!
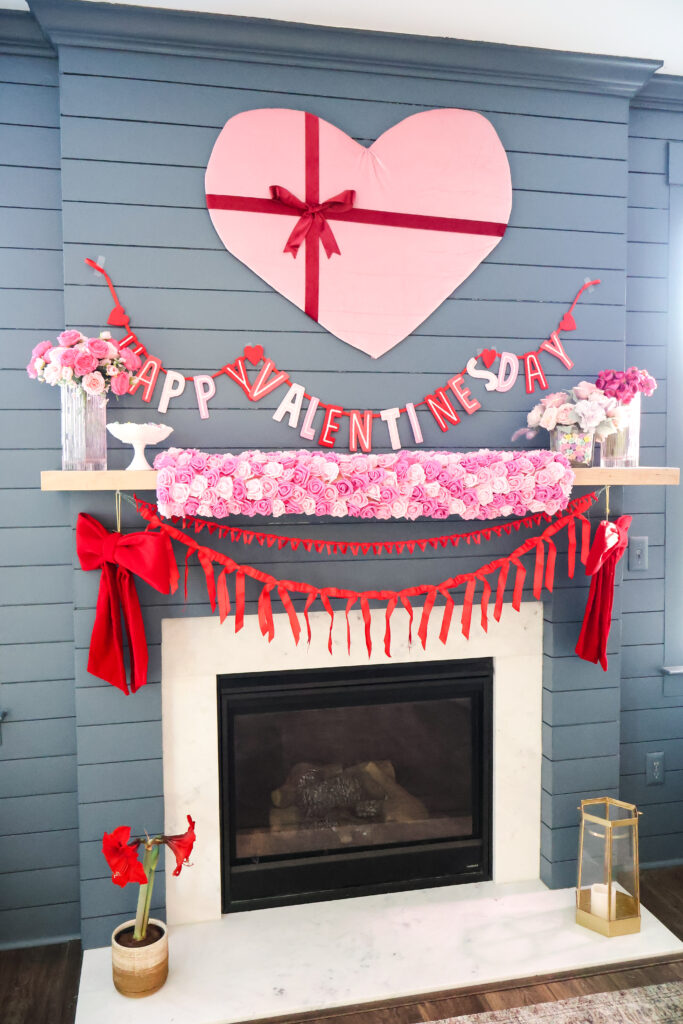
I absolutely love how mine turned out and think the pink pops so nicely off our navy blue DIY shiplap fireplace!


Looking for something?
We've been doing this since 2012 so we have a LOT of blog posts!
Search stuff like: Ceiling Projects | DIY Plant Stands | Thrift Flips

Hey there, I'm Sean, the woodworking enthusiast and builder behind CharlestonCrafted.com! Since 2012, I've been sharing the magic of turning raw materials into beautiful creations. I love teaching others the art and satisfaction of woodworking and DIY. I try to inspire fellow crafters to make something extraordinary out of nothing at all.