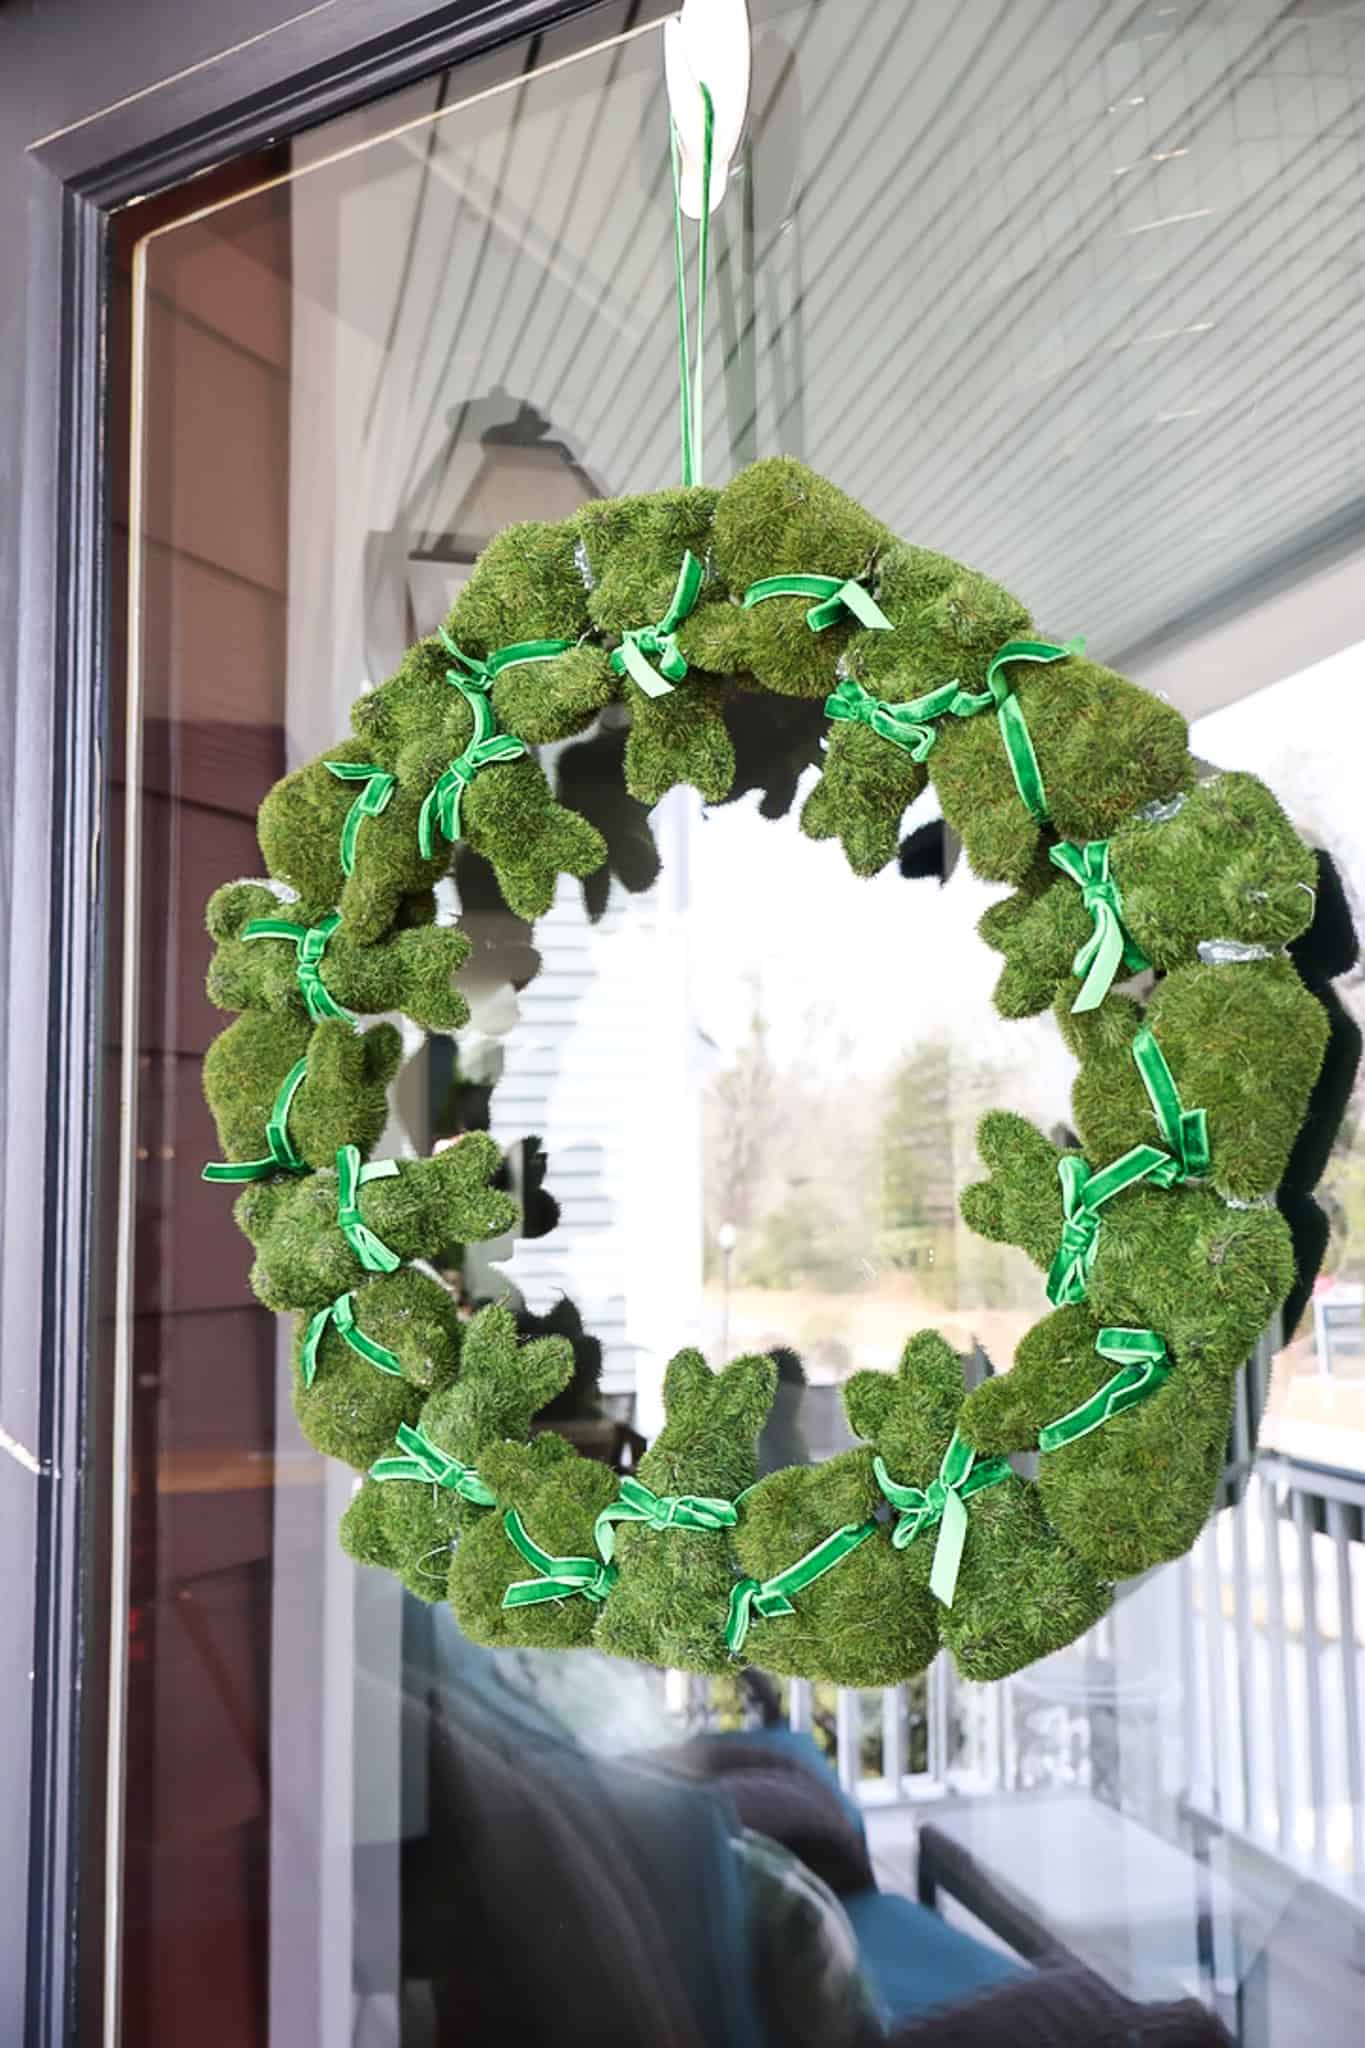
Want to decorate your front door for Easter? Here's how to make a DIY Flocked Bunny Easter Wreath!
I have been having so much fun going all out decorating for all of the holidays lately. But even if you don't want to go all out with your decorating, adding a new wreath is a simple way to dress your front porch for the season.
Today I want to share a really easy Easter wreath that I made.
I have been so inspired by all of the flocked bunnies that so many stores are carrying.
Flocked just means they're kind of fuzzy feeling not furry but more like a stiff hairbrush kind of shit very short fuzz.
I found these bags of mini green flocked bunnies at Walmart for less than four dollars a bag.
I brought a bag of them home and started messing around with them and decided they would make a great wreath.
I did have to get four bags total – though I had for leftover bunnies – but this turned out to be a super easy and affordable craft. Much cheaper than buying a premade wreath!
Here's how I did it.
How to make a DIY Flocked Bunny Easter Wreath
Here's how easy it is to make this adorable bunny Easter wreath!
Supplies needed:
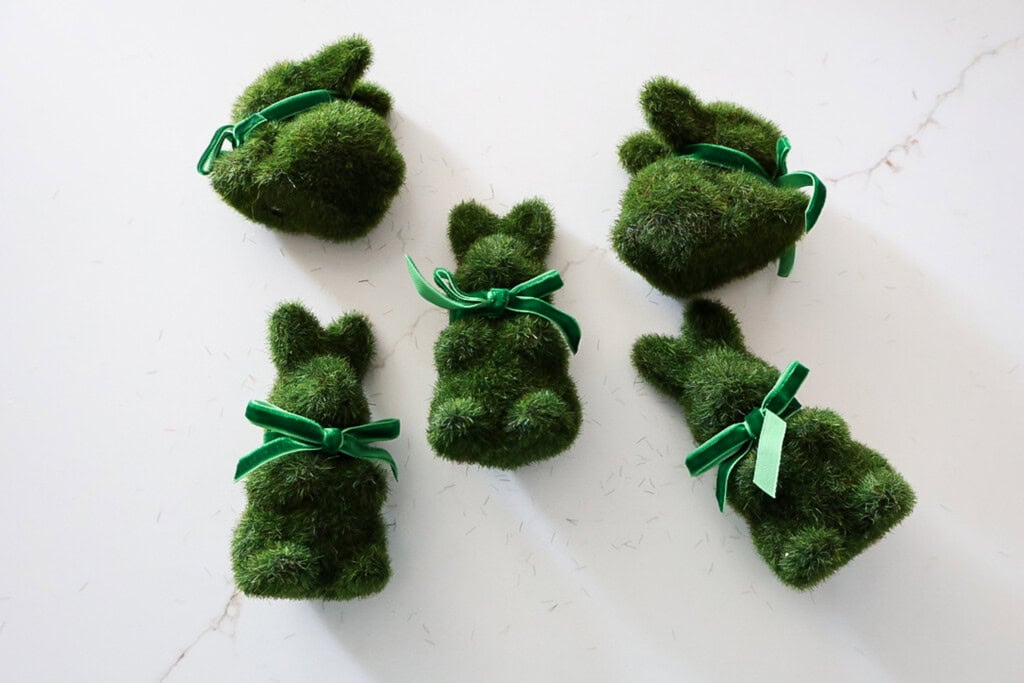
- Mini flocked bunnies - I used 4 bags of these (with 4 bunnies left over)
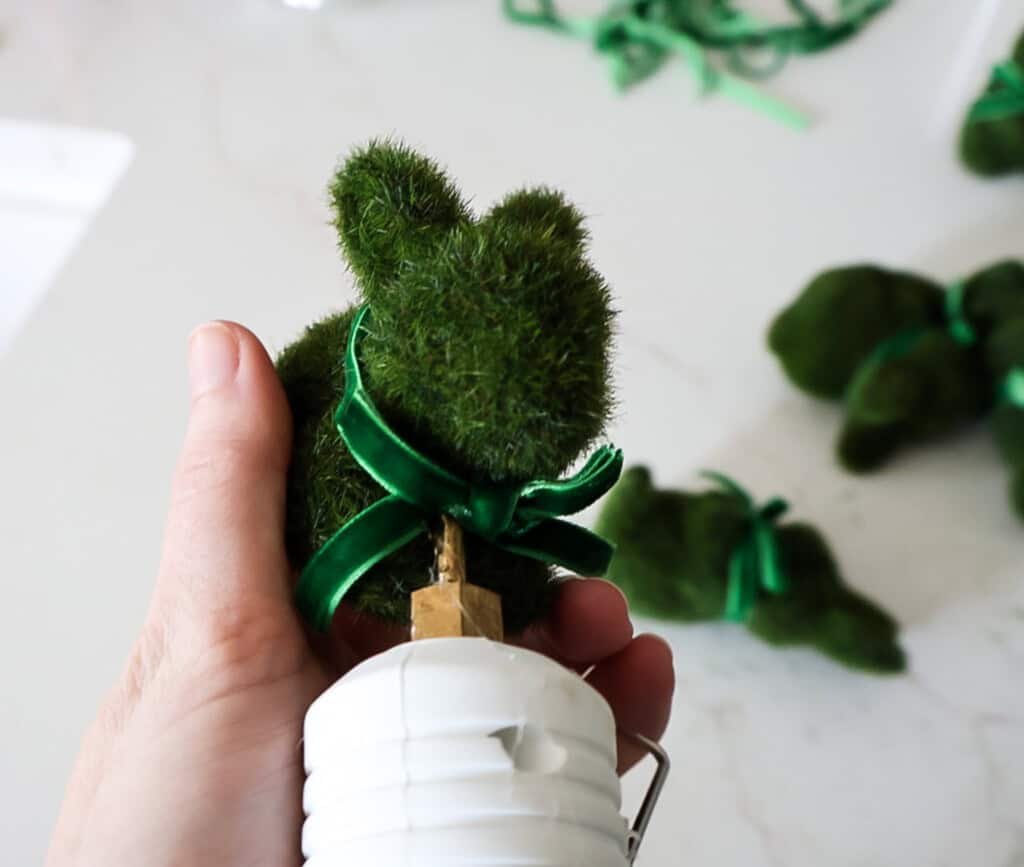
- Hot glue (LOTS)
Note: use any mini bunnies, just make sure they are lightweight so they will hold together while hanging as a wreath! My bunnies are sized in 2 heights: 4" and 2.75".

Steps to make:
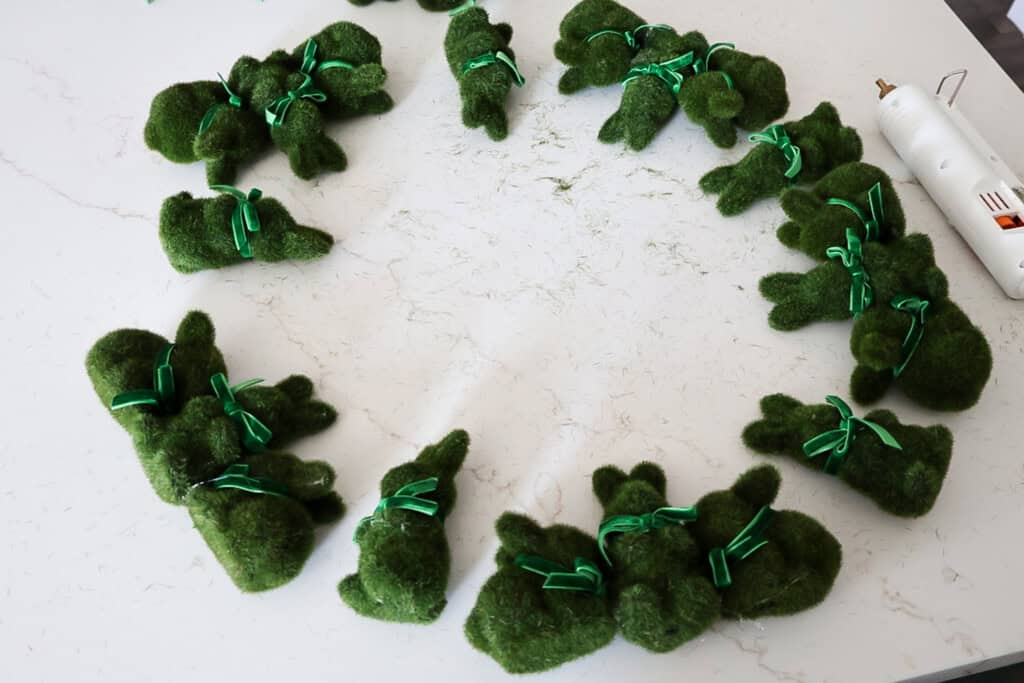
STEP 1: Layout your design
Before you start, take a minute to layout your design on the table. Just move and rearrange the bunnies until you get them to form a table.
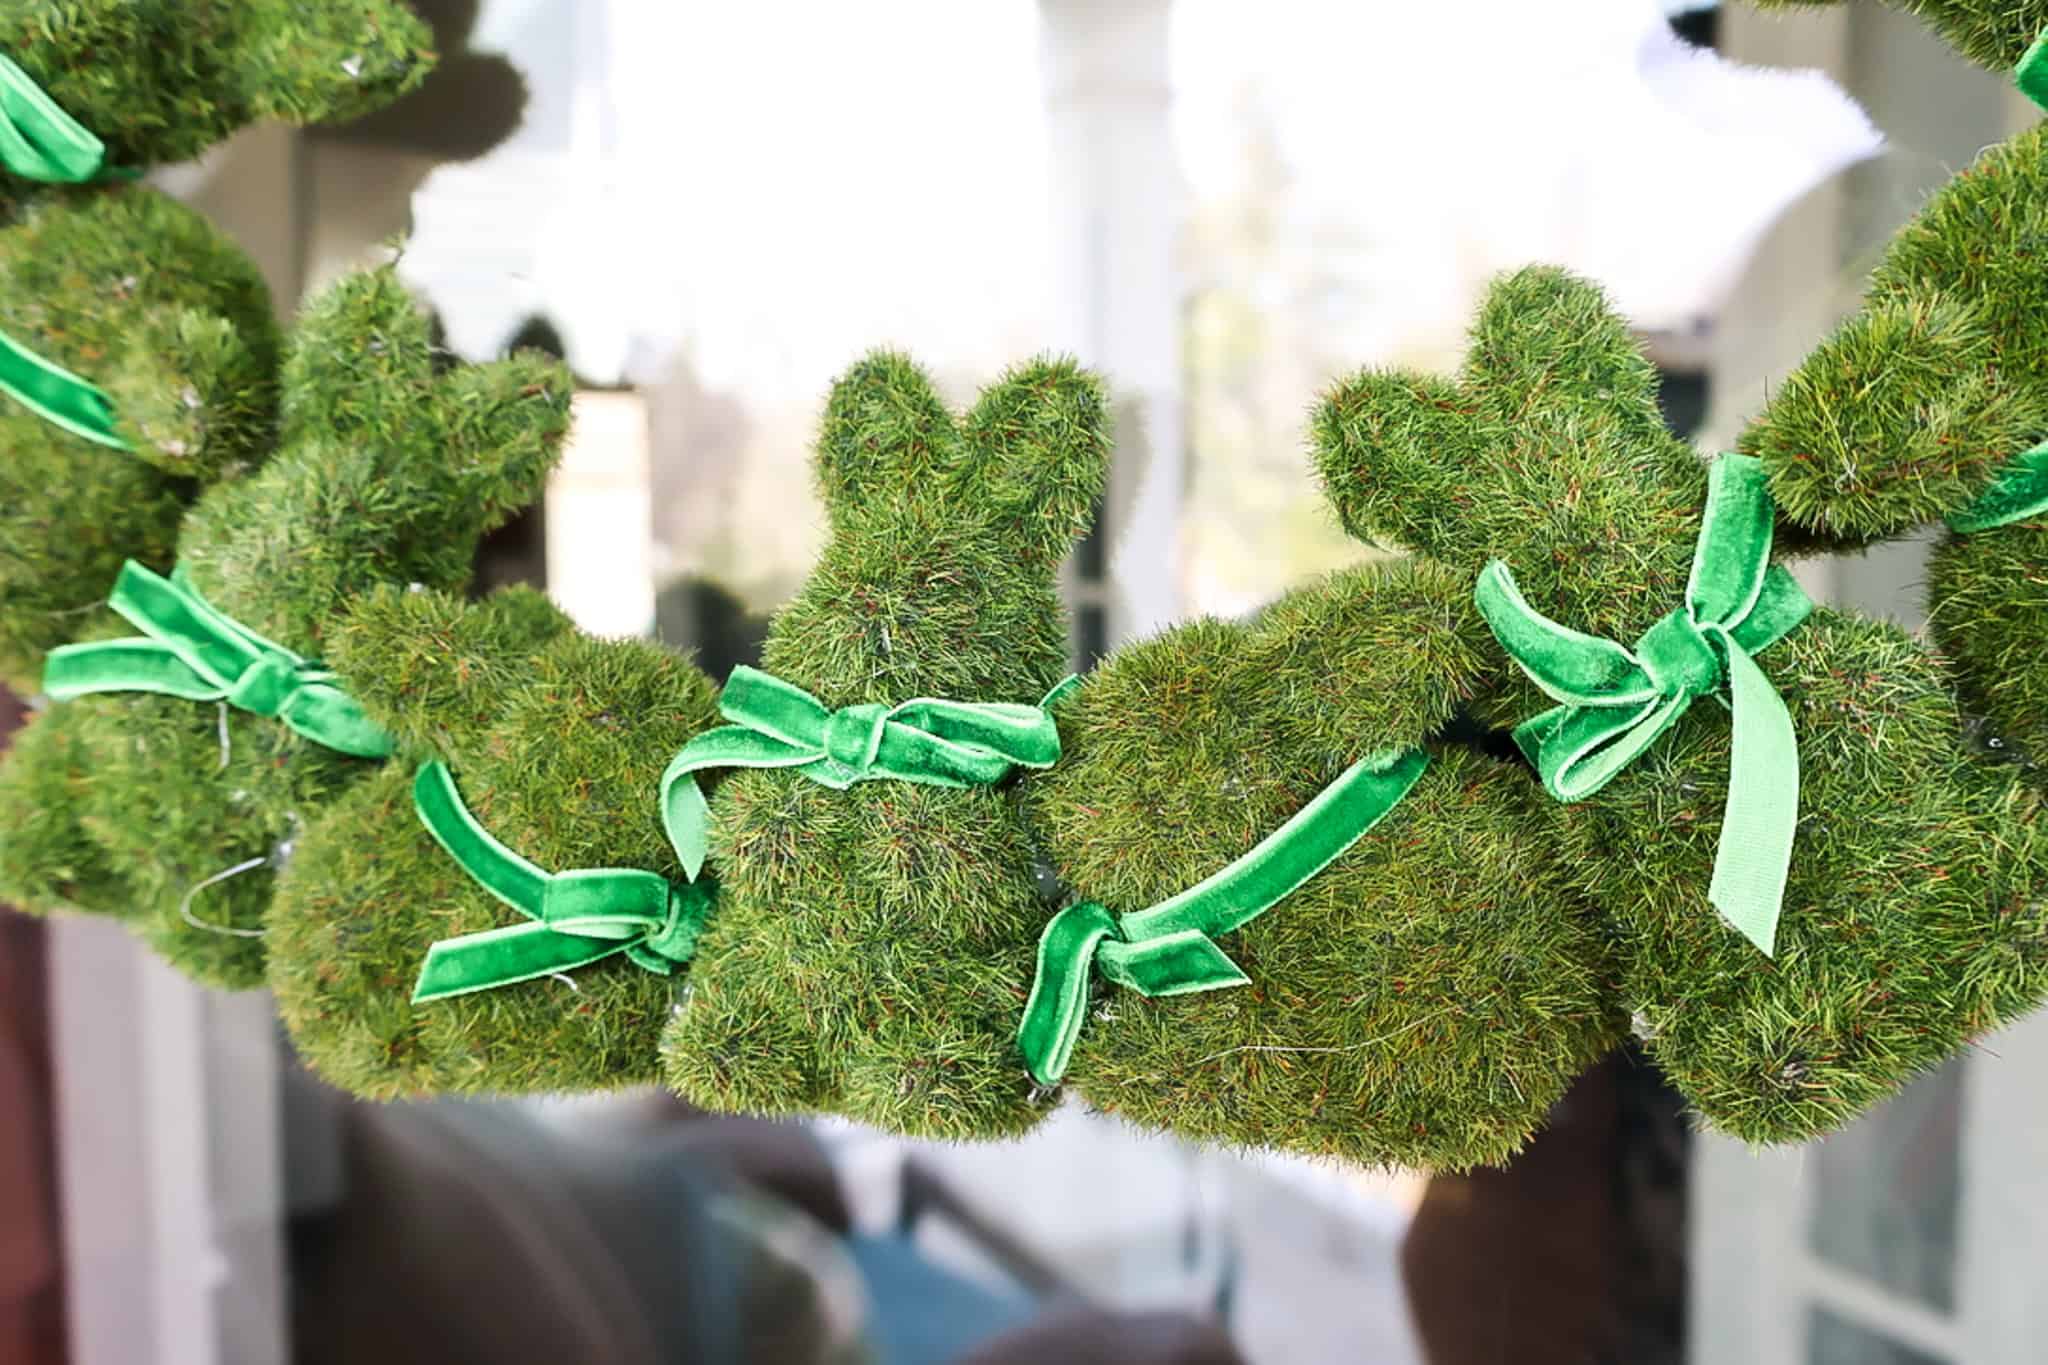
The set I used came with 2 styles of bunny - one sitting up and one more laying down.
I decided to alternate the bunnies, with the laying-down-bunnies changing directions to face each other.
There is no right or wrong way to do this - as long as they make a circle!
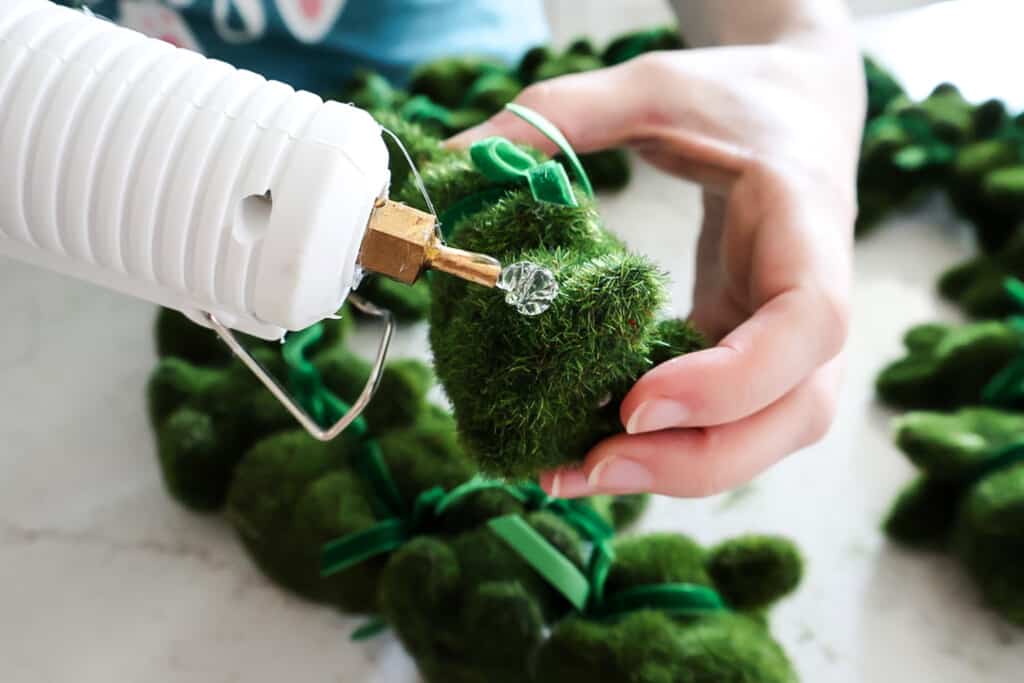
STEP 2: Glue together groups of 3
My best suggestion to assembling this wreath is to group the bunnies into groups of 3 or so and gluing them that way first.
Attach the bunnies together using generous amounts of hot glue. Press together firmly and hold for 6 seconds.
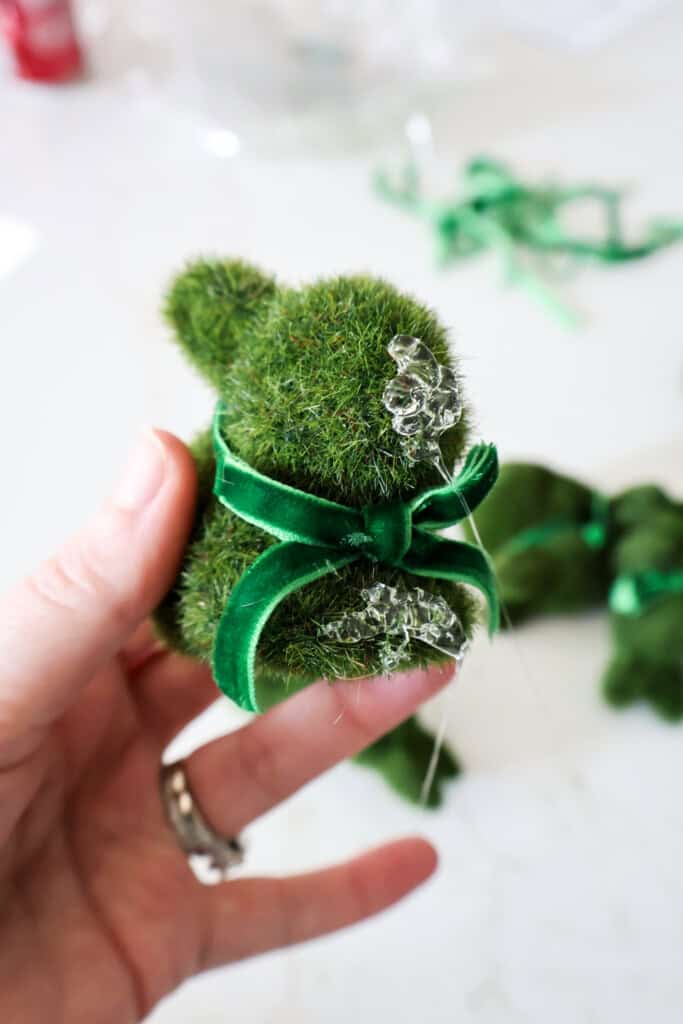
As you go, test it on the tabletop to be sure it is laying flat and everything is aligned.
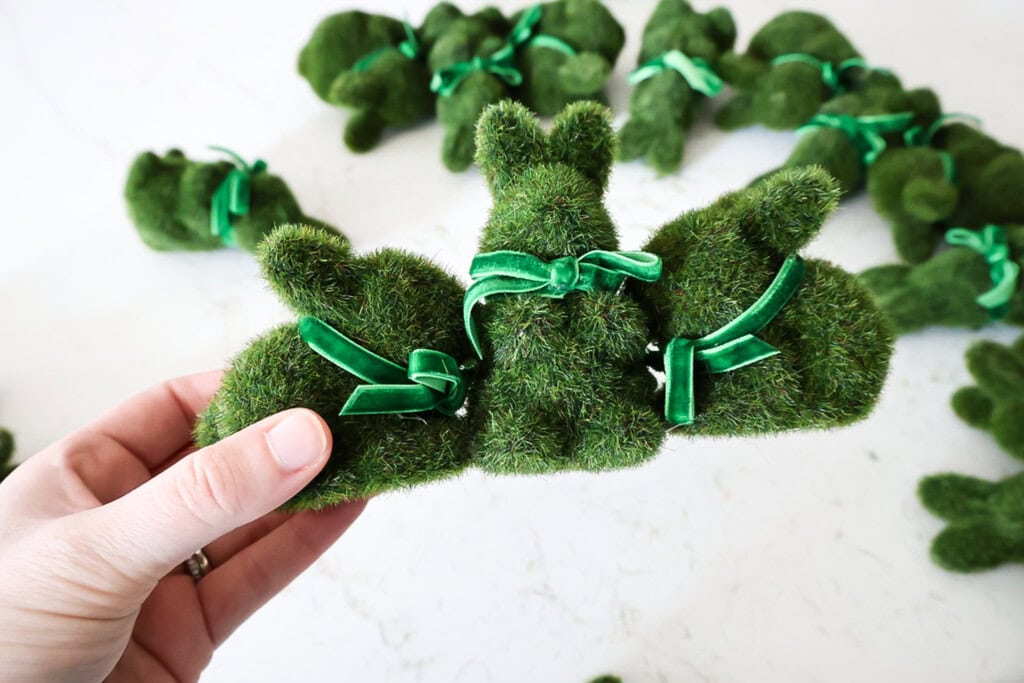
Repeat to create all of your groups of bunnies. Lay everything out to be sure they still make a circle shape.
If adjustments are needed, gently pry apart at the glue and then re-glue.
STEP 3: Connect the groups
Now, use hot glue to attach the groups together. I actually did 4 groups of 3 bunnies with a single bunny in between each group.
Either way, continue in the same way - lot of hot glue, press firmly, hold for 30 seconds.
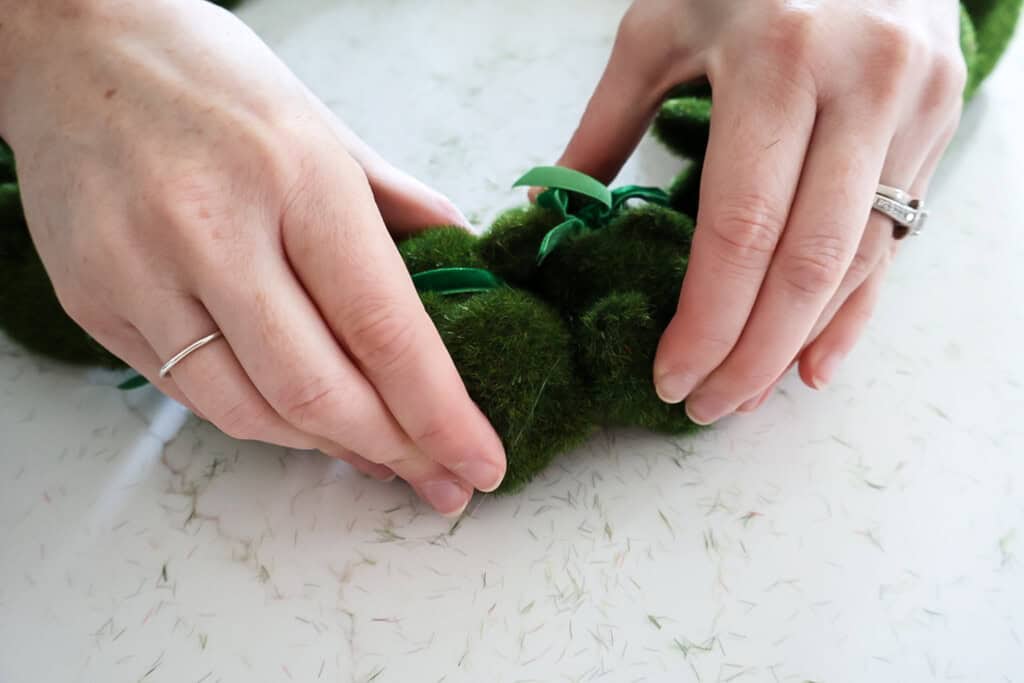
It's very important to lay on the table and make sure it's still flat so it won't be crooked or misshapen when hanging on the door.
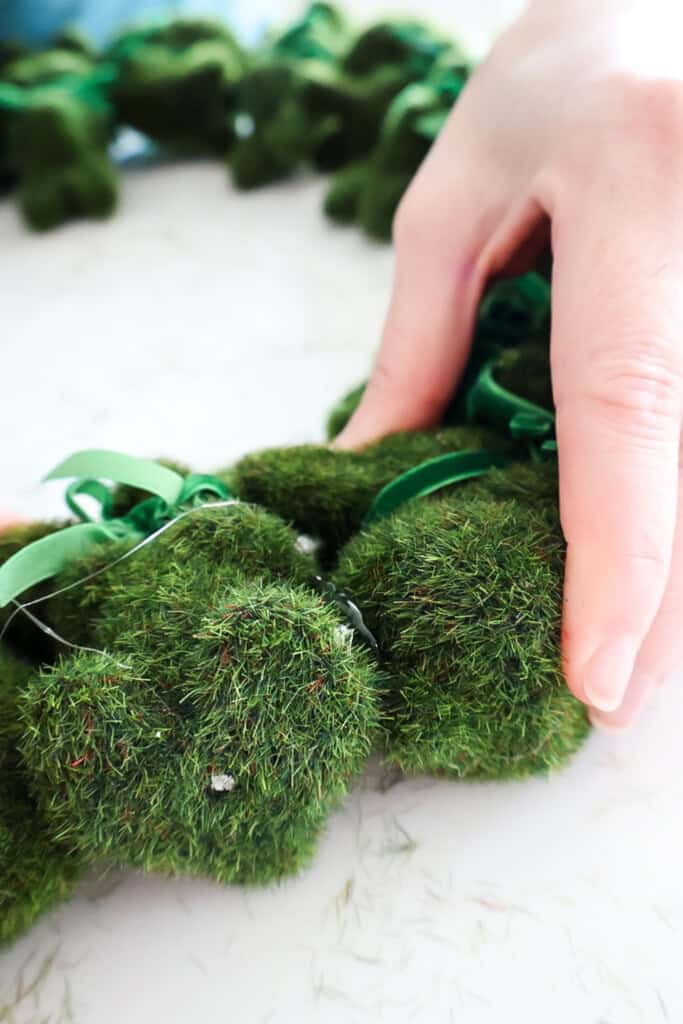
STEP 4: Add a hanger
Don't forget to add a hanger to the back of the wreath.
First, decide which way you want to be the top of the wreath - if you have a preference, such as to center a certain bunny.
Then, you want to add a loop to hang the wreath with.
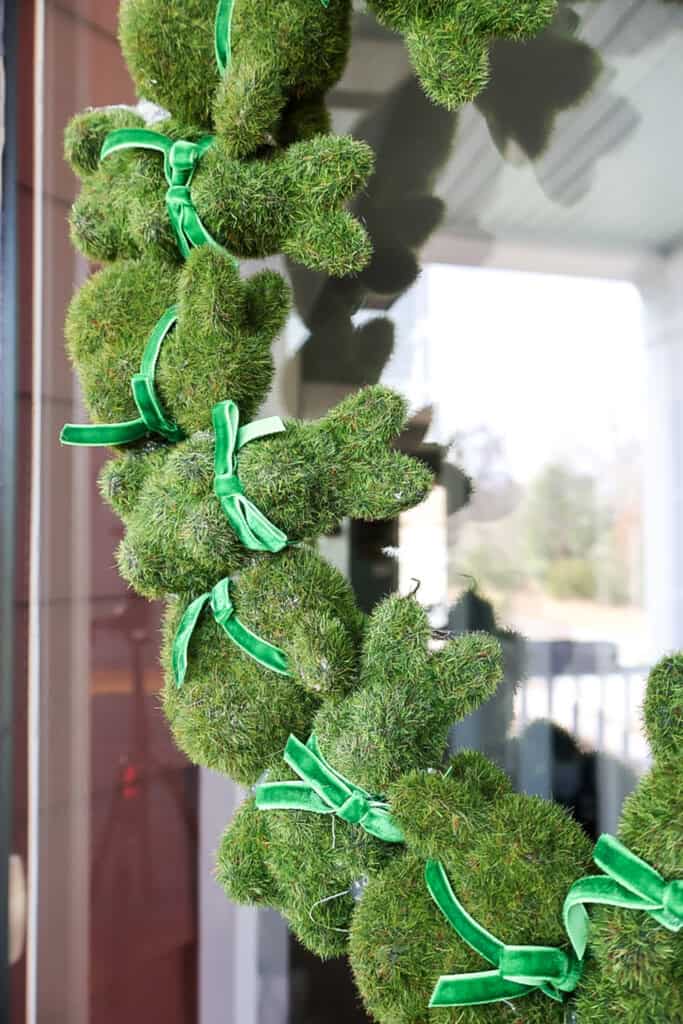
My bunnies came in clear bags tied with this adorable green velvet ribbon. I am never one to waste pretty ribbon!
Tie a loop of ribbon and use hot glue to attach the knot to the back of your wreath.
STEP 5: Let dry completely
Now, the hardest part - let dry completely. Hot gue does dry fast, and it might feel good enough immediately, but hear me out!
Since this wreath has 0 support other than the glue, you really want it VERY dry and secure.
Place it face up on a tabletop and let dry flat for AT LEAST one hour. This was you can be assured it won't fall apart.
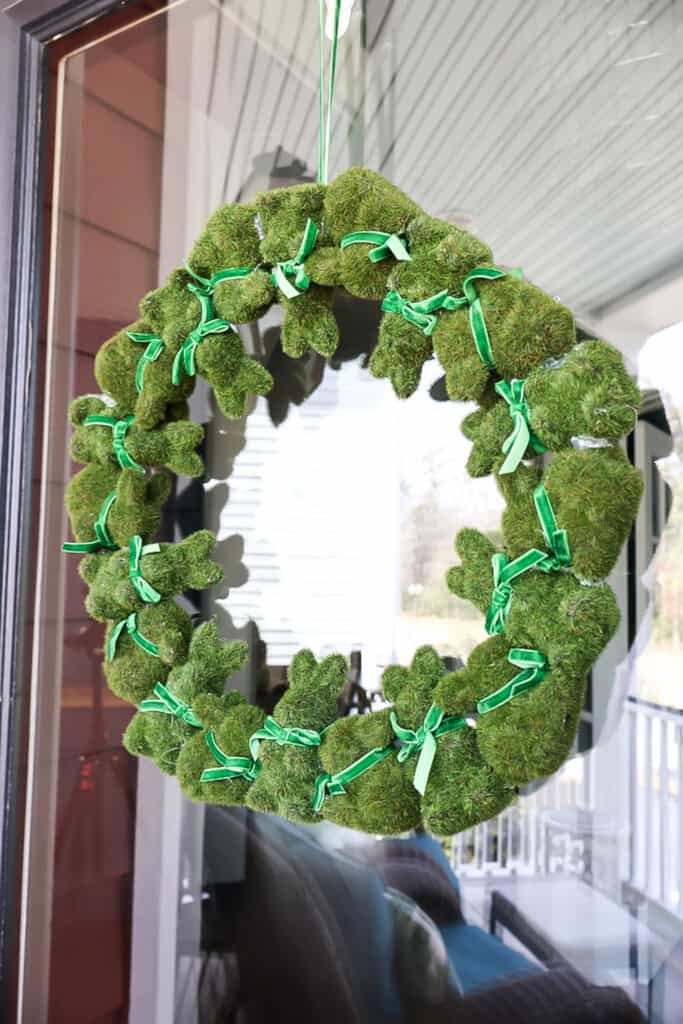
STEP 6: Hang and enjoy!
Hang from a nail or hook (we keep a command hook on our glass front door!) and enjoy!
You could also add a big bow, but I decided that I liked the simplicity of the bunnies as-is!

This wreath is so simple but so so sweet and such a great addition to your Easter decor!

You can totally customize it with any mini bunnies - I can't wait to see what you craft up!

Looking for something?
We've been doing this since 2012 so we have a LOT of blog posts!
Search stuff like: Ceiling Projects | DIY Plant Stands | Thrift Flips

Hello, I'm Morgan, half of the creative force behind CharlestonCrafted.com! With a passion for DIY that dates back to 2012, I've transformed three homes and now I'm dedicated to helping others craft their dream spaces. Let's turn your house into a home together!