Check out the details of our green and gold guest bedroom makeover!
We have finished making over our guest bedroom. This room is on the first floor of our home and is right off the entryway.
This is a space that everyone sees when they visit our home.
We wanted to make it more beautiful (it was builder beige before) and more useable for our family when we don't have guests in town.
So we cleaned it up, cleared it out, created a cozy reading area for the kids, and made space to bring in a piano for the kids to take future lessons at!
Let's dive into the details.
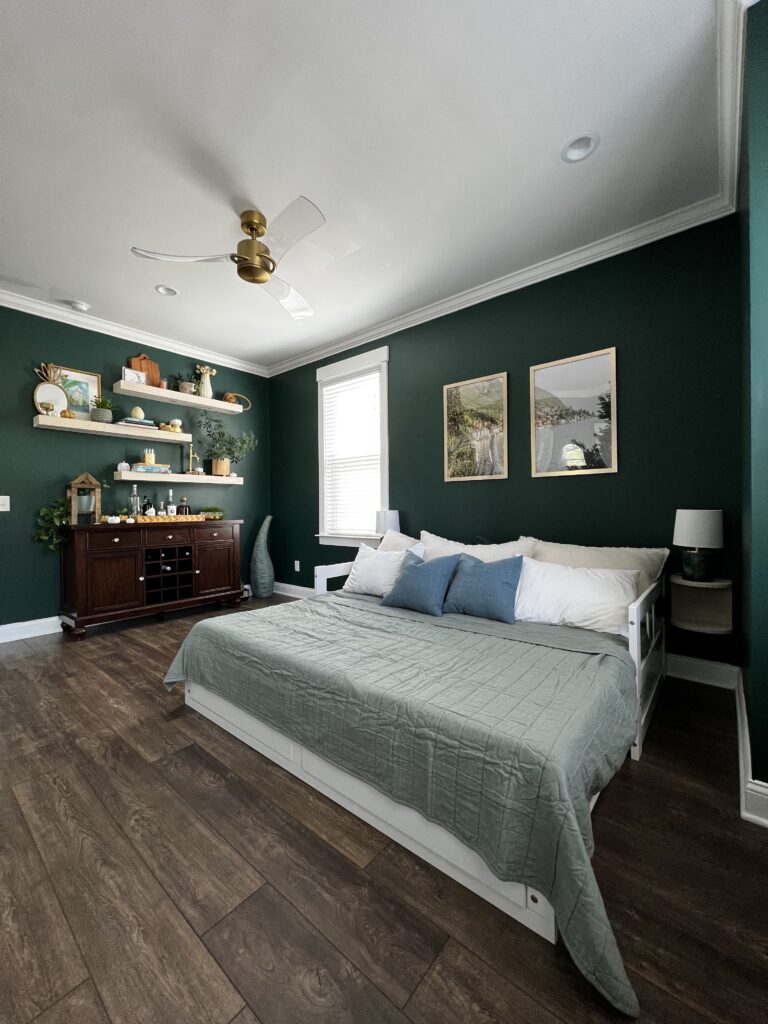
Our gold and green guest bedroom makeover
Here's a reminder of what the space looked like before:
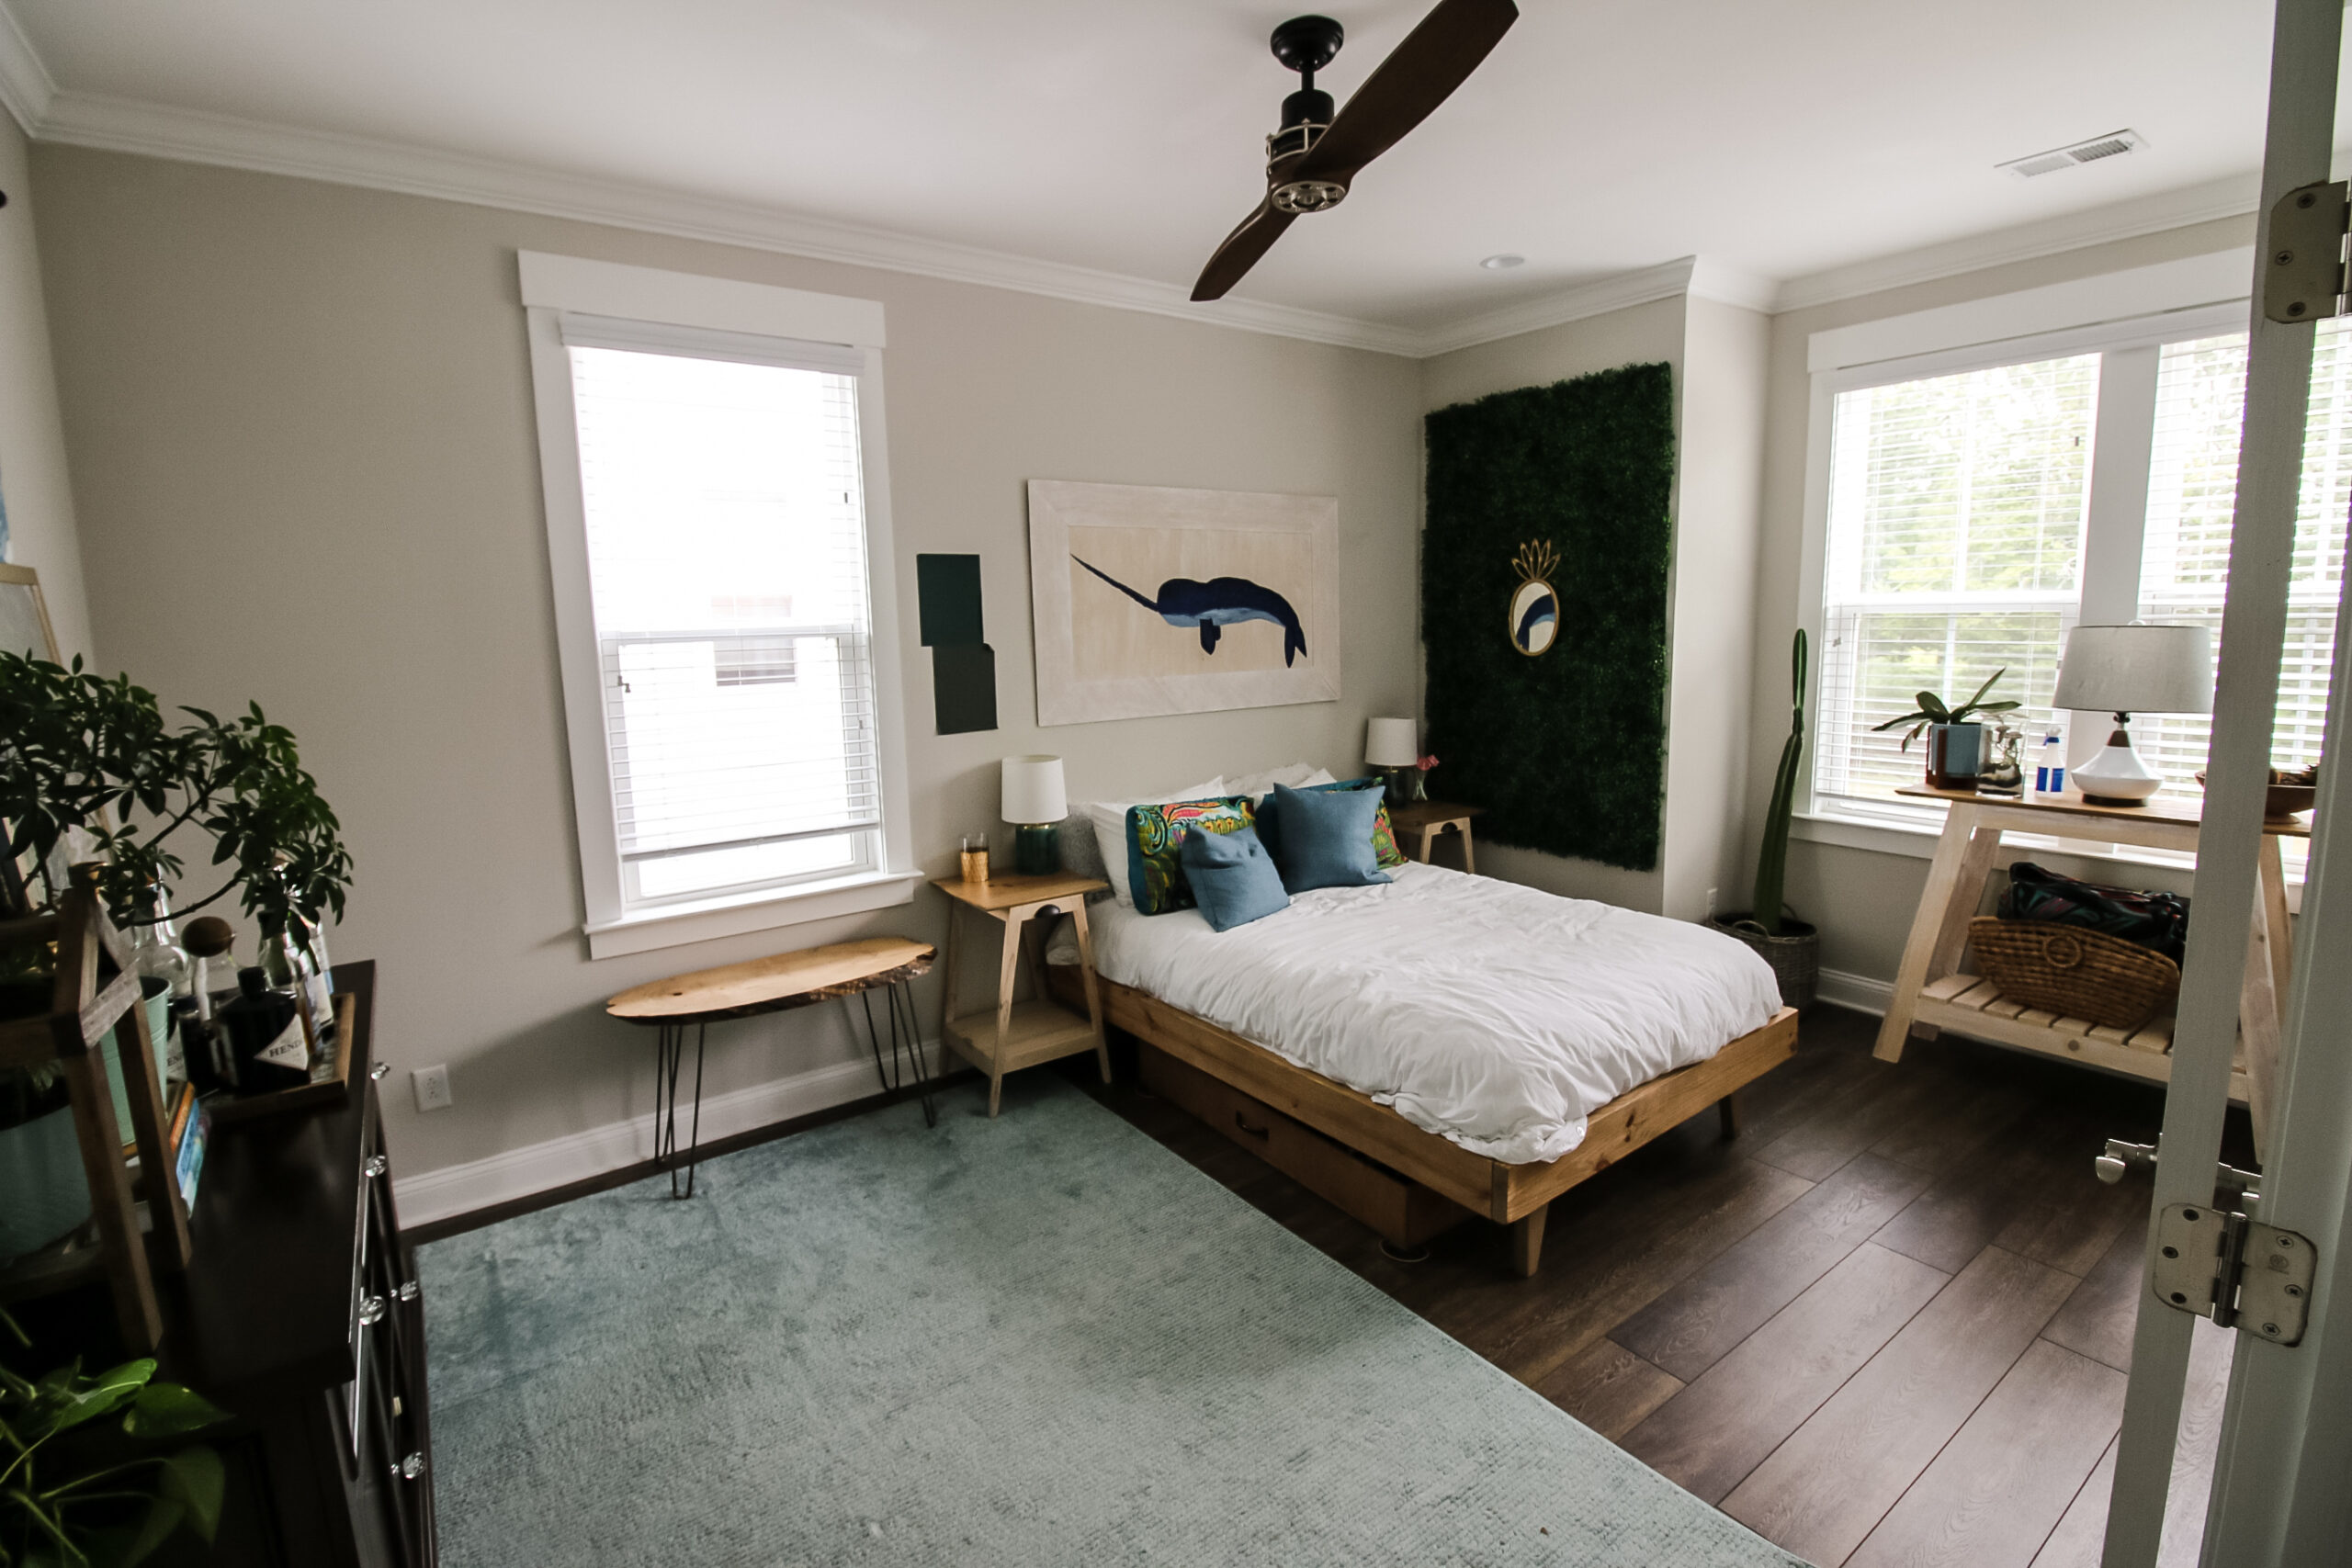
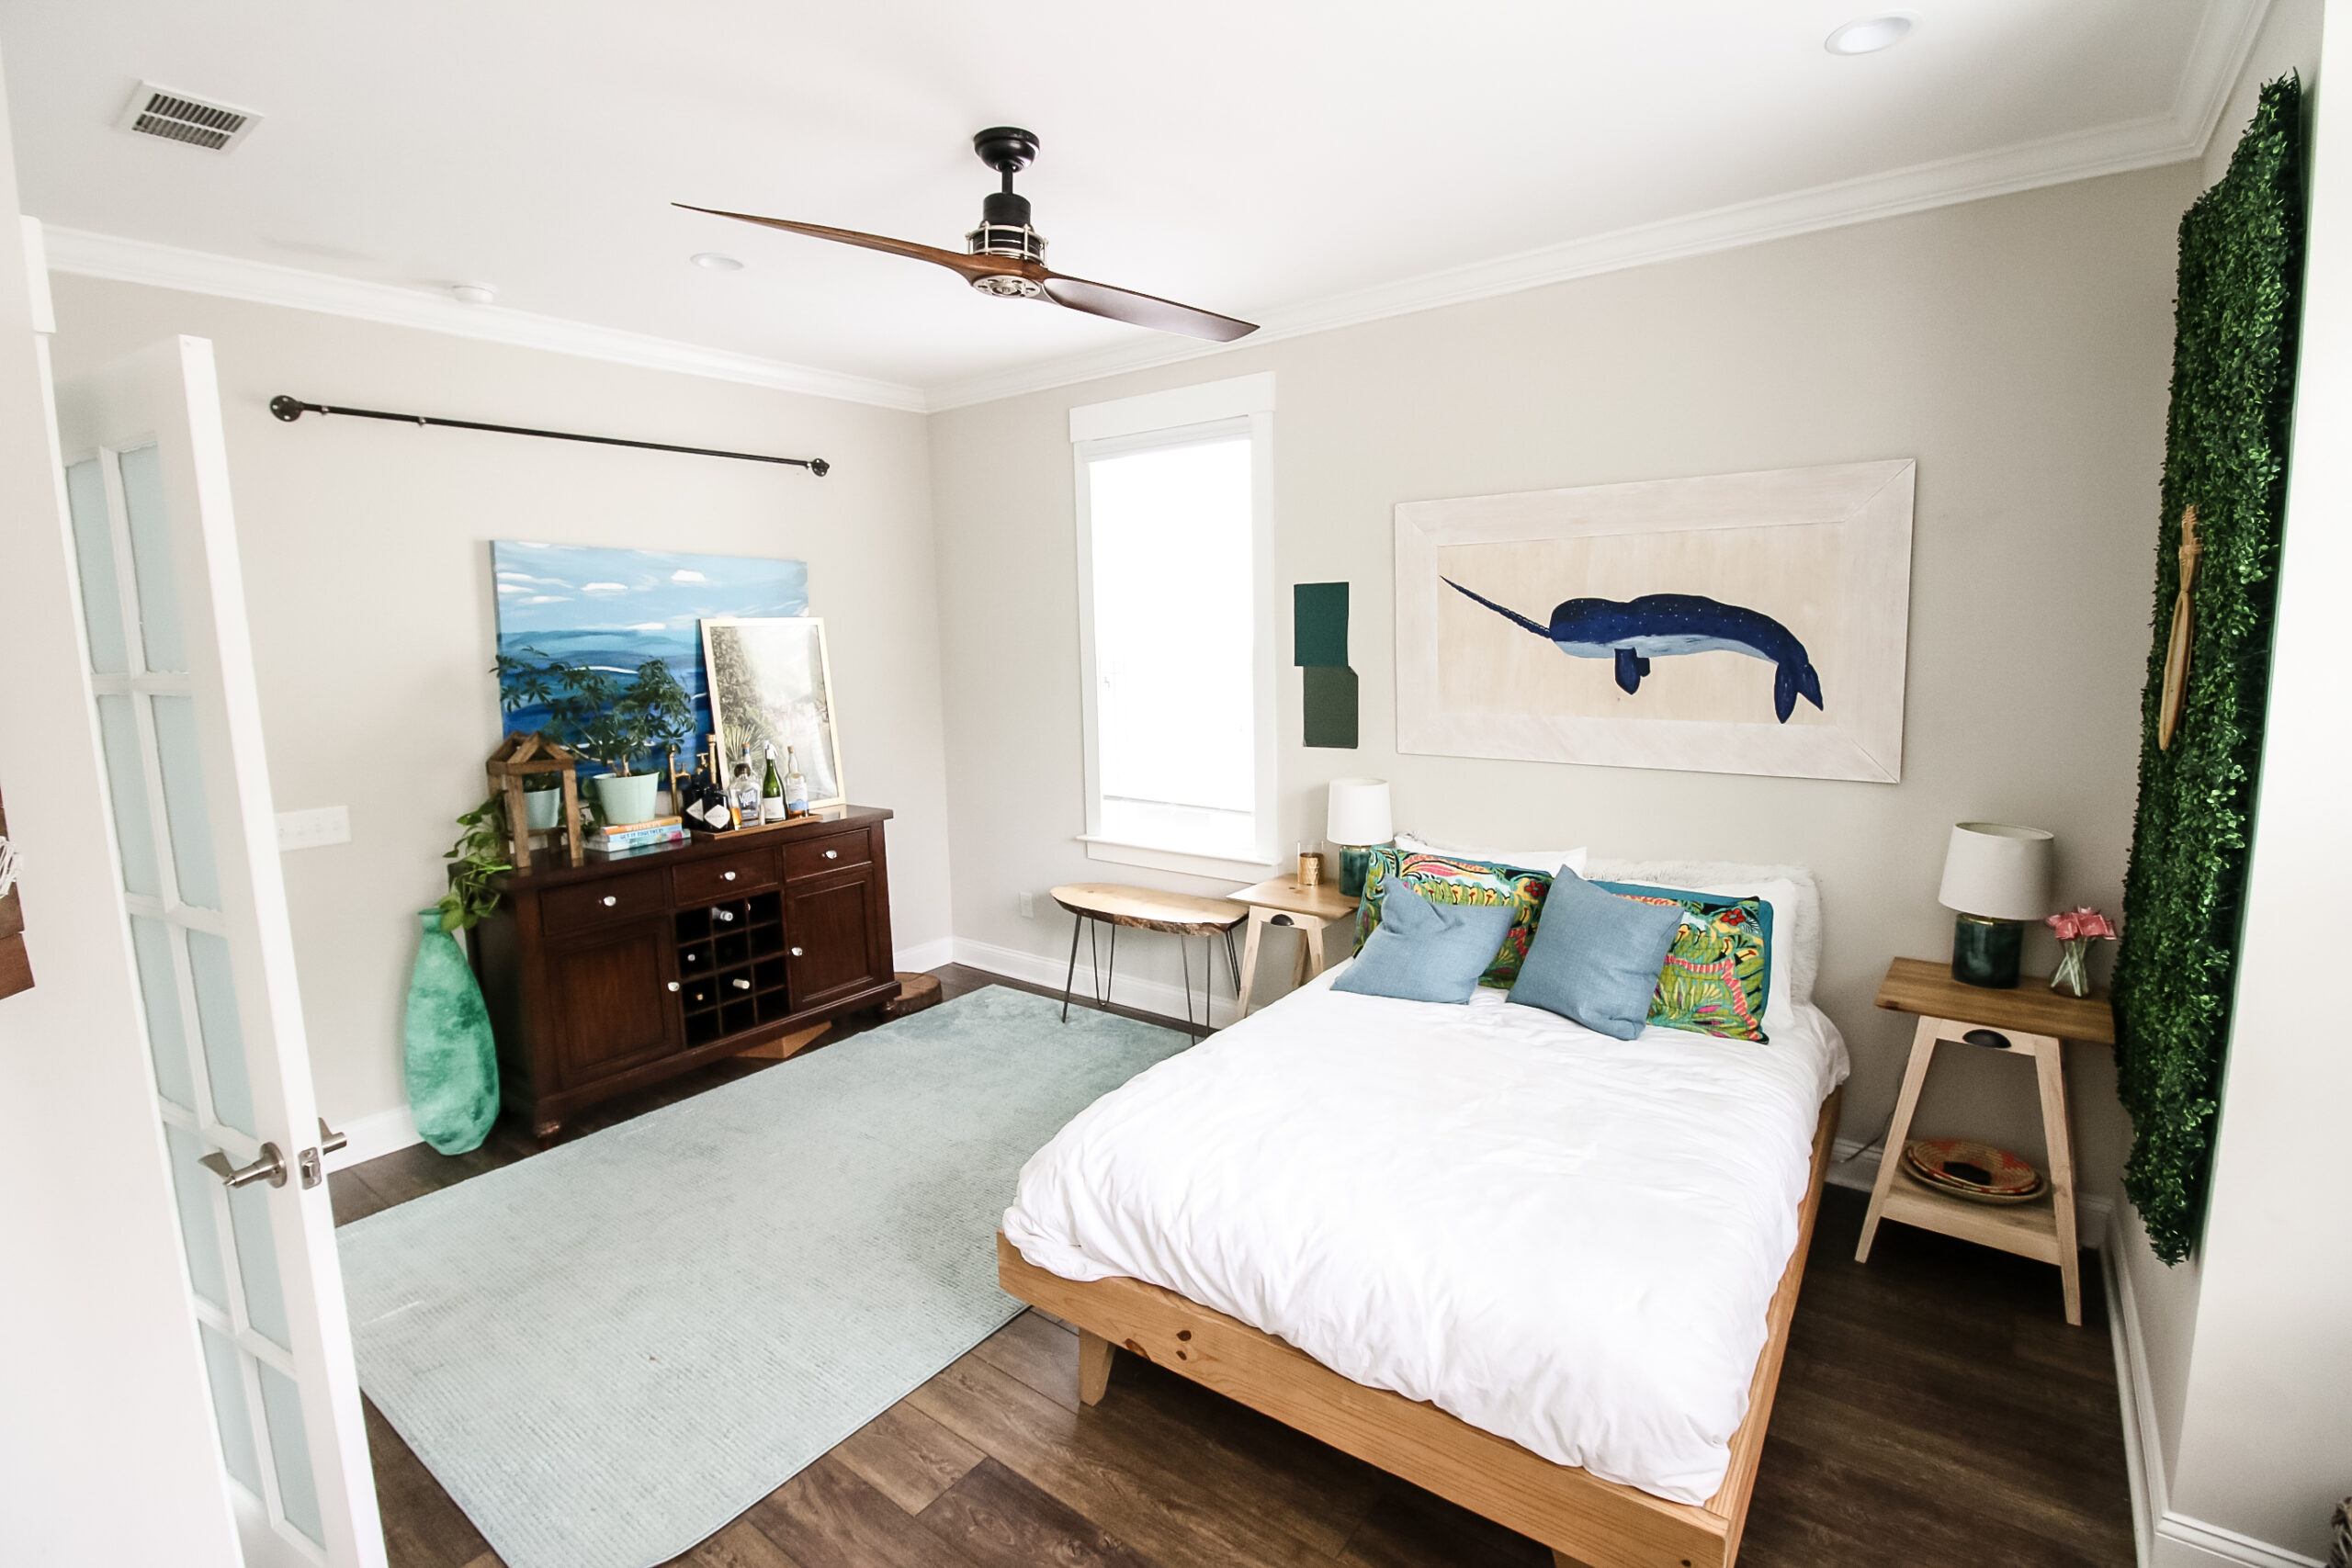
Paint
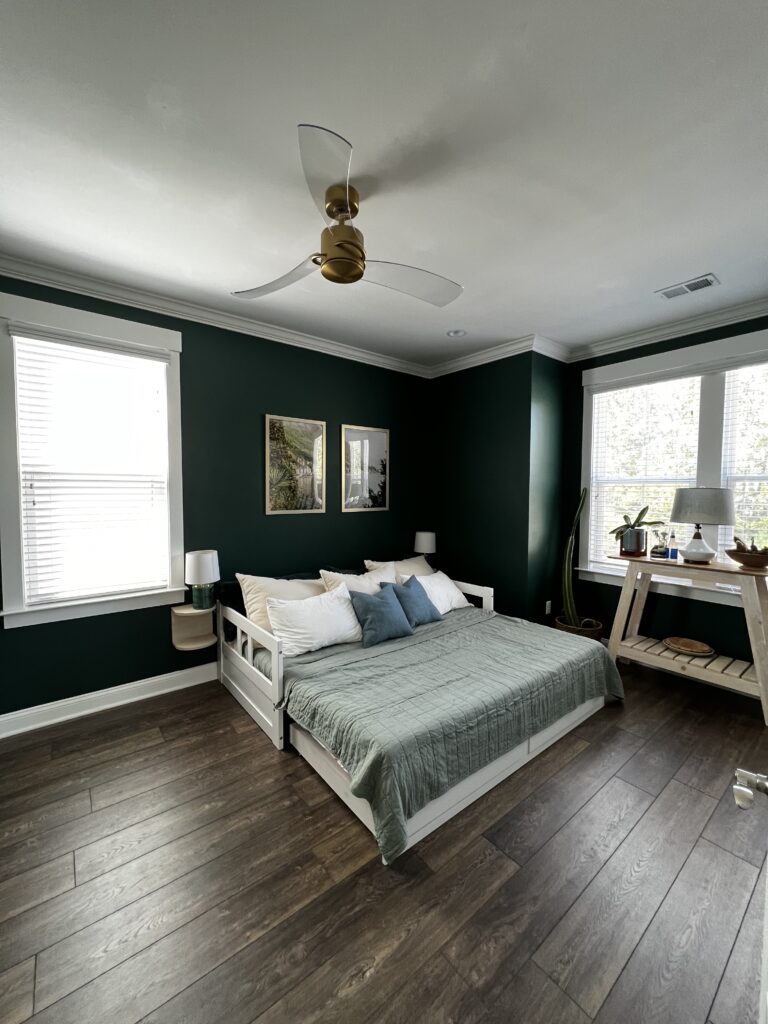
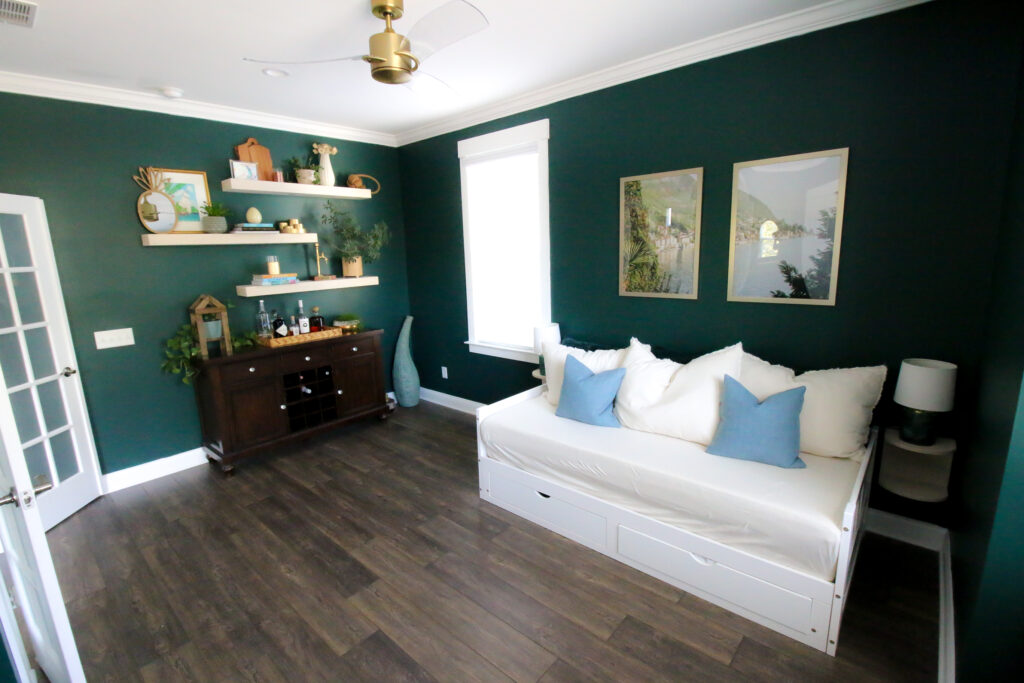
The most dramatic choice in this room was the wall color. We chose Behr Dark Everglade, which is a deep green with a splash of blue to it.
I adore a dark bedroom - and this one is large enough, with lots of bright natural light - that it doesn't feel dark at all.
Since our floors are dark and the bar (which I didn't want to paint!) is dark as well, we kept other accessories light for some contrast.
Daybed
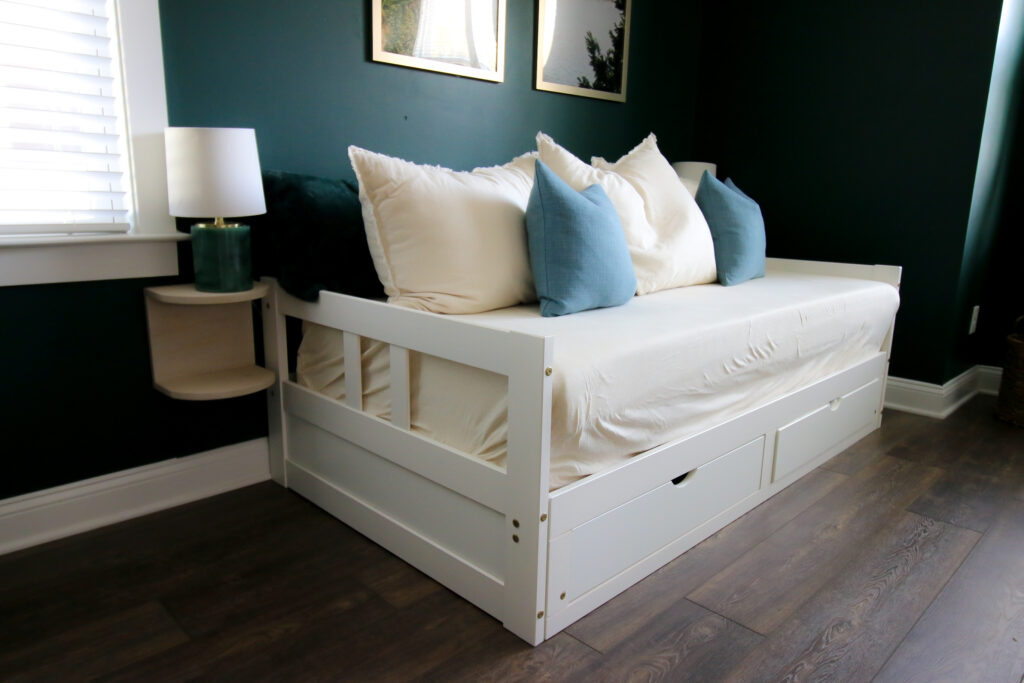
We decided to add a daybed in this space to allow more floor space for the kids to play in here, and to make room for the future piano.
This particular daybed has a trundle that pulls out to create a king sized bed when needed.
You can read all the details on our daybed here!
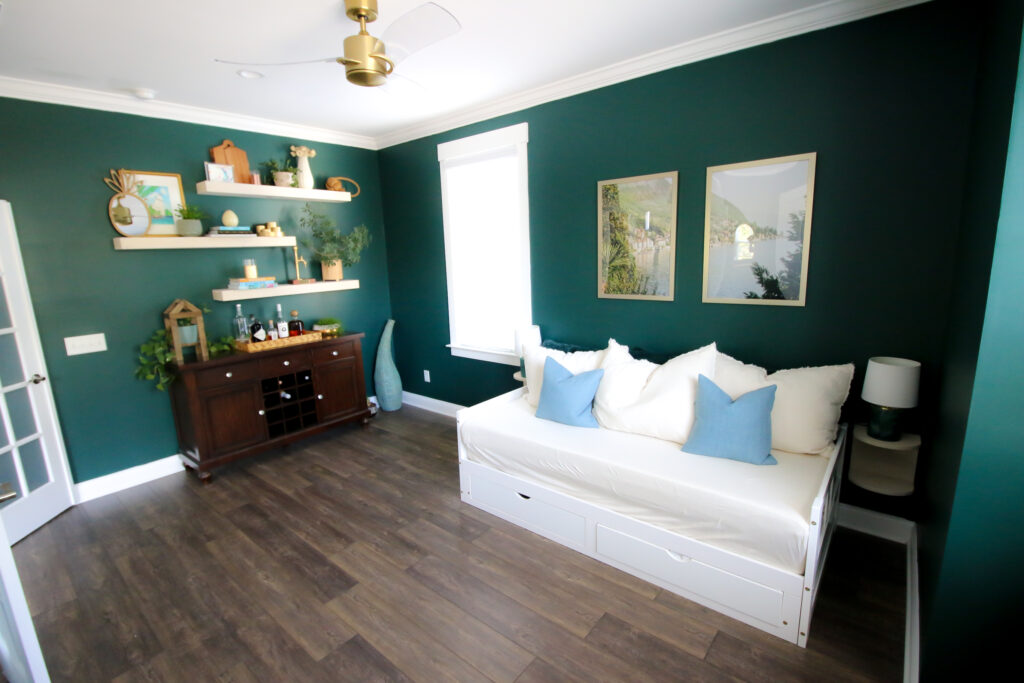
I styled it with pillows + a quilt from Target:
- Body pillow
- Body pillow covers (deep green)
- Large tan pillows (SUPER SOFT)
- Tan bedding (had to get king sized and twin sized for different uses)
- Green quilt (king sized only)
We also have standard pillows in white cases for guests to use to sleep on, that are otherwise stored in the storage drawers under the bed!
Side tables
Since the daybed is the length of a twin bed, it takes up a bit more wall space than our old double bed. Our old side tables would no longer fit.
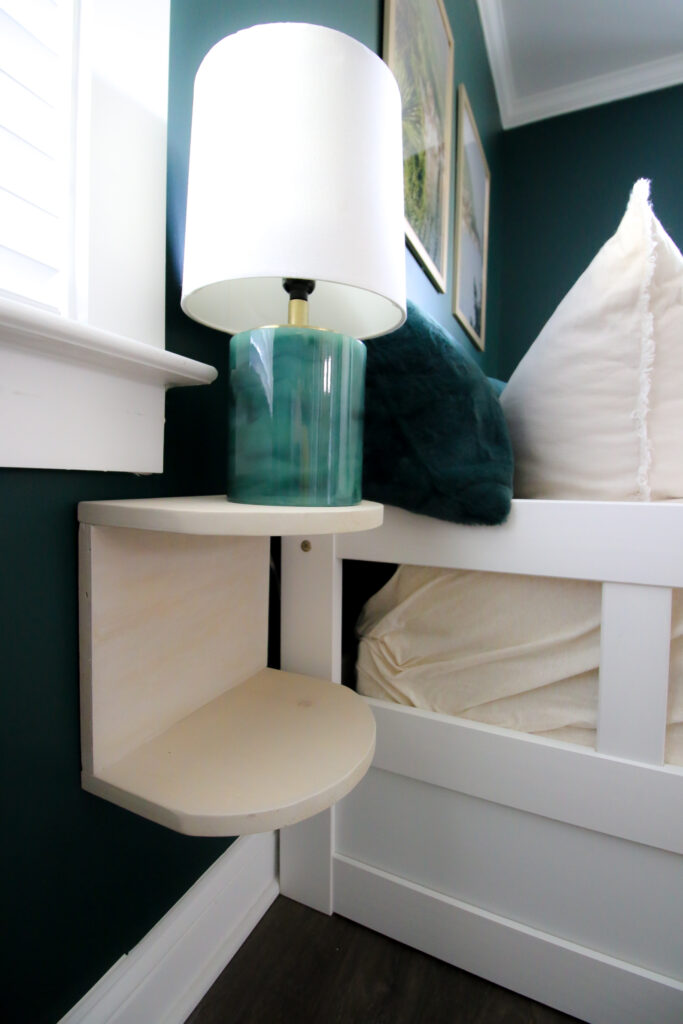
But, we still wanted somewhere to set lamps and let guests set their phones or a glass of water.
So, Sean designed and built these simple floating bedside tables with arched shelves for a bit of functional beauty beside the bed!
Floating Shelves
The other build in this space was wooden floating shelves to go over the existing bar. Truly, this is now my favorite view in the room!
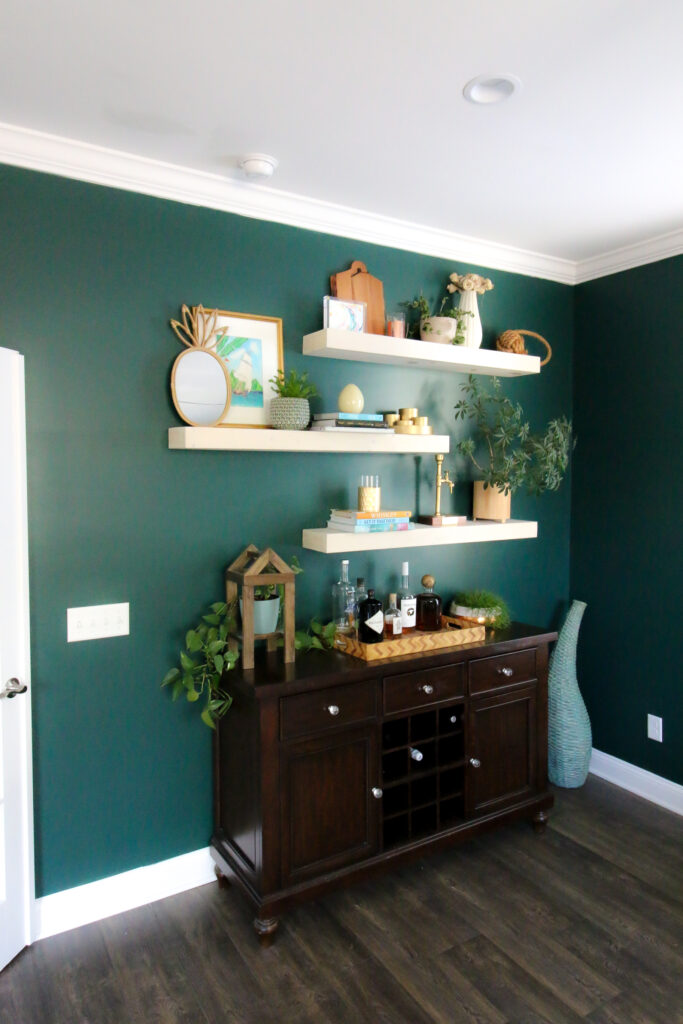
Shelves are a great way to fill a wall, store and display collections, and add color and interest to a space. I love how these turned out.
See the full floating shelves tutorial here!
Shelf over the door
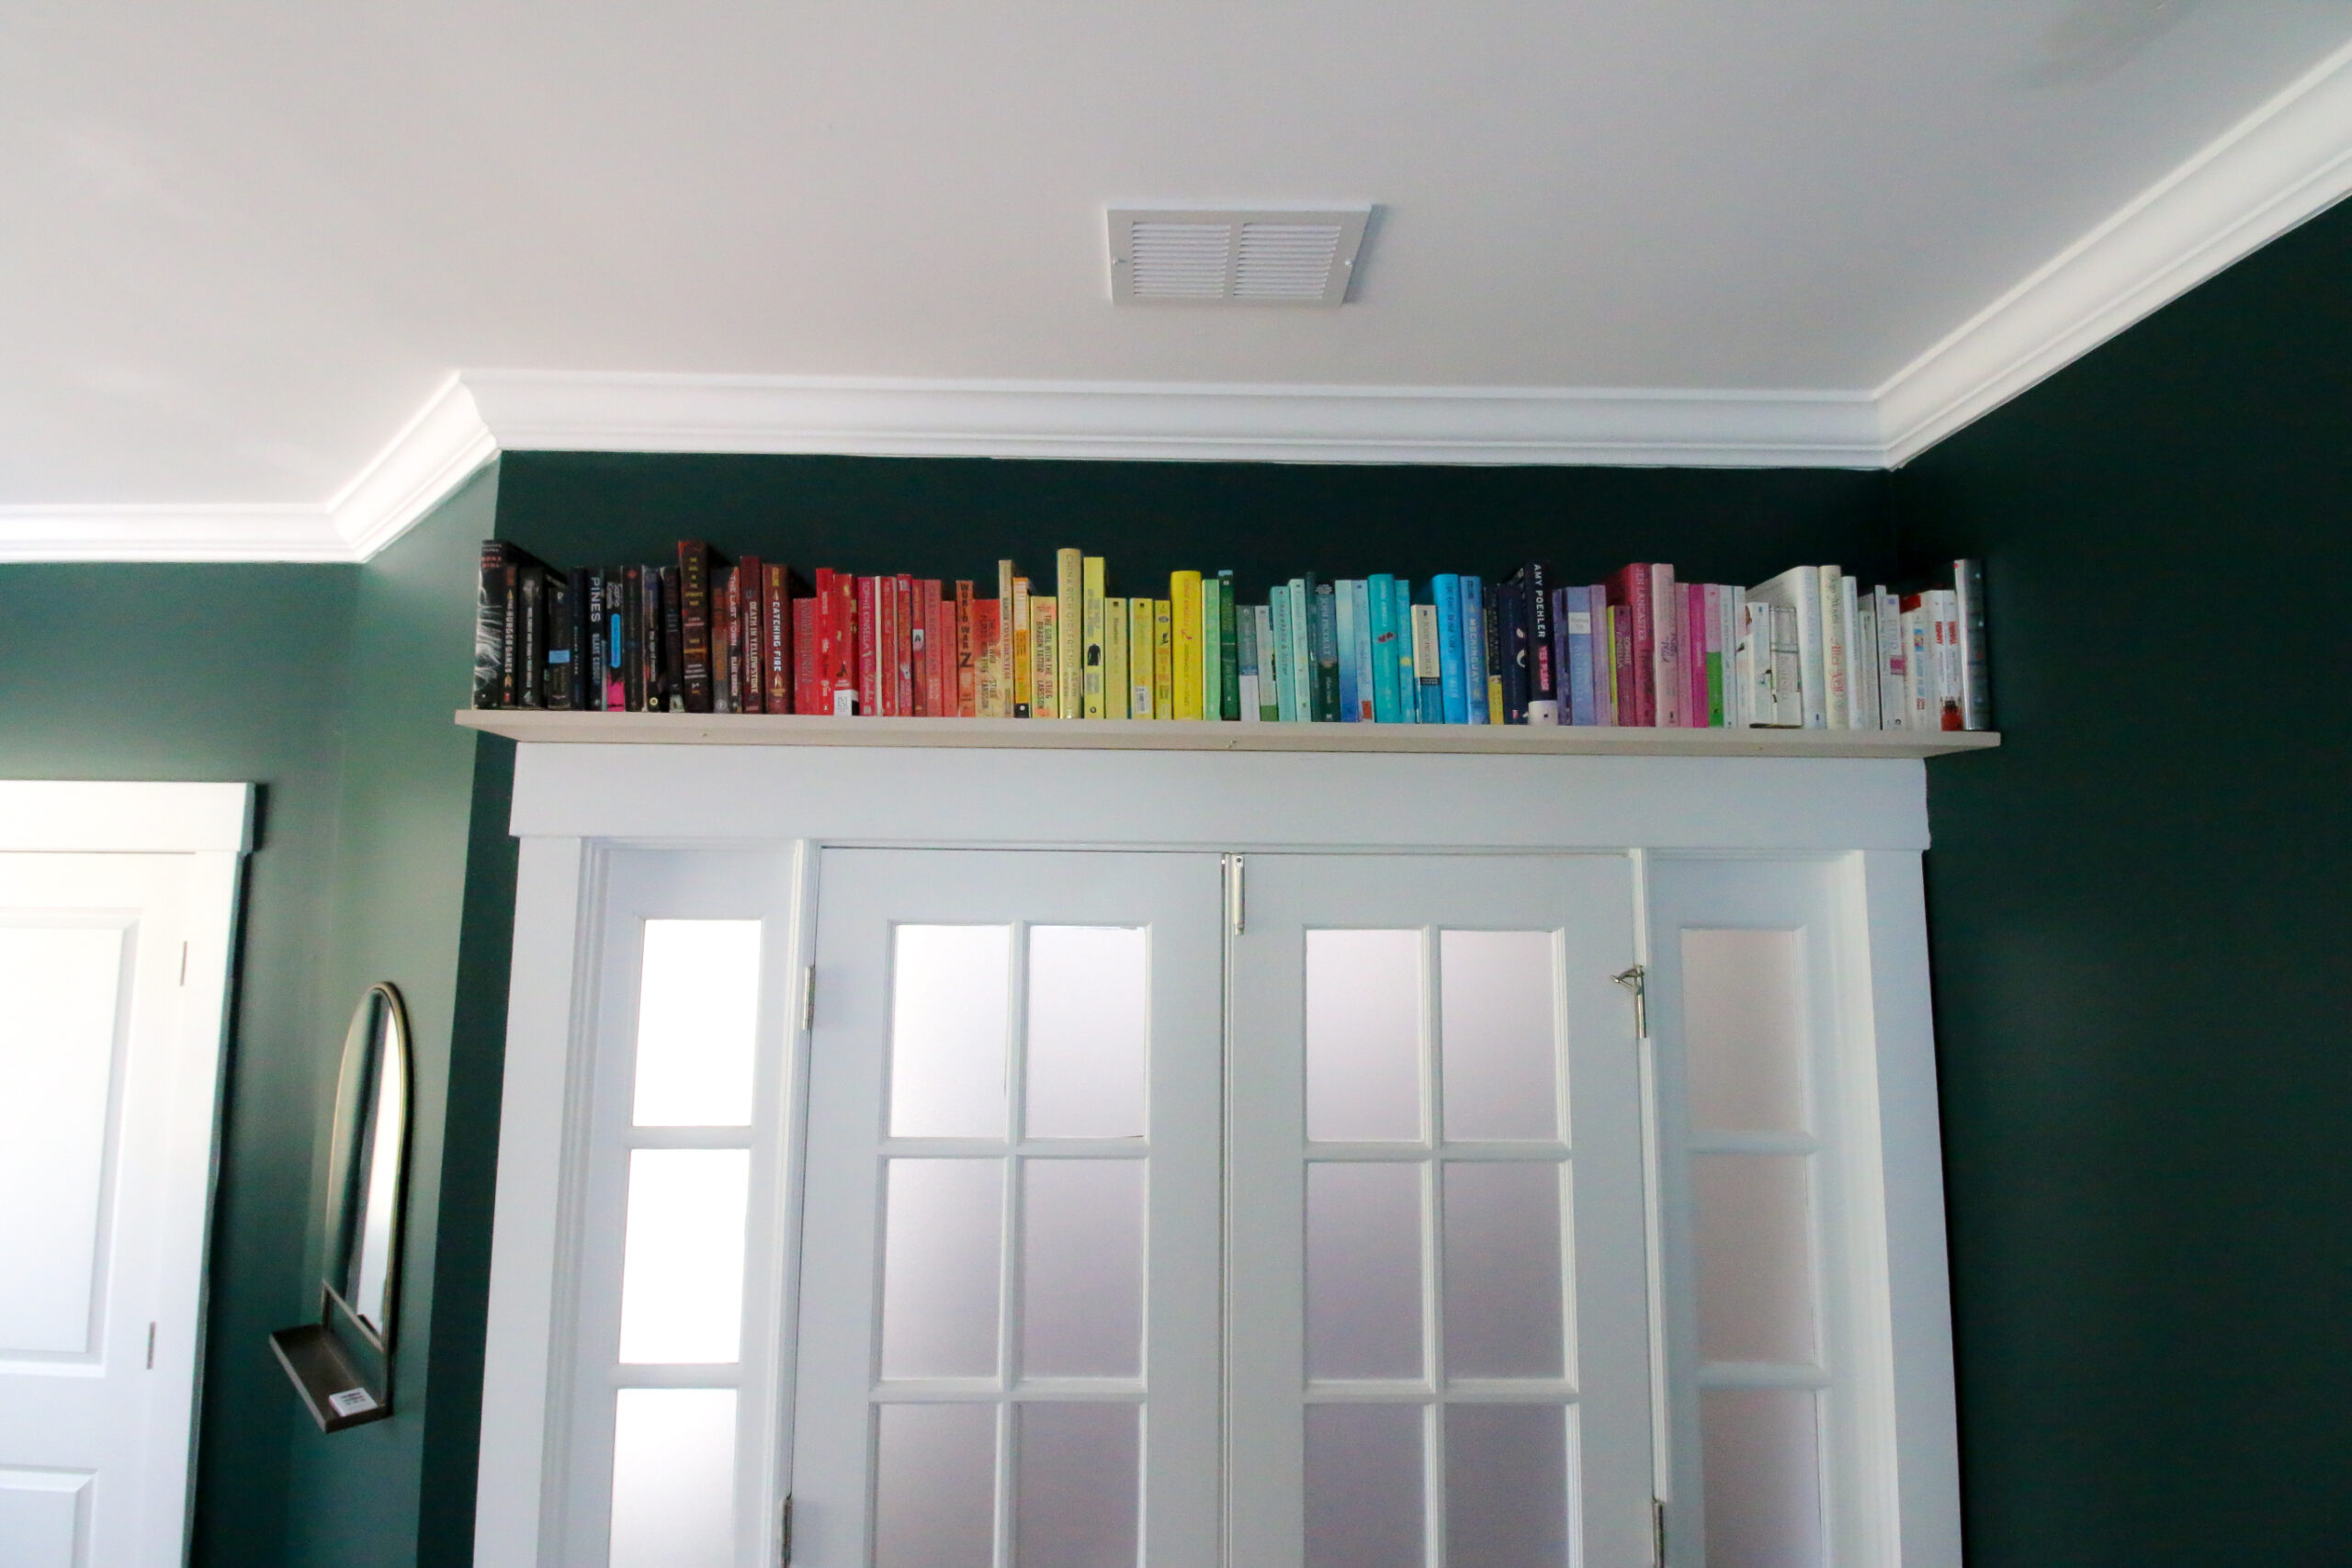
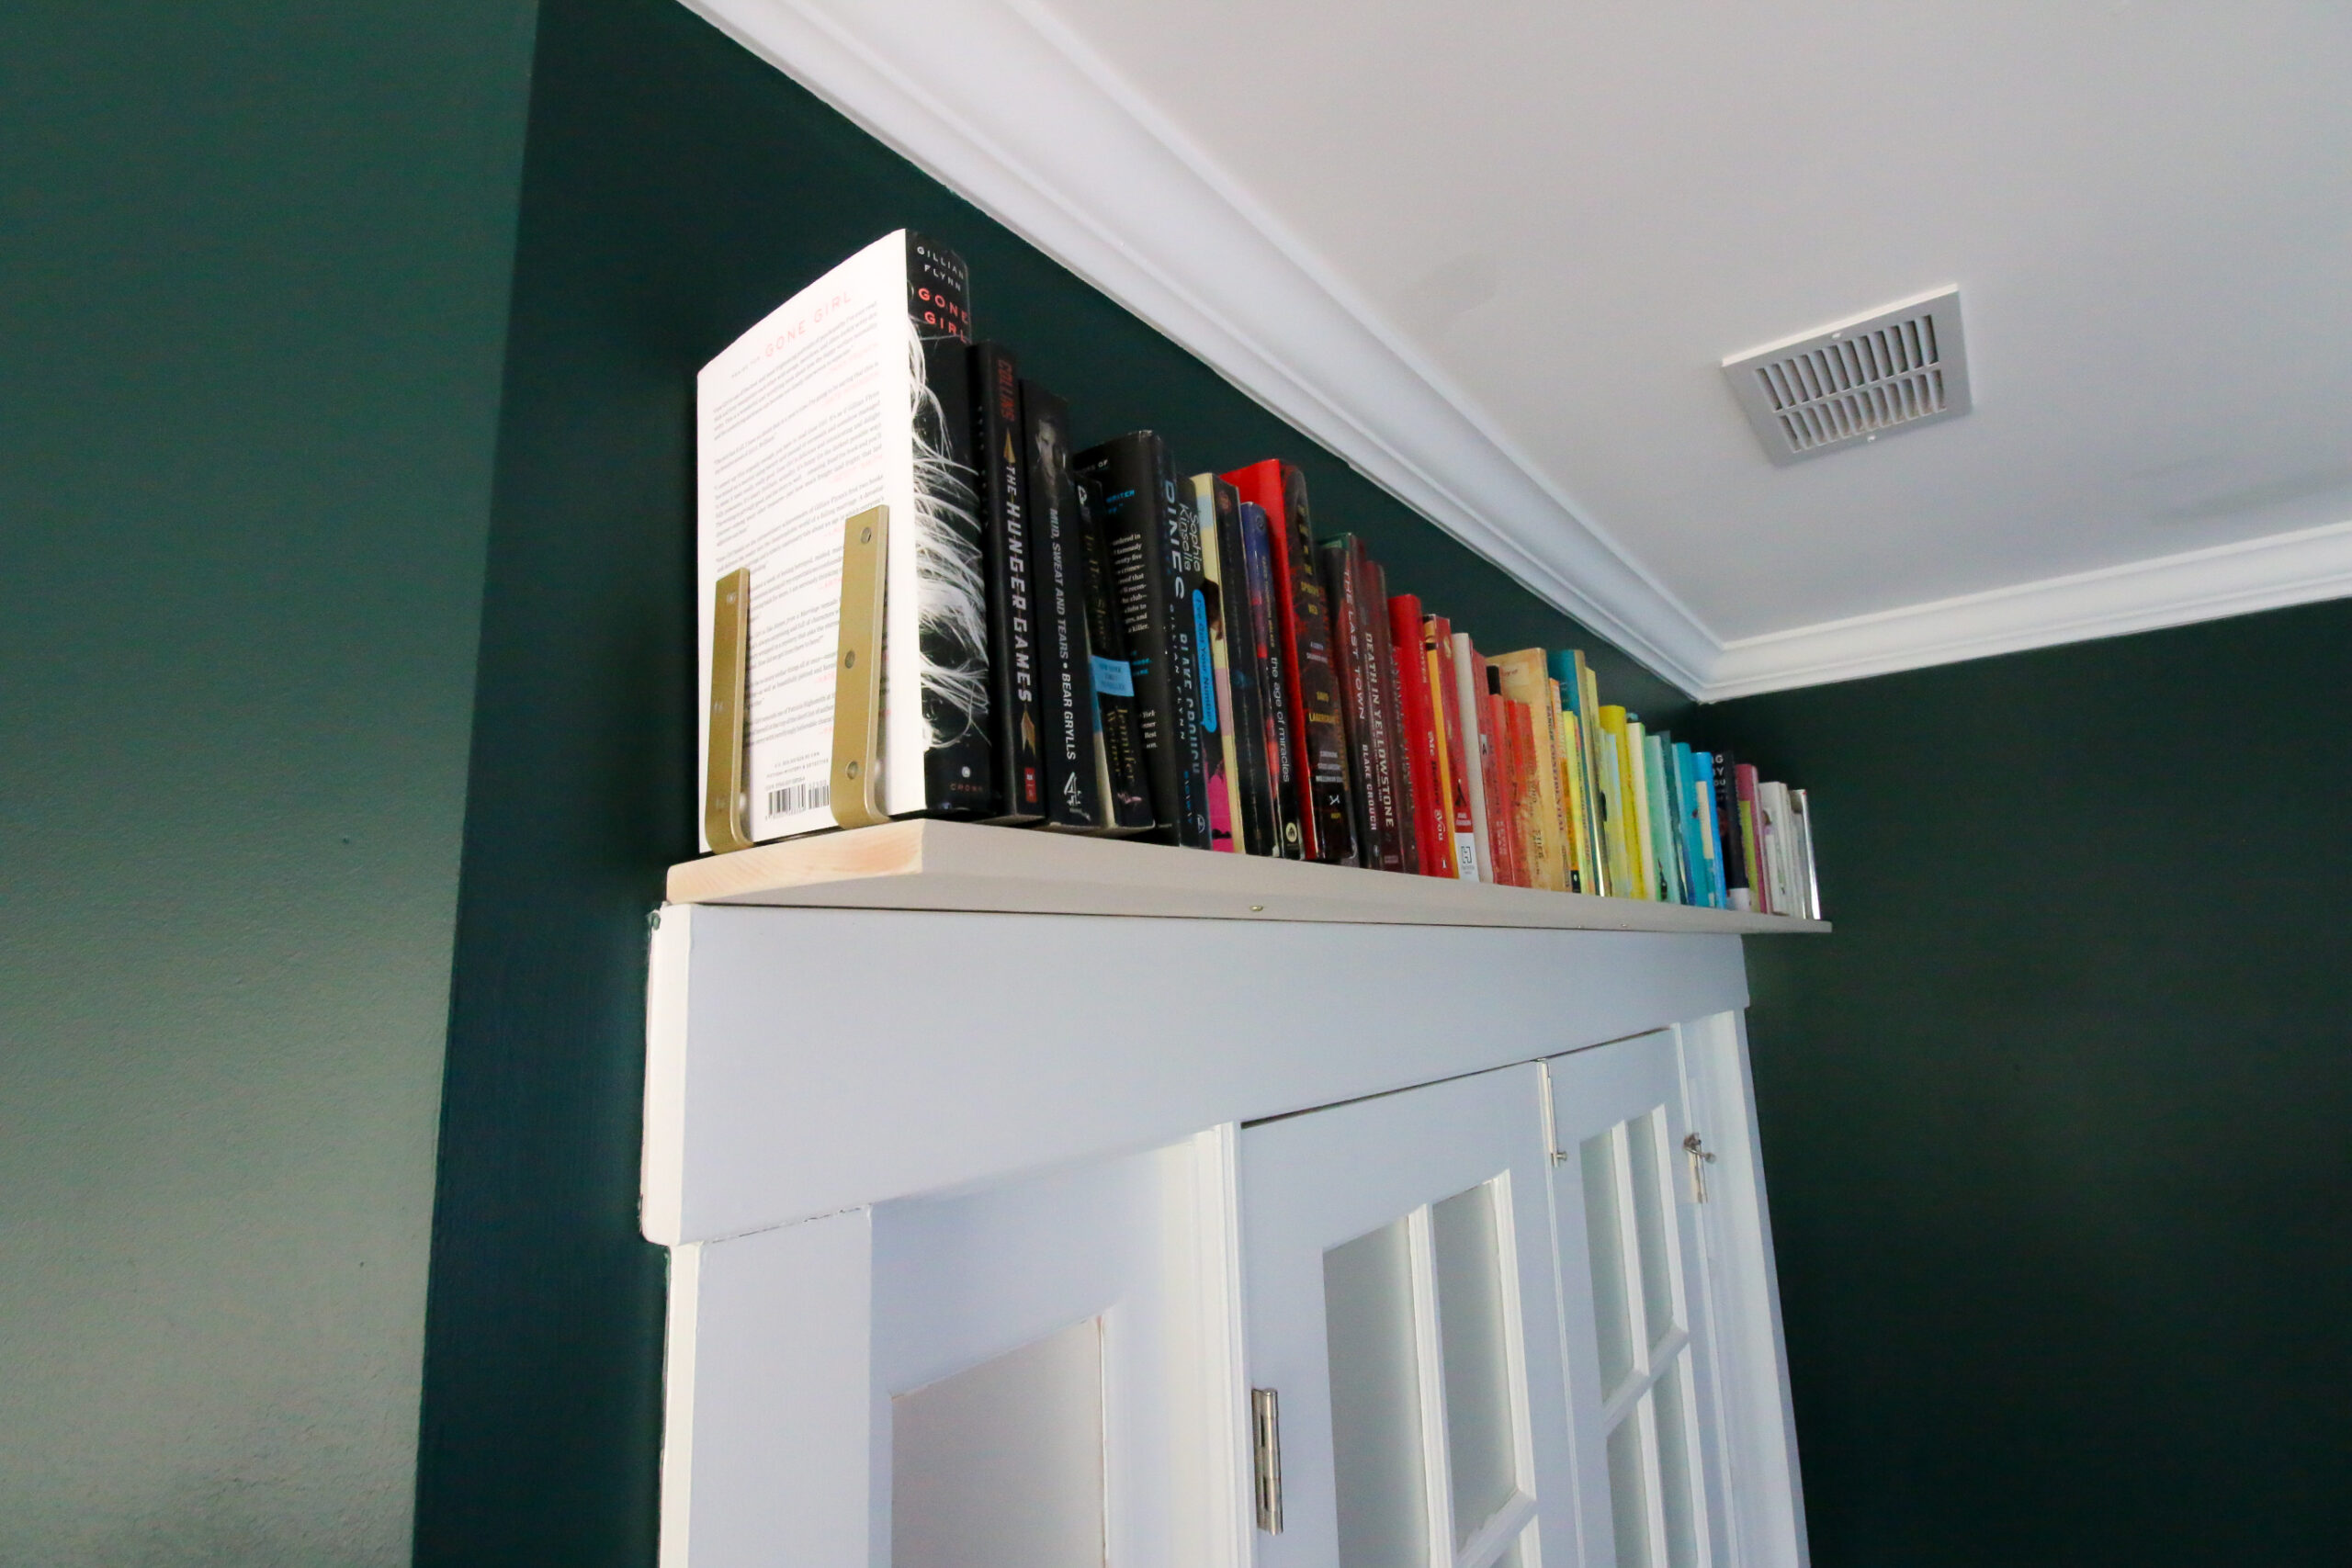
This was a bit of a last minute idea, but we decided to add a single bookshelf over the door to hold out paper backs.
Sean and I used to have hundreds and hundreds of paperbacks, but a few years ago we decided to re-sell most of them to the used bookstore. We used the trade in credit for kids books.
Since then we have gotten all of our books at the library (we read a combined 100+ books a year, so it adds up!) but we still have this selection of colorful favorites for guests to borrow or take to the beach.
The shelves are held up with 2 L brackets. There's an L bracket on the side holding the books in place.
Art
Above the daybed we hung a photo that we took in Lake Como on our honeymoon, blown up, split in two, and framed in 2 20x30 inch frames. These are the two large gold frames that we used! I love the matte gold finish.
I have gotten to prefer large art versus a lot of smaller art for bigger impact in a space.
Ceiling Fan
Our old ceiling fan was not something we chose and it was broken - on high speed you could hear it upstairs sounding like it was taking off to mars.
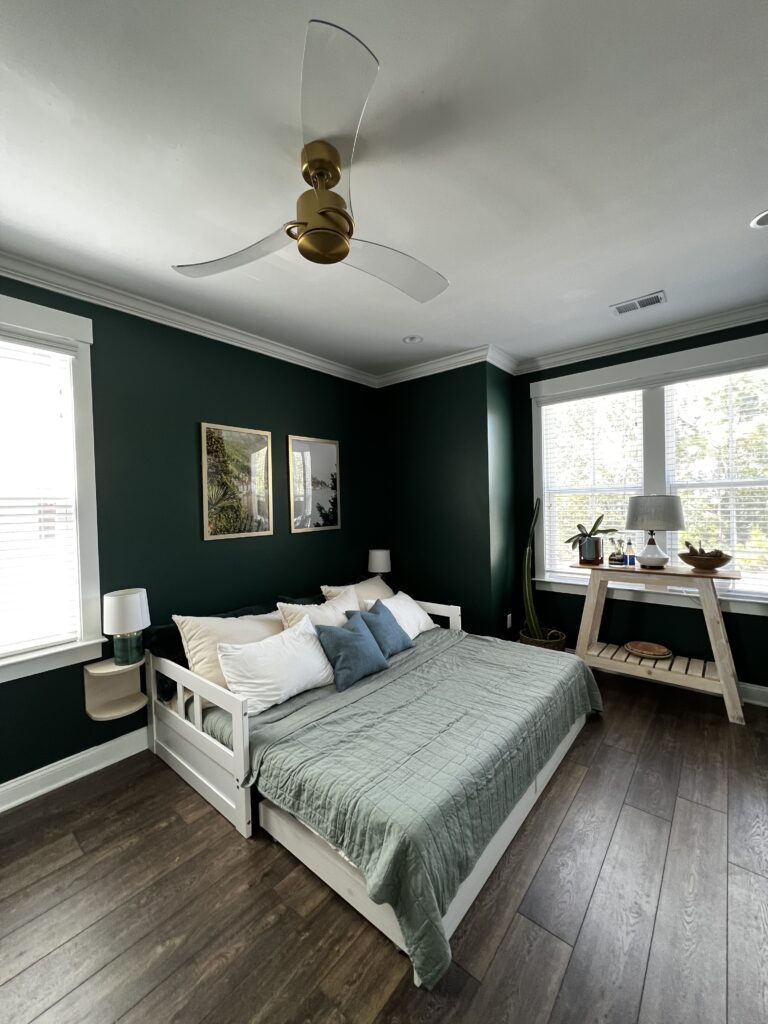
We replaced it with the Fanimation Sculptaire. I adore the brushed gold finish and the clear blades. We love Fanimation fans and this will make all of the fans in our home being replaced with them!
Closet
This room has a small, awkward closet with a diagonal wall to it. The space is actually the only storage closet on the first floor of our home!
So, it has to hold coats, cleaning supplies, linens for the guest bed, a few household items, and some wrapping paper supplies.
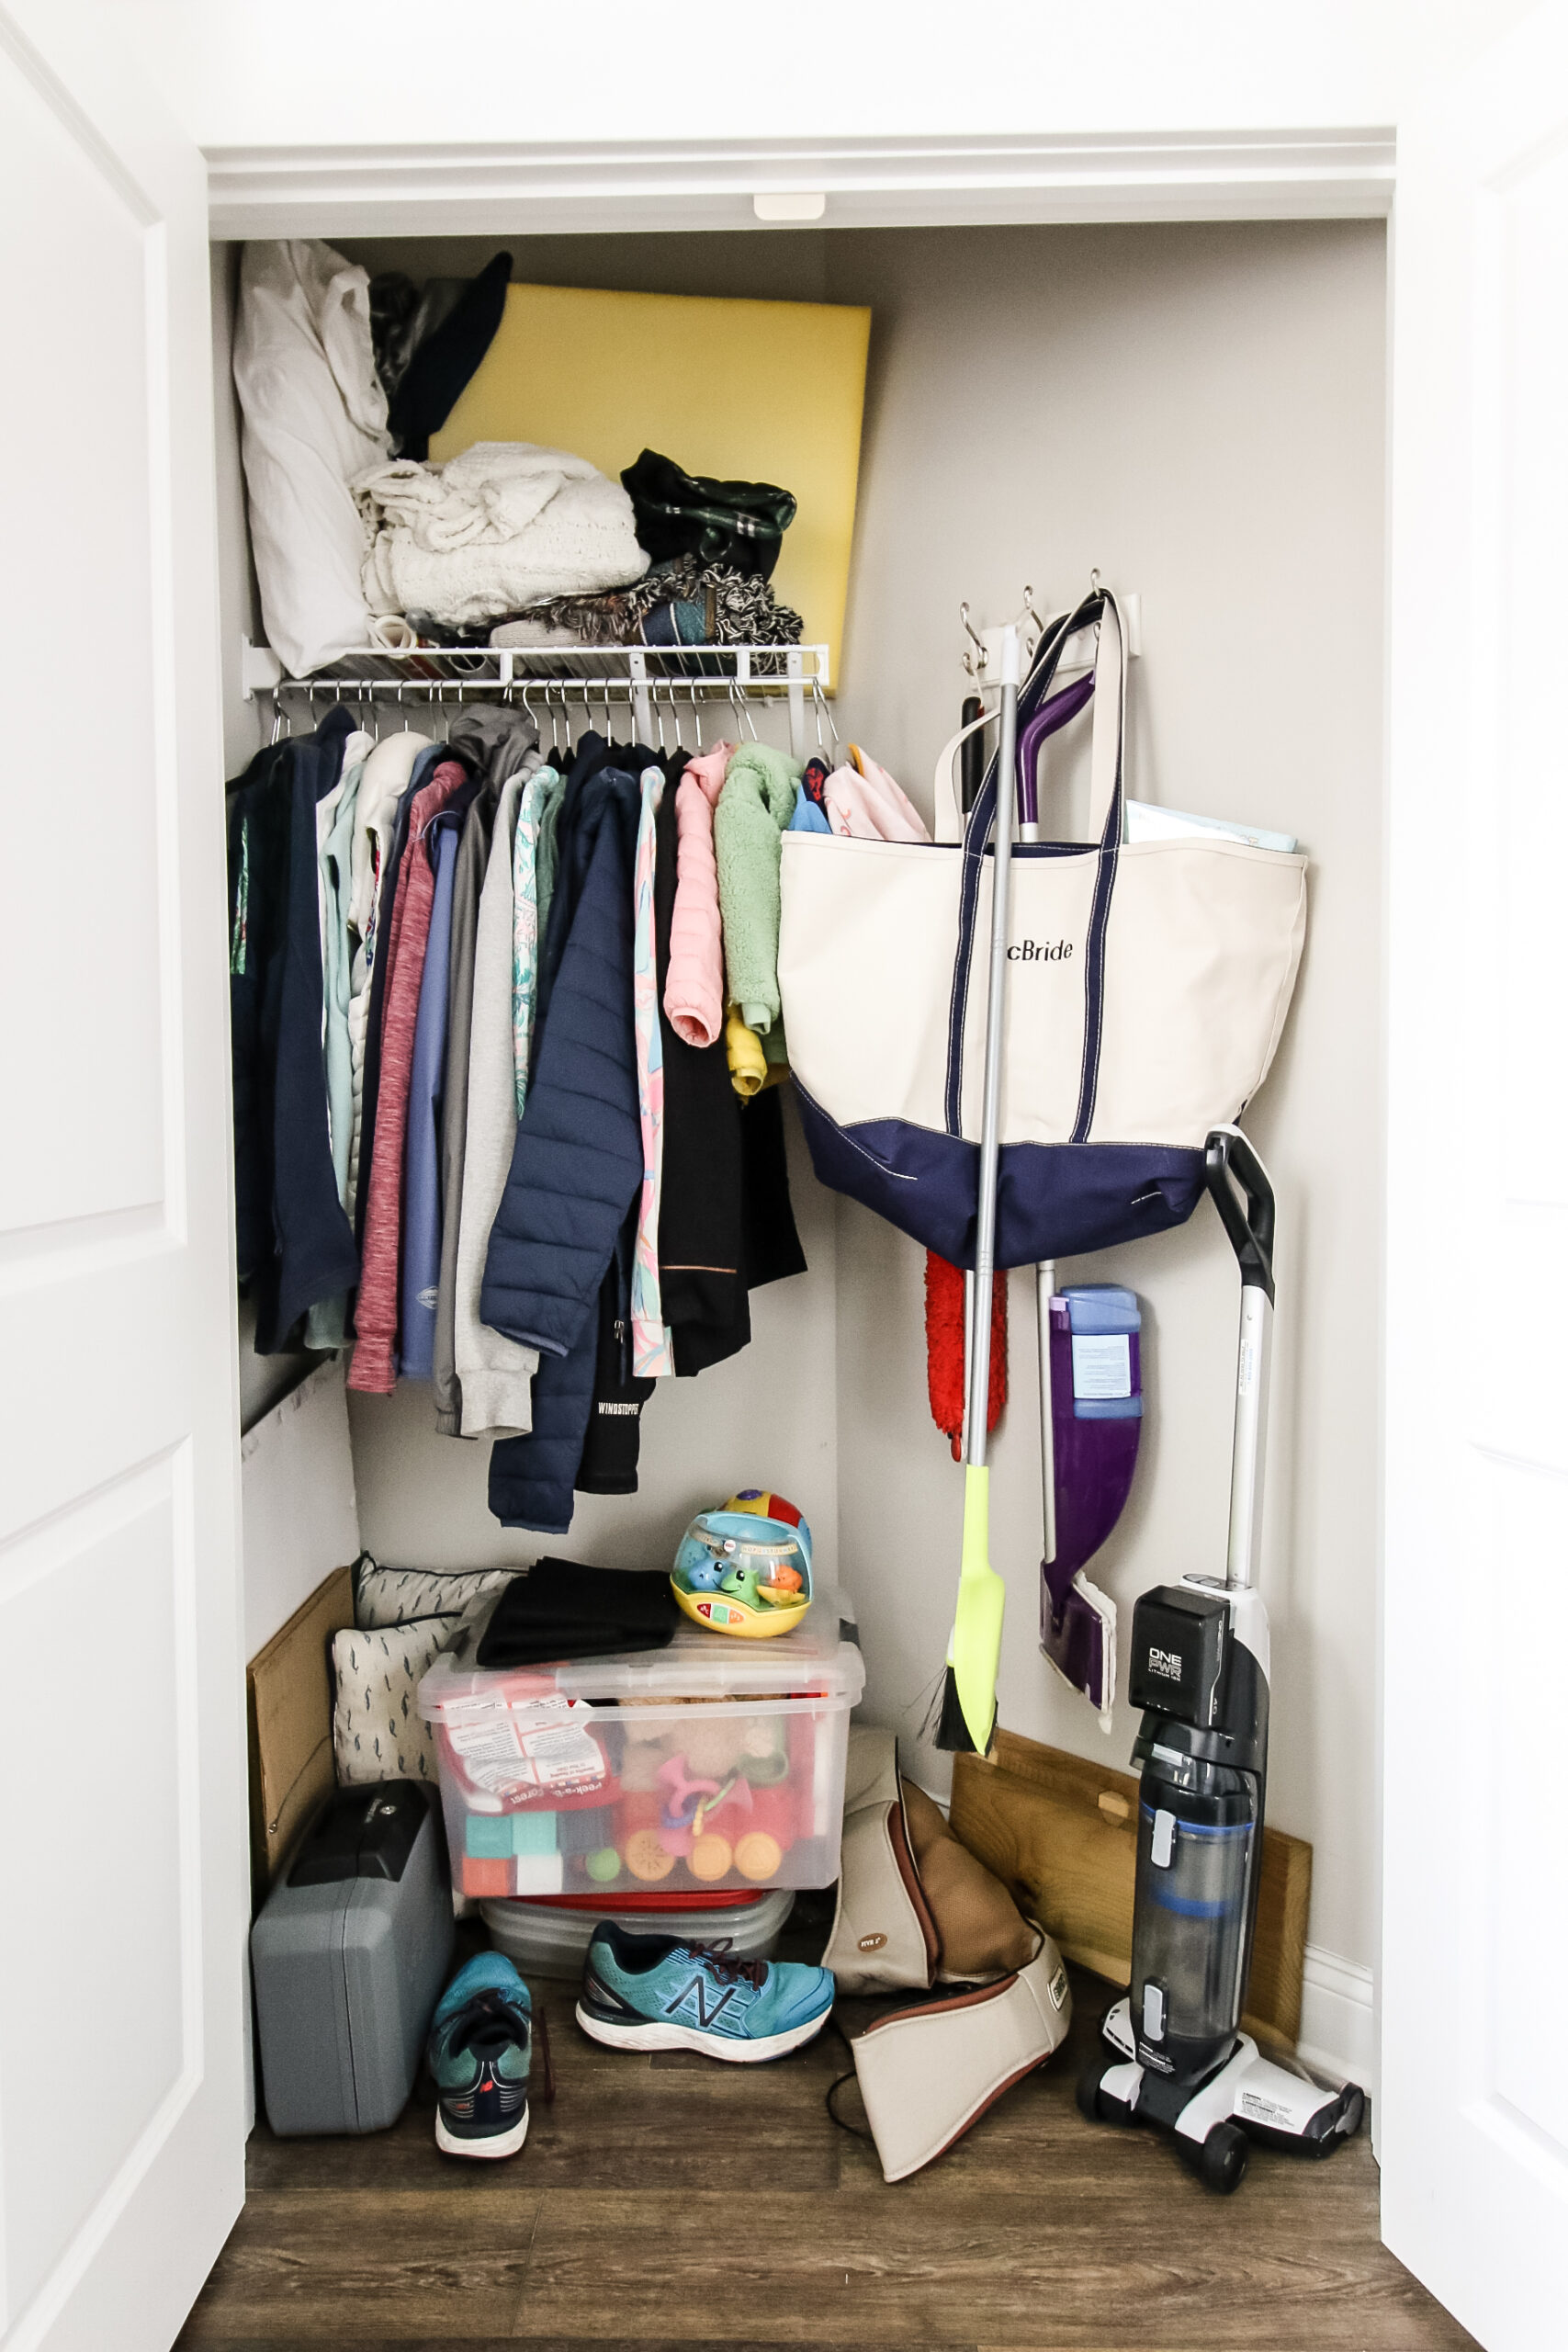
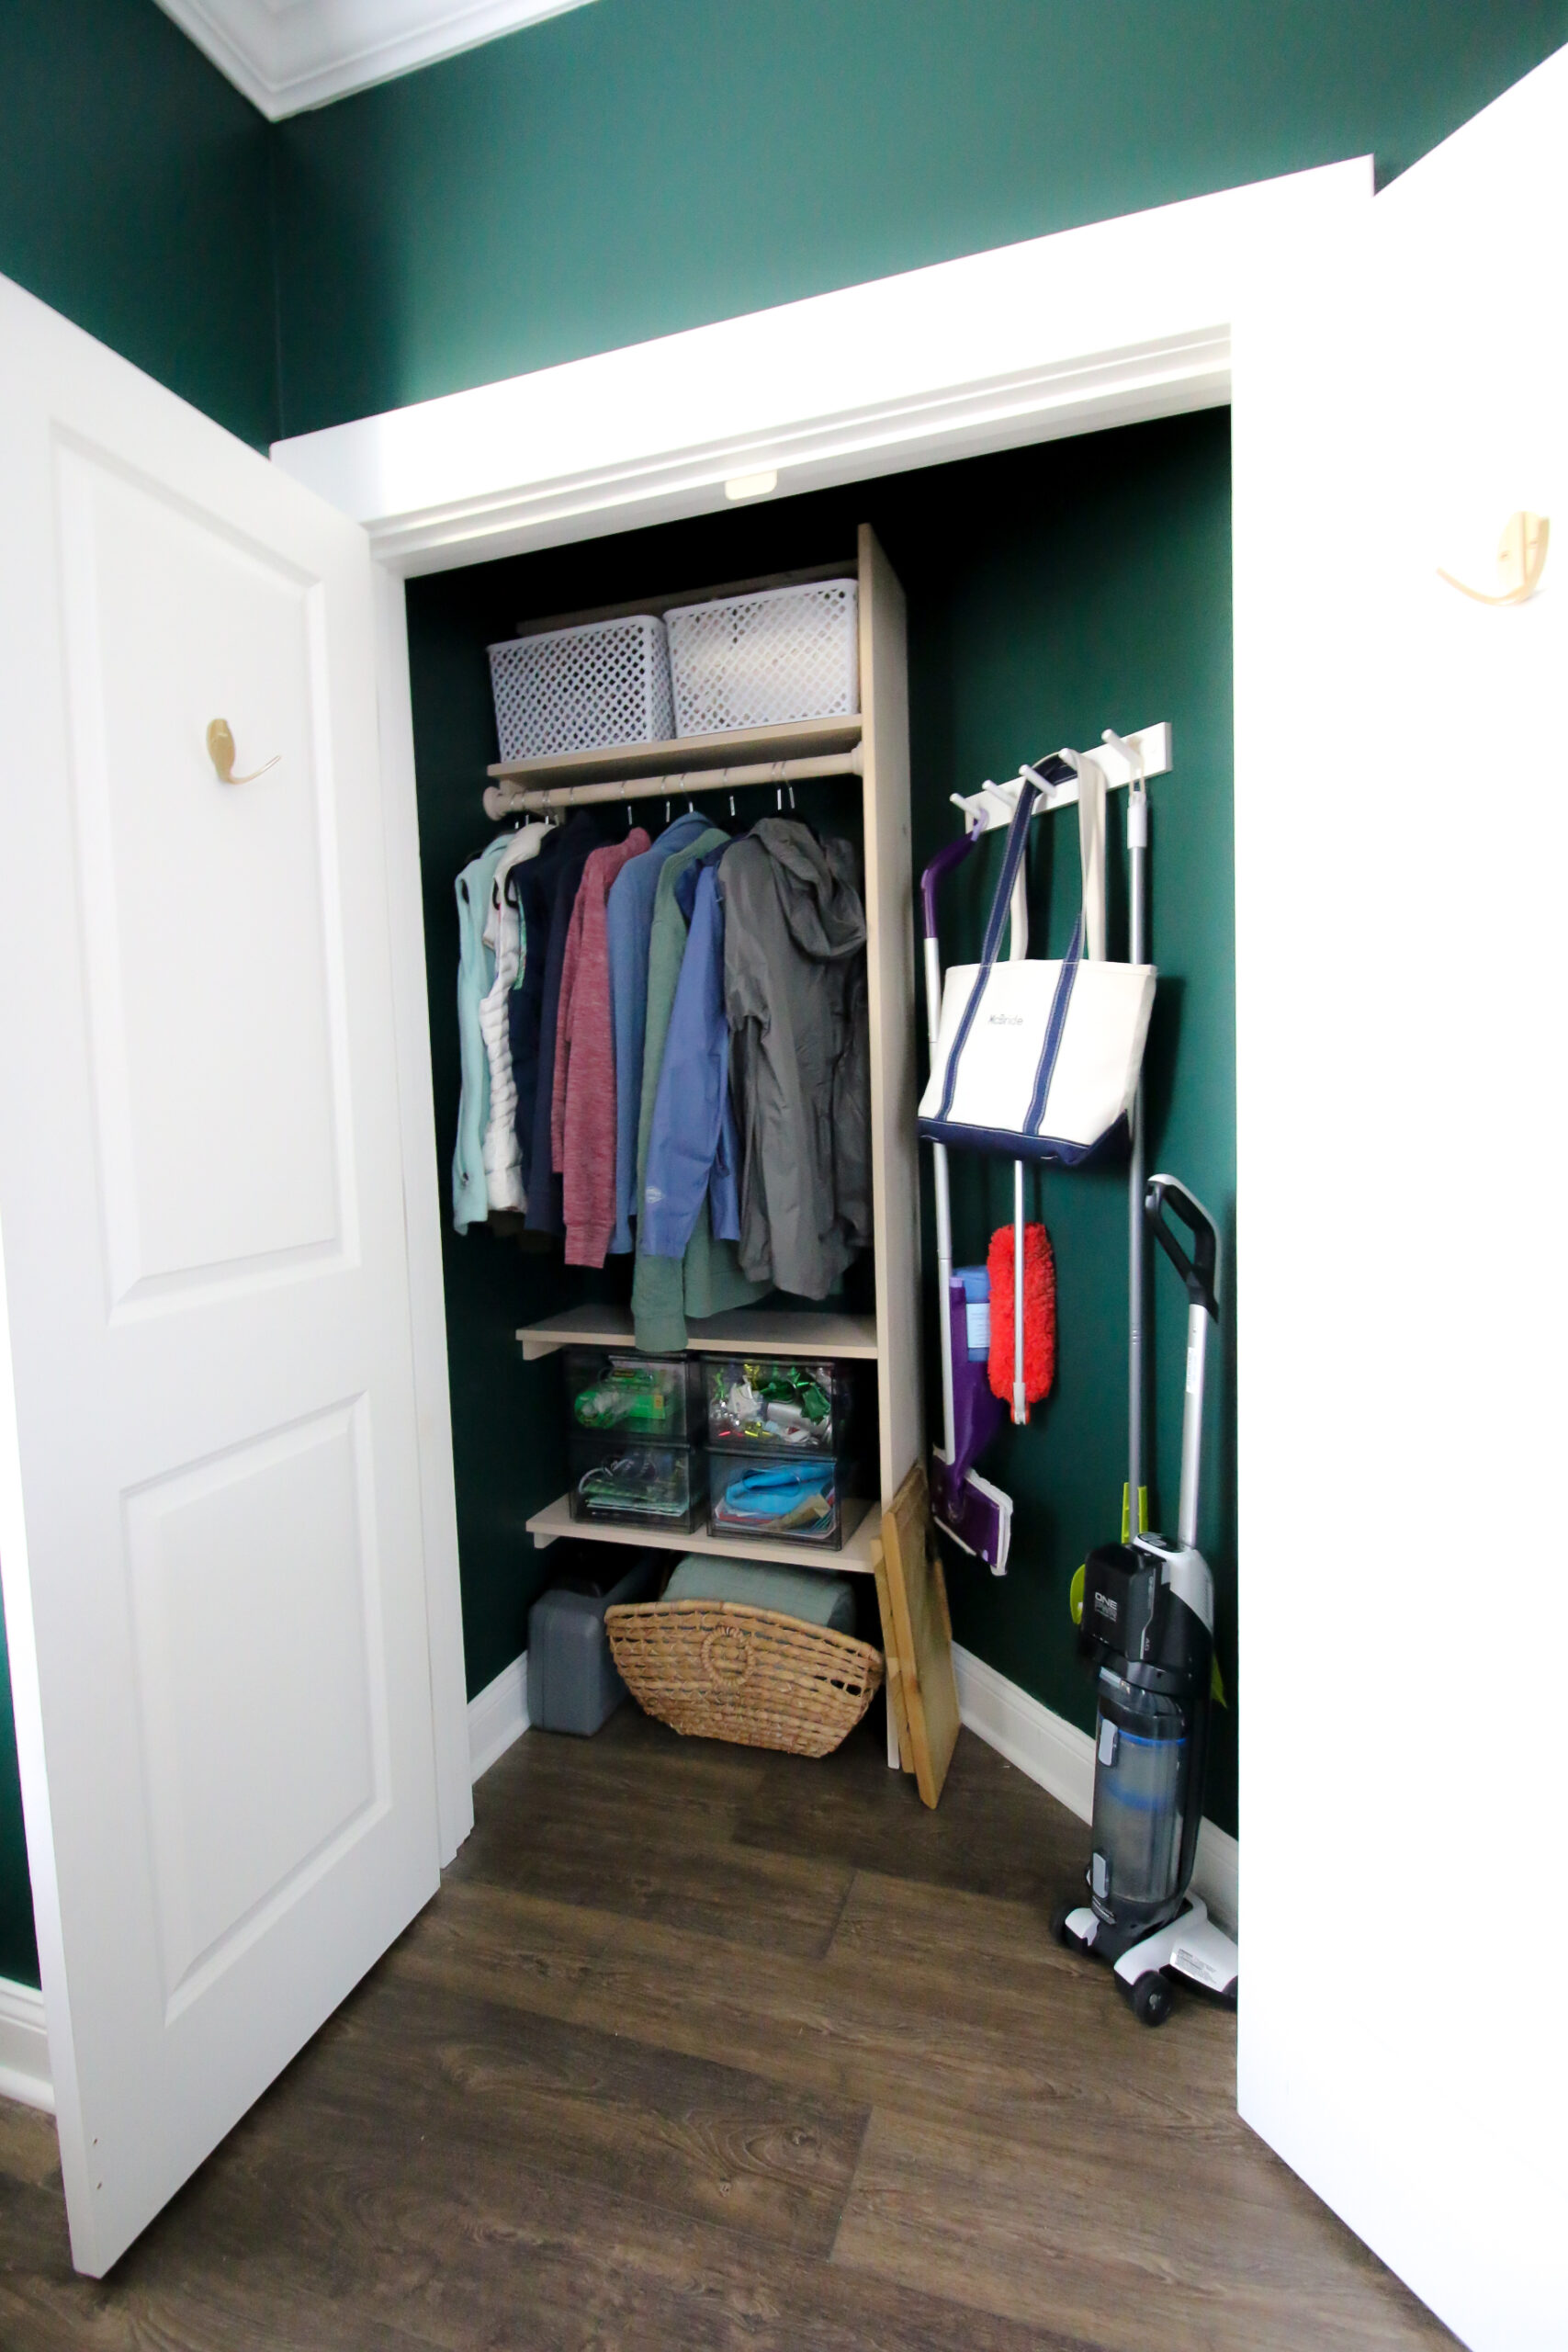
We made it work by ripping out the existing wire shelving and painting the walls the same color as the room for continuous flow.
Then, Sean added wooden shelving in the rectangular section and a simple hook rail on the diagonal wall to make the most of the space!
What's still to come
One major thing still missing from the space is the piano that we plan to put in the window nook. Since we are getting my childhood piano from North Carolina, we are limited in to when we can get up there and move it 5 hours across state lines.
We are hopeful that we will be able to get it here in the next six months - but since it will be a while wanted to share the rest of the room as it is now.
We also may add a rug to this space. We are going to see how we use it and decide if a rug would be a benefit or in the way.
Any questions about our guest bedroom makeover?
Looking for something?
We've been doing this since 2012 so we have a LOT of blog posts!
Search stuff like: Ceiling Projects | DIY Plant Stands | Thrift Flips


Hello, I'm Morgan, half of the creative force behind CharlestonCrafted.com! With a passion for DIY that dates back to 2012, I've transformed three homes and now I'm dedicated to helping others craft their dream spaces. Let's turn your house into a home together!


