• Skip to primary navigation
  • Skip to main content
  • Skip to primary sidebar
Charleston Crafted
  • DIY
  • Woodworking
  • Popular Posts
  • Blog
  • About
  • Shop
menu icon
go to homepage
  • DIY
  • Woodworking
  • Popular Posts
  • Blog
  • About
  • Shop
search icon
Homepage link
  • DIY
  • Woodworking
  • Popular Posts
  • Blog
  • About
  • Shop
×
Home » Decor

Blue Anchor Kitchen Mat

Published: Apr 17, 2014 · Modified: Jan 26, 2023 by Morgan · As an Amazon Associate, we earn from qualifying purchases. This site contains affiliate links. ·

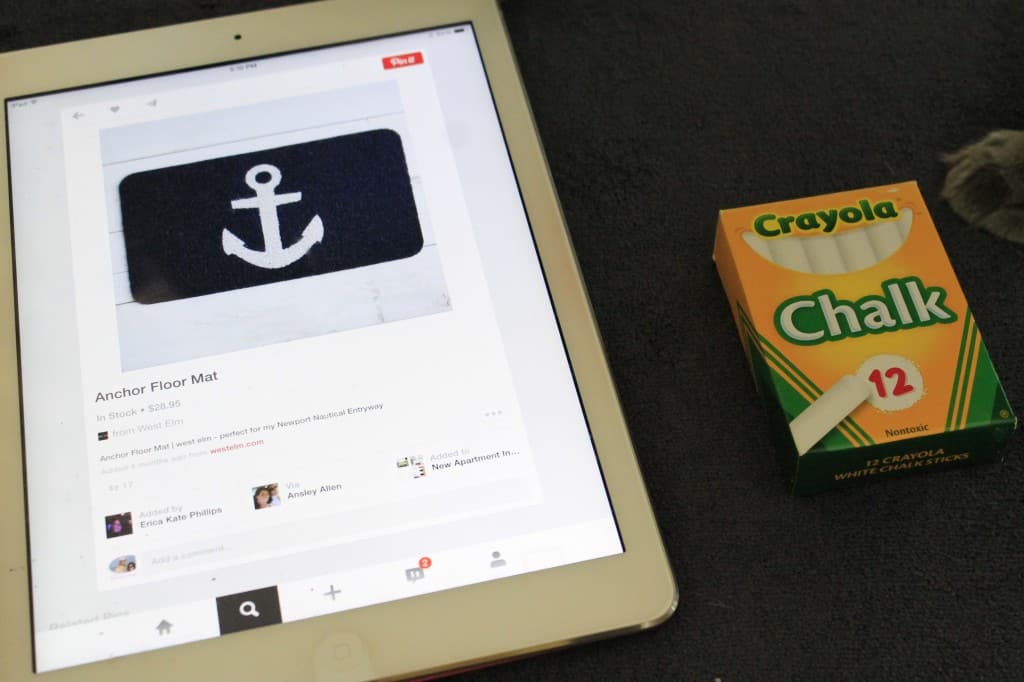
I am a big fan of nautical everything. So, when we saw this anchor mat at the West Elm in Charlotte, I was smitten. However, Sean had a good point in that it didn't have a non-skid back - I think it was designed for the bathroom. We have plenty of bath mats, but needed a new kitchen mat. So, I set out to make my own.

DIY Bleach Pen Anchor Mat - Charleston Crafted

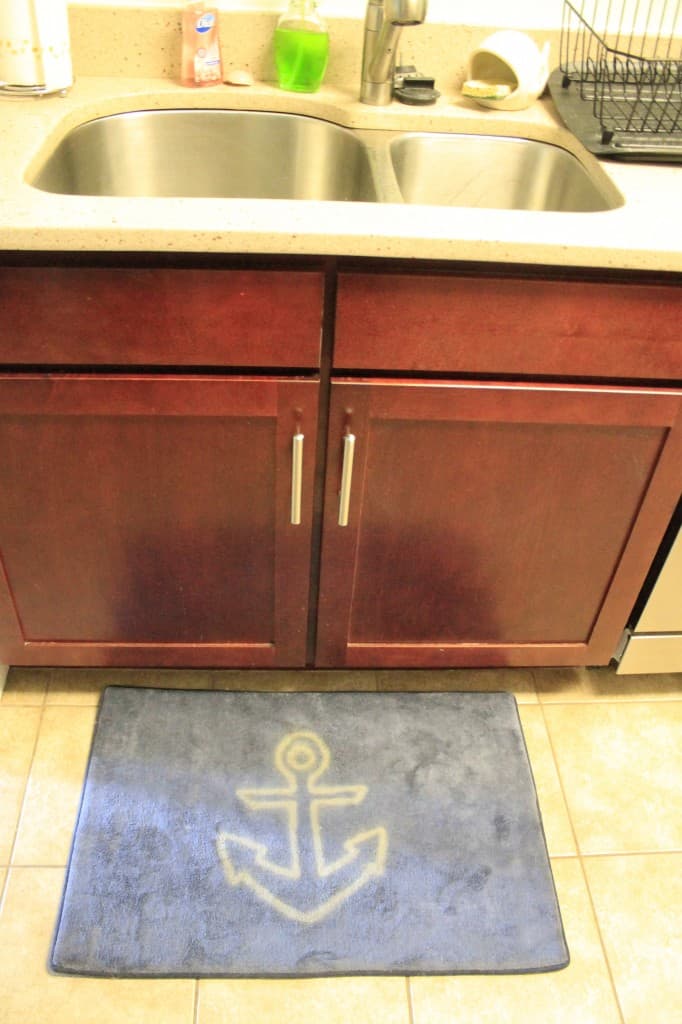
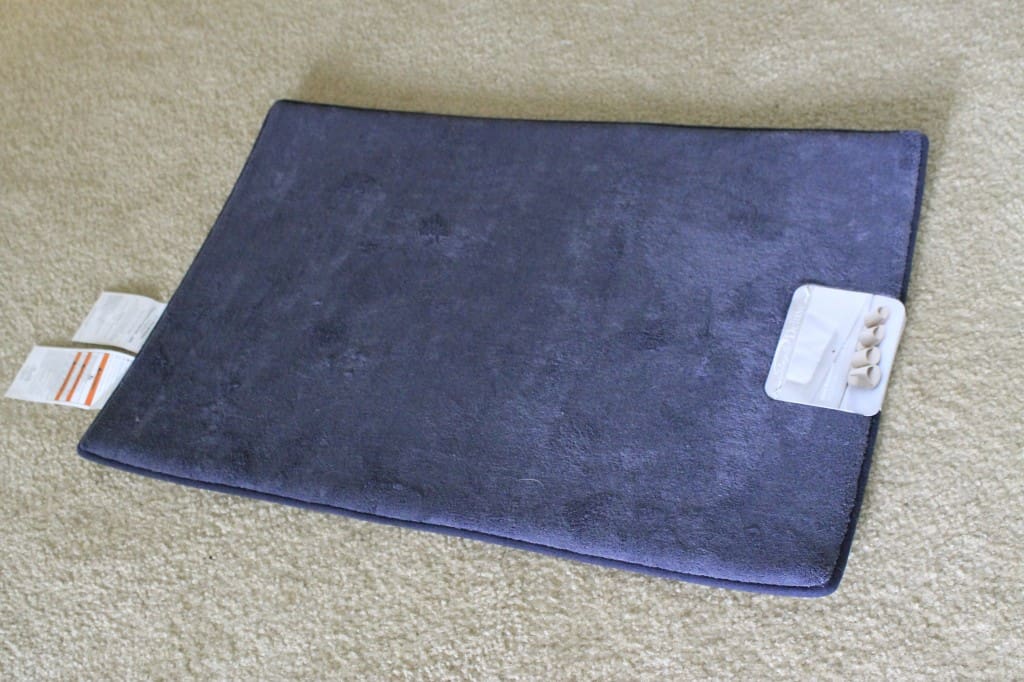
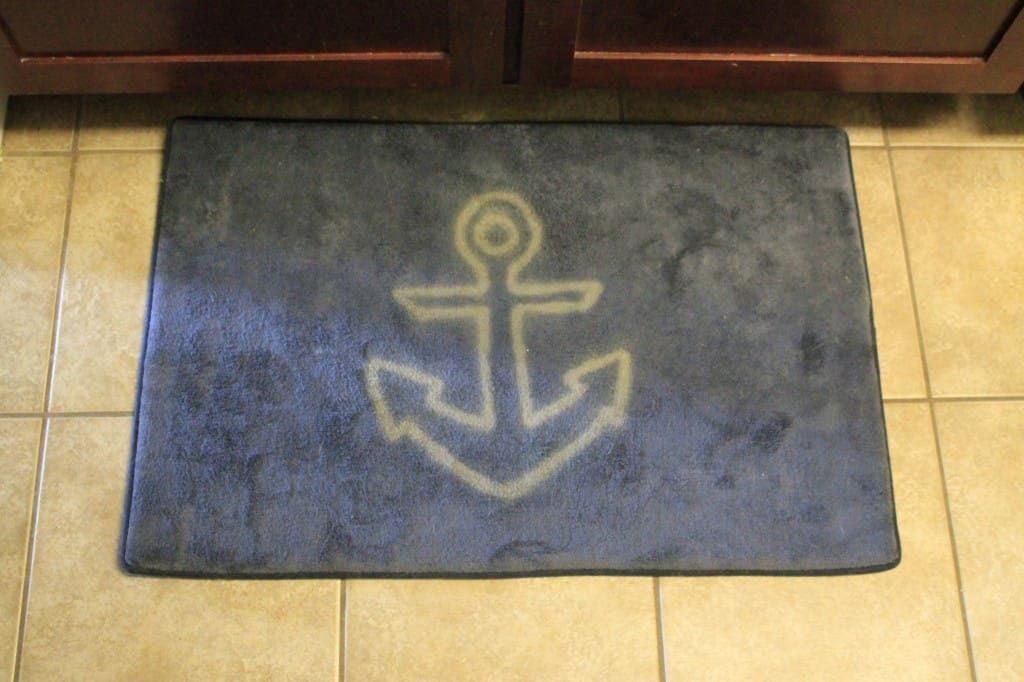
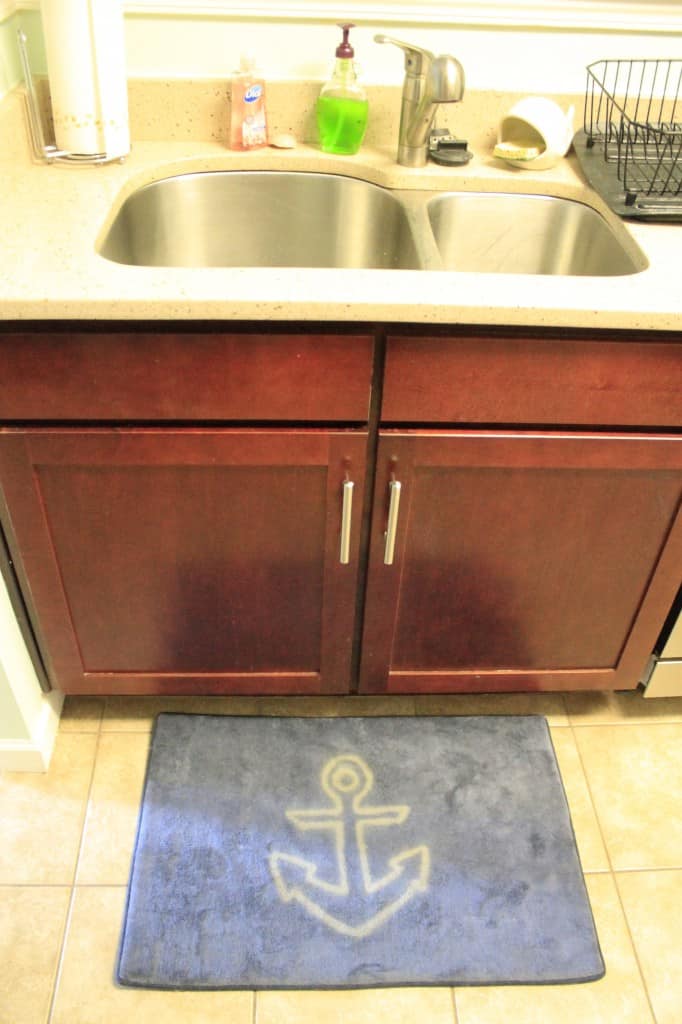
I started out with this navy memory foam non slip mat, from Amazon. It was perfect because it was non skid, a great navy color, and had really nice thick memory foam. We got the 20"x30" ($17.49, free shipping) and it is the perfect size for in front of the kitchen sink.

DIY Bleach Pen Anchor Mat - Charleston Crafted

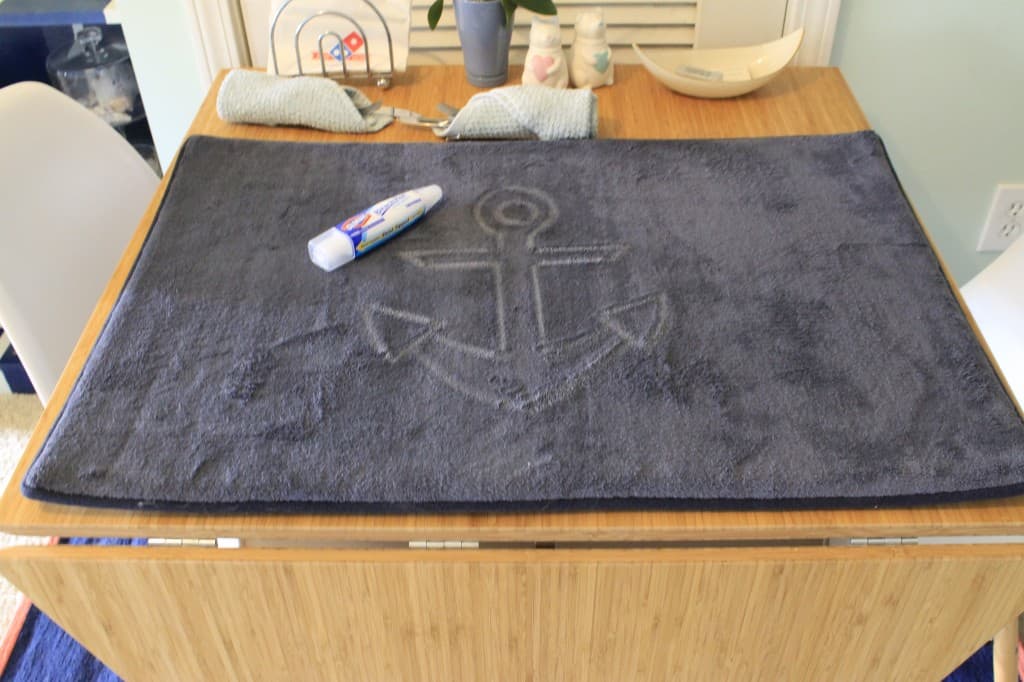
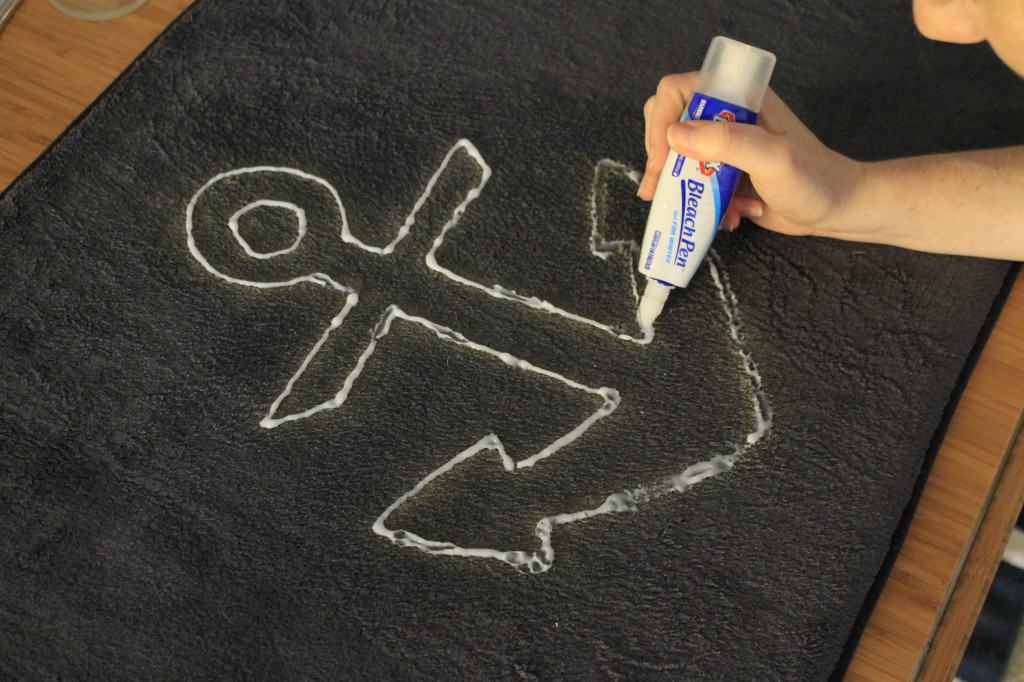
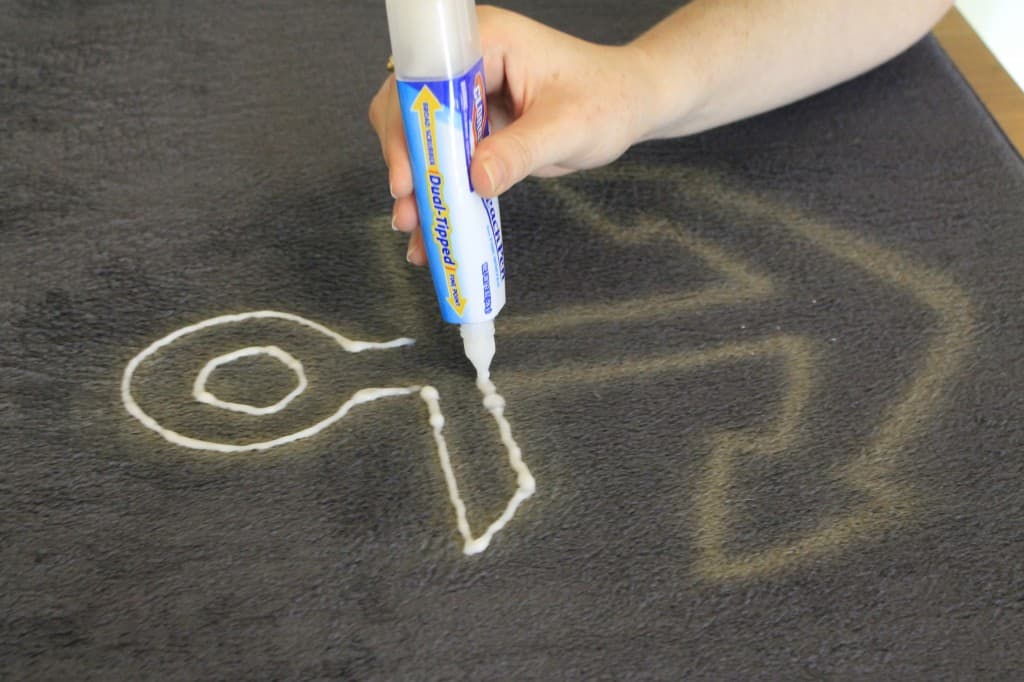
I decided to customize the mat in the same way that I have recently monogrammed a Lilly Pulitzer knock off sweater - using a bleach pen. I used the same Clorox bleach pen (for whites).

I just free handed the anchor on the mat using a piece of white chalk. I totally eyeballed the whole thing, but you could definitely trace a print out if you felt like you needed to.

DIY Bleach Pen Anchor Mat - Charleston Crafted

DIY Bleach Pen Anchor Mat - Charleston Crafted

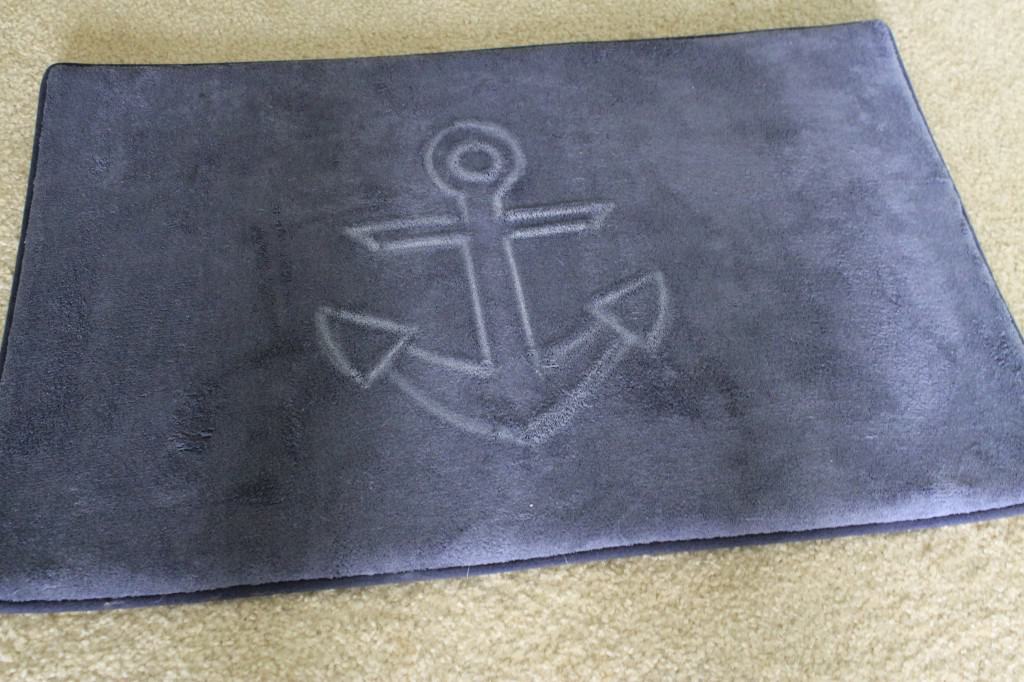
Then, I traced over the outline with bleach gel. I first made a line of bleach, then used the tip of the pen to rub it into the mat a little bit.

DIY Bleach Pen Anchor Mat - Charleston Crafted

DIY Bleach Pen Anchor Mat - Charleston Crafted

DIY Bleach Pen Anchor Mat - Charleston Crafted

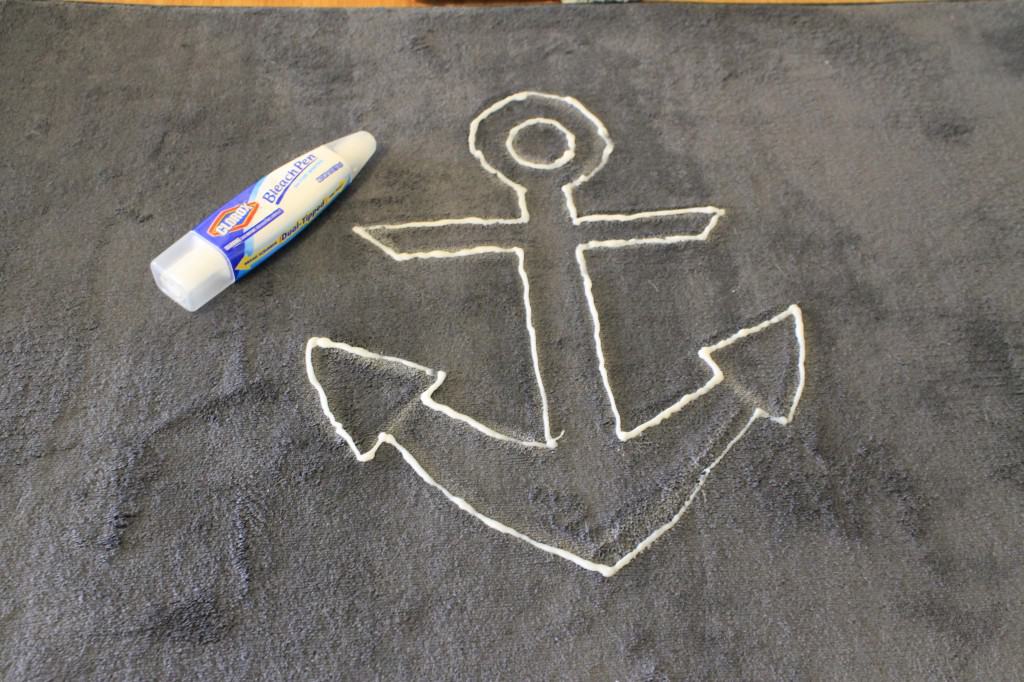
I originally planned to fill in the anchor (like the inspiration) but decided that I liked just the outline instead!

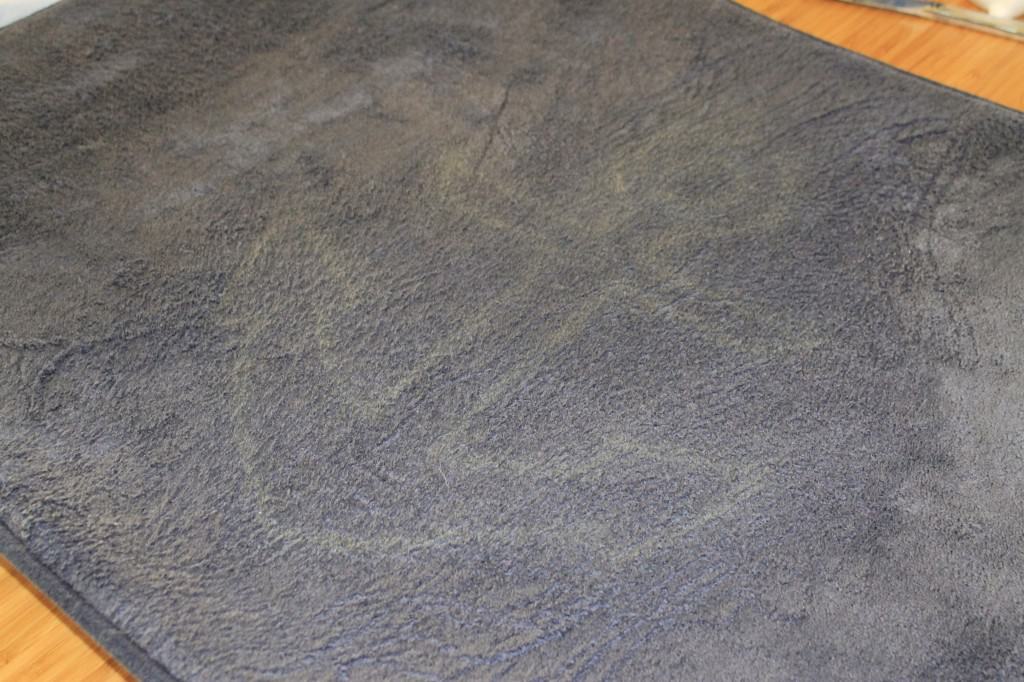
After letting it sit for at least one hour, I rinsed the bleach off in the tub. Then I let the mat dry flat in the tub over night and repeated. It took 3 coats to get it as white as I wanted. After the first coat, it was so faint that I didn't think it was going to work! but the second and third coats made a huge difference!

DIY Bleach Pen Anchor Mat - Charleston Crafted

DIY Bleach Pen Anchor Mat - Charleston Crafted

I totally love how it turned out, and it only cost me $18! If you needed to buy the bleach pen, it would still be under $25, and the inspiration rug was $40, and didn't have a non-skid backing or memory foam. I would totally do this project again if I needed another mat!

DIY Bleach Pen Anchor Mat - Charleston Crafted

DIY Bleach Pen Anchor Mat - Charleston Crafted

Have you been doing any knock off projects lately?

  signature 2
 logo facebook  logo instagram  logo pinterest  logo twitter


Morgan headshot cropped
Morgan

Hello, I'm Morgan, half of the creative force behind CharlestonCrafted.com! With a passion for DIY that dates back to 2012, I've transformed three homes and now I'm dedicated to helping others craft their dream spaces. Let's turn your house into a home together!

More Coastal Chic

  • DIY Sand Ball Ornament
  • DIY Beach Christmas Ornaments
  • DIY Sea Glass Ornaments
  • How to display sea shells
    How to display seashells

Primary Sidebar

Charleston Crafted about us image

Hey y'all!

We are Morgan & Sean McBride and we are crafting our home together in Charleston, South Carolina.

More about us

Popular Posts

  • DIY Coffered Ceiling
    DIY Coffered Ceiling
  • How to Make DIY Concrete Pumpkins via Charleston Crafted
    How to Make DIY Concrete Pumpkins
  • How to Make a Cupid's Arrow Valentine's Day Wall Hanging with felt on the Cricut
    How to make a Cupid's Arrow Valentine's Day Wall Hanging
  • Our Tropical Oasis - A backyard Hammock area - Charleston Crafted
    Our Tropical Oasis

Recent Posts

  • how to organize a pantry with zones
    How to Organize Your Pantry in Zones (And Why It’s a Game Changer)
  • Keep outdoor rug from blowing up - Charleston Crafted
    How to keep your outdoor rug in place
  • kitchen design mistakes to avoid
    Kitchen design mistakes to avoid
  • DIY Faux Tropical Window Box That Looks Real (But Won’t Die!)

Privacy Policy

Footer

↑ back to top

Navigation

  • Home
  • Blog
  • Contact Us
  • Terms of Use
  • Disclaimer

Newsletter

  • Sign up for emails and updates
  • Follow us on Instagram
  • Work with Us

Browse by Category

  • Woodworking
  • Home Projects
  • Paint Colors
  • Room Reveals

© 2025 The Charleston Crafted Blog LLC DBA “Charleston Crafted” and “CharlestonCrafted” (also known as N/A) / All Rights Reserved.
Official Website: (Charleston Crafted)
Registered in USA (Co. Reg. No.: 565586)
Address: Charleston, USA 29414, South Carolina
Contact Phone: Not applicable — contact is via email: sean@charlestoncrafted.com

DISCLAIMER: The content on this website is provided for general informational purposes only and is not intended as professional advice. The Charleston Crafted Blog LLC and The Charleston Crafted Blog LLC make no representations or warranties—express or implied—regarding the accuracy, completeness, or suitability of the information contained herein. Any reliance you place on this information is strictly at your own risk. In no event shall The Charleston Crafted Blog LLC or The Charleston Crafted Blog LLC be liable for any loss or damage, including without limitation, indirect or consequential loss or damage, arising from the use or inability to use this website. This website is the official website of The Charleston Crafted Blog LLC.

AFFILIATE DISCLOSURE: This website contains affiliate links. If you click through and make a purchase, we may earn a commission at no extra cost to you.

As an Amazon Associate, I earn from qualifying purchases.

Site Editor: Morgan Smith McBride

Copyright © 2025 Charleston Crafted