• Skip to primary navigation
  • Skip to main content
  • Skip to primary sidebar
Charleston Crafted
  • DIY
  • Woodworking
  • Popular Posts
  • Blog
  • About
  • Shop
menu icon
go to homepage
  • DIY
  • Woodworking
  • Popular Posts
  • Blog
  • About
  • Shop
search icon
Homepage link
  • DIY
  • Woodworking
  • Popular Posts
  • Blog
  • About
  • Shop
×
Coastal Chic

DIY Driftwood Candle Centerpiece

Published: Jun 13, 2016 · Modified: Feb 8, 2019 by Morgan · As an Amazon Associate, we earn from qualifying purchases. This site contains affiliate links. ·

Want to make a DIY Driftwood centerpiece? Here's an easy DIY tutorial!

DIY Driftwood Candle Centerpiece- Charleston Crafted

We love living so close to the beach and use our Charleston location as inspiration for tropical touches in our home. We have previously shared tutorials for a driftwood coffee table, a driftwood cupcake display for our wedding, and our driftwood Christmas tree topper, and now we are back with something new.

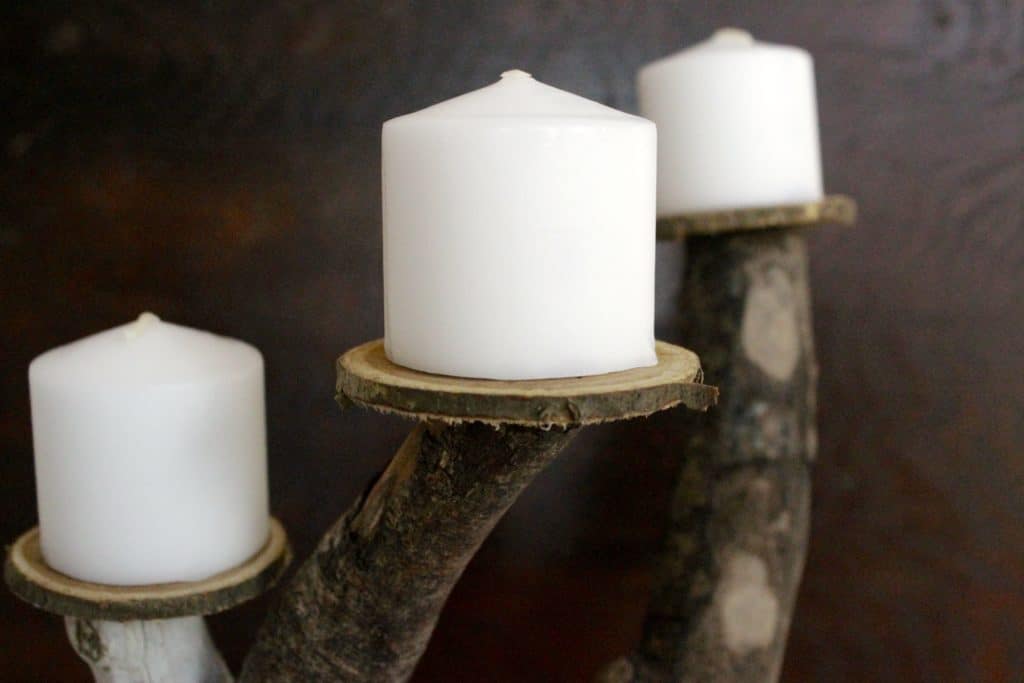
I had a bit of driftwood leftover and wanted to use it up prior to our move, and so we were inspired to build a DIY driftwood candelabra centerpiece. It holds five candles and really brings a little beachy-ness indoors all year long.

Driftwood Centerpiece

Here's how we did it:

DIY Driftwood Candle Centerpiece- Charleston Crafted

DIY Driftwood Candle Centerpiece- Charleston Crafted

DIY Driftwood Candle Centerpiece- Charleston Crafted

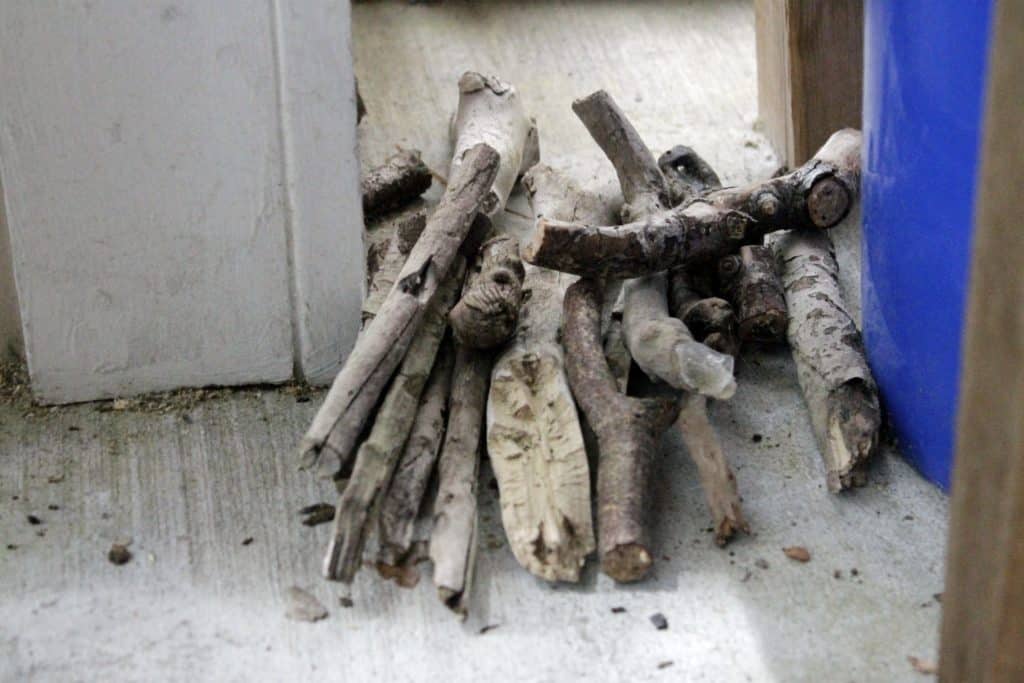
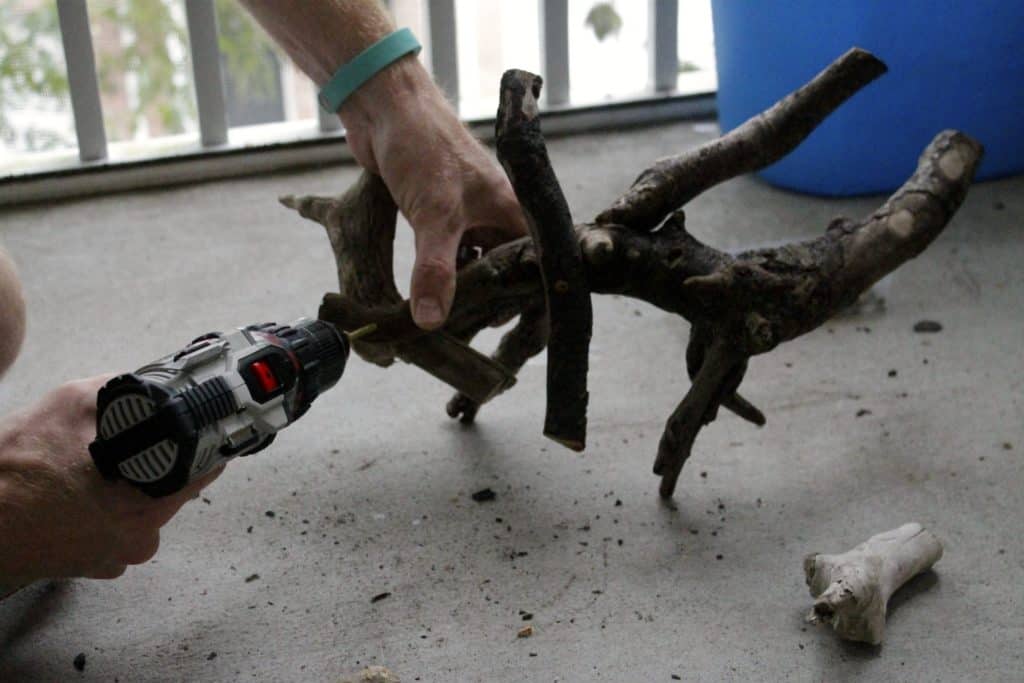
As we've mentioned in our other driftwood crafts, it's very important to start with a solid base. You can add lots of pieces to your driftwood craft, but you need to have a solid base to build on and around. We found a good piece that had multiple points that touch the ground and stood well on it's own. Then we used wood screws to attach a couple of other pieces to hold the base in place.

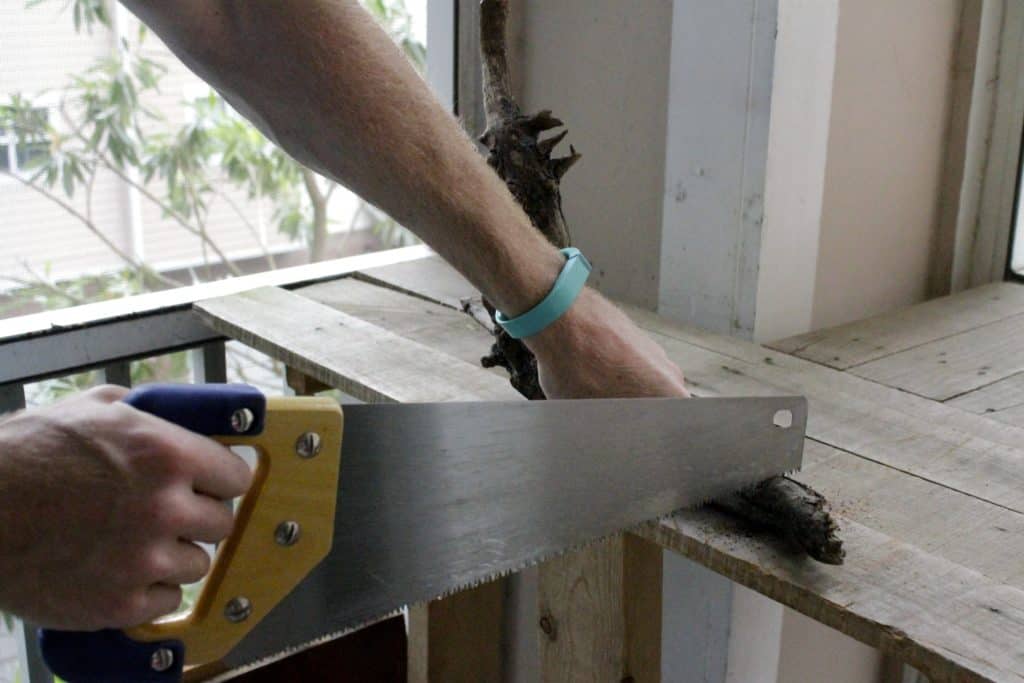
Then it's up to you to design what your driftwood craft looks like. Working with driftwood is always a puzzle because the pieces don't ever necessarily go together. They are all different shapes, sizes and thicknesses, so you just have to work with it. For this driftwood candelabra, we wanted to do five candles, so we sawed off the tips of different pieces of wood and attached them to the base the the flat side as level as possible.

Once the structure is built, go back and use an electric sander to make them more level.

DIY Driftwood Candle Centerpiece- Charleston Crafted

DIY Driftwood Candle Centerpiece- Charleston Crafted

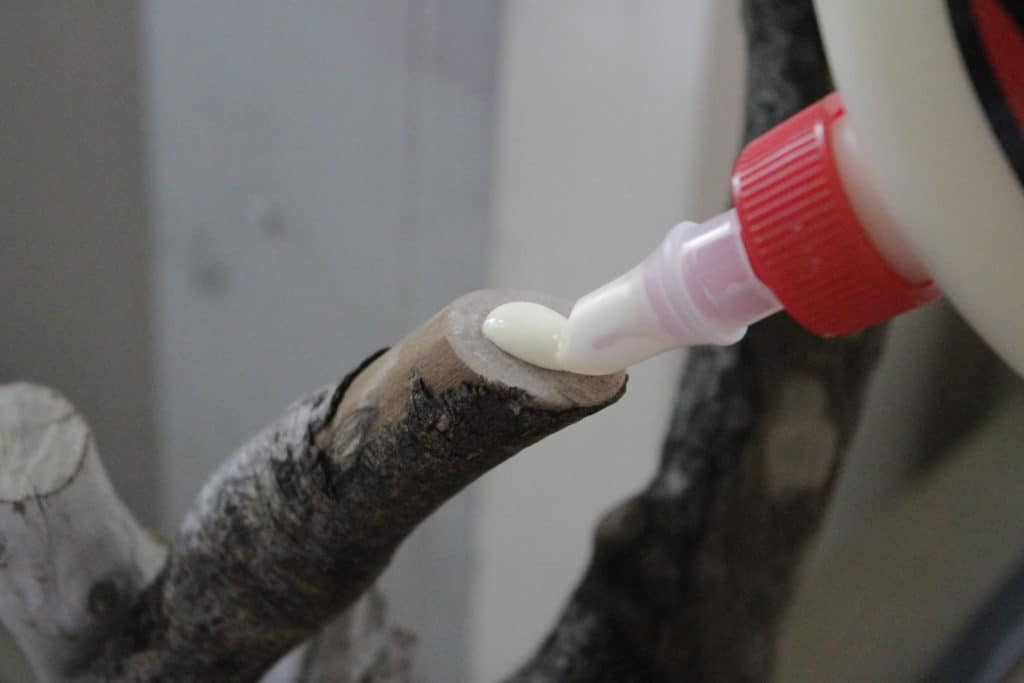
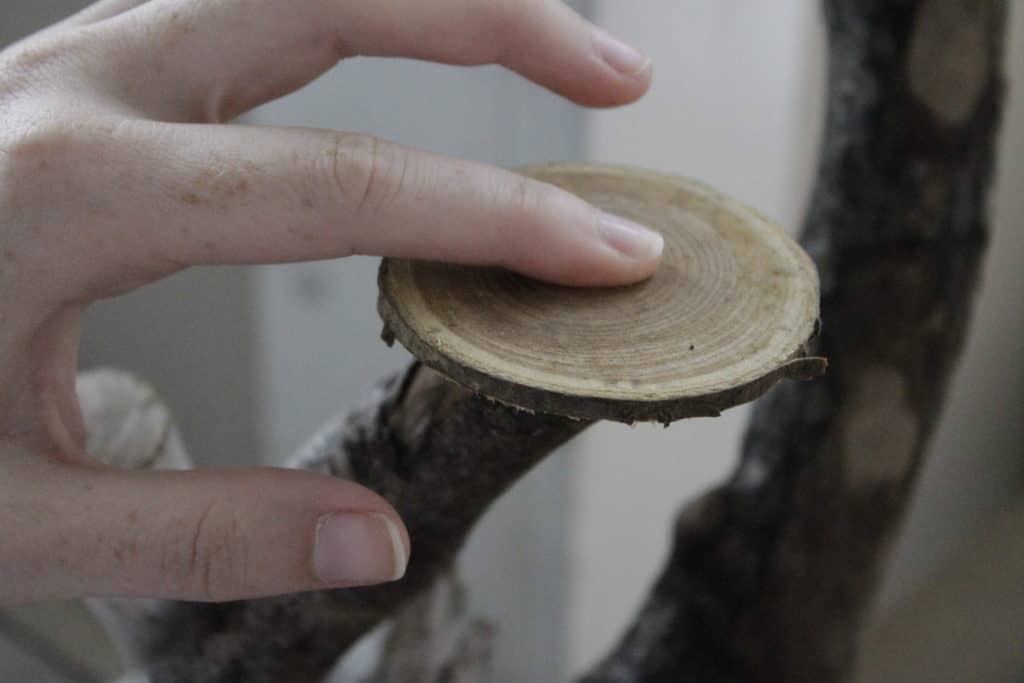
Once the structure is built, we used small discs of wood that we picked up at the craft store and used wood glue to attach them to the candelabra so that candles could be placed on top of them. After it's done, you feel like you're sitting by the beach under candlelight!

DIY Driftwood Candle Centerpiece- Charleston Crafted

Have you been building anything cool lately?

Morgan headshot cropped
Morgan

Hello, I'm Morgan, half of the creative force behind CharlestonCrafted.com! With a passion for DIY that dates back to 2012, I've transformed three homes and now I'm dedicated to helping others craft their dream spaces. Let's turn your house into a home together!

More Coastal Chic

  • DIY Sand Ball Ornament
  • DIY Beach Christmas Ornaments
  • DIY Sea Glass Ornaments
  • How to display sea shells
    How to display seashells

Reader Interactions

Trackbacks

  1. Driftwood Inspiration - Just Call Me Homegirl says:
    May 24, 2017 at 8:48 am

    […] Create a candle centerpiece […]

Primary Sidebar

Charleston Crafted about us image

Hey y'all!

We are Morgan & Sean McBride and we are crafting our home together in Charleston, South Carolina.

More about us

Popular Posts

  • DIY Coffered Ceiling
    DIY Coffered Ceiling
  • How to Make DIY Concrete Pumpkins via Charleston Crafted
    How to Make DIY Concrete Pumpkins
  • How to Make a Cupid's Arrow Valentine's Day Wall Hanging with felt on the Cricut
    How to make a Cupid's Arrow Valentine's Day Wall Hanging
  • Our Tropical Oasis - A backyard Hammock area - Charleston Crafted
    Our Tropical Oasis

Recent Posts

  • how to organize a pantry with zones
    How to Organize Your Pantry in Zones (And Why It’s a Game Changer)
  • Keep outdoor rug from blowing up - Charleston Crafted
    How to keep your outdoor rug in place
  • kitchen design mistakes to avoid
    Kitchen design mistakes to avoid
  • DIY Faux Tropical Window Box That Looks Real (But Won’t Die!)

Privacy Policy

Footer

↑ back to top

Navigation

  • Home
  • Blog
  • Contact Us
  • Terms of Use
  • Disclaimer

Newsletter

  • Sign up for emails and updates
  • Follow us on Instagram
  • Work with Us

Browse by Category

  • Woodworking
  • Home Projects
  • Paint Colors
  • Room Reveals

© 2025 The Charleston Crafted Blog LLC DBA “Charleston Crafted” and “CharlestonCrafted” (also known as N/A) / All Rights Reserved.
Official Website: (Charleston Crafted)
Registered in USA (Co. Reg. No.: 565586)
Address: Charleston, USA 29414, South Carolina
Contact Phone: Not applicable — contact is via email: sean@charlestoncrafted.com

DISCLAIMER: The content on this website is provided for general informational purposes only and is not intended as professional advice. The Charleston Crafted Blog LLC and The Charleston Crafted Blog LLC make no representations or warranties—express or implied—regarding the accuracy, completeness, or suitability of the information contained herein. Any reliance you place on this information is strictly at your own risk. In no event shall The Charleston Crafted Blog LLC or The Charleston Crafted Blog LLC be liable for any loss or damage, including without limitation, indirect or consequential loss or damage, arising from the use or inability to use this website. This website is the official website of The Charleston Crafted Blog LLC.

AFFILIATE DISCLOSURE: This website contains affiliate links. If you click through and make a purchase, we may earn a commission at no extra cost to you.

As an Amazon Associate, I earn from qualifying purchases.

Site Editor: Morgan Smith McBride

Copyright © 2025 Charleston Crafted