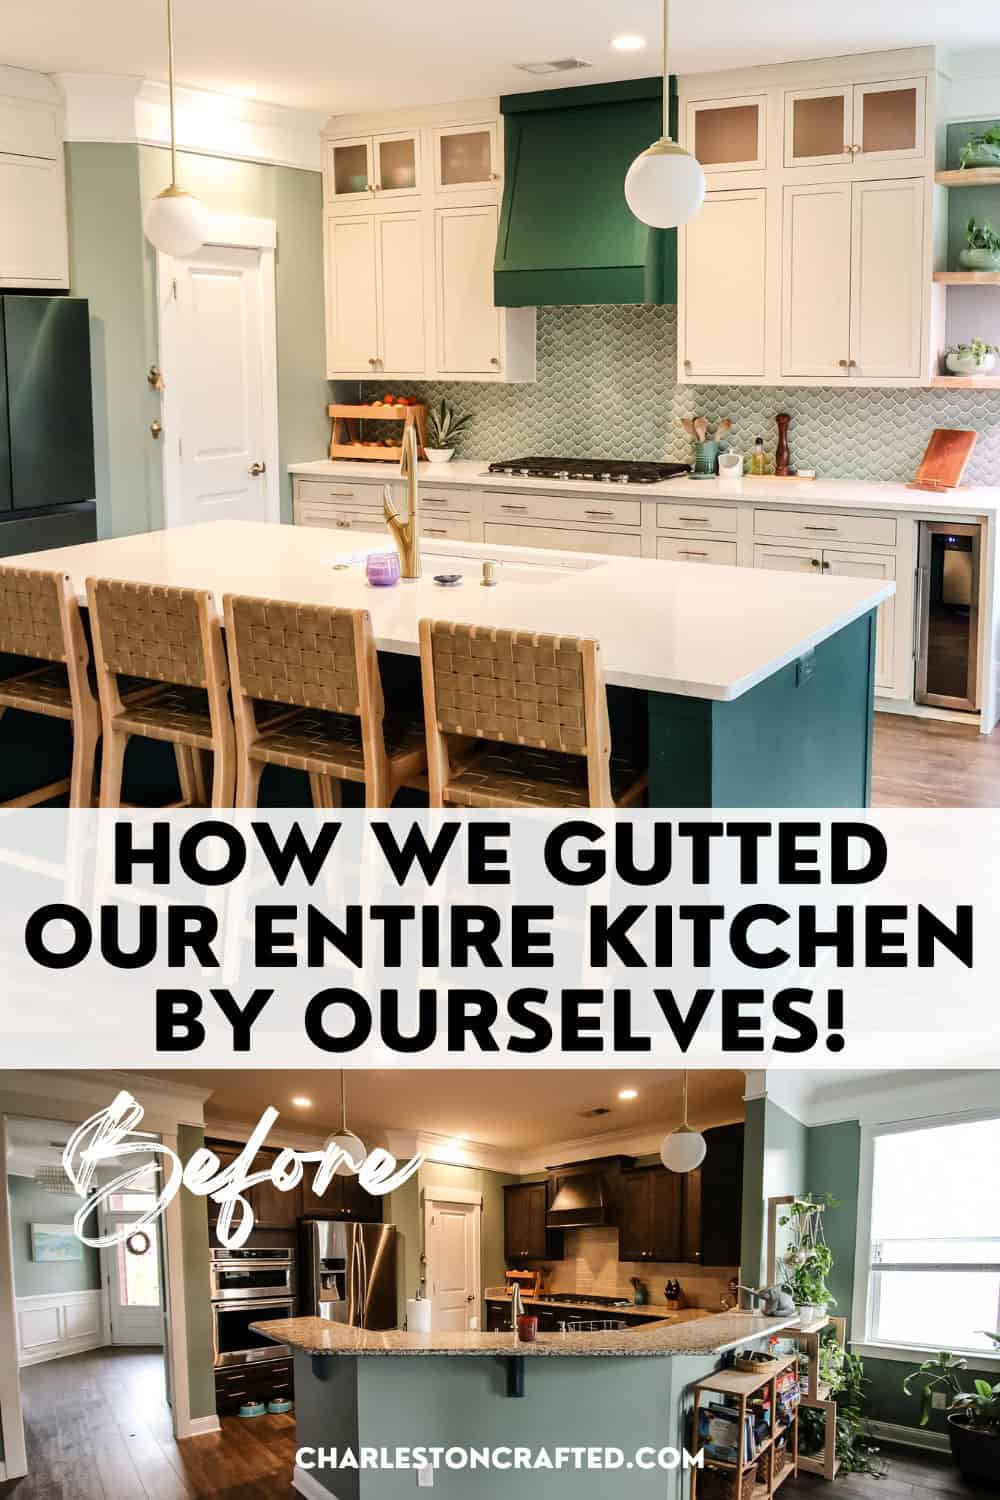
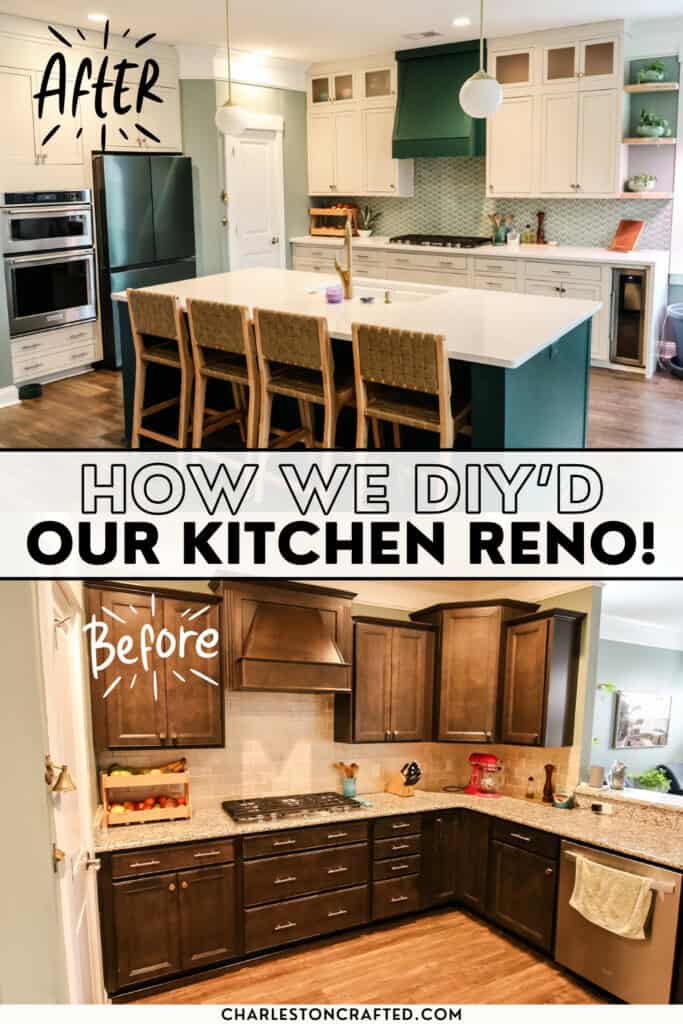
Here's the full recap of our DIY kitchen renovation! This is how we took our closed-off, outdated kitchen and turned it into modern open-concept!
It's finished. It's finally finished. I completely gutted our kitchen... by myself.
After about a year of on and off work, I finished our DIY kitchen renovation.
The timeline is vague, having done a ton of work early in 2023, but then having to wait on counters, then getting back into finishing everything that make it function in the 2nd half of the year.
While the bulk of the work was done in the first six months, it took another six months of sporadic improvements and projects to get it to what I consider officially done. And it looks great.
I've shared a lot of the process with you, so let's look at the entire process and budget from start to finish.
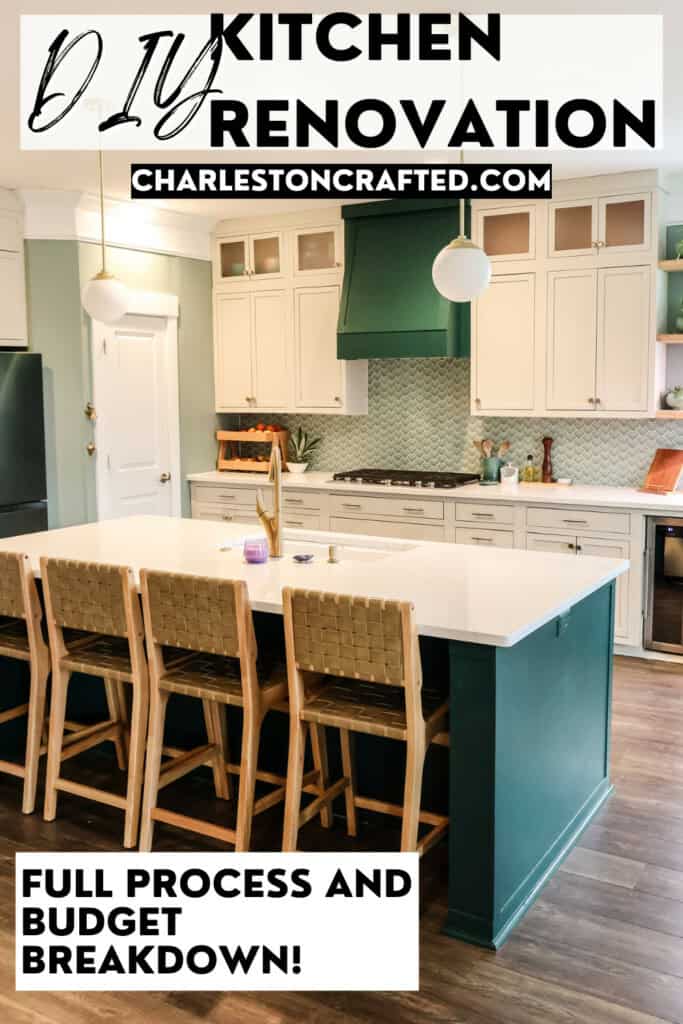
Kitchen reveal
This post is going to walk you through the entire process of the big things I did for the kitchen remodel. We started out with a closed off peninsula kitchen and I turned it into a bright, open concept modern kitchen.
For the record, I literally did everything myself except for the 2 hour plumbing work, electrical, countertop fabrication and when my friend Scott helped me move the oven. That's it.
I'm not recommending anyone else do this. It was crazy and a lot of work. But I challenged myself and here's everything I did.
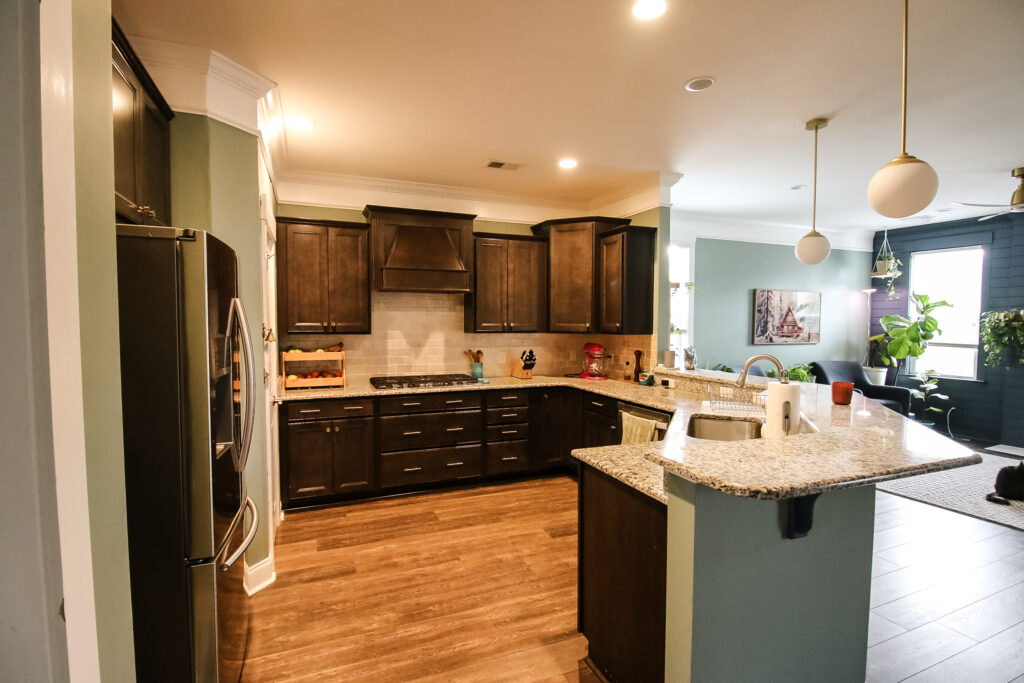
Kitchen before
This kitchen had a closed off peninsula style floor plan when we moved in, with a bar top around the peninsula and a wall coming off half the kitchen. This all closed off the openness of the area and made it dark.
Not to mention the dark cabinets, dark stone tile and poor function. We didn't like how it looked or how it felt, so we wanted to tear it out.
Did it function? Yes. Did we have to demolish it? No. But do we feel better now? Absolutely. Here's what it looked like before I started.
Kitchen peninsula demolition
The demolition of this kitchen was honestly so satisfying. But it took at long time and it was a mess.
Another thing to note about this is that, for the most part, I worked in 2-3 hour bursts to get this done while my kids were in half-day preschool.
This would have been a lot easier if I'd worked full days or if we weren't living in the space.
But, realistically, who can work full time on their own kitchen renovation? That's just not the reality for most people.
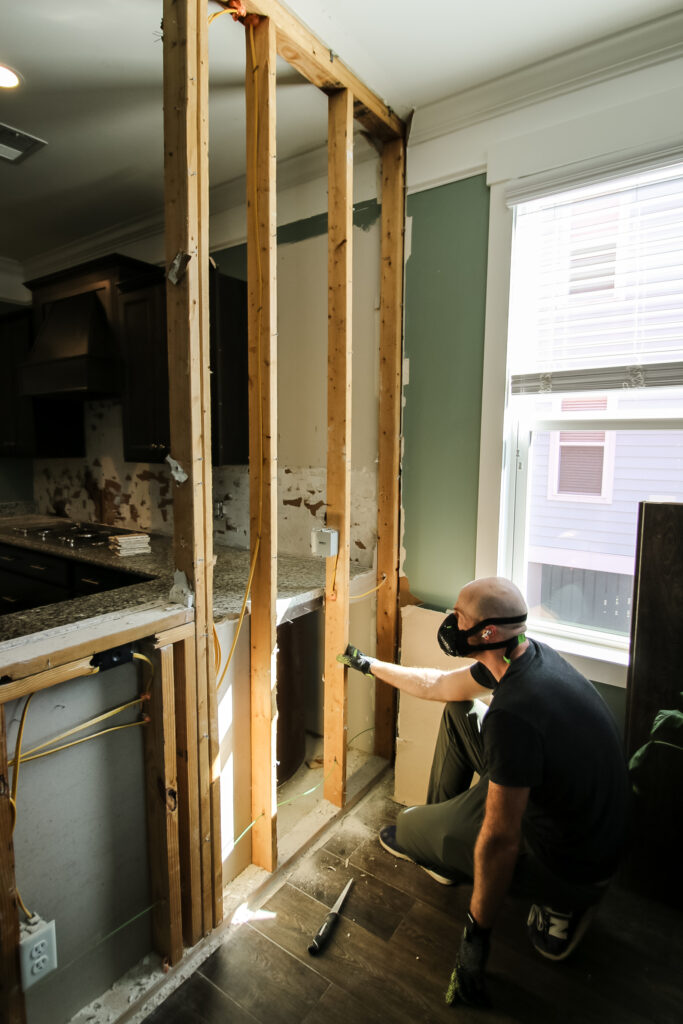
The main demolition consisted of tearing out the peninsula and the wall, tearing out countertops and removing all the old cabinetry and removing the old backsplash. It was heavy, dirty and fun.
Removing the peninsula meant I did have to patch the flooring as well, which took two days, and patch the hole in the side wall and ceiling from removing the half-wall that was there before.
DIY cabinets
Before even starting the actual demolition, I actually built all of my cabinets. I wanted to be able to move the cabinets in as soon as demolition was done in order to minimize the time we had no useable kitchen.
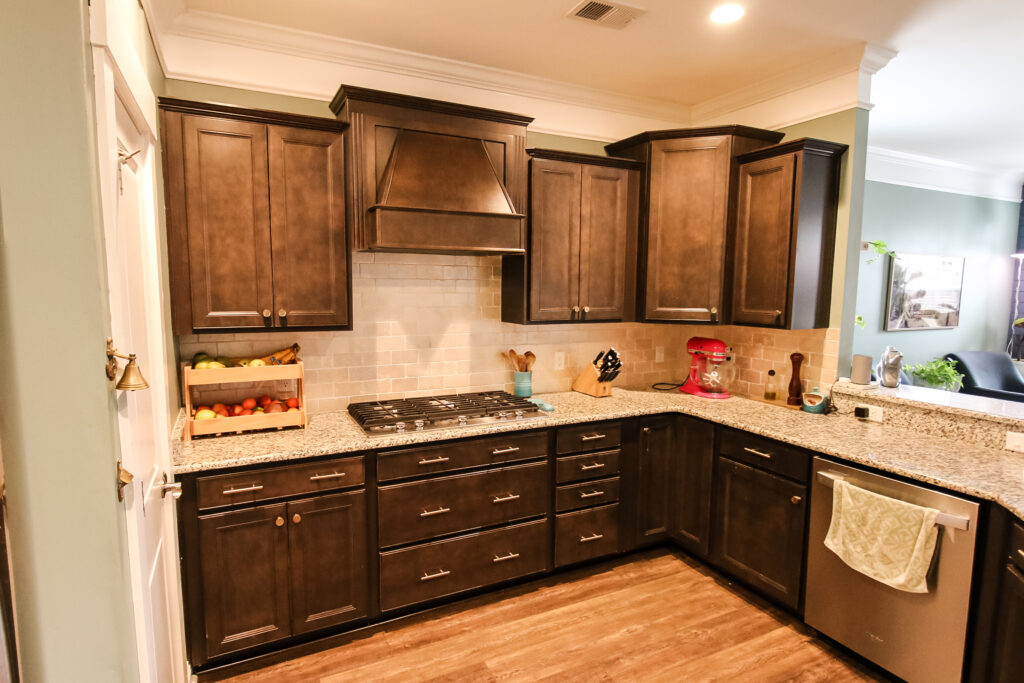
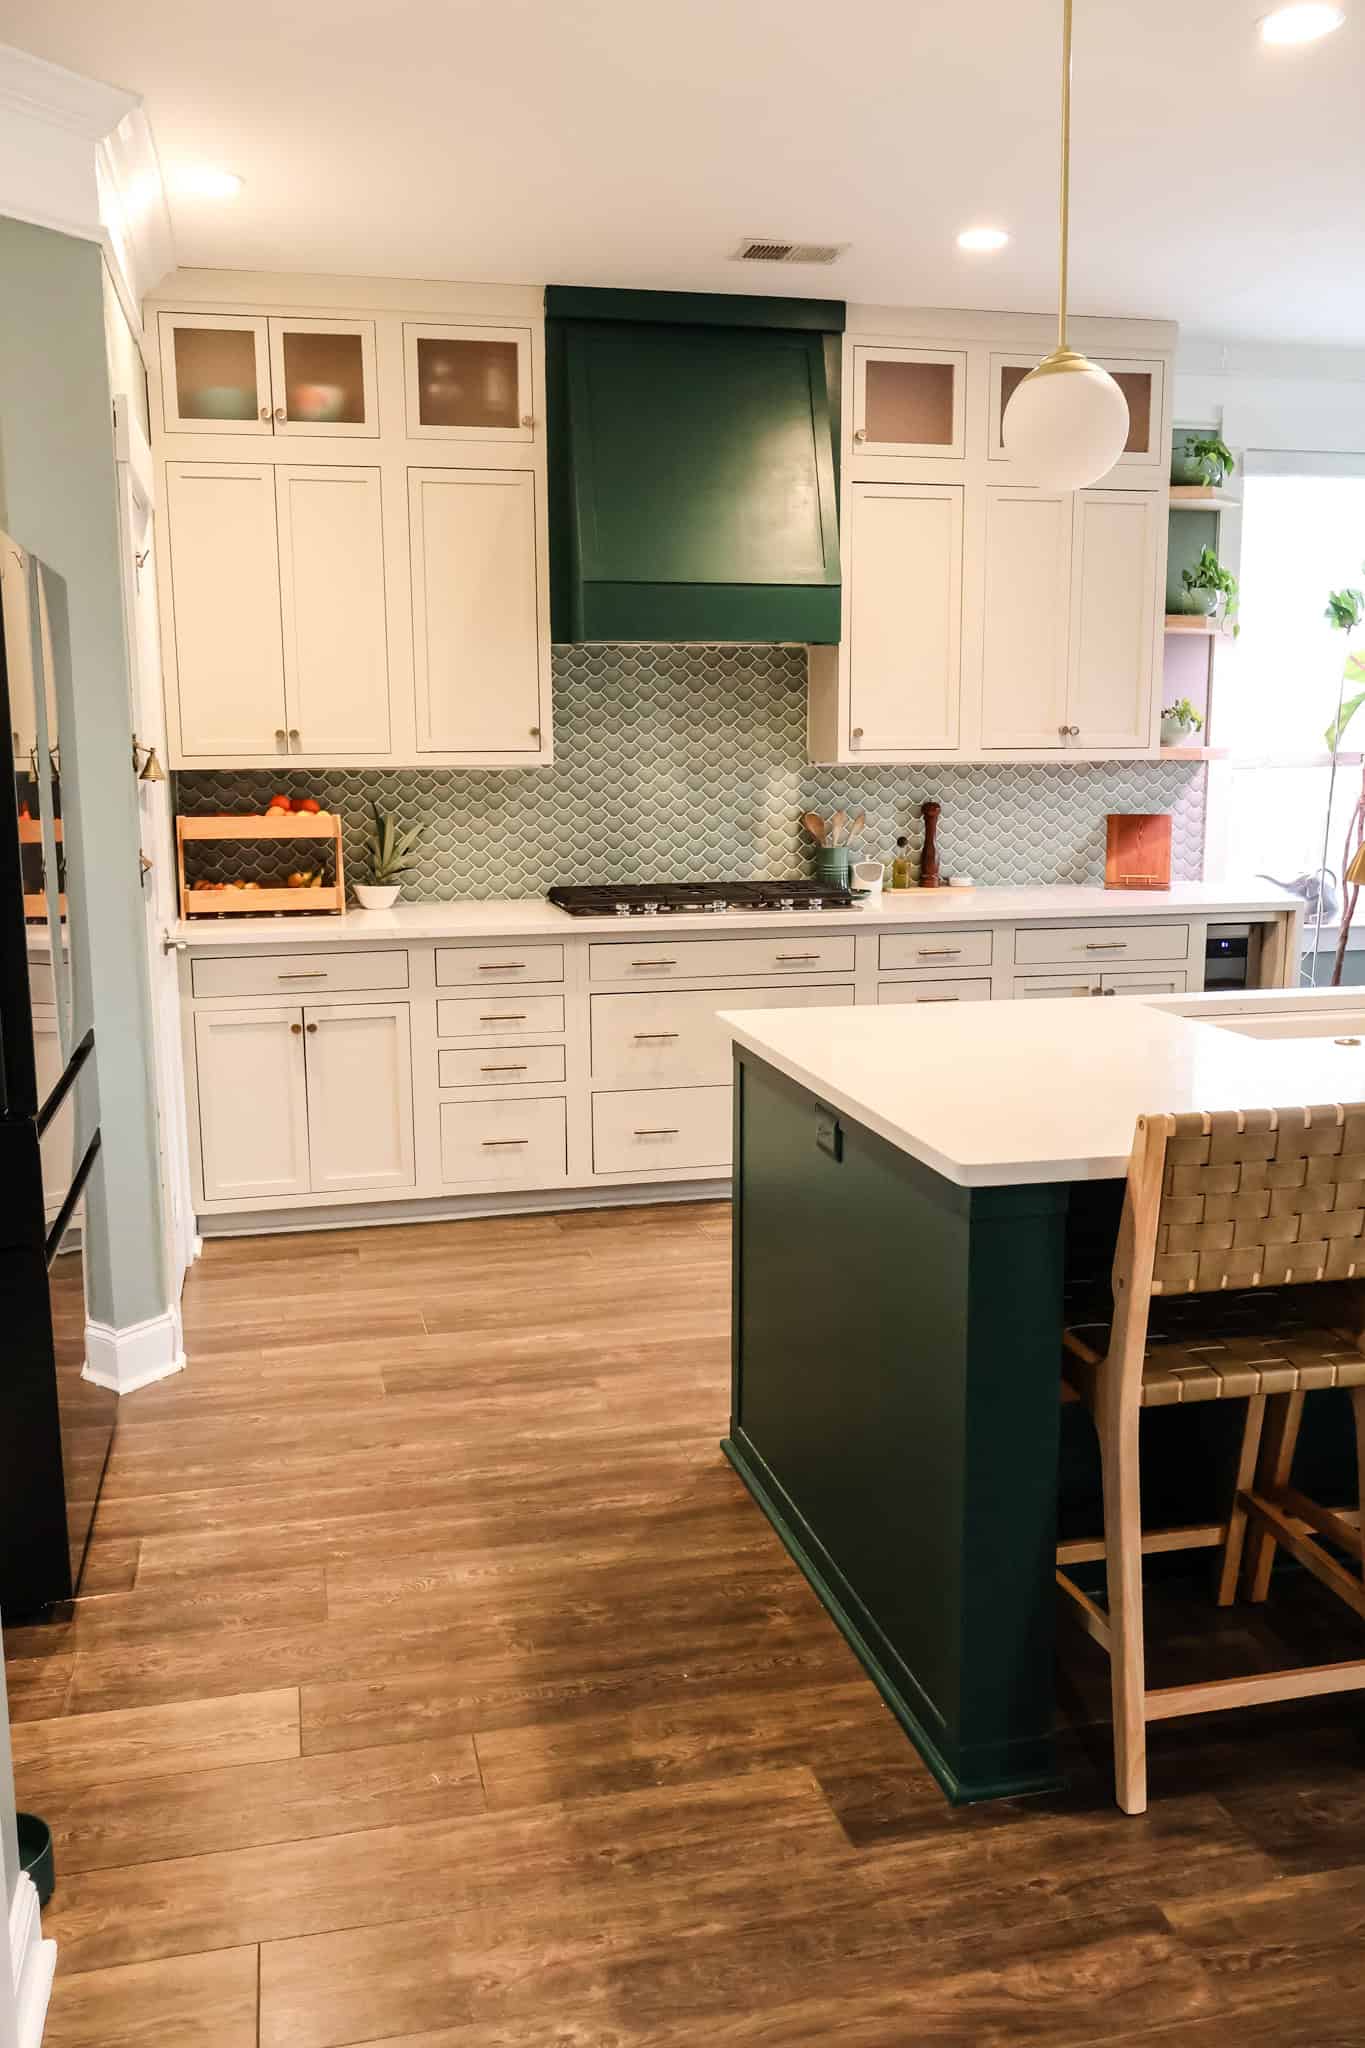
This kitchen is now a mix of cabinets that I saved from the old kitchen and new ones that I built to replicate the old ones. The layout of the main wall of the kitchen is now symmetrical and beautiful because I planned ahead.
I had to build a base cabinet with doors and a drawer, a base cabinet with four drawers, and an upper wall cabinet. I was able to save one of each of those, plus the stove pull out drawers and then just reconfigure the layout.
We also didn't go with a white kitchen. It's trendy, but we like color. We chose the color Natural Linen by Sherwin Williams for all our cabinets.
Then, after the cabinets were all done and in place, I added some corner floating shelves off the end of the cabinets to fill the space between the window.

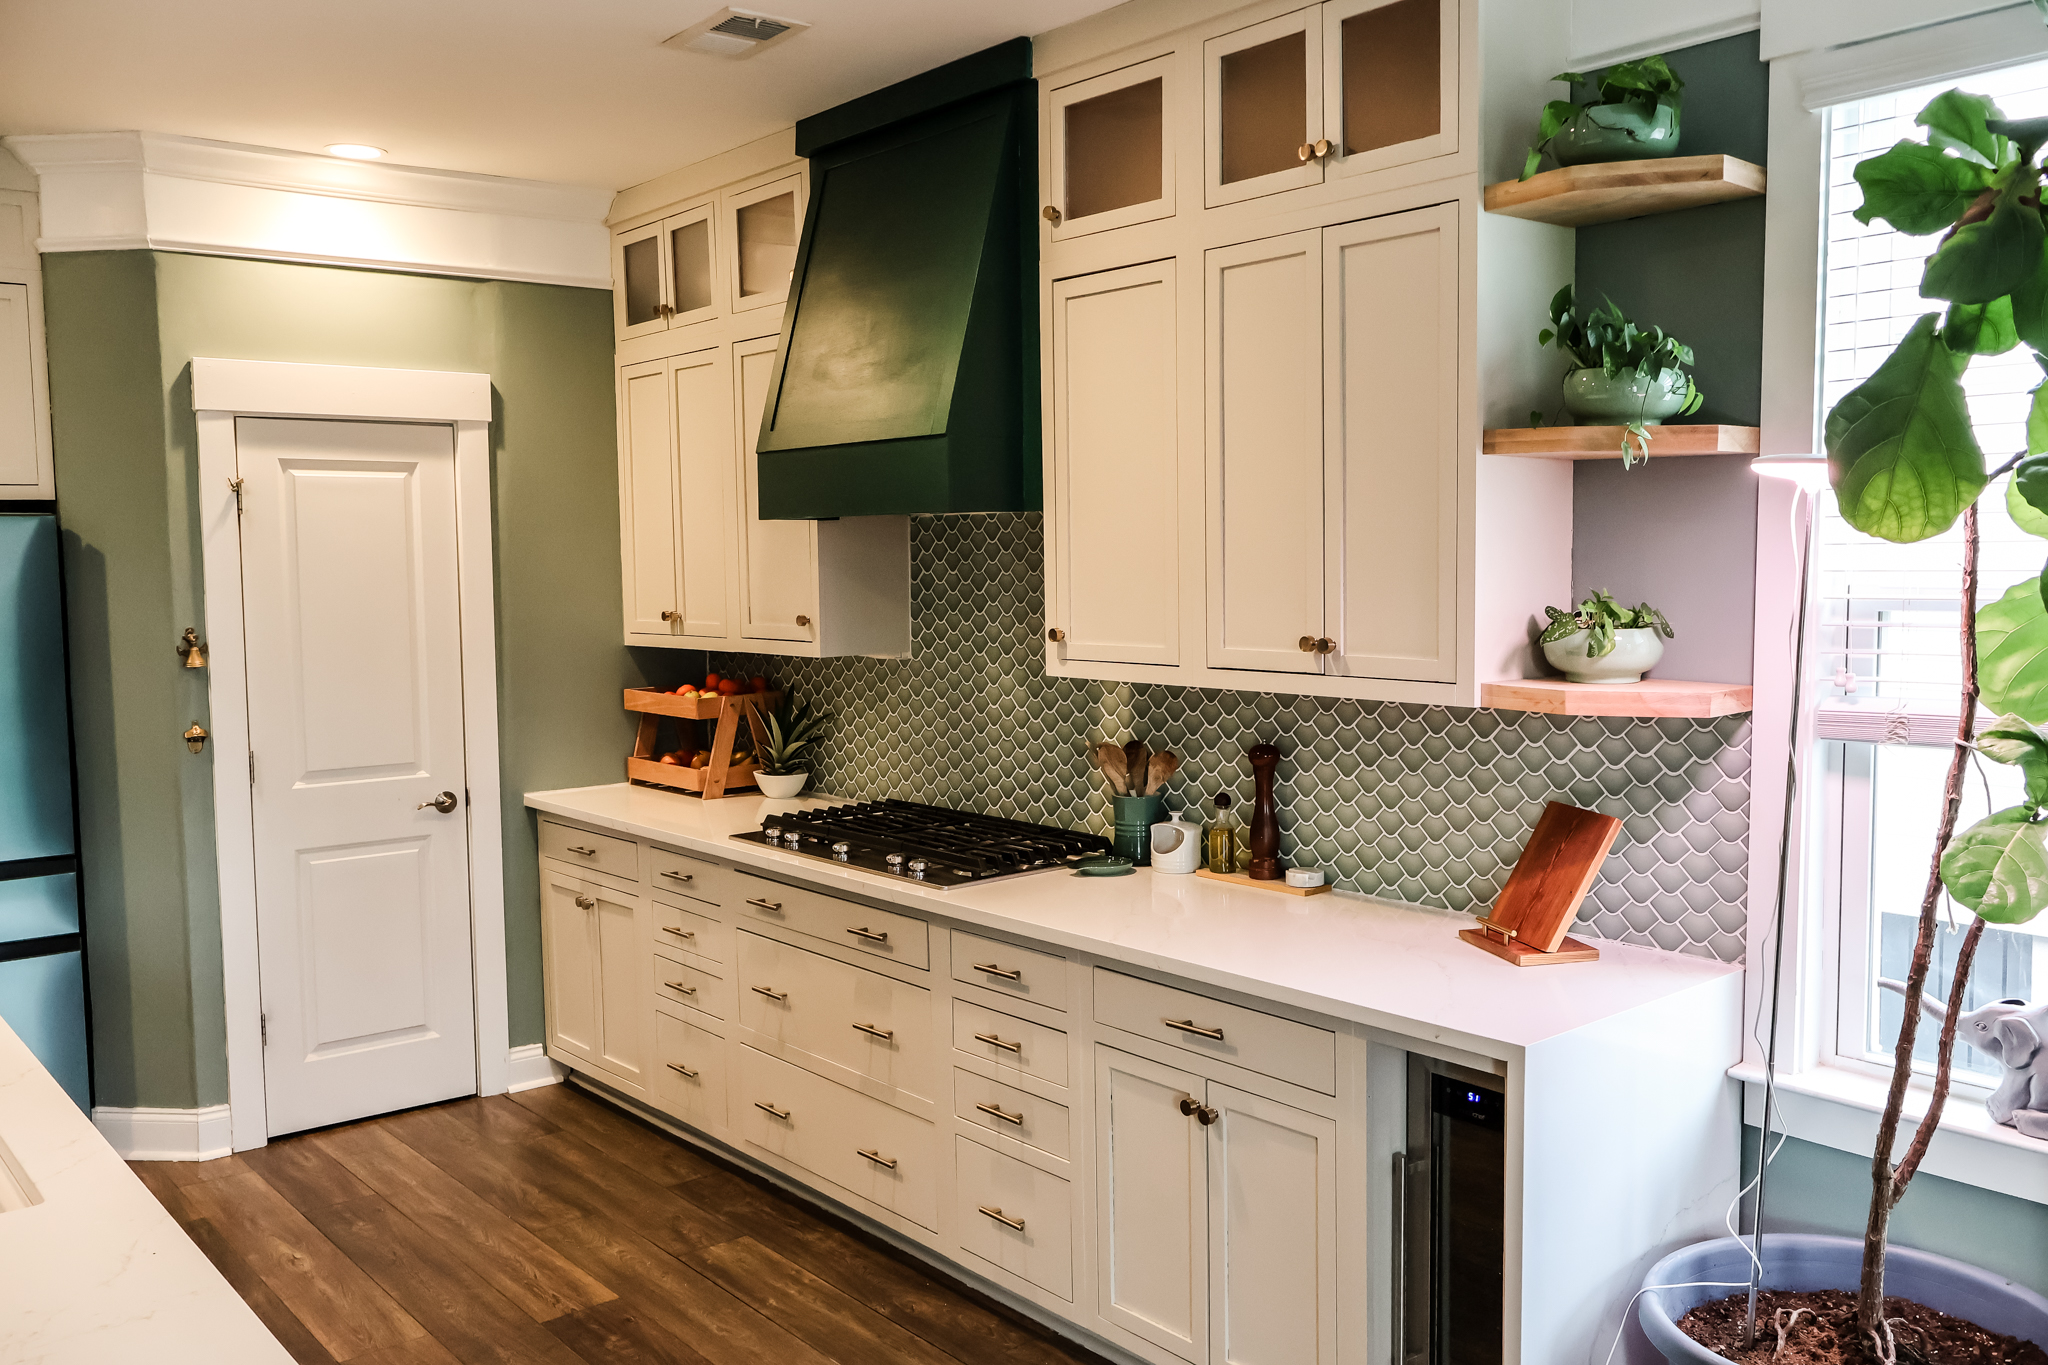
DIY range hood
To go between the upper cabinets and above the stove, I built a custom range hood that would be a statement piece and stand out against the cabinets.
The range hood has sharp angles and doesn't have moulding like our old one did. I love the new design of this and how it fits better with what we have.
We also chose to have the hood serve as an accent piece by painting it Dark Everglade by Behr.
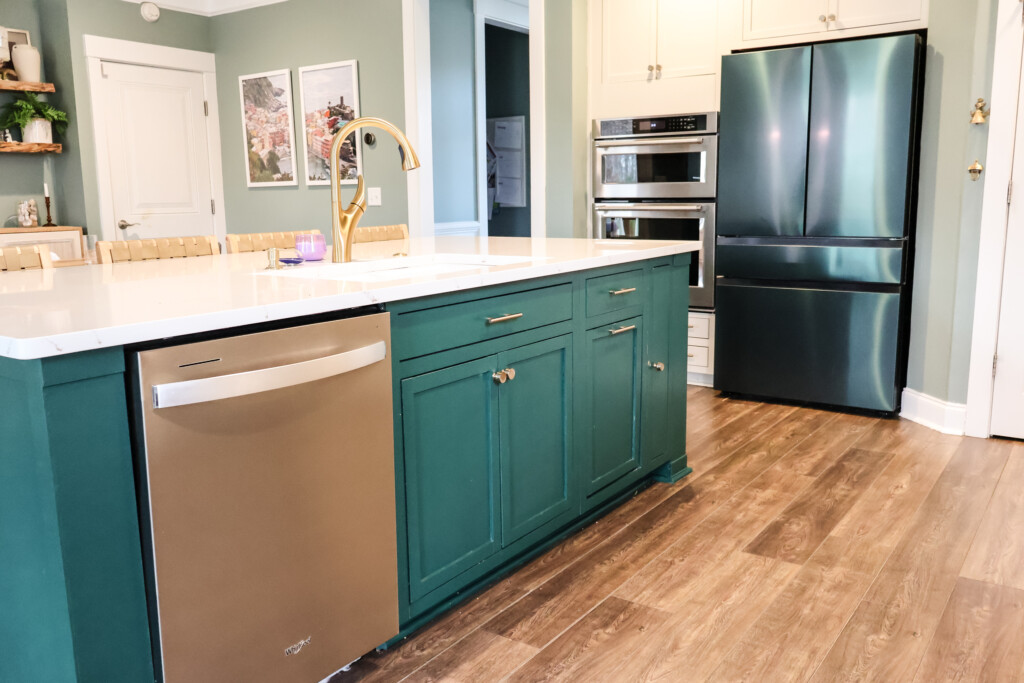
We painted the island the same color, which is the same color we painted our guest bedroom and was the closest color we could find to our Samsung Bespoke fridge we bought to start this whole renovation.
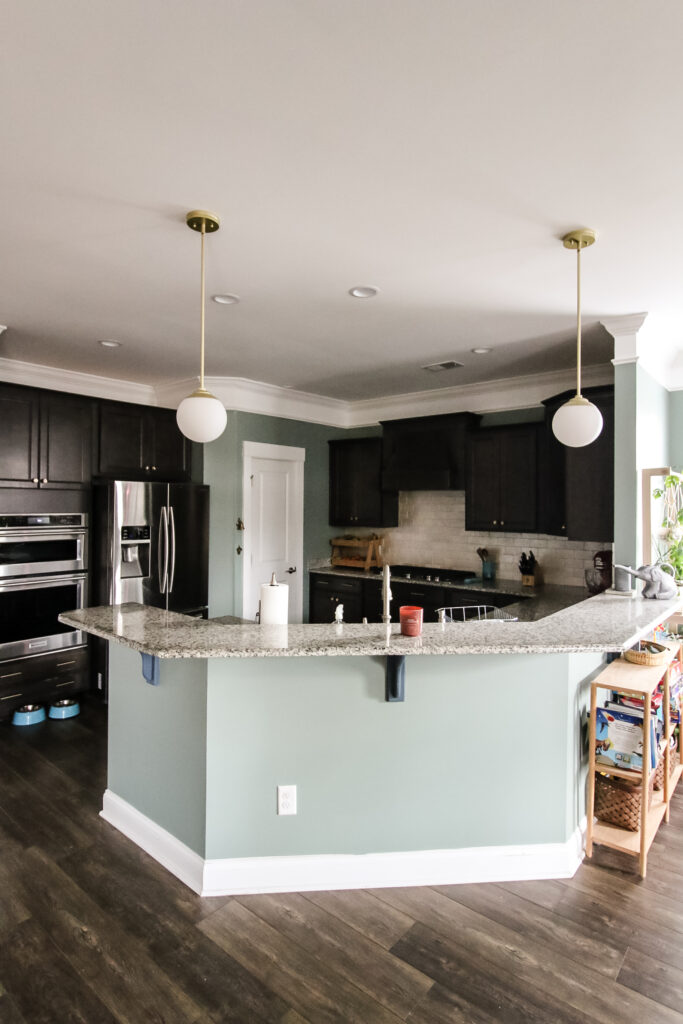
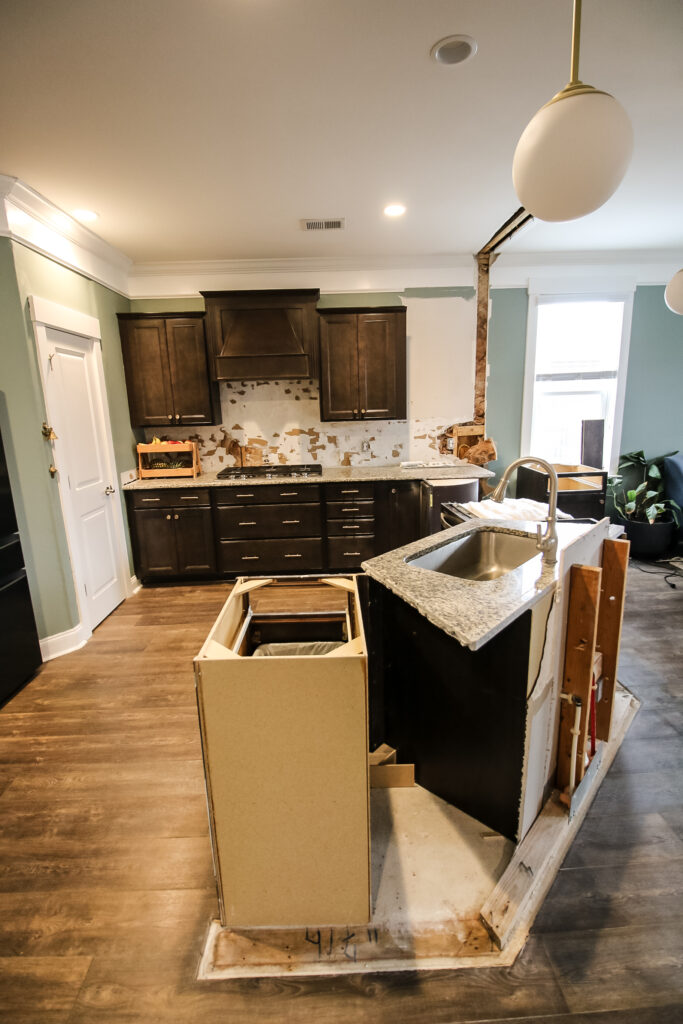
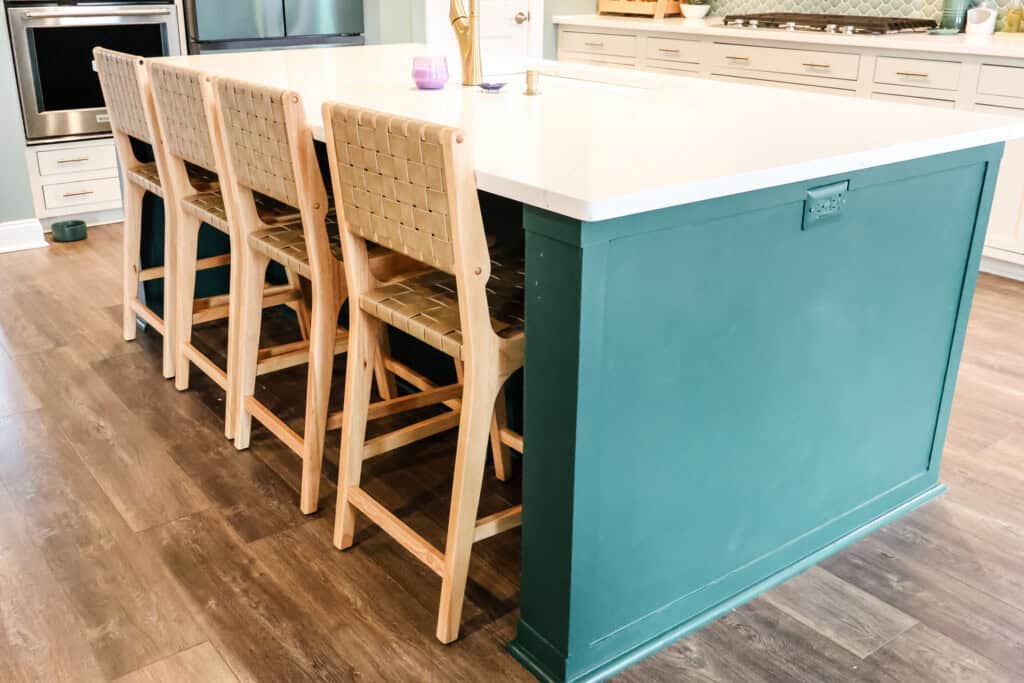
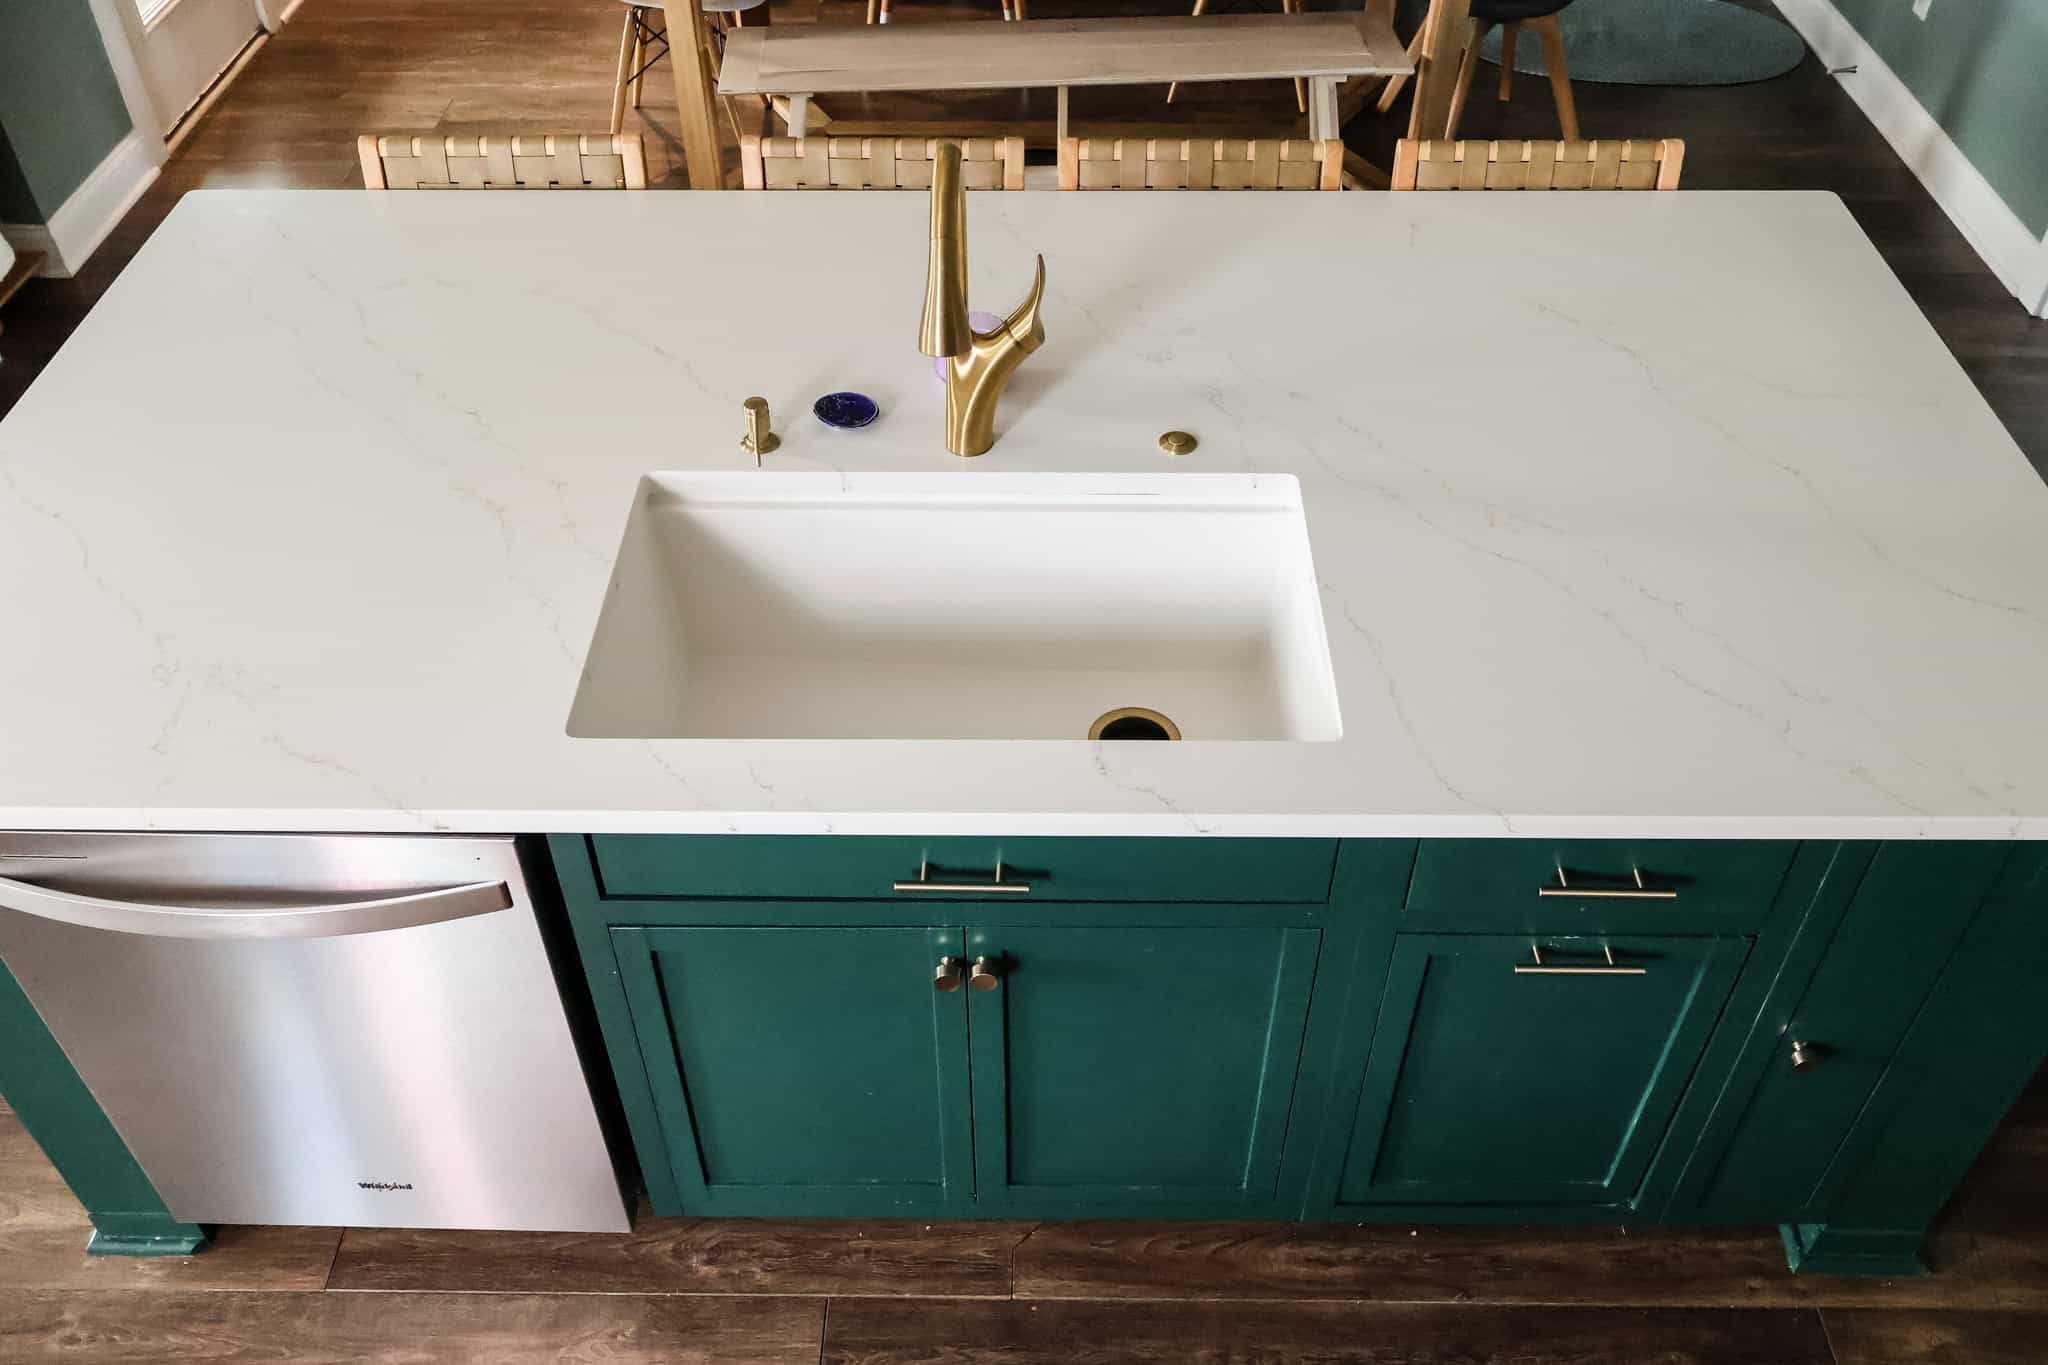
DIY island
I also built our new massive kitchen island by myself too. This is actually a pretty simple design for such a large project.
This island is essentially just a big I-shaped frame. I built two short frames for the sides and one longer one for the middle out of 2x4s, then wrapped them in plywood.
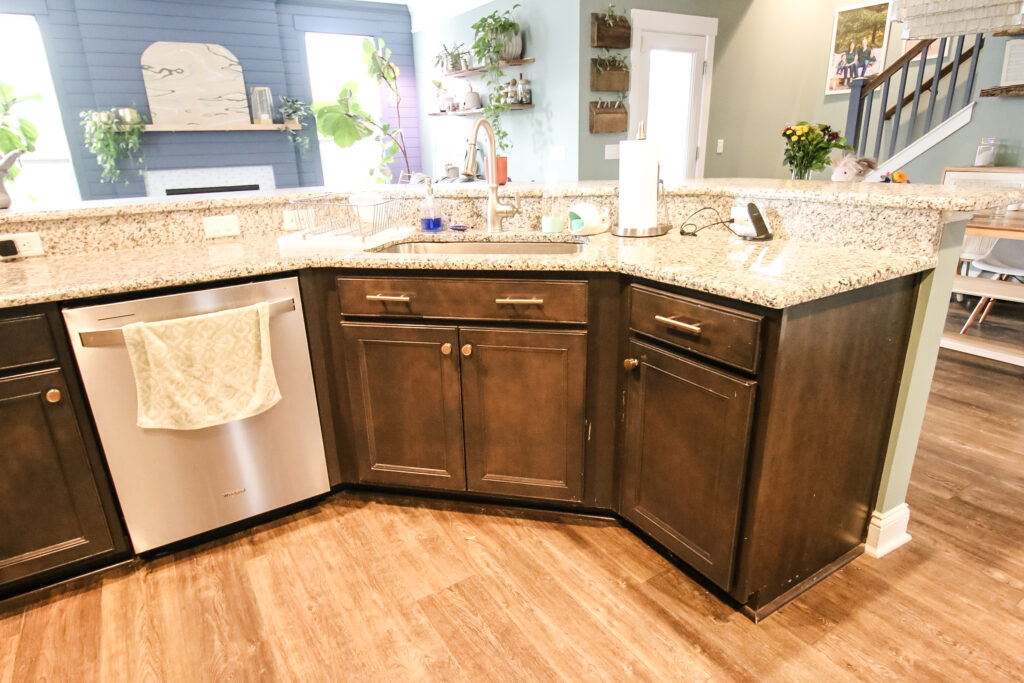
On one side, it's left open for the barstools that we got, and the other side has our dishwasher and the old sink cabinet and trash can cabinet.
I did build a slim cabinet on one end to fill the gap (that we now use for cutting boards) and we got a new white sink and a gold faucet.
If you want to build all the cabinets, range hood and island from my kitchen for your own kitchen, make sure you grab my full kitchen woodworking plans bundle! 👇
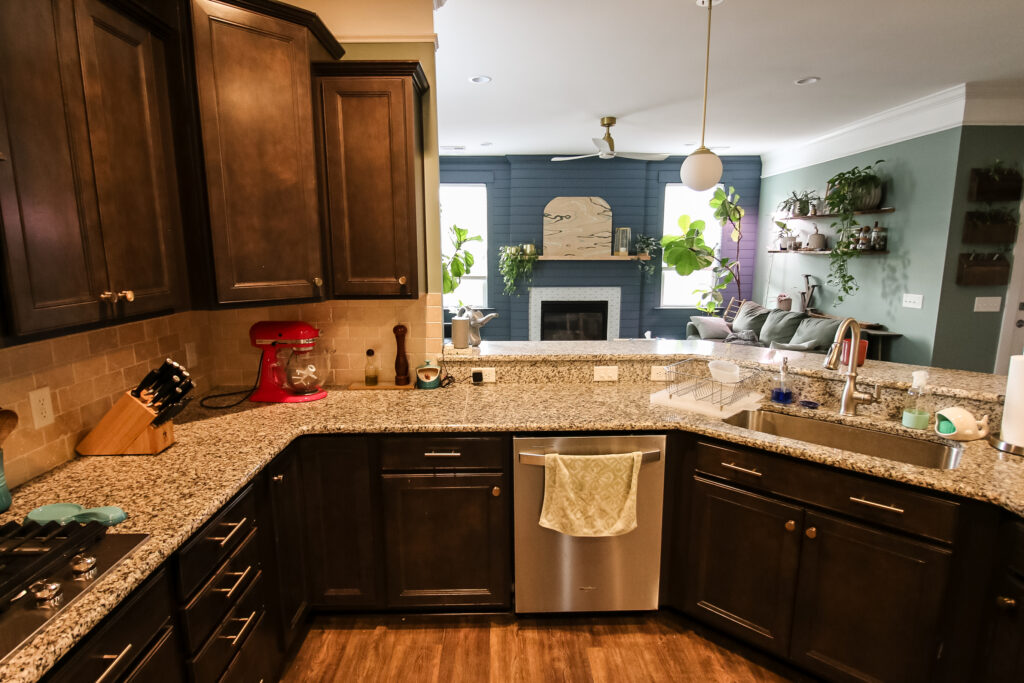
On top of the island and the base cabinets on the wall, we had a gorgeous white countertop installed that had just a slight amount of veining.
We love this countertop (even though our first ones were stolen) and love that we chose quartz over granite for our countertops!
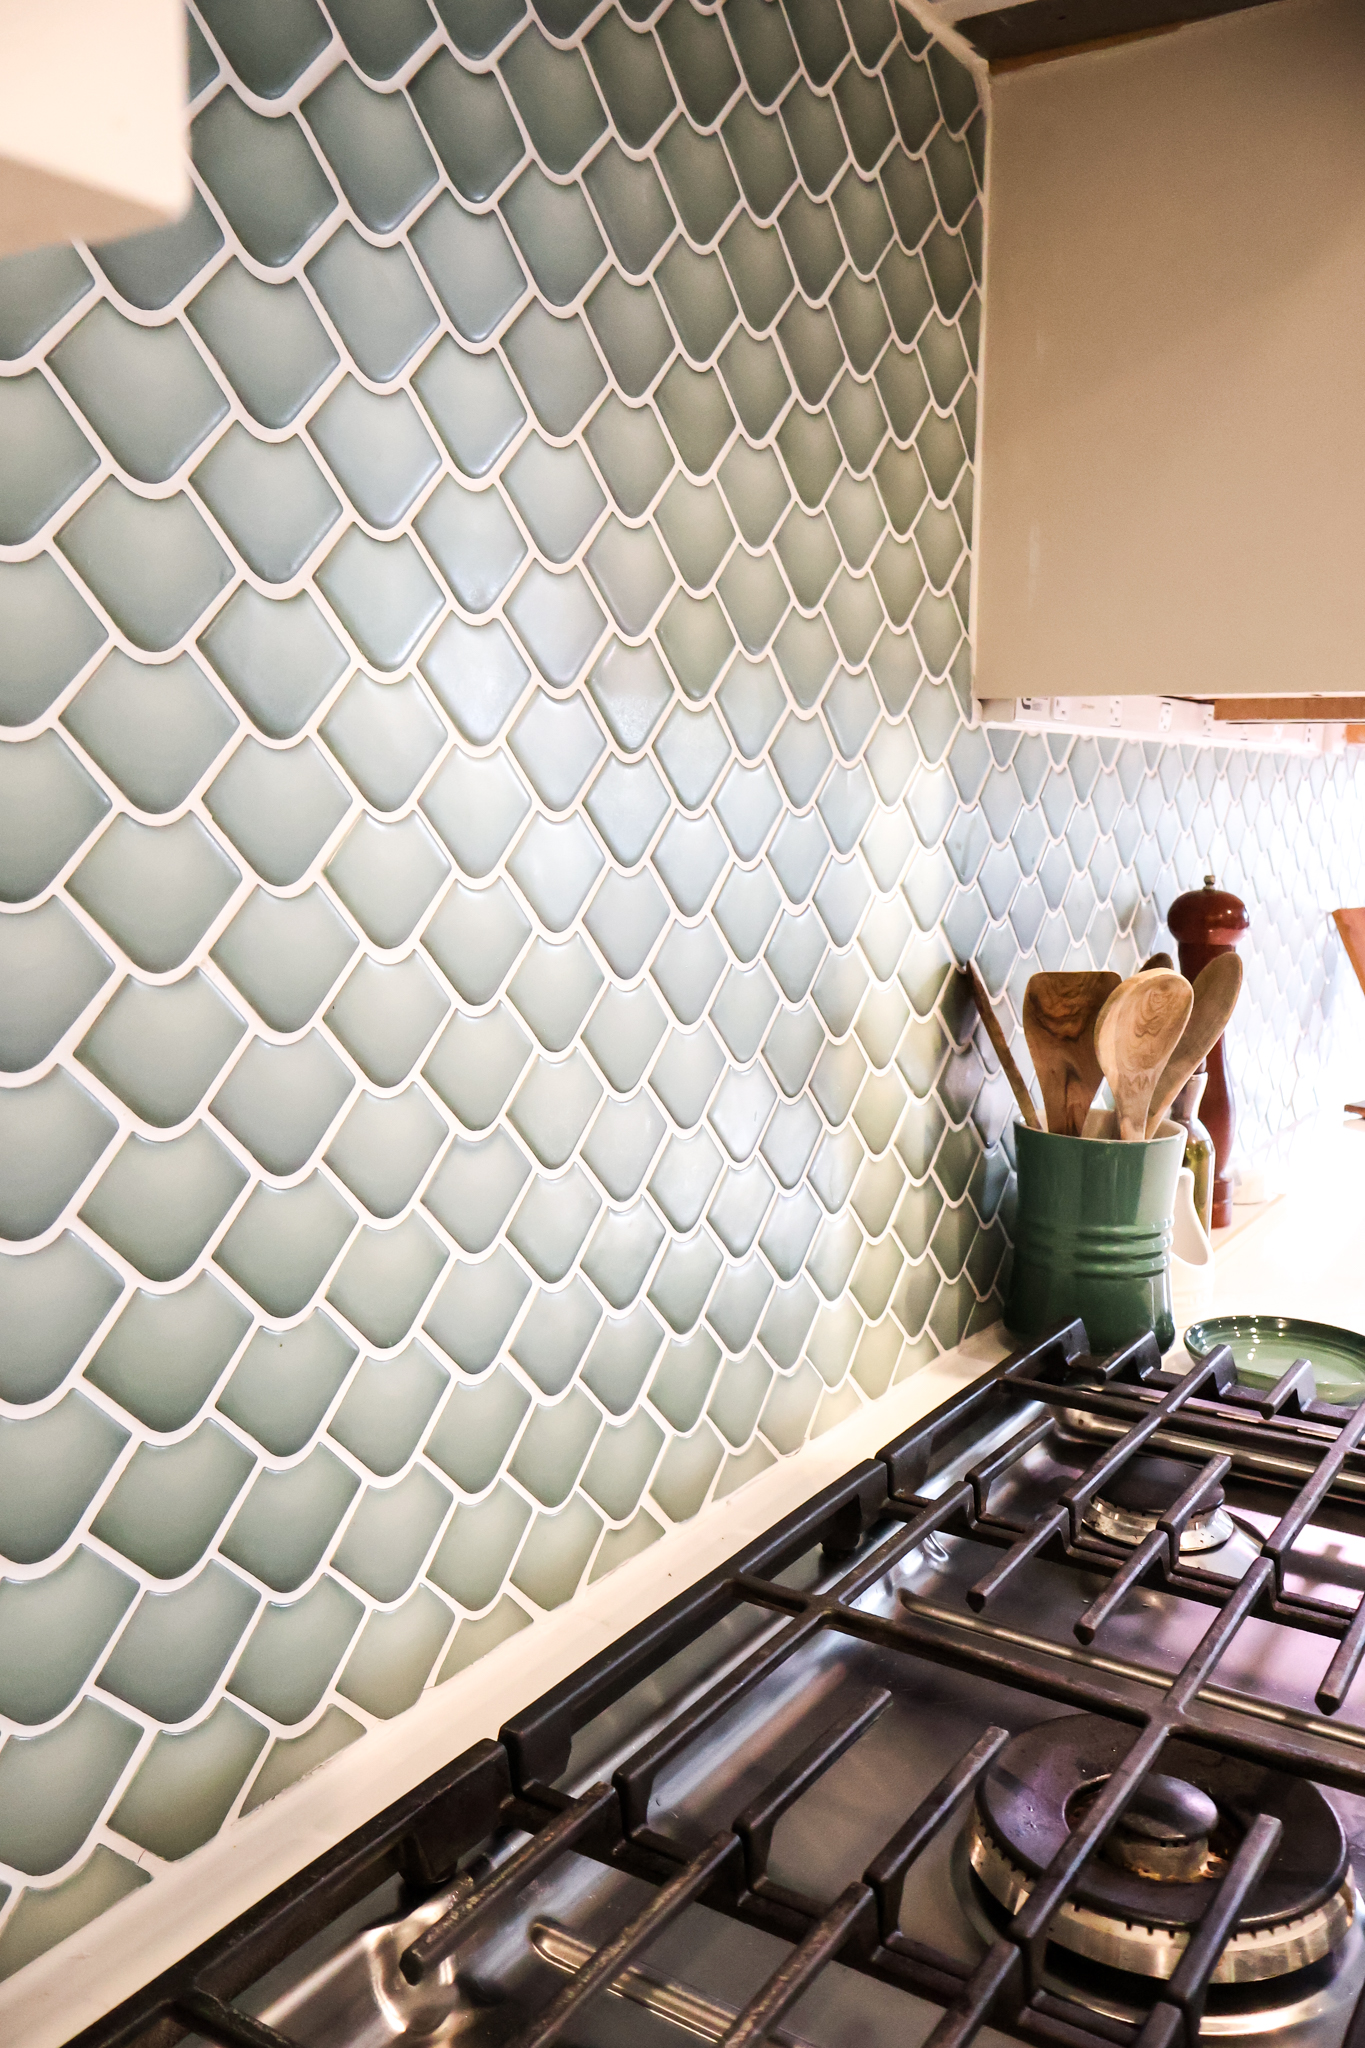
Backsplash installation
The backsplash we chose for our kitchen is not a white subway tile like everyone would think. Again, we went with some color and texture.
We chose this beautiful mermaid scale pattern tile sheet from Tile Bar that has several tones similar to the wall color in our gathering area. Plus we liked the pattern and that it was in sheets.
To install it, we tried using Musselbound Tile Adhesive Mats and the process was much cleaner and faster than using mortar.
You'll notice that we don't have any outlets on the kitchen wall now either, making it much faster and easier to install the tile. More on that in a minute.
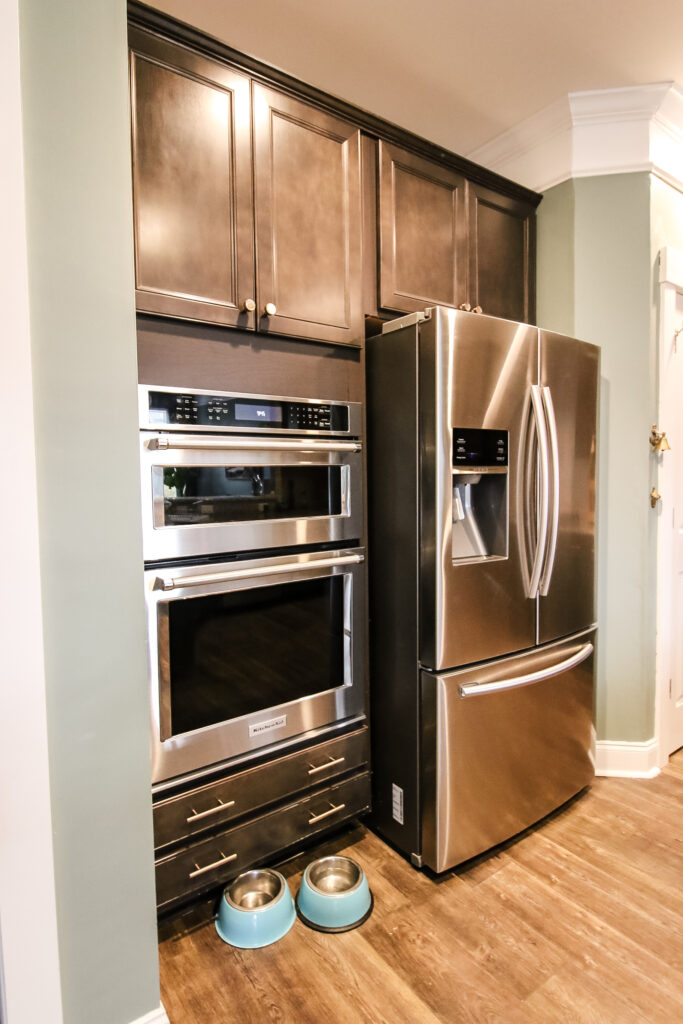
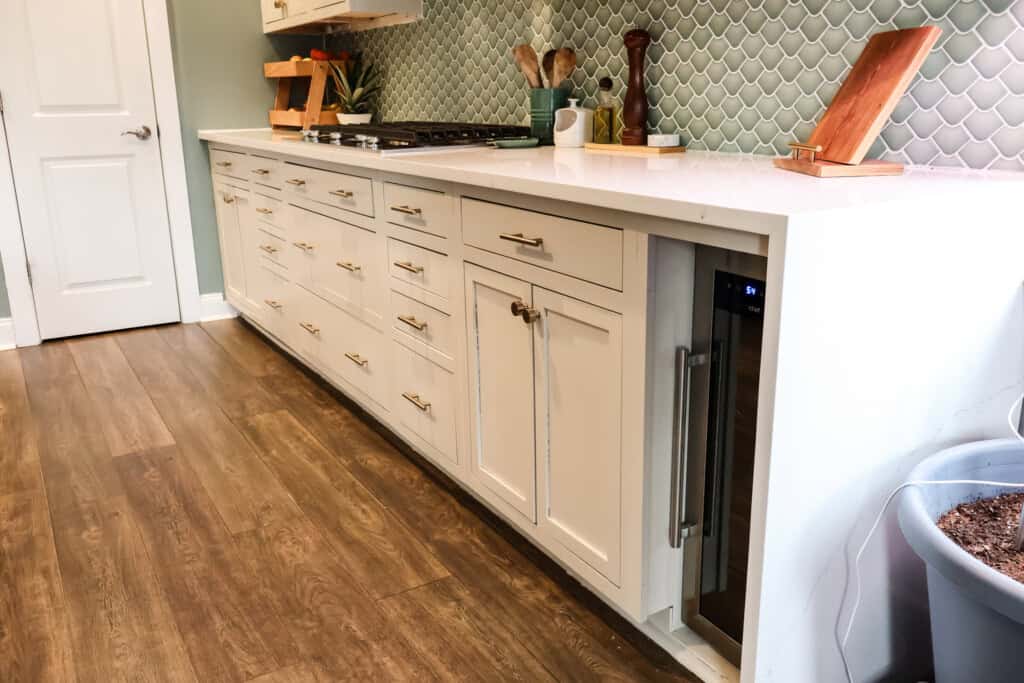
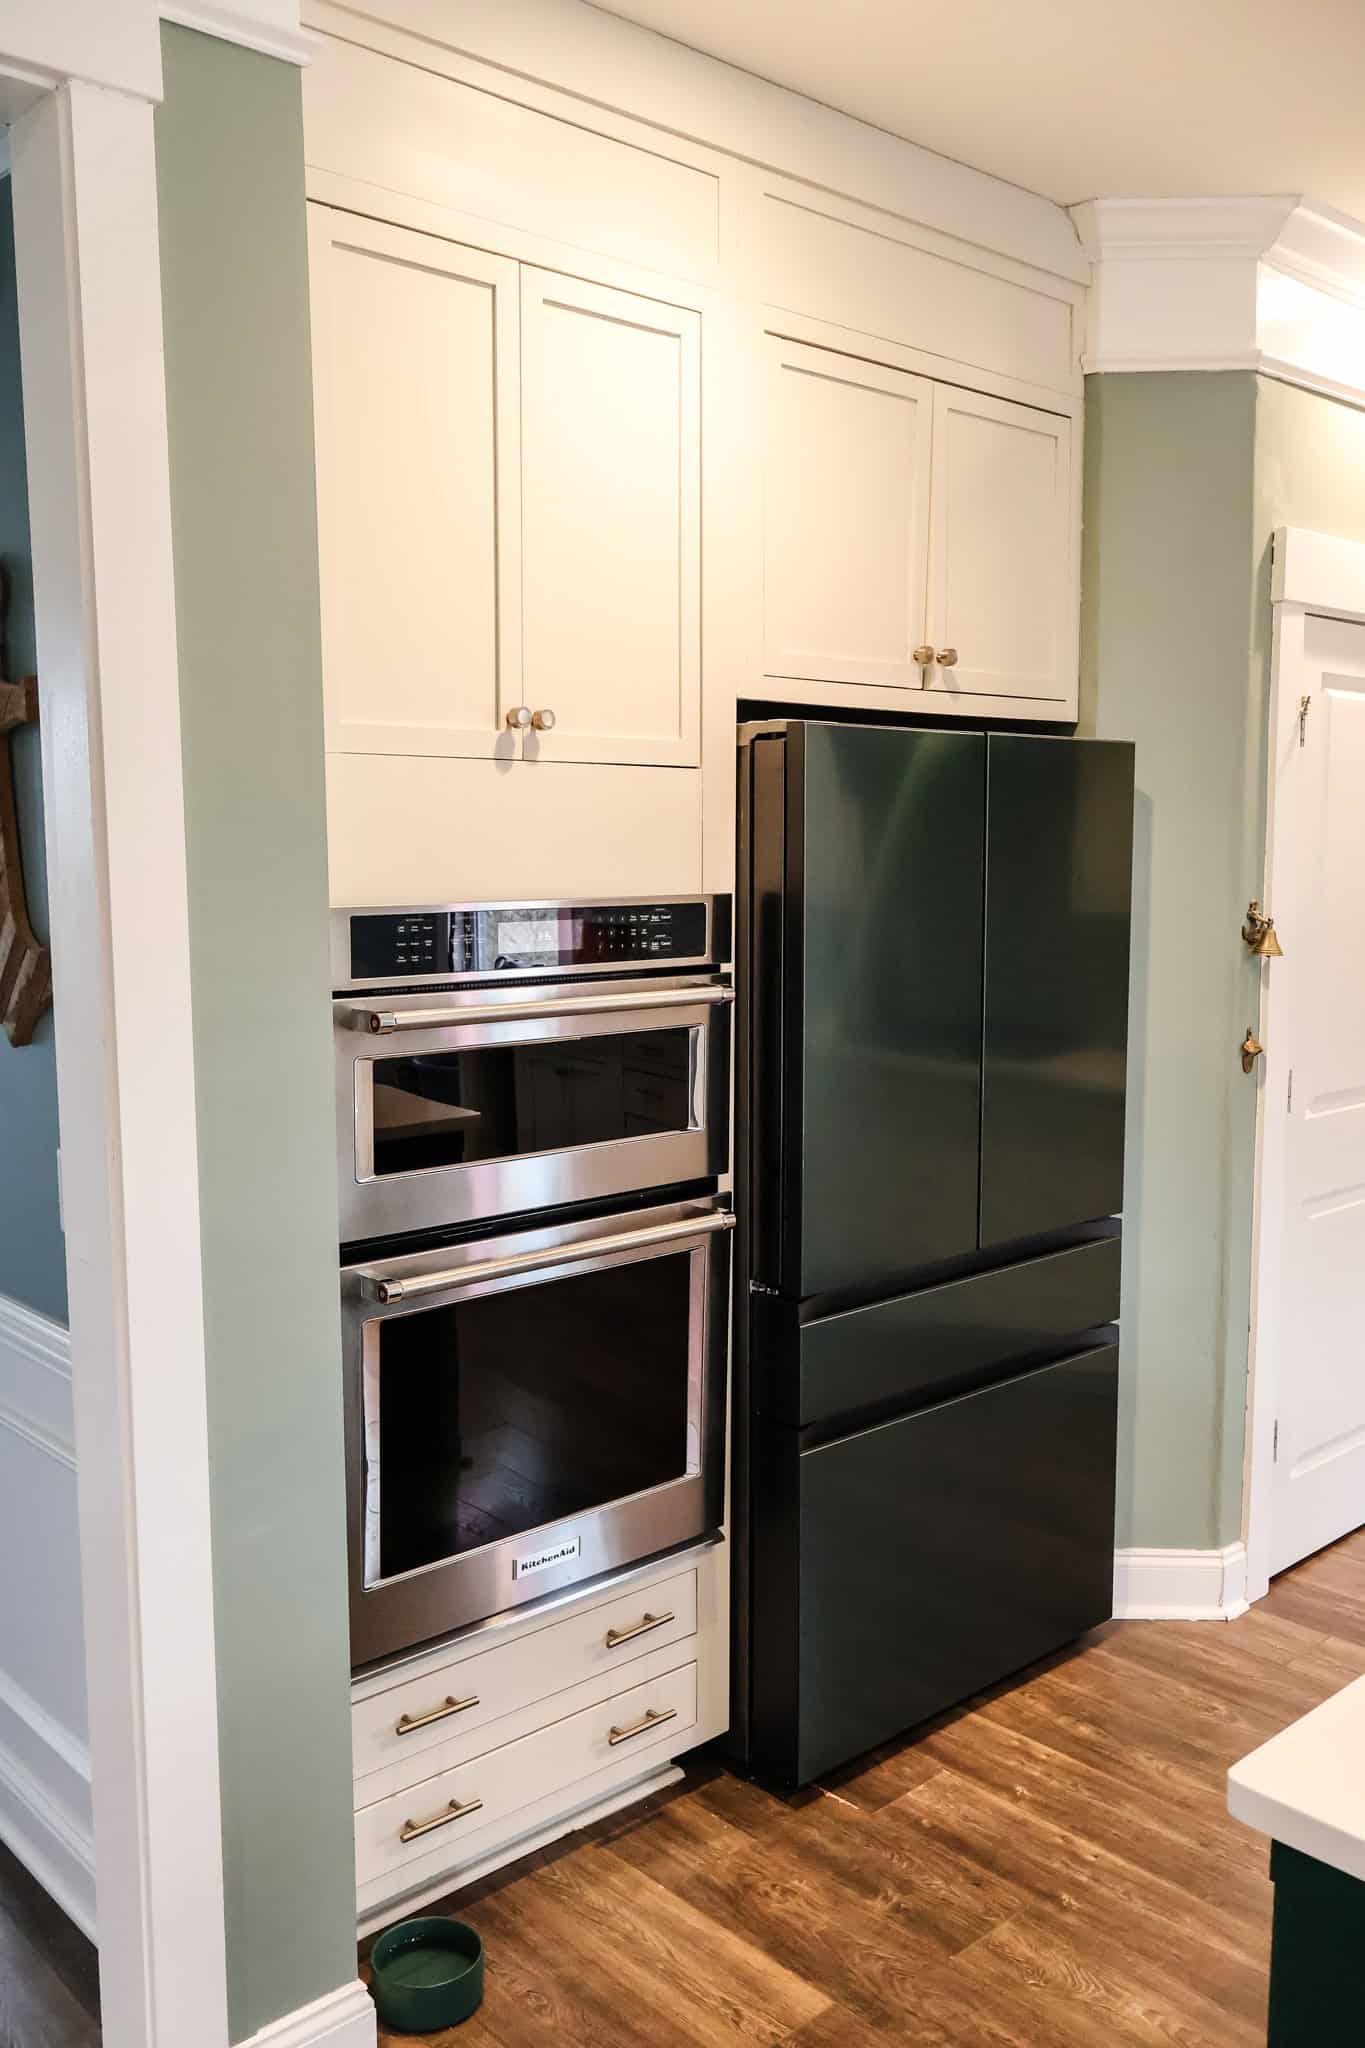
Bump out fridge cabinets
The last big part of the kitchen renovation was saved for last, which was bumping out the cabinets around our fridge to give the fridge a counter depth look.
Everyone online said this was a bad idea and we should have just bought a counter depth fridge (which actually have way less space in them) or cut out the drywall behind the fridge and pushed it in there.
That idea is wild, because that's where the electrical and plumbing are for the fridge - not to mention all of the water coming down from our second floor.
So I just took all the cabinets down, pulled out the massively heavy oven (thanks to my buddy Scott), built a 2x6 frame and attached it to the wall, then reattached all the cabinets and took them to the ceiling. Voila.
Hidden custom kitchen upgrades
The best thing about a DIY kitchen renovation is you can do whatever you want and add in whatever little upgrades you want to.
One of my favorites is how I mentioned earlier we don't have outlets on our back kitchen wall.
That's because we had the electrician install these outlet strips right underneath the cabinets so you can't see them.
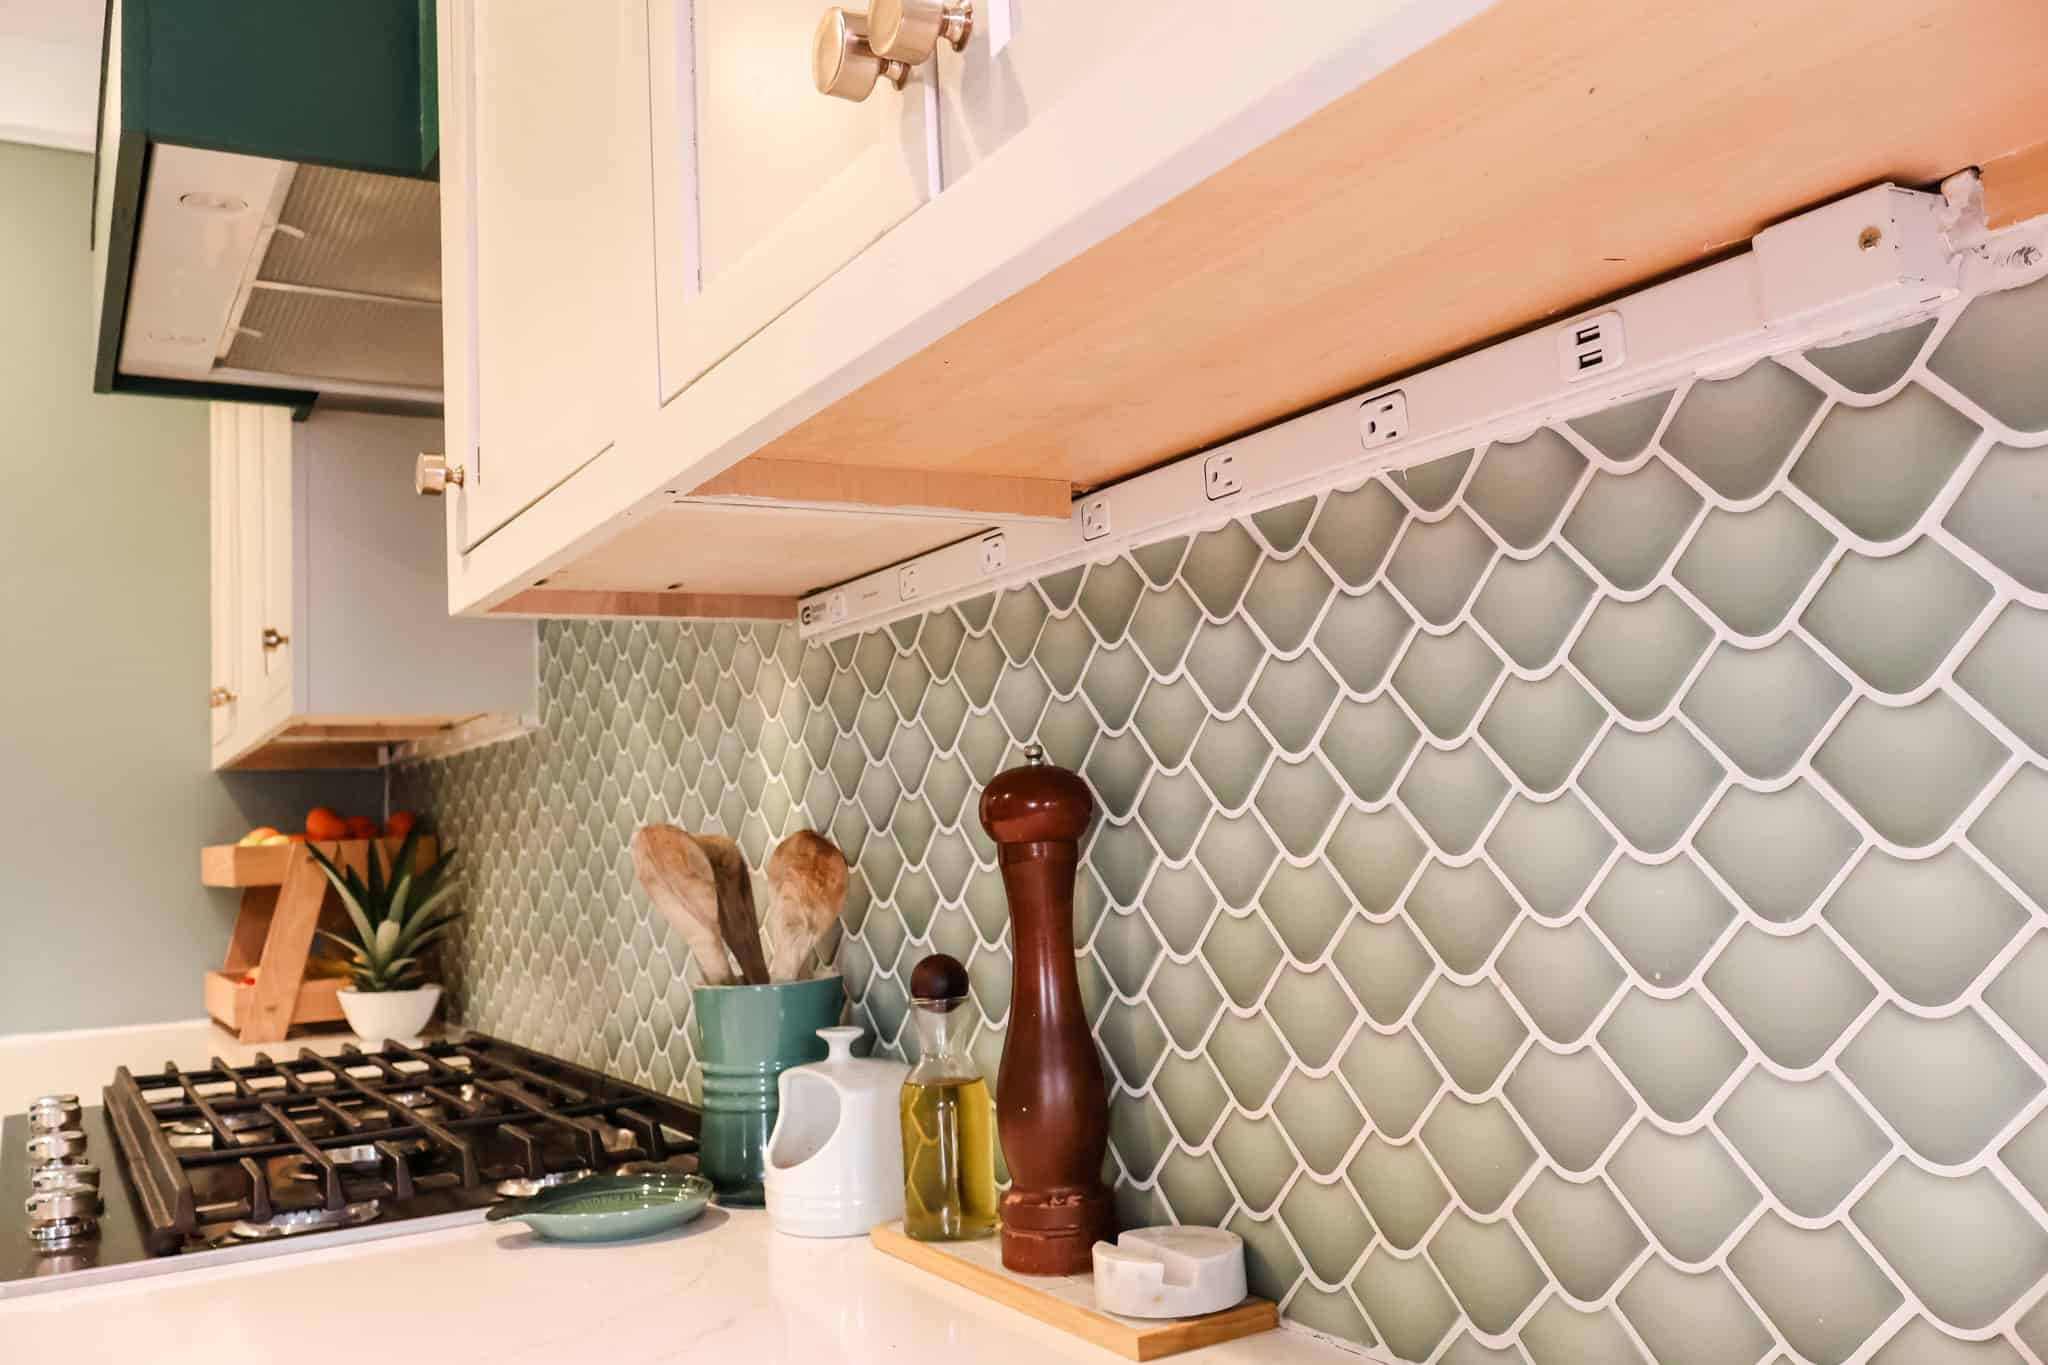
Another easy upgrade is the push button air switch for our garbage disposal.
This goes into the countertop so you can just push a button while washing dishes to turn on the disposal. No need to reach into the cabinet below!
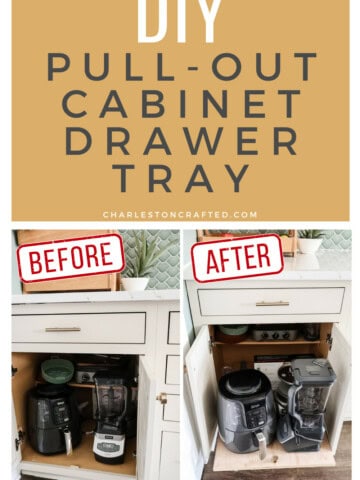
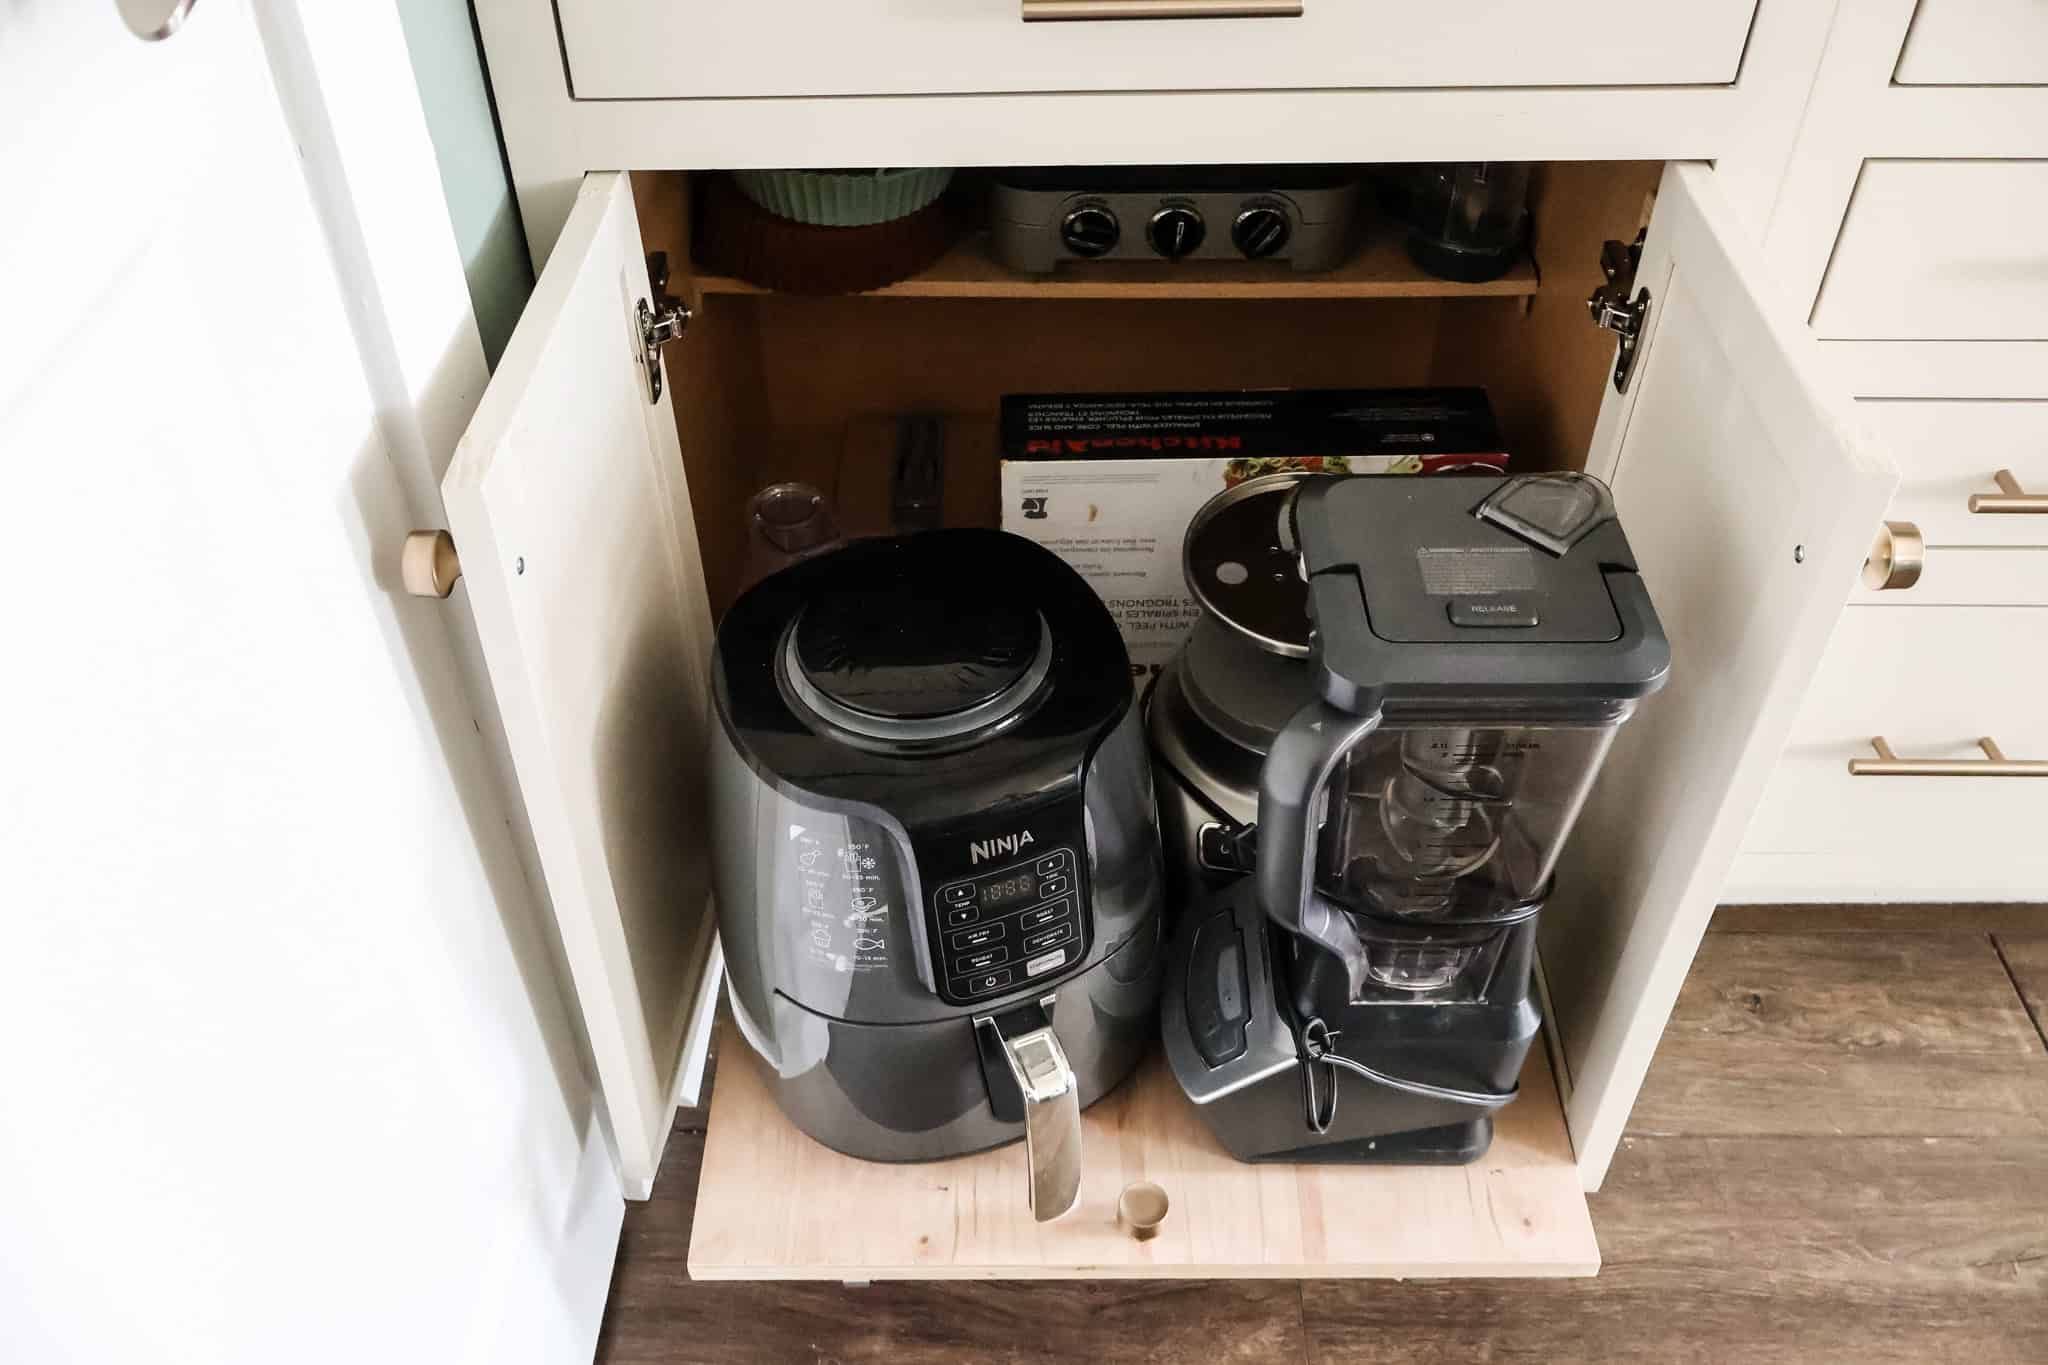
Another really great upgrade is the pull out shelf I put in each of the base cabinets for our appliances.
I just added drawer slides and then a piece of plywood that glides out smoothly. You can see my process in this video!
DIY kitchen renovation budget
I had this really great spreadsheet in place for tracking our DIY kitchen renovation budget and did a really good job for a while. And I did track all the big things.
Honestly, towards the second half of this project, some of the repeat runs to Home Depot for smaller one-off things started to get missed.
But I have a pretty good idea of what it cost, so I'll break it down here. Again, everything was done by me, except for the plumbing, electrical and counters, which (go figure) were the most expensive parts. That's why I do things myself!
- Lumber- $600
- Flooring- $187 (just patching)
- Paint and painting supplies- $115
- Hardware (drawer slides, hinges, handles, etc)- $242
- Drywall- $14
- Tile and supplies- $935
- Faucet- $240
- Wine fridge- $215
- Outlet strips- $65
- Sink- $400
- Garbage disposal- $100
- Range vent- $159
- Countertops- $5,760
- Plumber- $1,200
- Electrician- $1,025
- Total- $11,255
Completed DIY kitchen remodel
In the end, this DIY kitchen remodel turned out incredible if I do say so myself. It was such an incredible and difficult journey, but I learned so much.
A lot of the skills I put into place during this remodel were things I knew how to do, but a lot of them I had to look up or I just did some trial and error.
But in the end, everything looks great and is even better because I did it myself.
I hope you love this DIY kitchen remodel and that it inspires you to do one yourself!

Looking for something?
We've been doing this since 2012 so we have a LOT of blog posts!
Search stuff like: Ceiling Projects | DIY Plant Stands | Thrift Flips

Hey there, I'm Sean, the woodworking enthusiast and builder behind CharlestonCrafted.com! Since 2012, I've been sharing the magic of turning raw materials into beautiful creations. I love teaching others the art and satisfaction of woodworking and DIY. I try to inspire fellow crafters to make something extraordinary out of nothing at all.