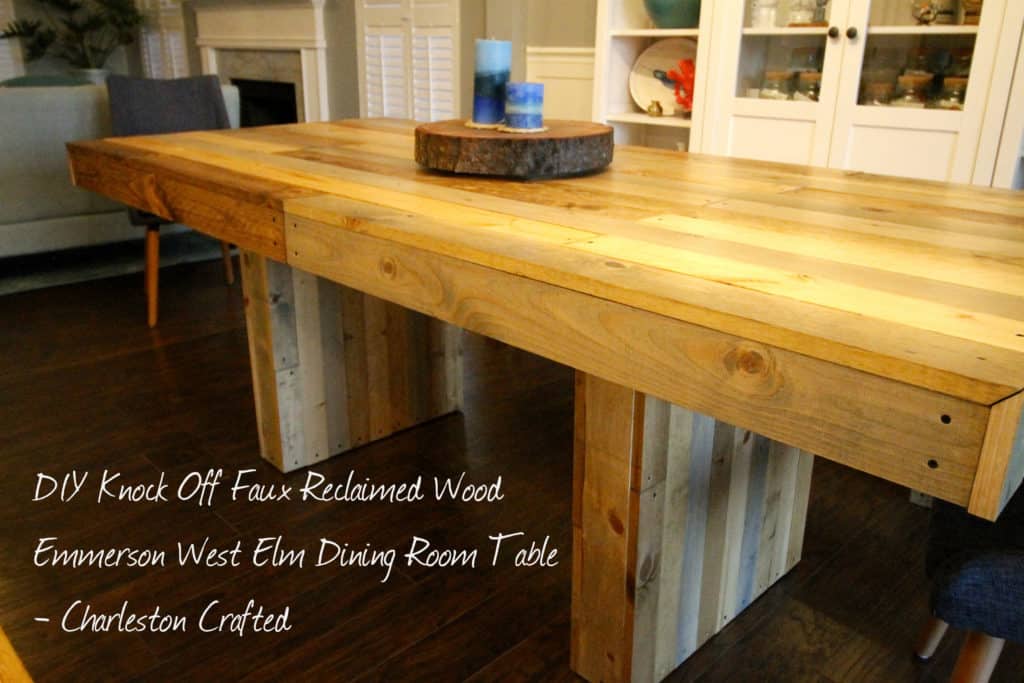
Check out how I built this knock off version of the West Elm Emmerson dining table because I didn't want to spend the money to buy it!
What happens when you find the perfect piece of furniture, but that piece of furniture costs $1,300? Ummm, you just build a knock off version, duh. Ain't no way we were paying $1,300 for a table.
That's what happened when Morgan saw the Emmerson Reclaimed Wood dining room table at West Elm. She loved the look of it and the modern reclaimed wood style, but I knew there was no way I could justify that expense.
But honestly, it didn't look that hard. So, I decided to create a DIY knock off version of the West Elm Emmerson table and, turns out, it wasn't that hard.
Interested in building a DIY version of the West Elm Emmerson benches? We built those too and they go perfectly with this West Elm Emmerson Table DIY knock off.
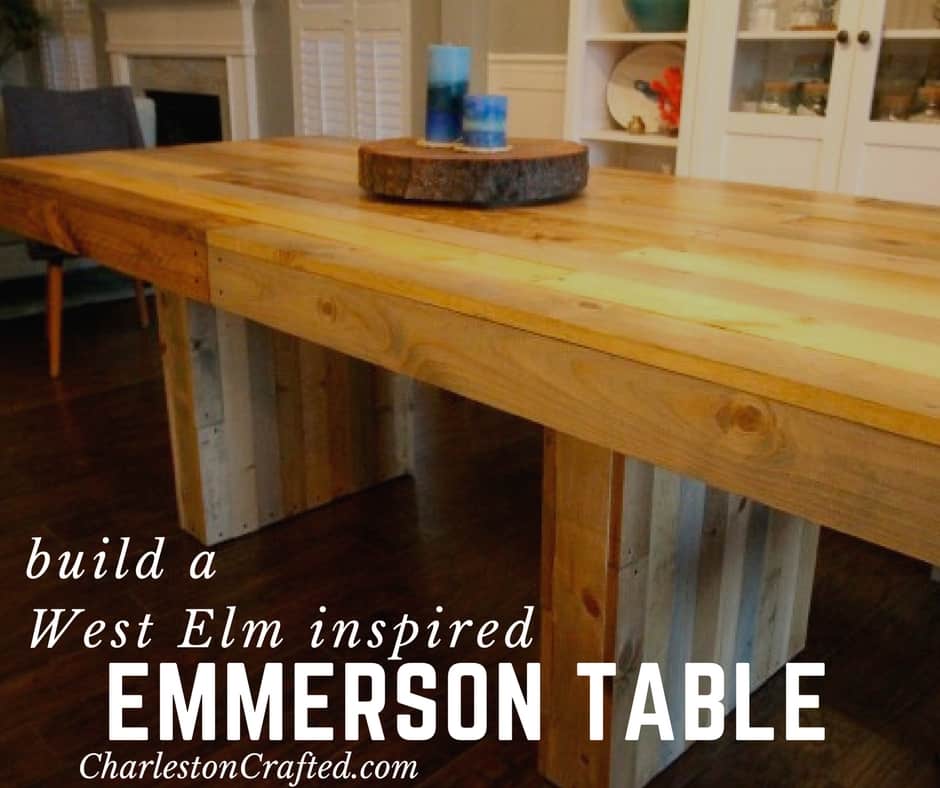
West Elm Emmerson Table DIY Knock Off
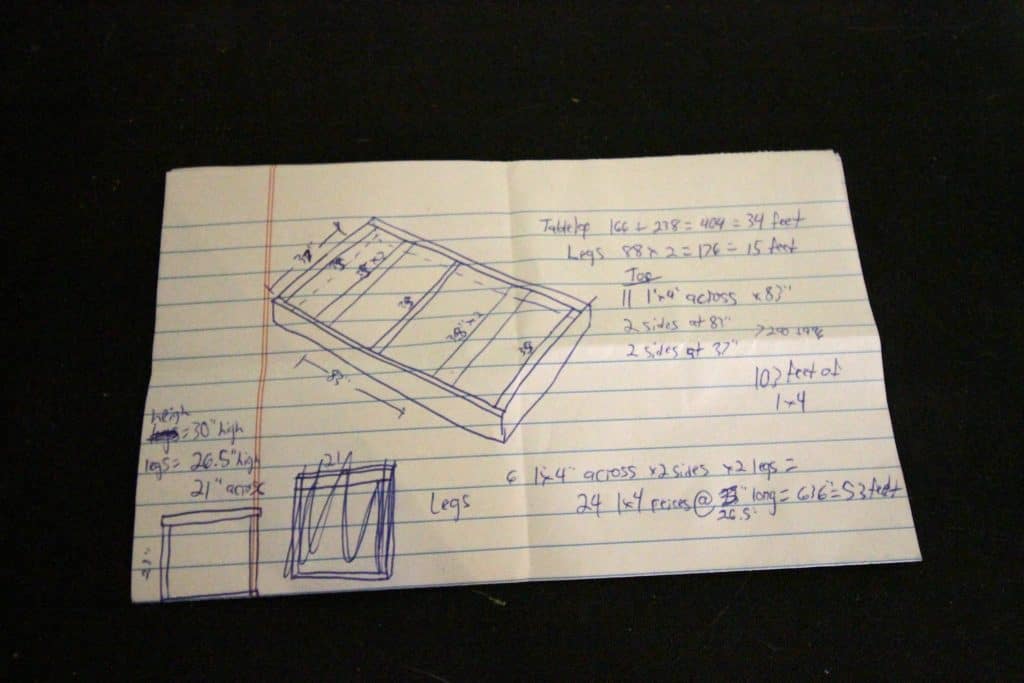
Before this, the most extensive wood project I had undertaken was our sliding barn door, but this was basically a door with two legs. The hardest part was the design.
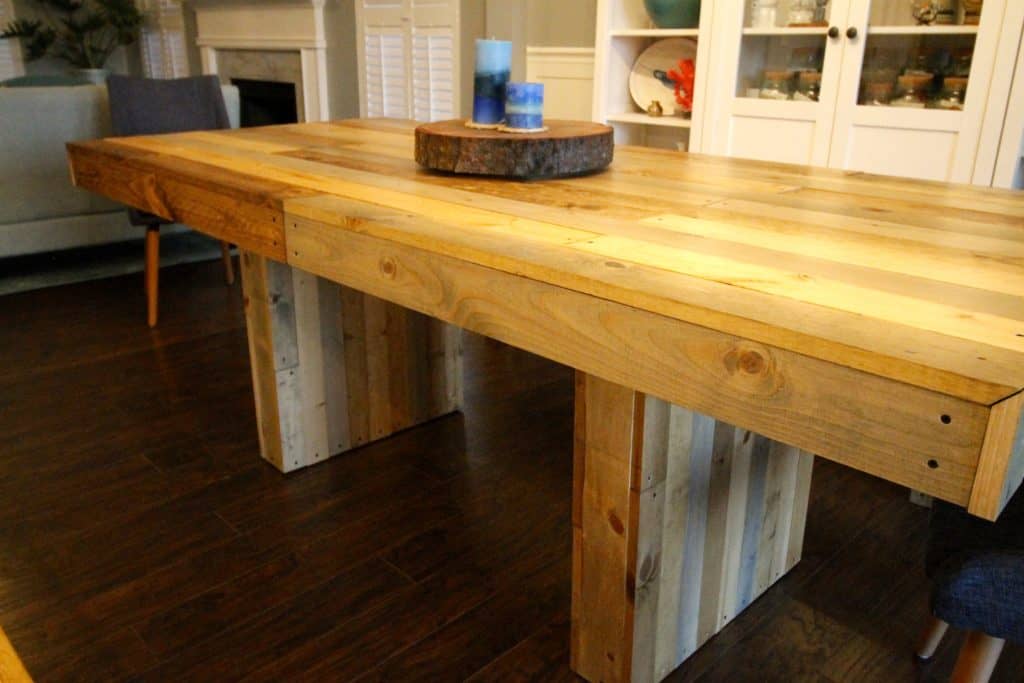
We designed it to be three different frames (one for the top and two for the legs) that would be made out of 2x4s and then overlaying 1x4s to serve as the top and sides.
Other than that, all we had to decide as the size we wanted. We measured out the space in our dining room and opted for 36" wide, 83" long and 30" tall.
Our dining room is basically a walkway from our front room to our sun room, so we wanted to make sure it wasn't too big that it would be in the way, but would also fit up to eight people.
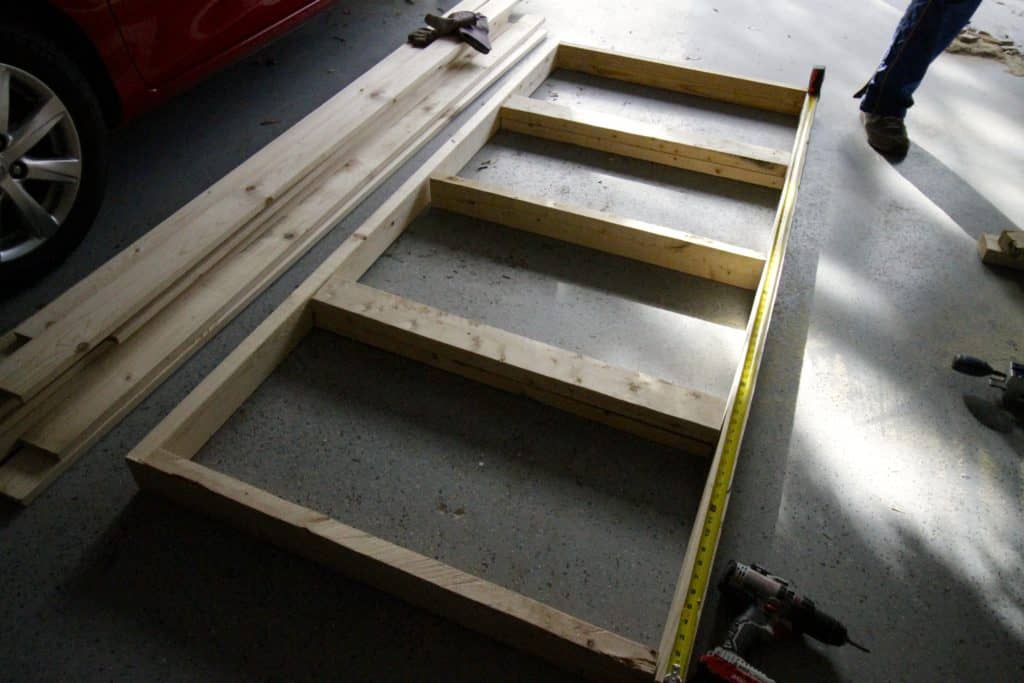
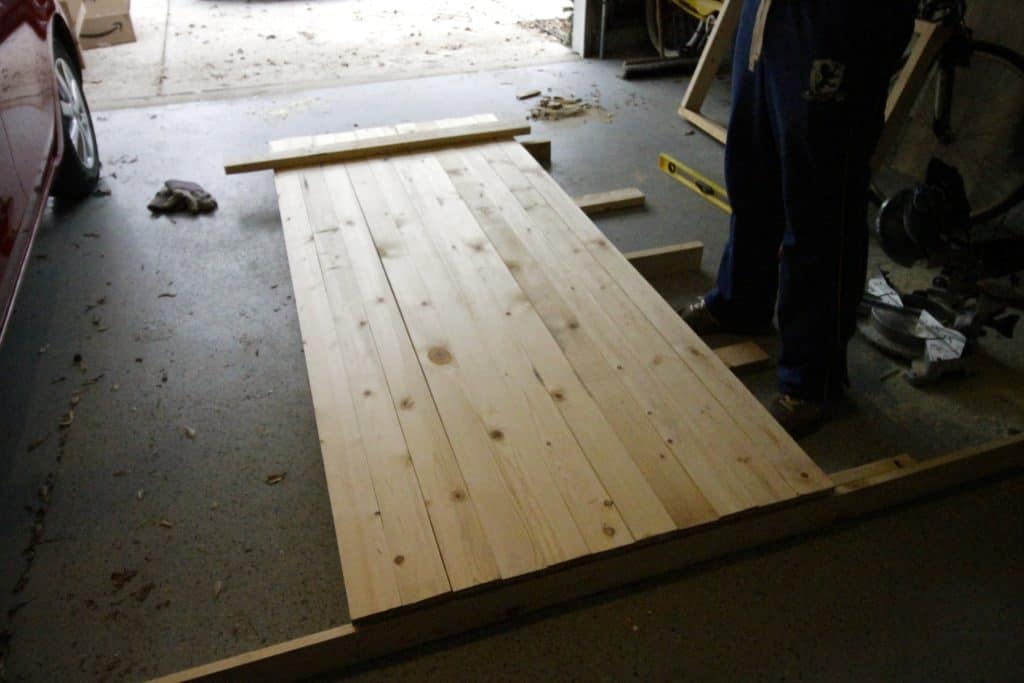
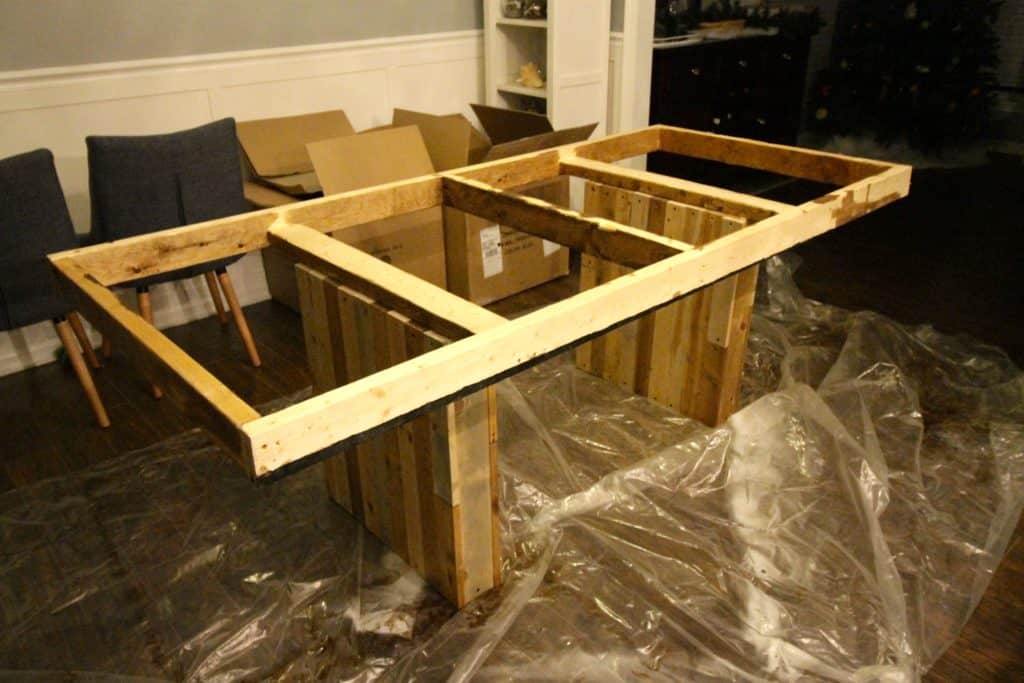
Step one: building the frame
I started out by constructing the frame for the table top. I used 2x4s to build the frame to the specifications of length and width we wanted. Then, I used support beams across the middle as well to make it solid.
The main thing here was that I laid the two support beams on the sides flat, so that I could later attach the legs directly to those support beams.
That means we had to do a double layer of those support beams. Aka, this table top is solid AF.
Next, I made the legs out of 2x4s as well and just built them as a square box frame. For all of these, I used 2 ½ inch deck screws to secure the wood in place.
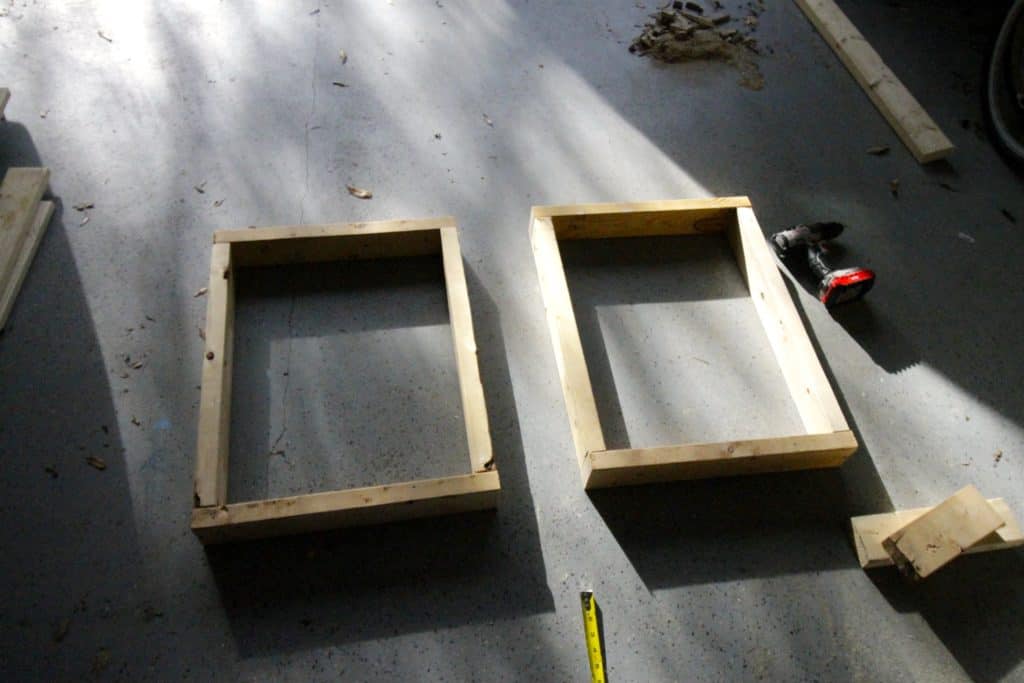
We tested it out by setting the table top on the legs and it was the perfect height and looked good. So, next was the painful process of making a butt ton of cuts on the 1x4s for the table top.
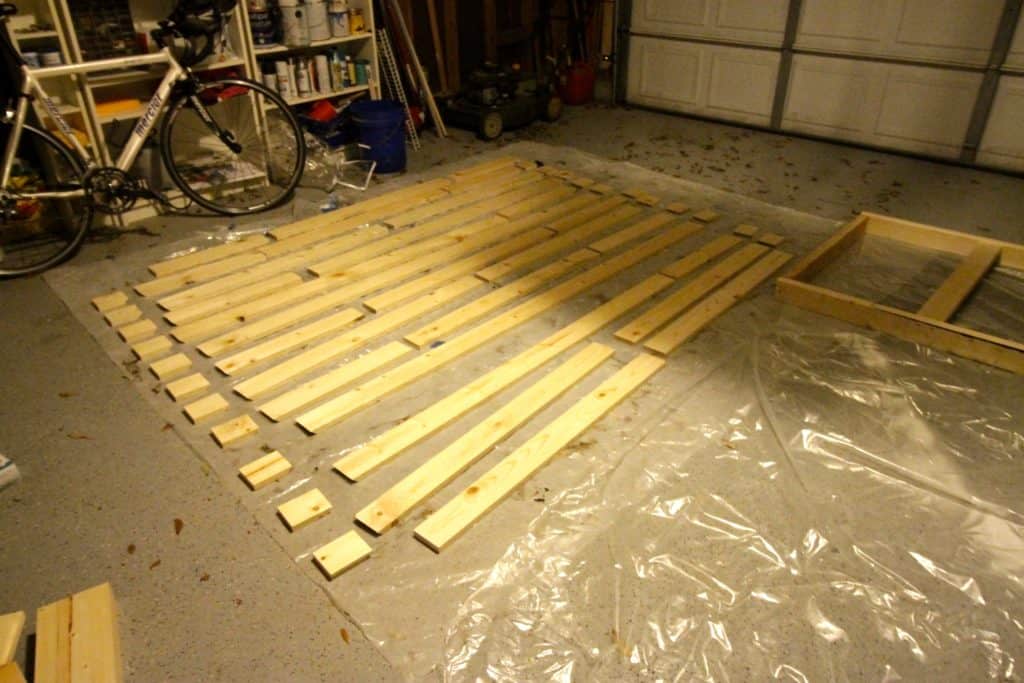
Step two: making the table top cuts
We wanted to match the reclaimed wood look, meaning the pieces needed to be cut to different lengths and grains and (eventually) stained different colors. So, we laid out our wood on the table top frame and then marked where we wanted the cuts to be.
Then, I had to pick up each piece of board and make the cut where we wanted it and then set it back exactly in the same spot. Each cut of wood needed to rest on at least two studs of the frame so it wouldn't flop around, so that was the only limiting factor.
Each line of wood got a mitered 45 degree cut on each end of the table and then whatever cuts in the middle were straight. It took a while, but they all got done. Then, we had to cut short pieces of wood for the sides that were all the exact same length (3.5 inches) from the end of the mitered cut to the flat cut on the bottom.
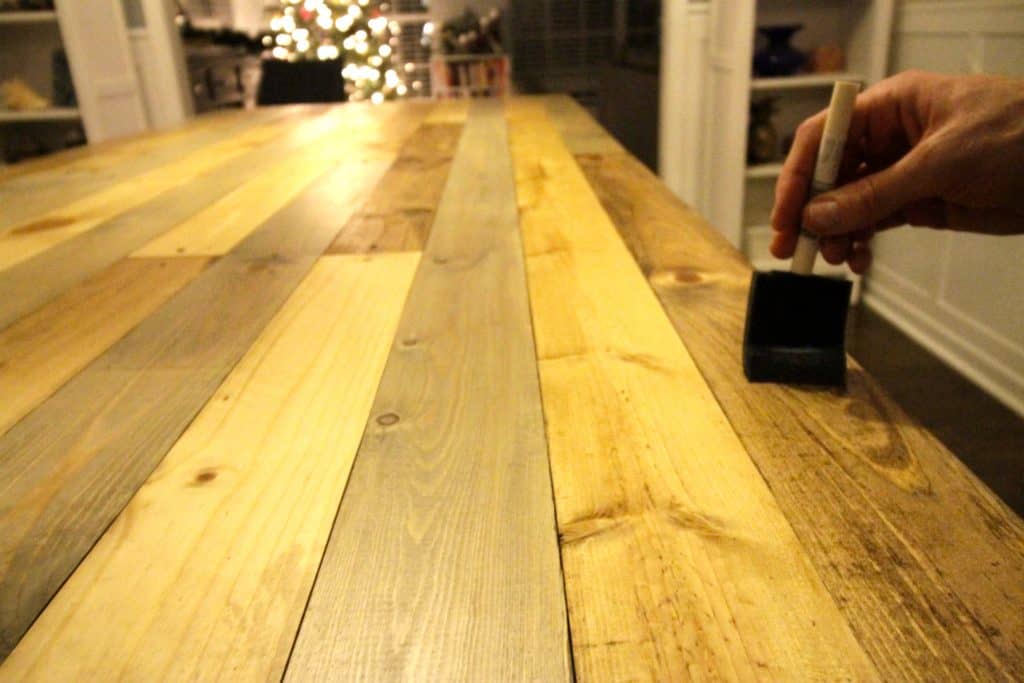
Step three: staining
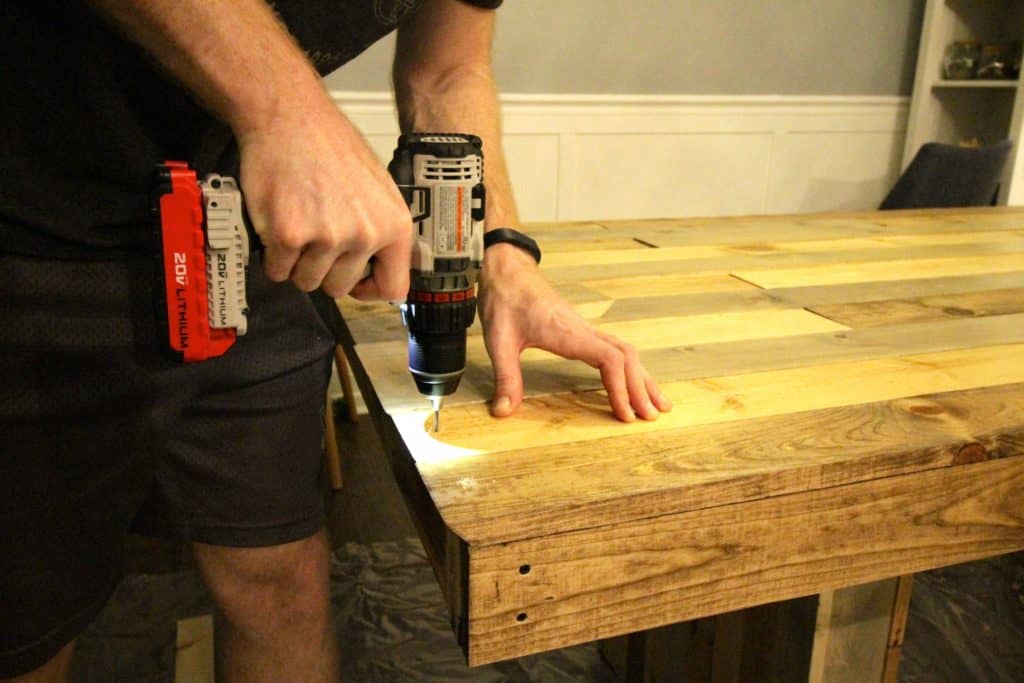
Once every cut was made, every piece of wood had to be stained in order to make this a modern reclaimed wood dining table instead of just one color. Morgan got four different colors of stain and we laid each board out in the order it was supposed to be in for the table.
She went around and stained each board a different color. It's pretty difficult to make something intentionally look random but she did a great job. Between the cuts and the stain colors, each board looks different.
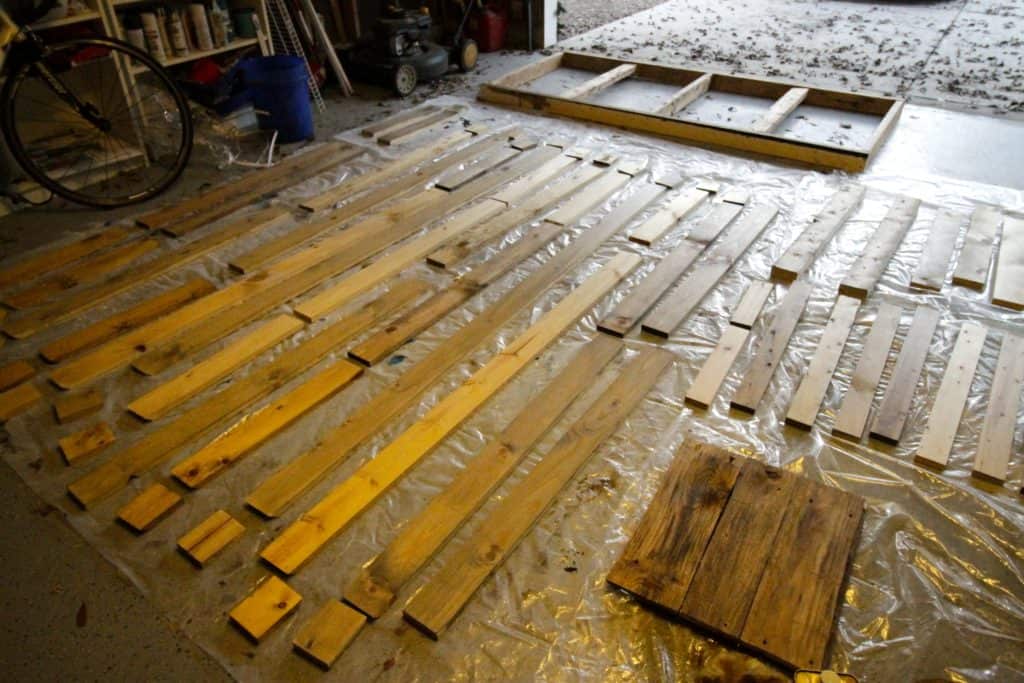
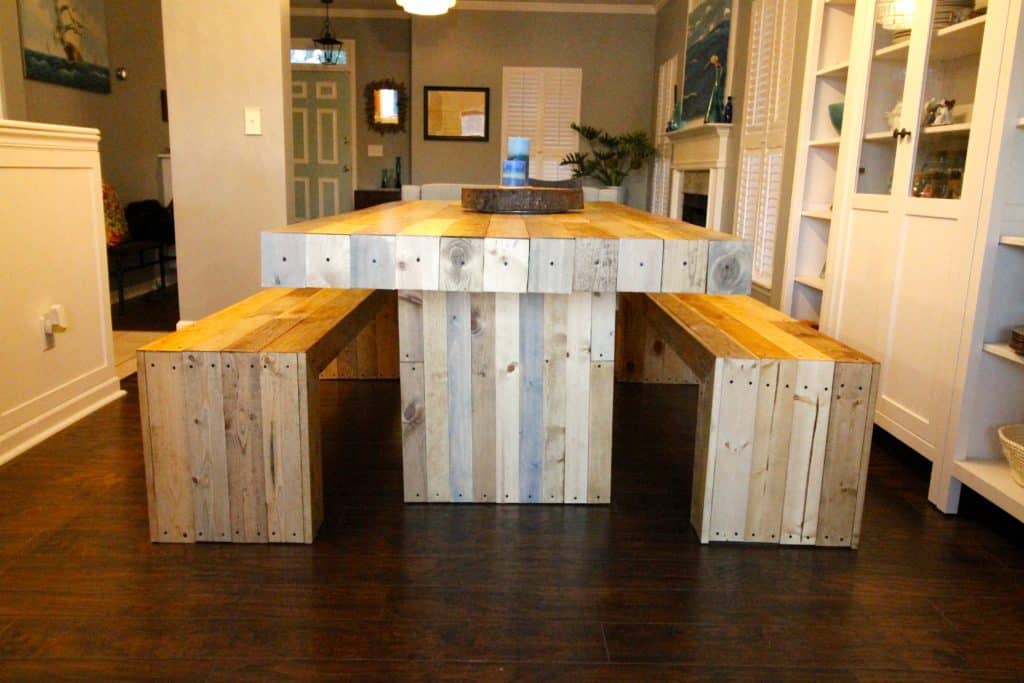
We also had to do the same thing for the boards for the legs as well. We used 1x3s for this instead of 1x4s, simply because to of the width of the legs and the calculations we had to make to make sure there were no gaps.
Step four: construction
We actually decided to bring the table inside to build it. First thing was to attach all the boards to the legs to make our legs finished.
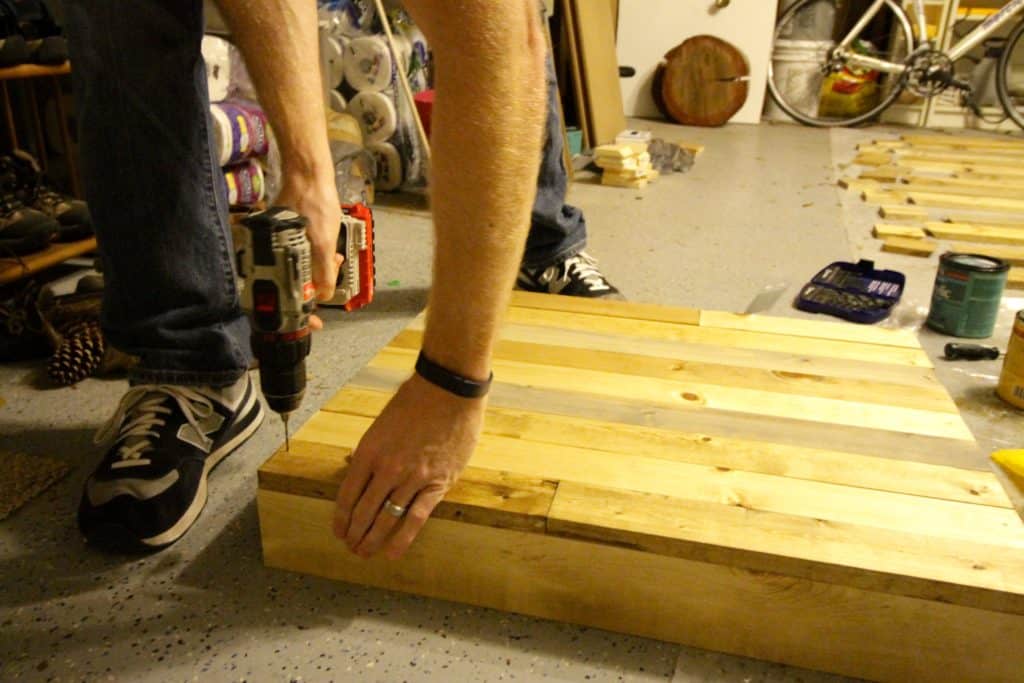
Then, we brought them in and set the table top on top of the legs and screwed the table top frame to the frame of the legs.
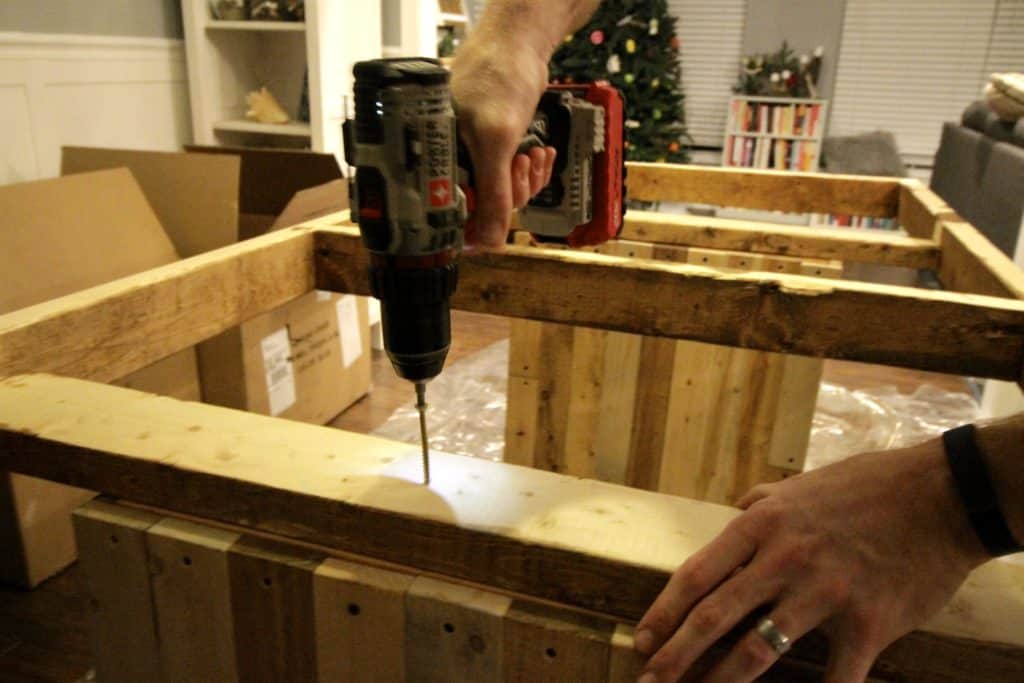
After that is when we added the second layer of stud supports on two pieces, making the legs stuck in place.
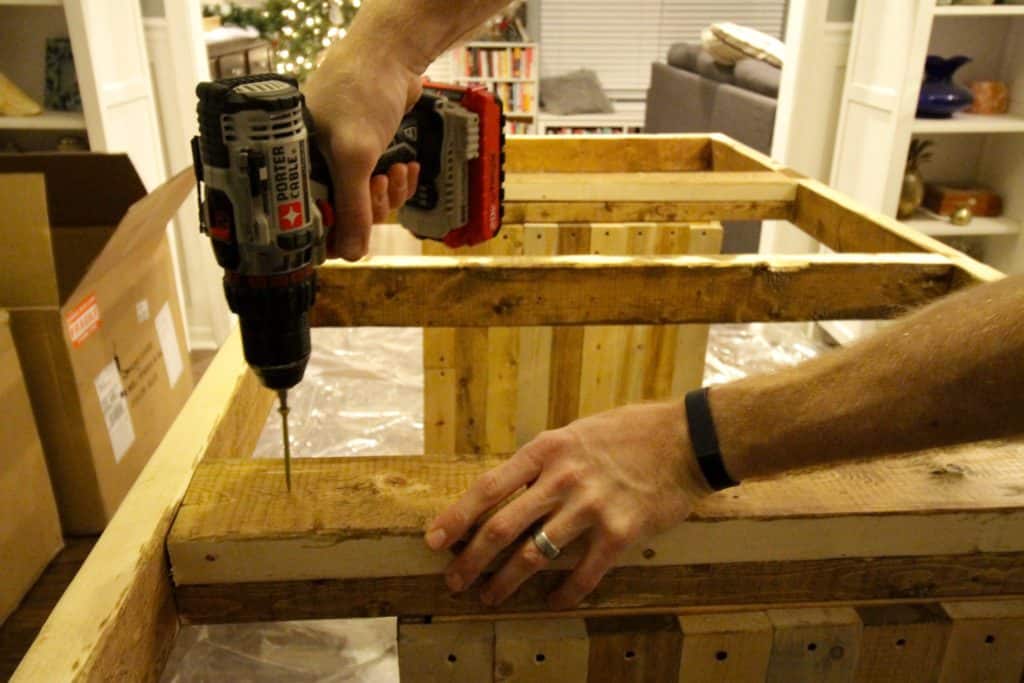
Finally came the the pieces for the table. We brought all the pieces in and laid them out on top of the table where they were supposed to go. We had to make sure they were in the same place as before in order to make sure the colors lined up as well.
From here, I drilled pilot holes for each spot I was going to drill a screw. This keeps the wood from splitting when you drill a screw straight in.
I used black cabinetry screws (the same ones I used for the barn door) to give it that rustic look like some old farmer dude had just thrown this together in his spare time. The top pieces were first, followed by the sides and the tiny end cap pieces.
After everything was screwed in, we did six coats of matte polyurethane to make sure the surface was protected. I think it turned out pretty nice in the end.
Knock off West Elm Emmerson dining table
In the end, the wood for this project cost around $250. Compared to $1,300 for the West Elm Emmerson Dining Table, I can easily justify the time it took to construct it.

Plus, we can now say that we built our own modern reclaimed wood table and it turned out great.
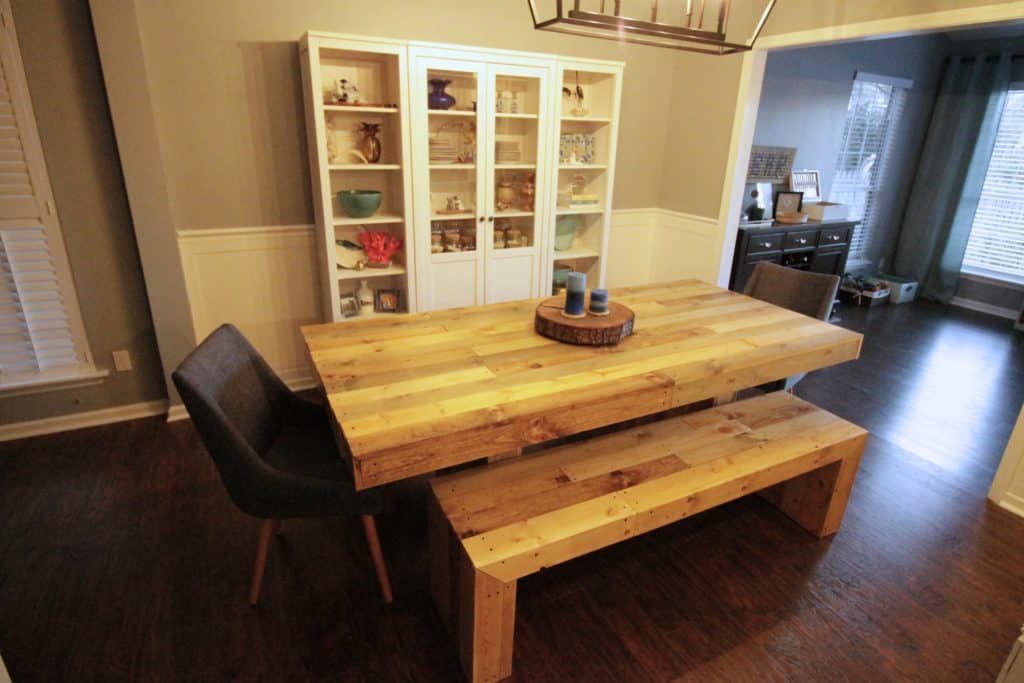
Check out the tutorial for how we built the waterfall benches to go along each side!

Looking for something?
We've been doing this since 2012 so we have a LOT of blog posts!
Search stuff like: Ceiling Projects | DIY Plant Stands | Thrift Flips

Hey there, I'm Sean, the woodworking enthusiast and builder behind CharlestonCrafted.com! Since 2012, I've been sharing the magic of turning raw materials into beautiful creations. I love teaching others the art and satisfaction of woodworking and DIY. I try to inspire fellow crafters to make something extraordinary out of nothing at all.


Ivory says
Wow, what a beautiful result. I love it! Thanks foot sharing, and Happy 2021.
Sean says
Thanks so much for featuring our work! That's an honor!
Sean says
Thanks for sharing!