• Skip to primary navigation
  • Skip to main content
  • Skip to primary sidebar
Charleston Crafted
  • DIY
  • Woodworking
  • Popular Posts
  • Blog
  • About
  • Shop
menu icon
go to homepage
  • DIY
  • Woodworking
  • Popular Posts
  • Blog
  • About
  • Shop
search icon
Homepage link
  • DIY
  • Woodworking
  • Popular Posts
  • Blog
  • About
  • Shop
×
Home » Decor

DIY Pin Stripe Lamp Overhaul

Published: Aug 22, 2012 · Modified: Nov 30, 2023 by CharlestonCrafted · As an Amazon Associate, we earn from qualifying purchases. This site contains affiliate links. ·

I love my apartment- it is in a great location and is very nice and clean and safe. However, one thing about it that drives me absolutely bonkers is the fact that none of the rooms (except the bathrooms!) have wired overhead lighting. That's right, everything has to be lit by lamps! Since I have to have lamps, I decided to try and make them statement pieces of my rooms.
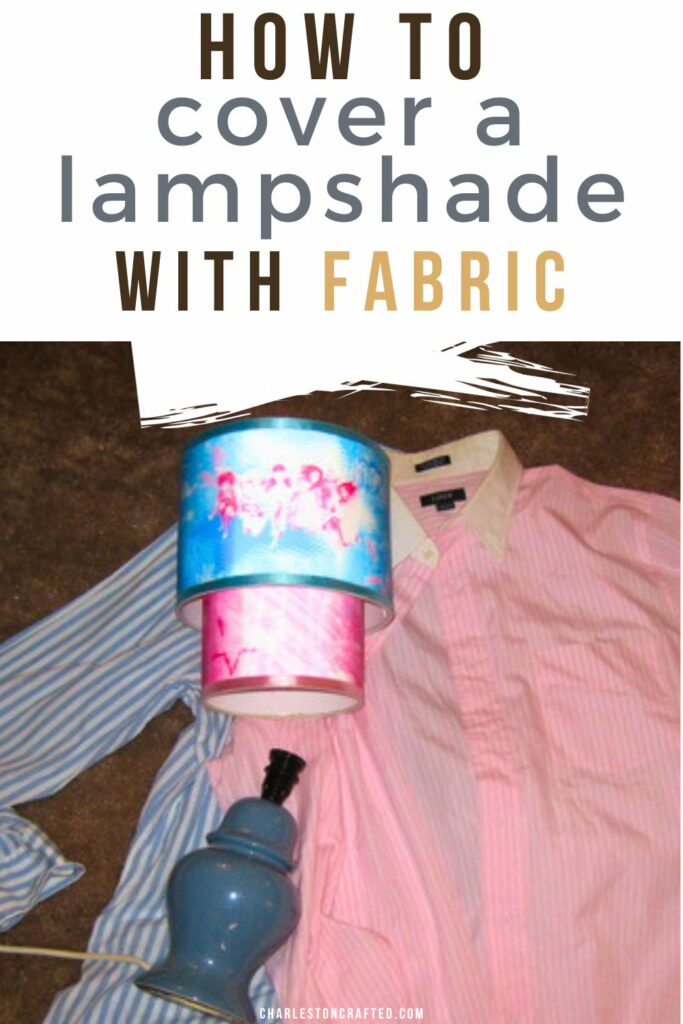
My bedroom is pink and blue preppy themed. The comforter is Ralph Lauren and from Macy's. I decided to make a lampshade inspired by my bedding. So, one Saturday I went thrifting and this is what I came back with:
how to cover a lampshade with fabric
 
Picture
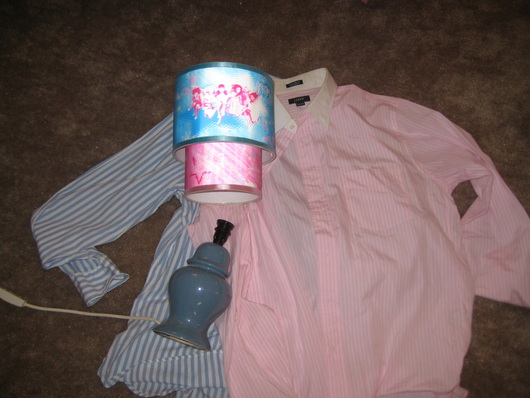
Two men's pinstripe shirts
From: James Island Goodwill
Cost: $2 each
Blue Ceramic Lamp
From: ReTail
Cost: $1.50
High School Musical 3-D Double Lampshade (be jealous)
From: James Island Goodwill
Cost: $1


Can you see where I'm going with this?
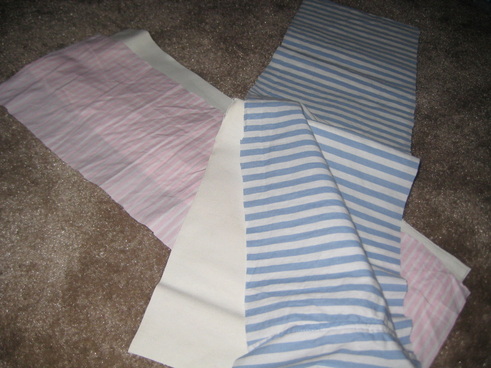
So, I laid out the shirts and cut the fabric to fit over the shades. Note- I layered the shirt fabric on top of a thicker solid white fabric to try and keep the colored shade from showing through. It still shows when lit up, but what can you do.
I did feel slightly bad cutting up the pink shirt because its from JCrew and cost someone an arm and a leg (or 135), but I figure it's already had one good life and I'm glad to give it a second one! Plus, I had tons of fabric left over, I'm thinking pillows!

Picture
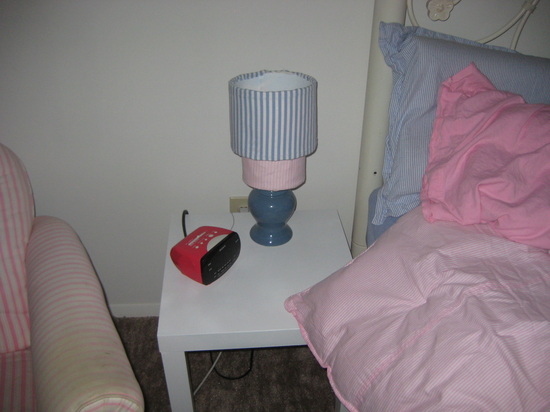
Then I began to hotglue. It took a lot of patience to pull the fabric taut enough. The smaller shade was waaaay more annoying because my hands really didn't fit in the tiny little space there was to work with. But fifteen minutes later:
 
Picture
Ta-da! A preppy, pinstripe lamp! It goes perfectly in my room, don't you think?
 
Picture

Have you done any transformations lately?

Charleston Crafted Signature

Follow us on:
Pinterest | Instagram | TikTok | YouTube | Facebook | Amazon Storefront | LTK Shop

Looking for something?

We've been doing this since 2012 so we have a LOT of blog posts!
Search stuff like: Ceiling Projects | DIY Plant Stands | Thrift Flips

Charleston Crafted logo banner
CharlestonCrafted

More Decor

  • DIY easter egg topiary
    How to make an oversized Easter egg topiary
  • design shop review
    DesignShop Box Review
  • lighting trends for 2025
    Top Lighting Trends to Brighten Your Home in 2025
  • Our Valentine's Day Mantel Decor
    Valentines Day Mantel Decor

Reader Interactions

Comments

  1. arzea says

    August 22, 2012 at 2:58 pm

    This looks fab!

    • charlestoncrafted says

      August 22, 2012 at 9:56 pm

      Thanks! It's fun to take something and make it look new 🙂

Primary Sidebar

Charleston Crafted about us image

Hey y'all!

We are Morgan & Sean McBride and we are crafting our home together in Charleston, South Carolina.

More about us

Popular Posts

  • DIY Coffered Ceiling
    DIY Coffered Ceiling
  • How to Make DIY Concrete Pumpkins via Charleston Crafted
    How to Make DIY Concrete Pumpkins
  • How to Make a Cupid's Arrow Valentine's Day Wall Hanging with felt on the Cricut
    How to make a Cupid's Arrow Valentine's Day Wall Hanging
  • Our Tropical Oasis - A backyard Hammock area - Charleston Crafted
    Our Tropical Oasis

Recent Posts

  • how to organize a pantry with zones
    How to Organize Your Pantry in Zones (And Why It’s a Game Changer)
  • Keep outdoor rug from blowing up - Charleston Crafted
    How to keep your outdoor rug in place
  • kitchen design mistakes to avoid
    Kitchen design mistakes to avoid
  • DIY Faux Tropical Window Box That Looks Real (But Won’t Die!)

Privacy Policy

Footer

↑ back to top

Navigation

  • Home
  • Blog
  • Contact Us
  • Terms of Use
  • Disclaimer

Newsletter

  • Sign up for emails and updates
  • Follow us on Instagram
  • Work with Us

Browse by Category

  • Woodworking
  • Home Projects
  • Paint Colors
  • Room Reveals

© 2025 The Charleston Crafted Blog LLC DBA “Charleston Crafted” and “CharlestonCrafted” (also known as N/A) / All Rights Reserved.
Official Website: (Charleston Crafted)
Registered in USA (Co. Reg. No.: 565586)
Address: Charleston, USA 29414, South Carolina
Contact Phone: Not applicable — contact is via email: sean@charlestoncrafted.com

DISCLAIMER: The content on this website is provided for general informational purposes only and is not intended as professional advice. The Charleston Crafted Blog LLC and The Charleston Crafted Blog LLC make no representations or warranties—express or implied—regarding the accuracy, completeness, or suitability of the information contained herein. Any reliance you place on this information is strictly at your own risk. In no event shall The Charleston Crafted Blog LLC or The Charleston Crafted Blog LLC be liable for any loss or damage, including without limitation, indirect or consequential loss or damage, arising from the use or inability to use this website. This website is the official website of The Charleston Crafted Blog LLC.

AFFILIATE DISCLOSURE: This website contains affiliate links. If you click through and make a purchase, we may earn a commission at no extra cost to you.

As an Amazon Associate, I earn from qualifying purchases.

Site Editor: Morgan Smith McBride

Copyright © 2025 Charleston Crafted