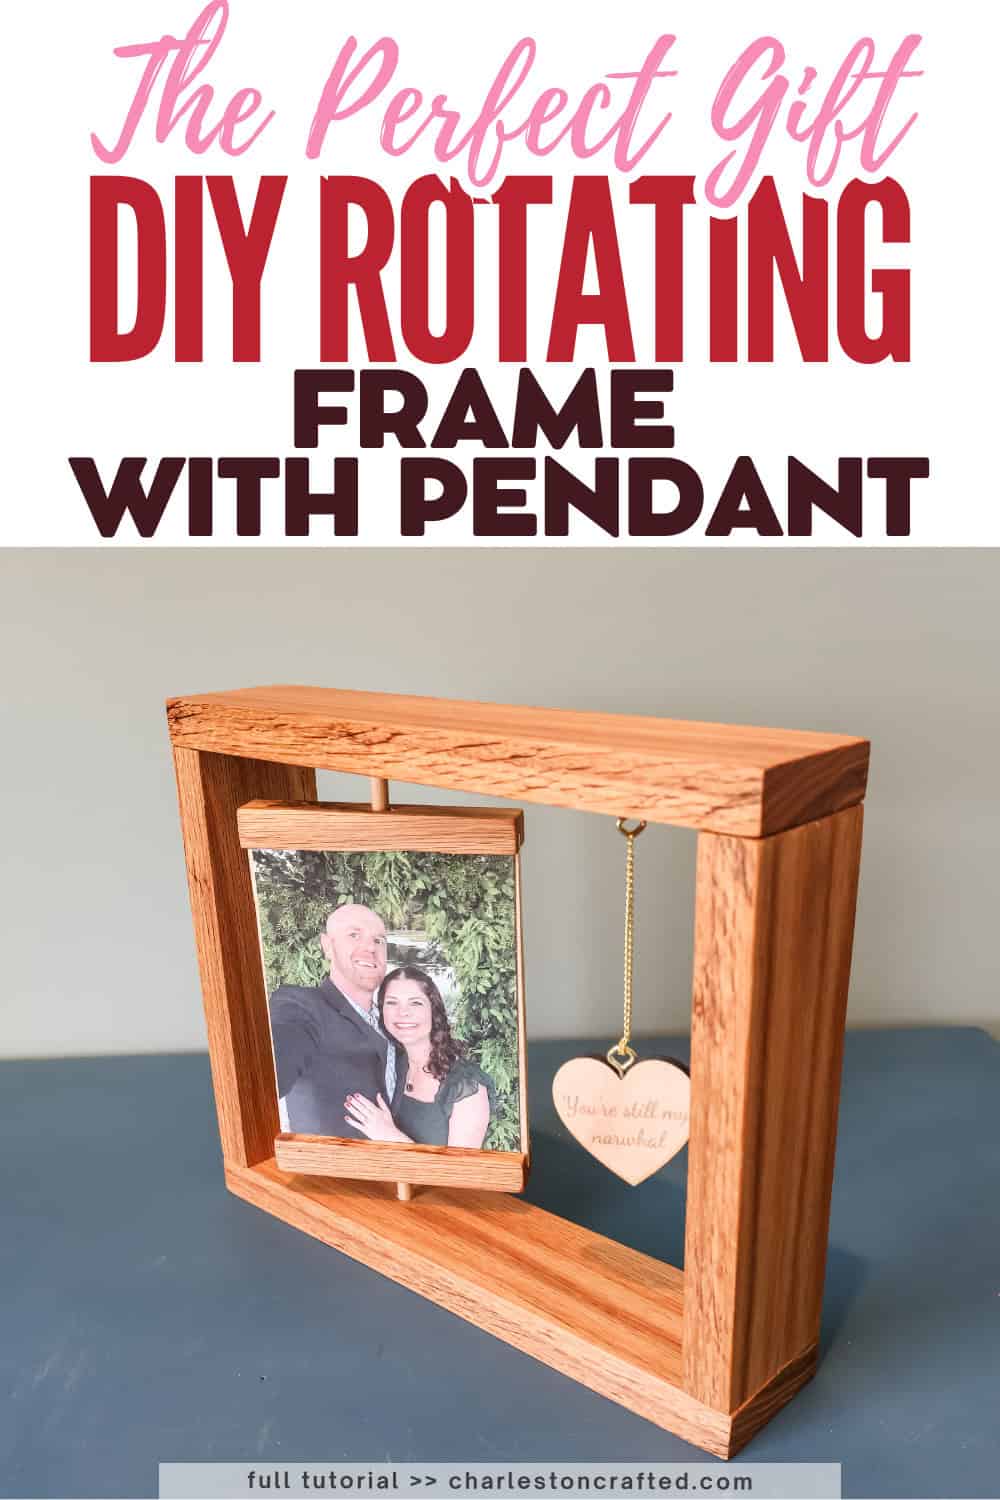
Check out how I made this DIY rotating double-sided wood picture frame from scrap wood. It's a perfect romantic gift idea!
Looking for that perfect Valentine's Day gift to give to your wife or girlfriend? How about making this DIY rotating picture frame!
I built this picture frame out of scrap wood, but it would only require a small amount of wood if you had to buy it. It's really a beginner friendly project too because it doesn't require any fancy joinery or special tools.
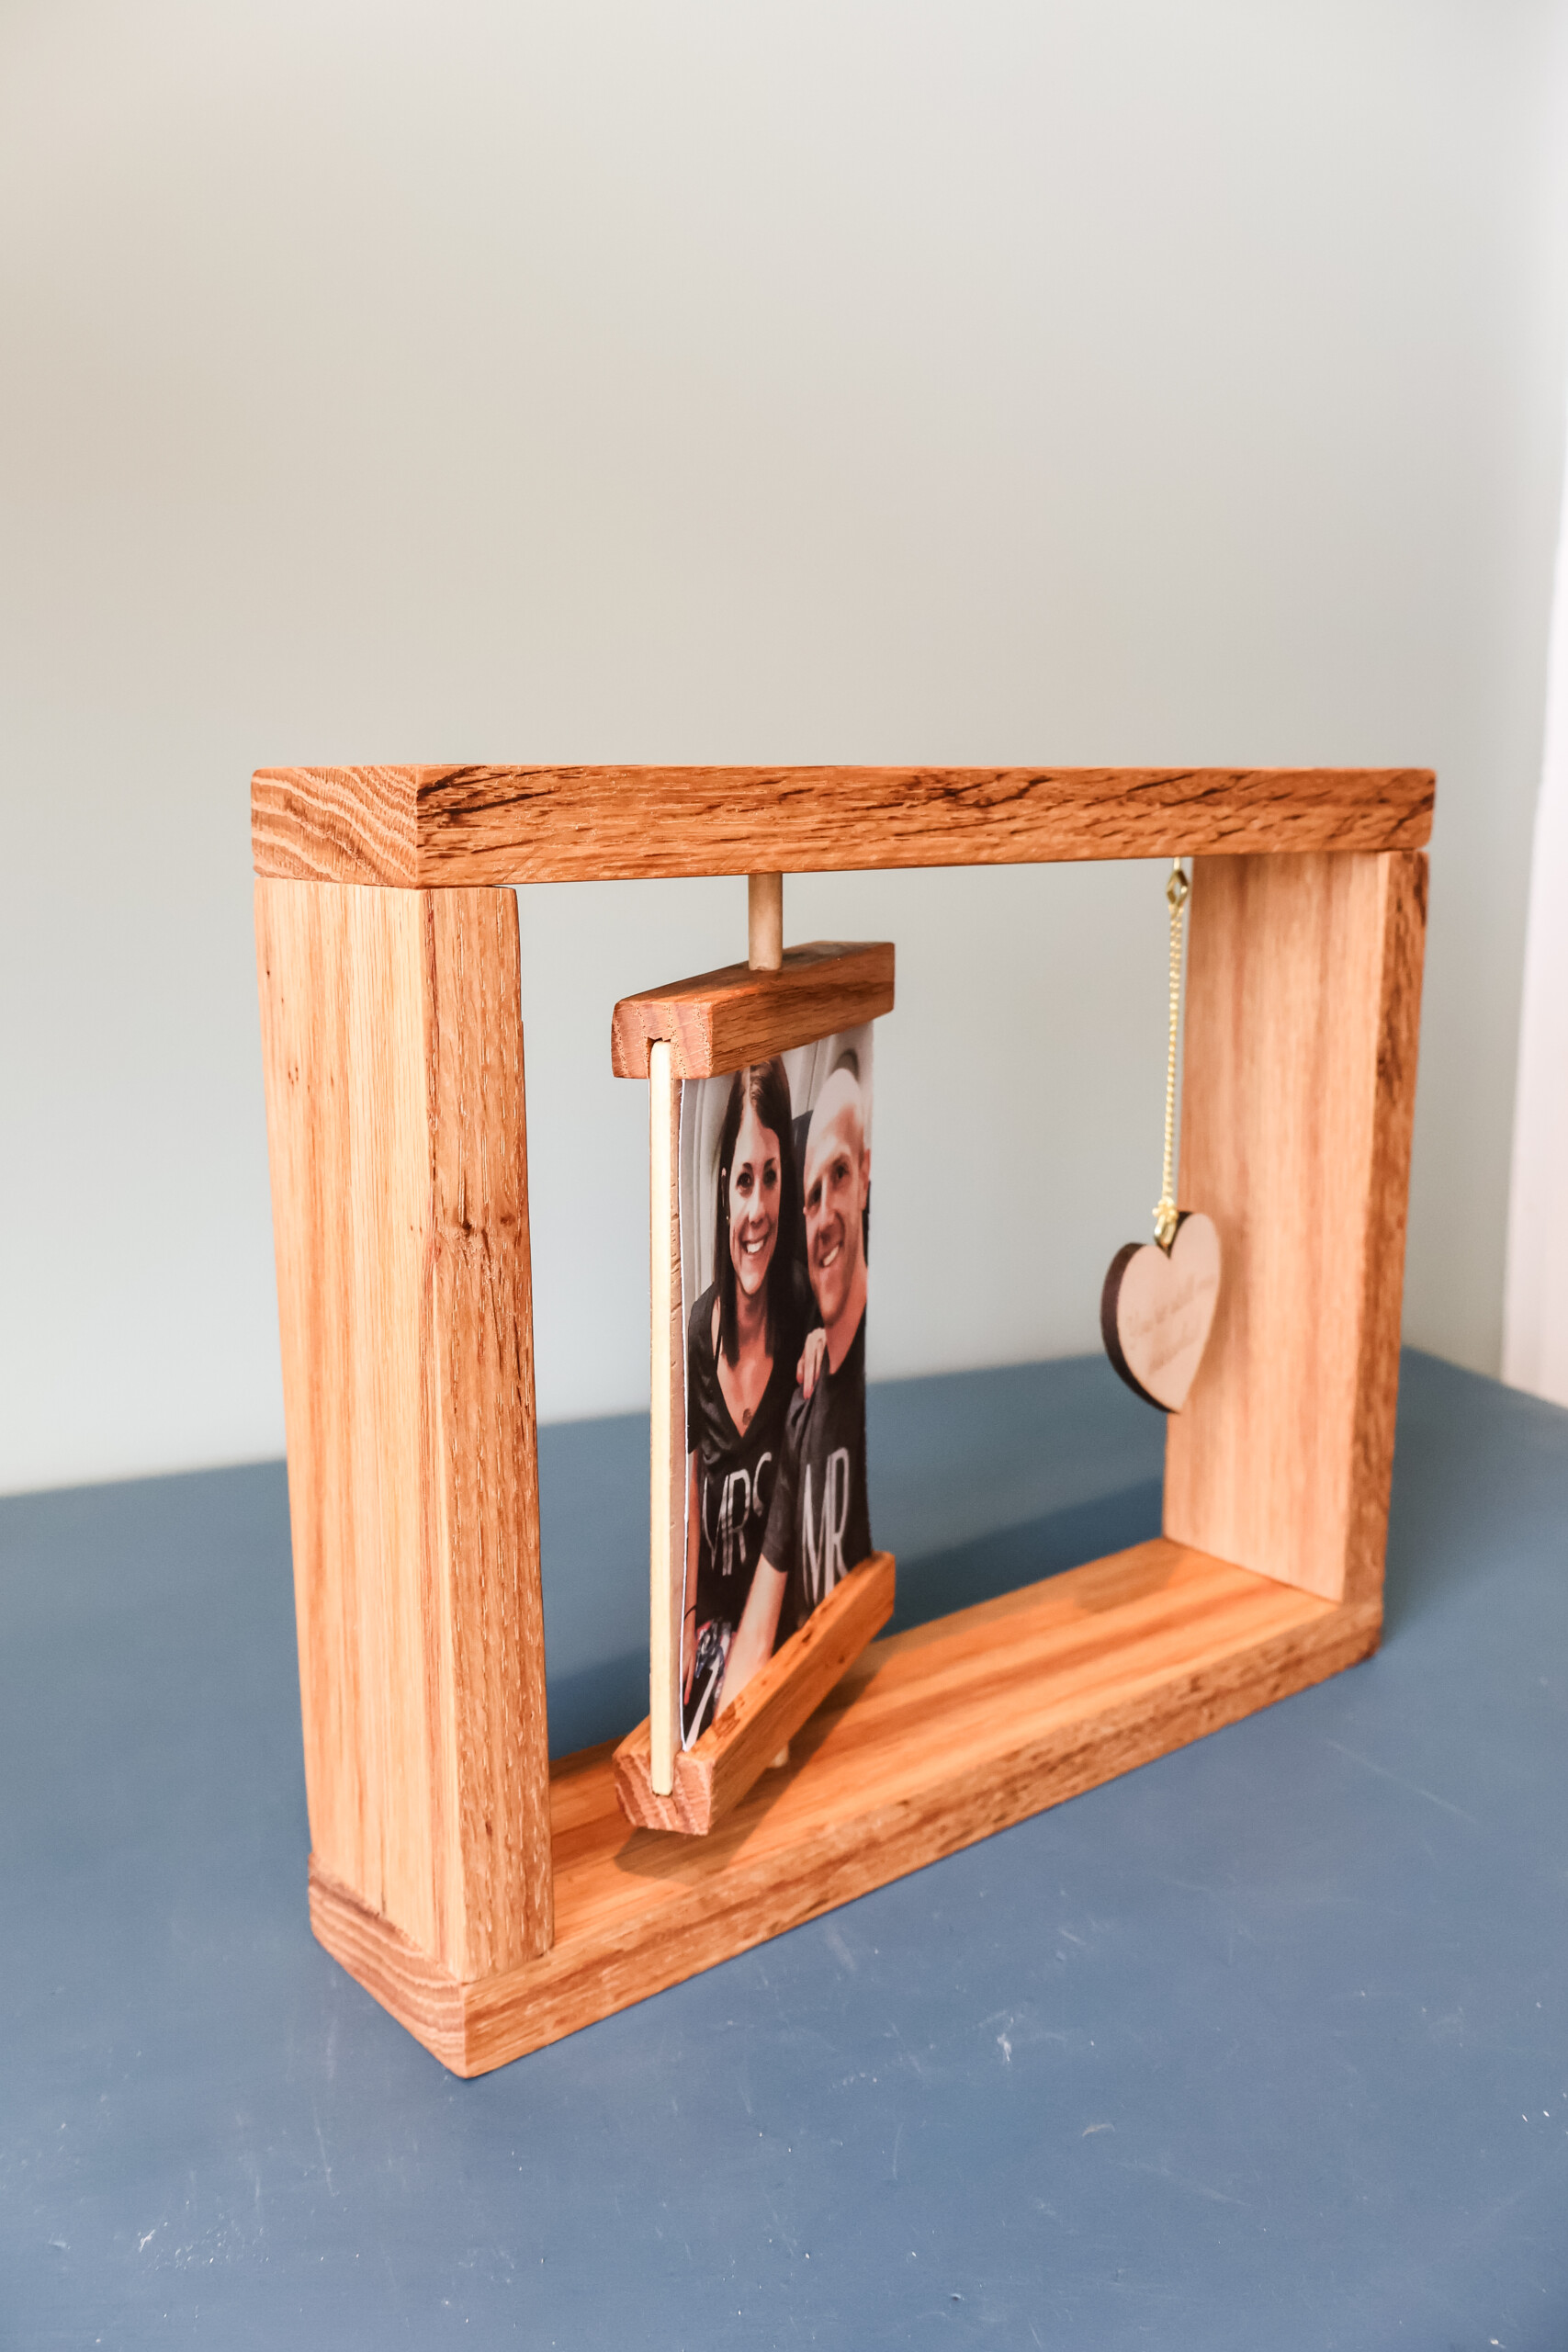
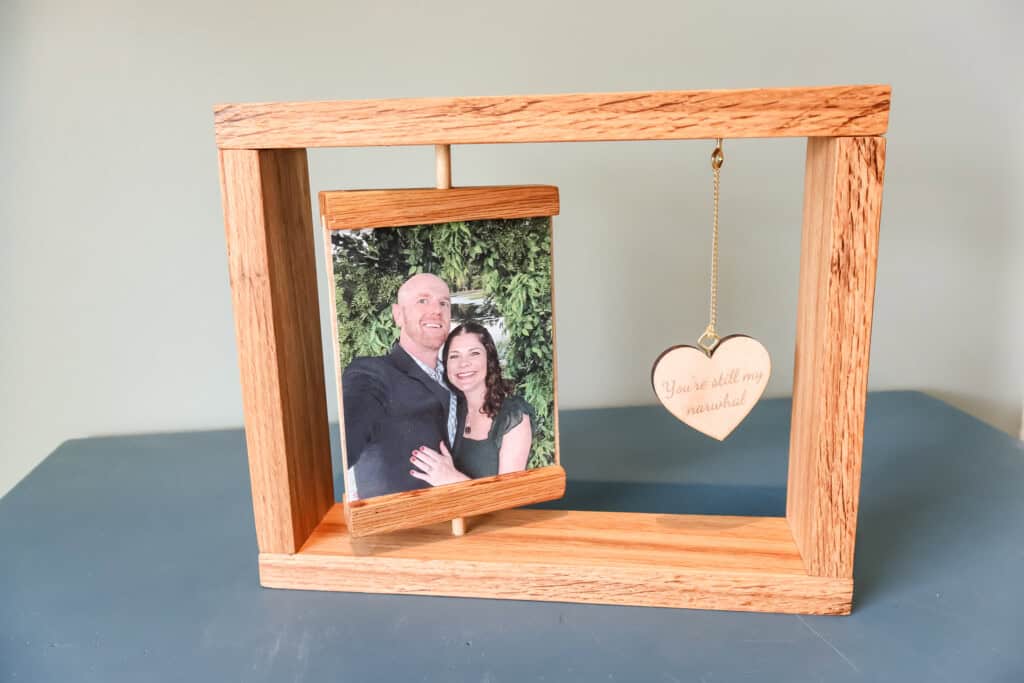
I designed this frame to have a rotating double-sided picture, but also to have a hanging pendant. The pendant is totally optional, but I've been having fun with my xTool P2 laser cutter lately and knew this would be a great use for the cutting and engraving features.
How to build a rotating picture frame
This was a simple project to build and you just need an oak board, two pieces of dowel and some scrap ¼" plywood to make it. And it all comes together with just glue!
Let's talk about what you need to make it and how easy it is to do!
Another great gift idea is this watch and accessories holder!

Materials needed:
Here's everything you need to make this rotating double sided picture frame as a gift for someone you love!
- 1x3 board of choice (I used oak)
- 2" of ¼" dowel
- 6"x6" of ¼" plywood
- (2) hook eyes (optional)
- chain or twine (optional)
- wood glue
- wood oil of choice (I used Walrus Oil)
Step one: make photo holder
Start by making the photo holder portion of the frame. This is the part where the photos will be able to rotate around.
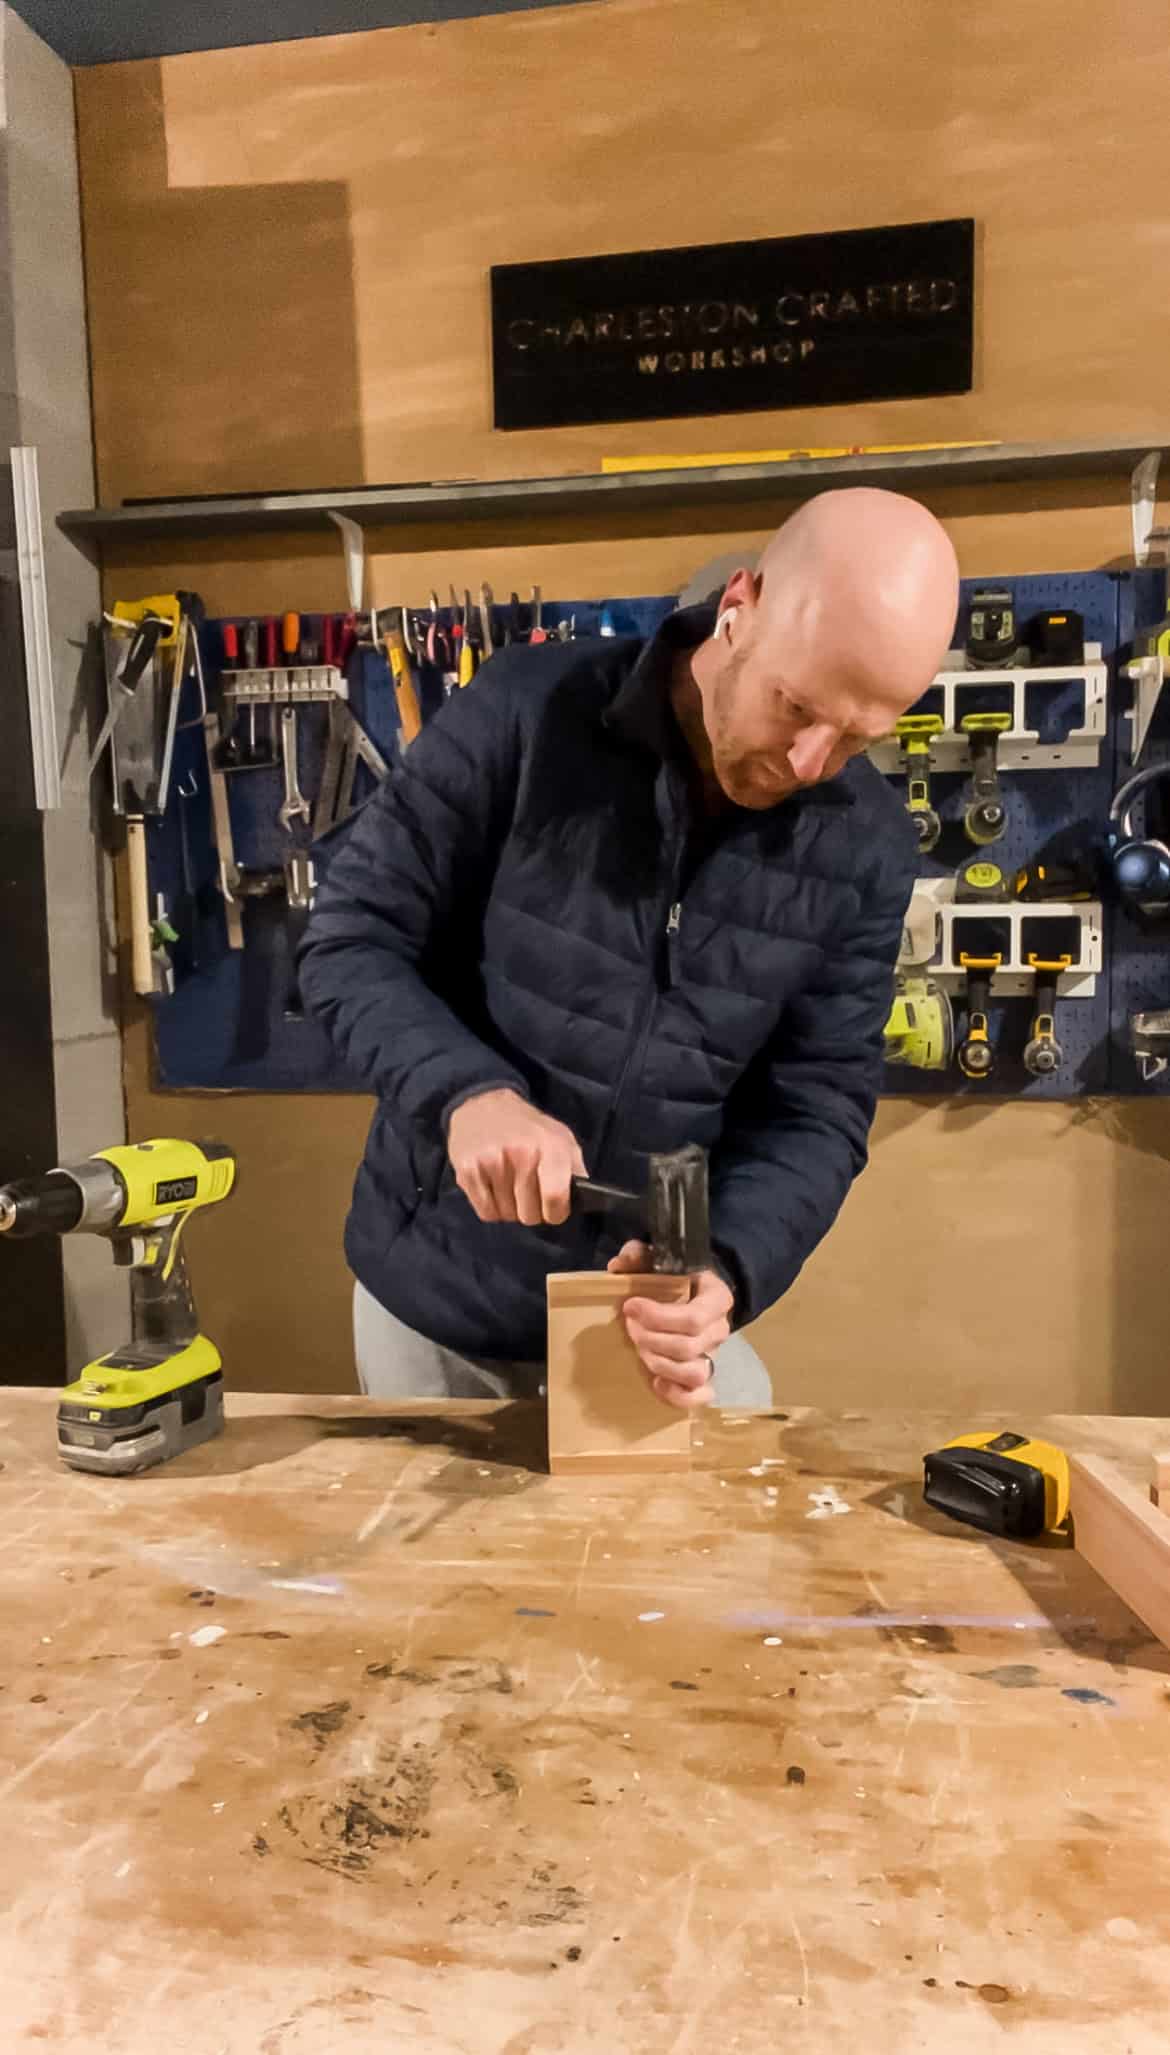
Start by cutting a 4" x 5" piece of ¼" plywood and two pieces of 4" x ¾" x ¾" of board scraps. When the board scraps are cut, run them through your table saw to create a ¼" wide and ¼" deep groove in the middle of each piece. Finally, drill a ¼" diameter hole in the center on the other side of the scraps.
Then, wedge the plywood into the grooves and the dowels into the two holes. If you did everything tight, there is probably no need for wood glue, but if you need it, add a small dot into each hole and groove.
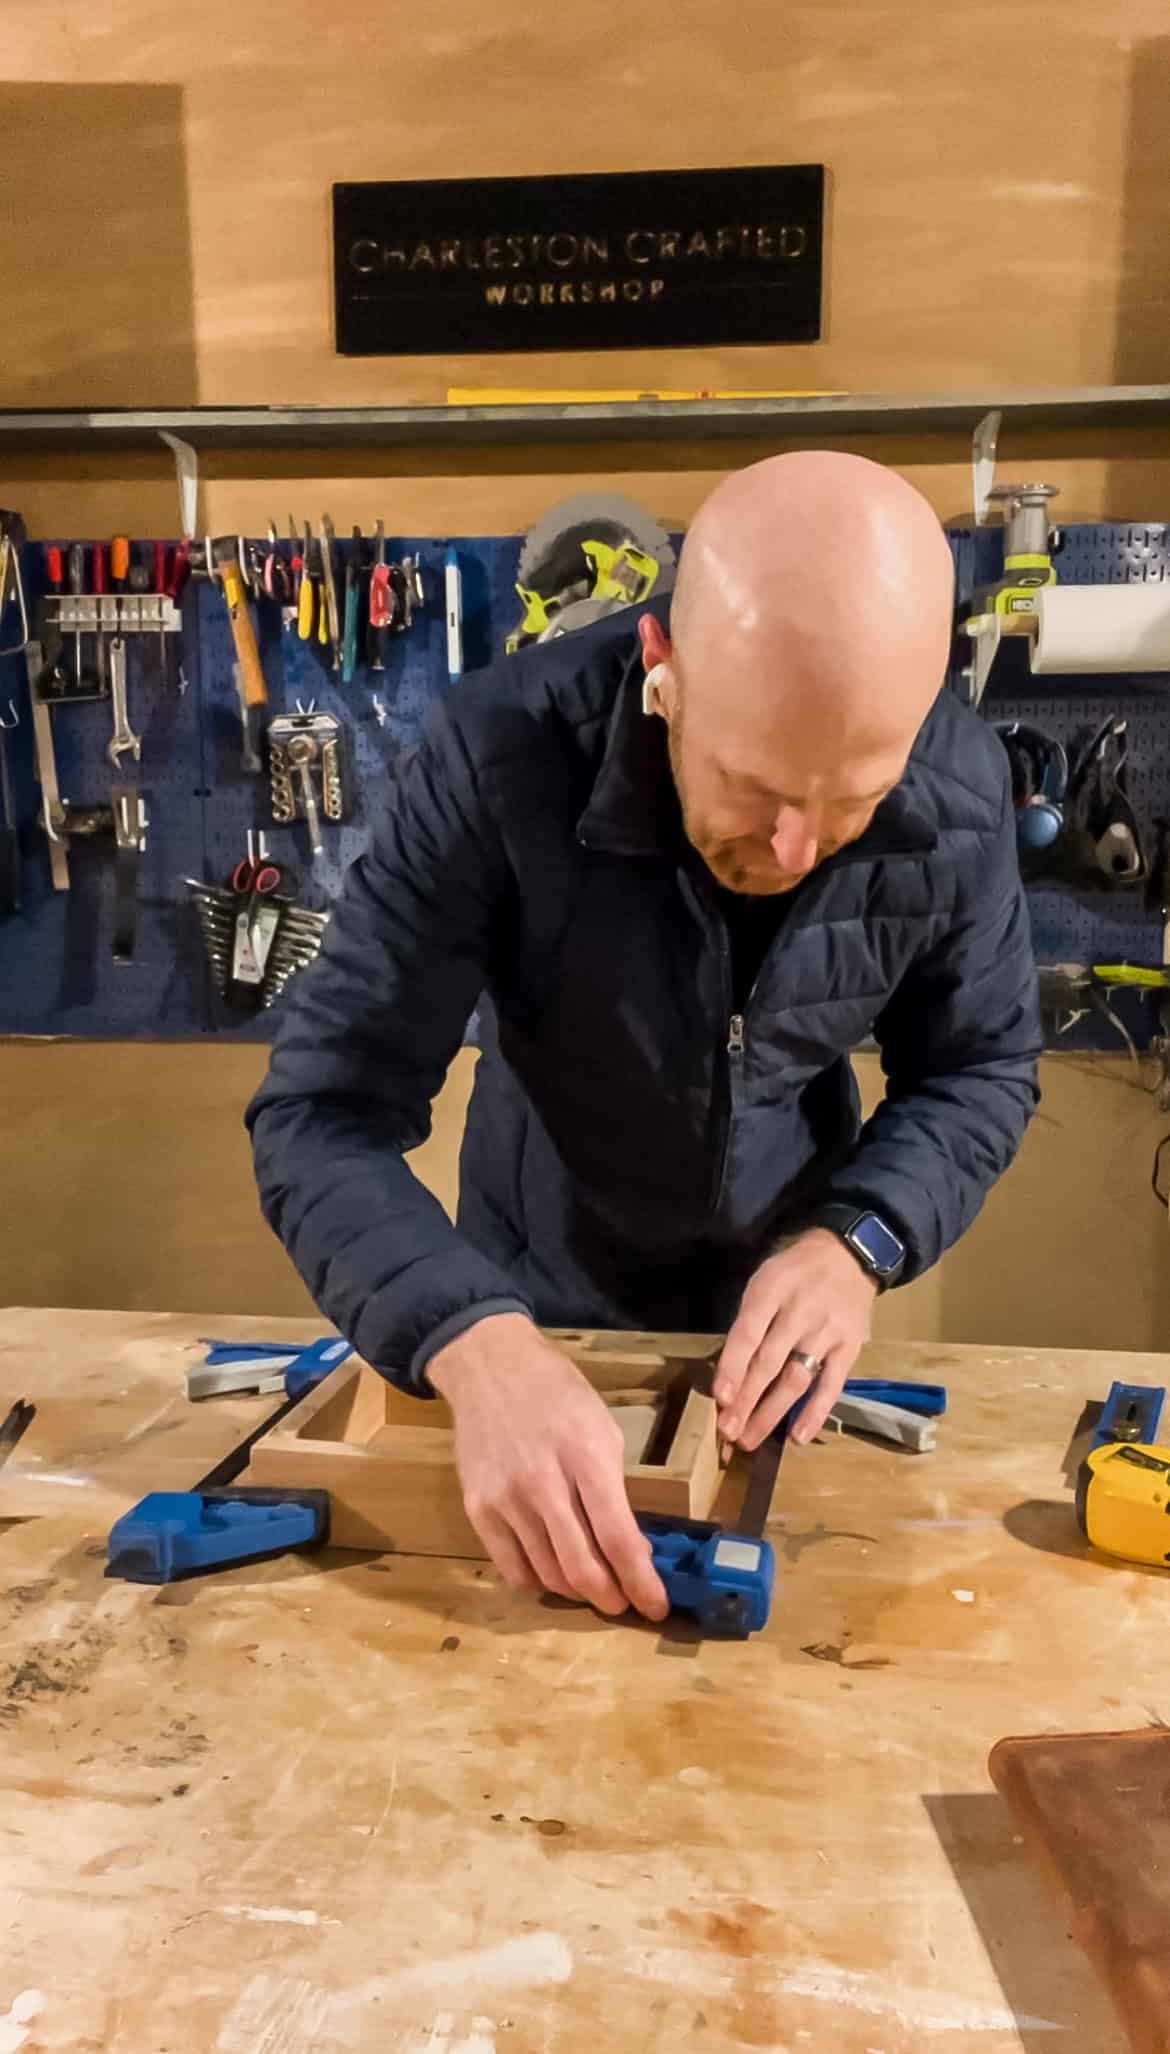
Step two: make frame
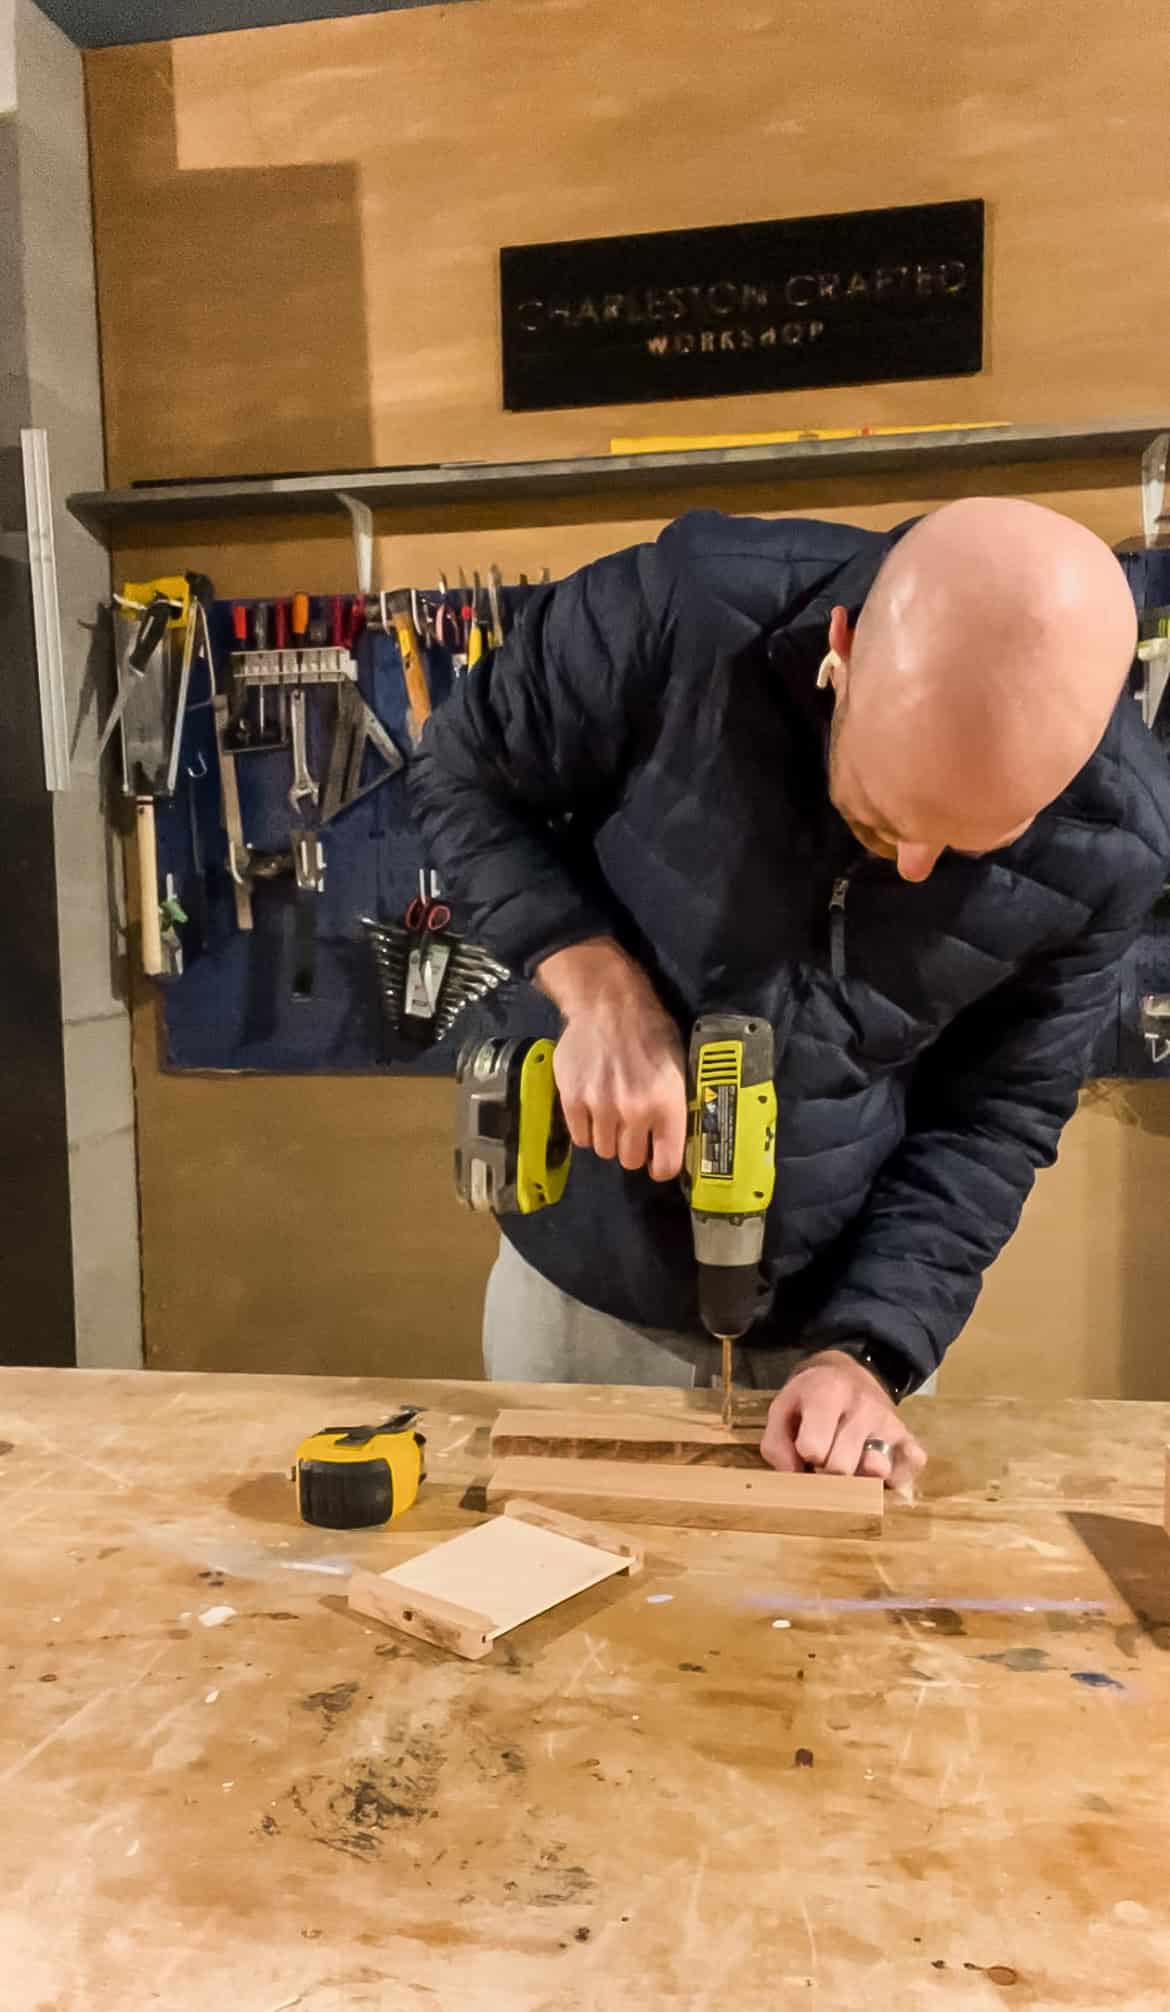
Next, make the actual frame. Cut the boards into two 10" long pieces and two 7" long pieces.
Now determine where you want the rotating picture to be. For me, I offset it to the left of the frame to have the hanging pendant on the right. If you want, you could center it in the frame.
Wherever you want it, drill a ¼" deep ¼" diameter hole on each opposing 10" long board. If you want to hang a pendant as well, you might want to drill a small pilot hole where you want to hang the pendant as well.
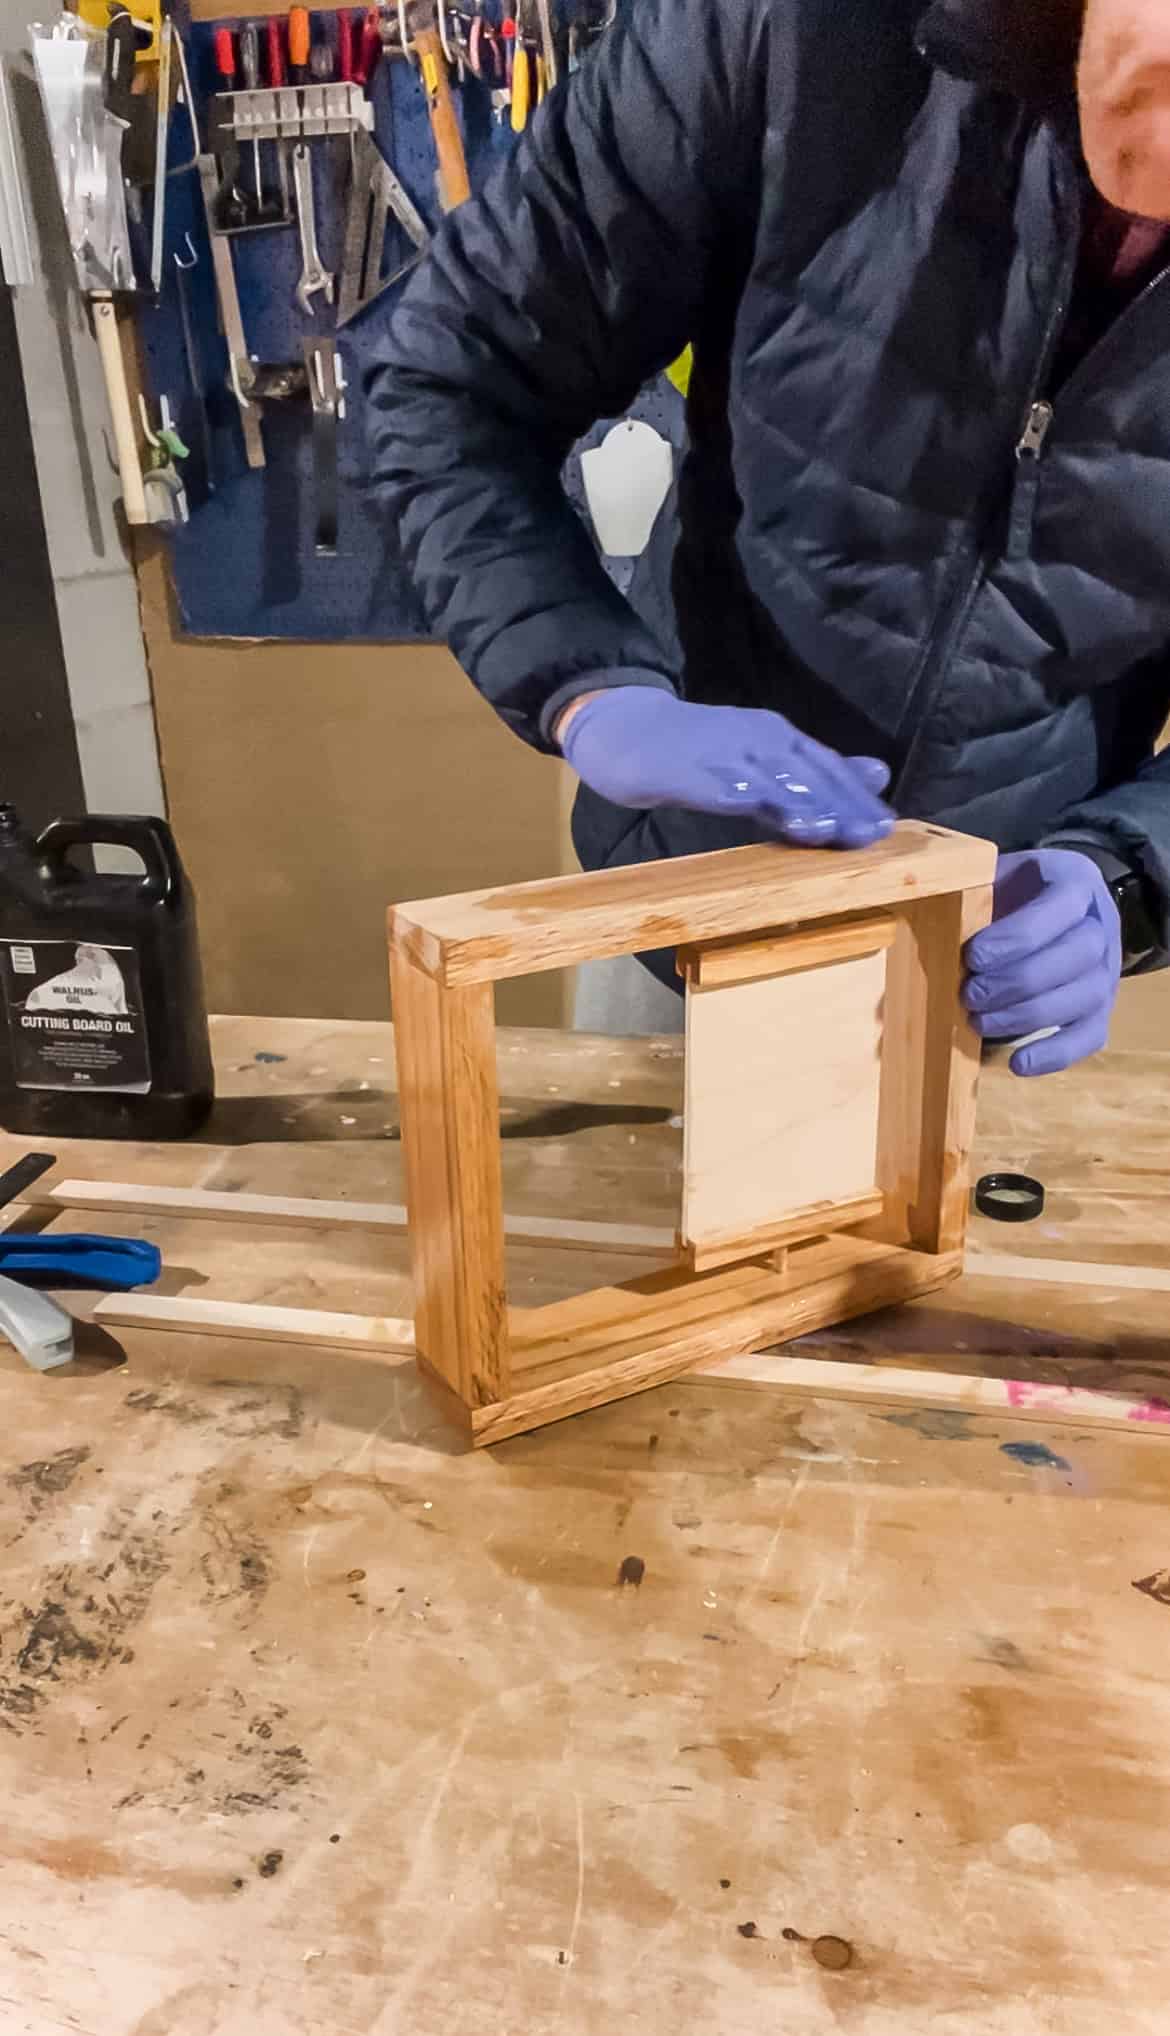
Step three: connect photo holder to frame
Time to put it all together! Put the bottom dowel of the photo holder into one of the frame pieces and the top dowel into the opposing hole on the other piece.
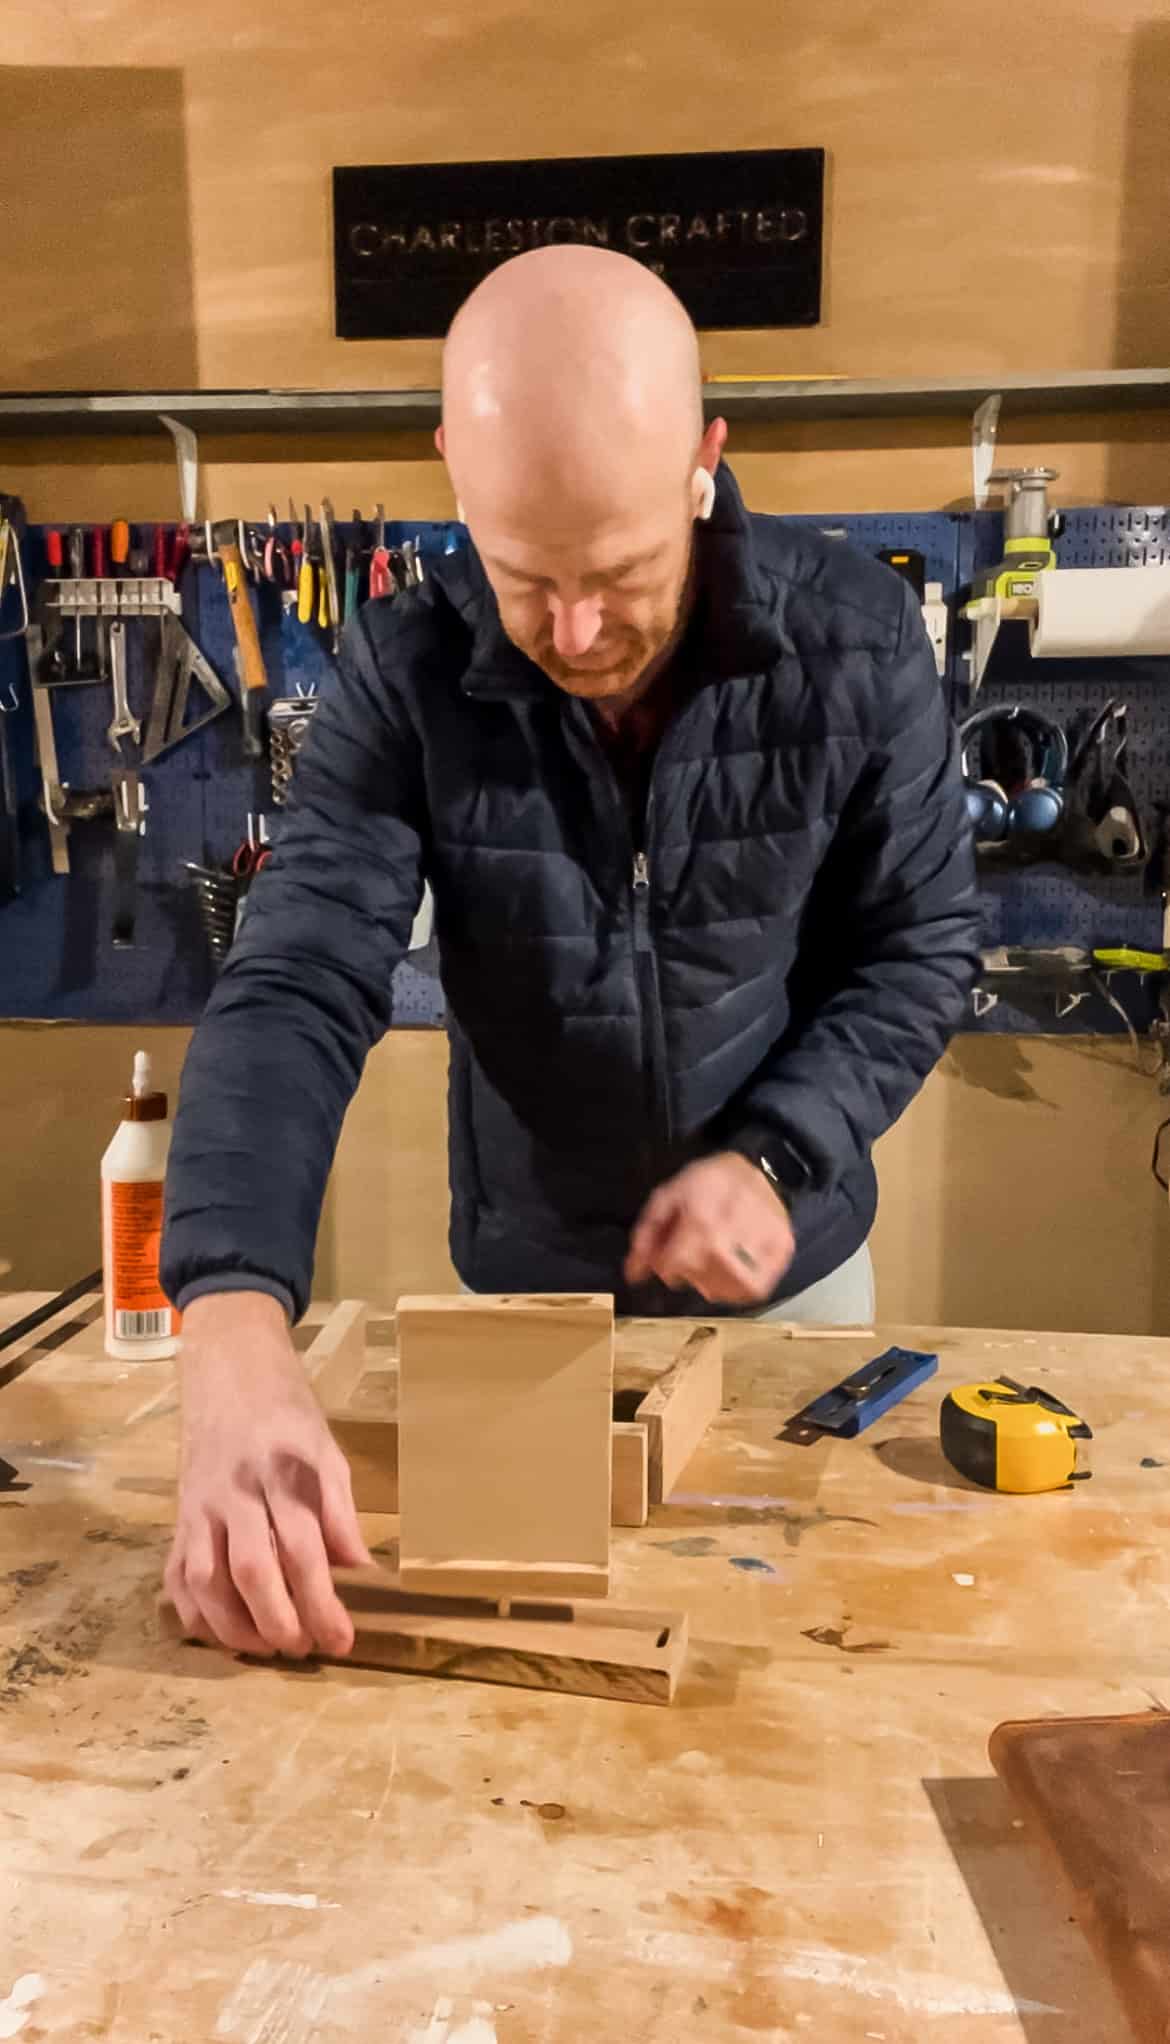
Add wood glue to each end of the 7" side pieces and slide them between the top and bottom pieces. Use clamps and clamp them together until dry.
When it was dry, this is the best time to add an oil finish to the entire project before adding photos and hardware.
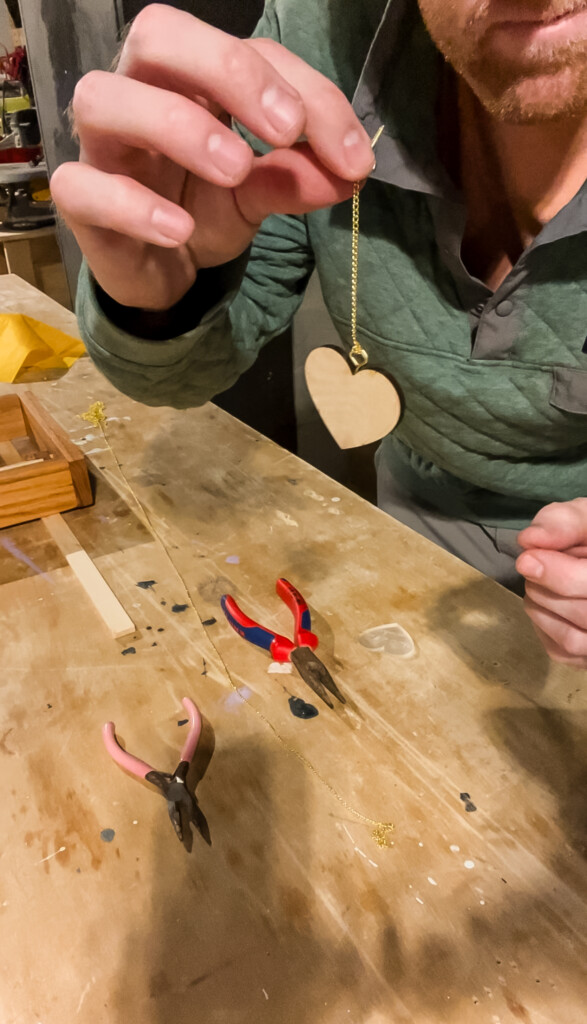
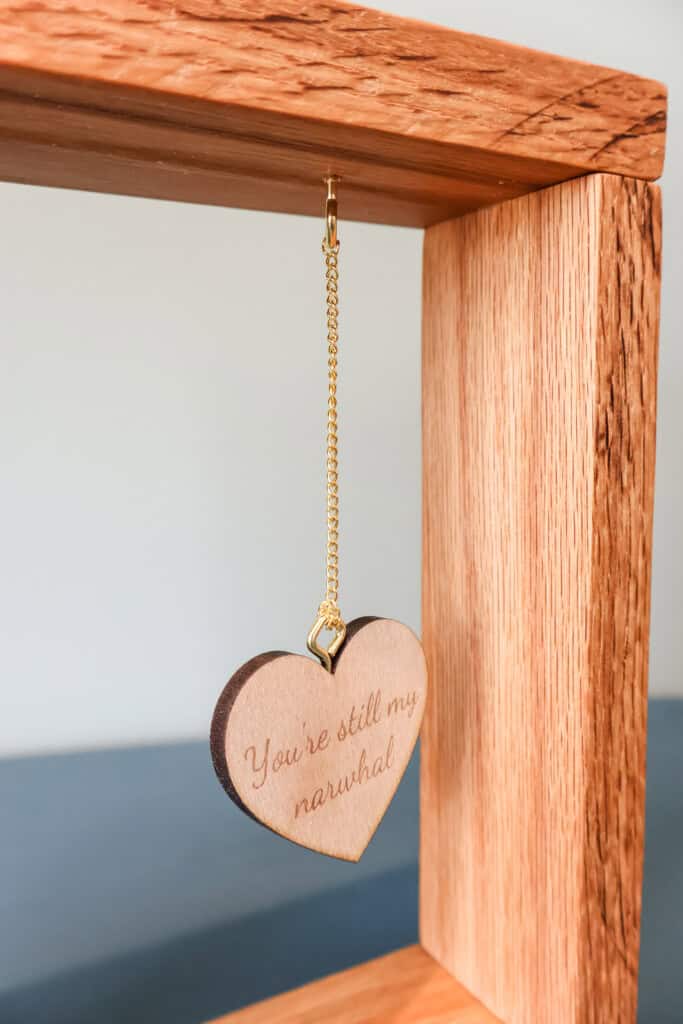
Step four: add hanging pendant
If you adding a pendant of any kind, here's the time to do it. I used my xTool P2 laser cutter to cut a small heart and engrave a saying special to us, but there's lots of options of what you could do.
I screwed one hook eye into the hole in the top of the frame and one into the pendant and then hung a chain between them.
Step five: add photos
Finally, time to add the photos you want to show off! I opted for two photos of my wife and I, one from our earlier (younger) days and one that was more recent.
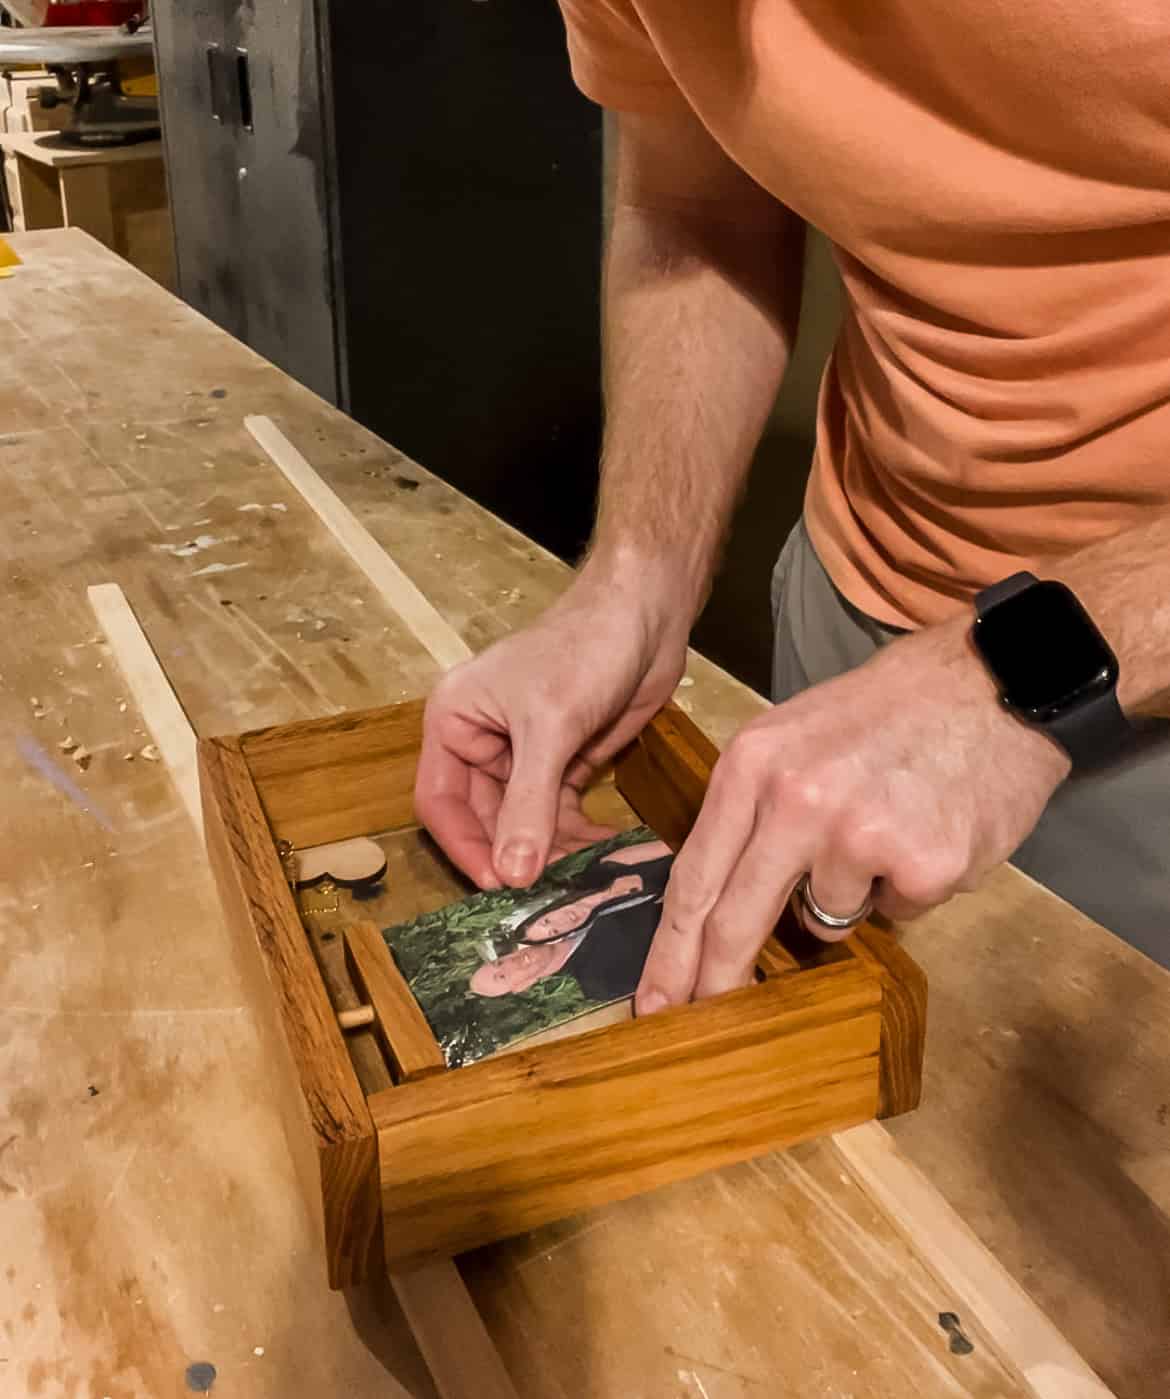
To attach them to the rotating photo holder, I just added double sided tape to all four edges of the back of each photo and taped them to the plywood.
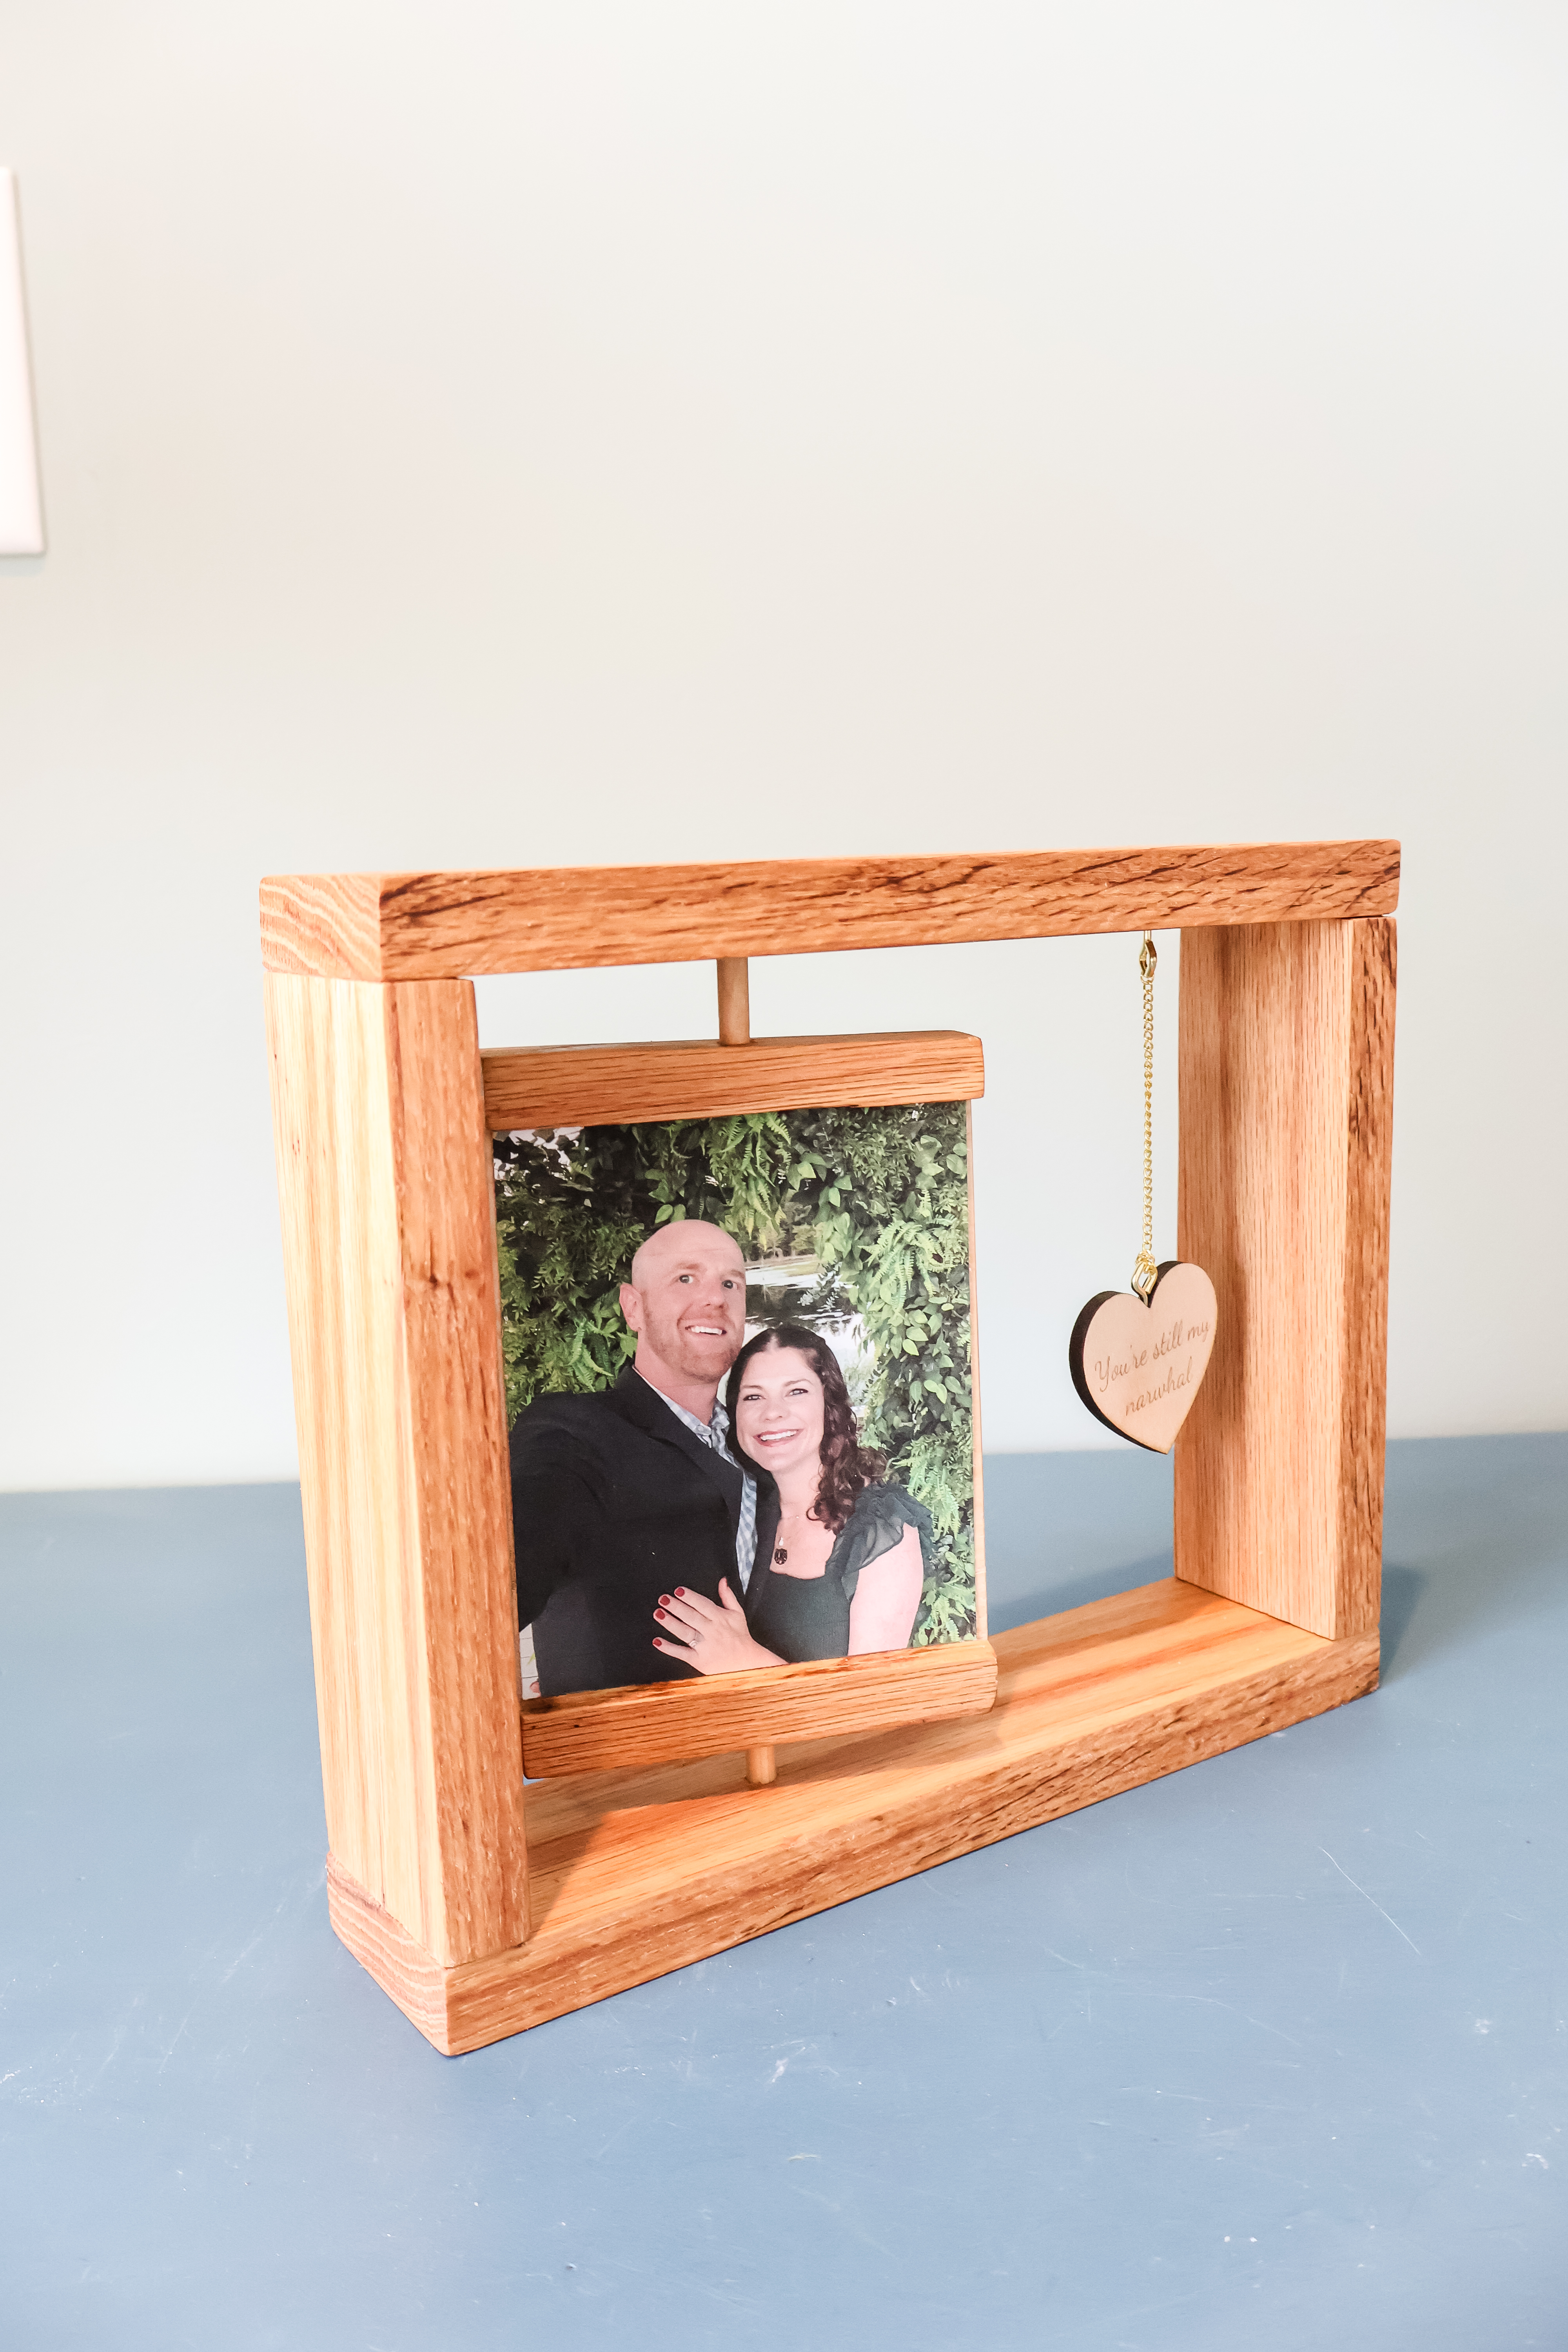
DIY rotating wooden picture frame with pendant
I absolutely love how this DIY rotating wooden picture frame turned out! It's a really thoughtful gift idea for Valentine's Day, a birthday, Christmas or anniversary.

Next time you want to build a present for your loved one, try this project out!


Looking for something?
We've been doing this since 2012 so we have a LOT of blog posts!
Search stuff like: Ceiling Projects | DIY Plant Stands | Thrift Flips

Hey there, I'm Sean, the woodworking enthusiast and builder behind CharlestonCrafted.com! Since 2012, I've been sharing the magic of turning raw materials into beautiful creations. I love teaching others the art and satisfaction of woodworking and DIY. I try to inspire fellow crafters to make something extraordinary out of nothing at all.