Want to build a small media console to hide all of your boxes and wires? Here's how to build a DIY side table with tile top - and hidden storage!
OK, I'm just going to put it out front here that this is a really cool project.
Today we're bringing you a DIY side table with a tile top that we're doubling as a hidden media console for our new TV!
This DIY side table is built from plywood and features a tile top, giving you endless possibilities to make it your own! Plus you can use this as a media console and hide all those ugly TV boxes and routers in this beautiful table today!
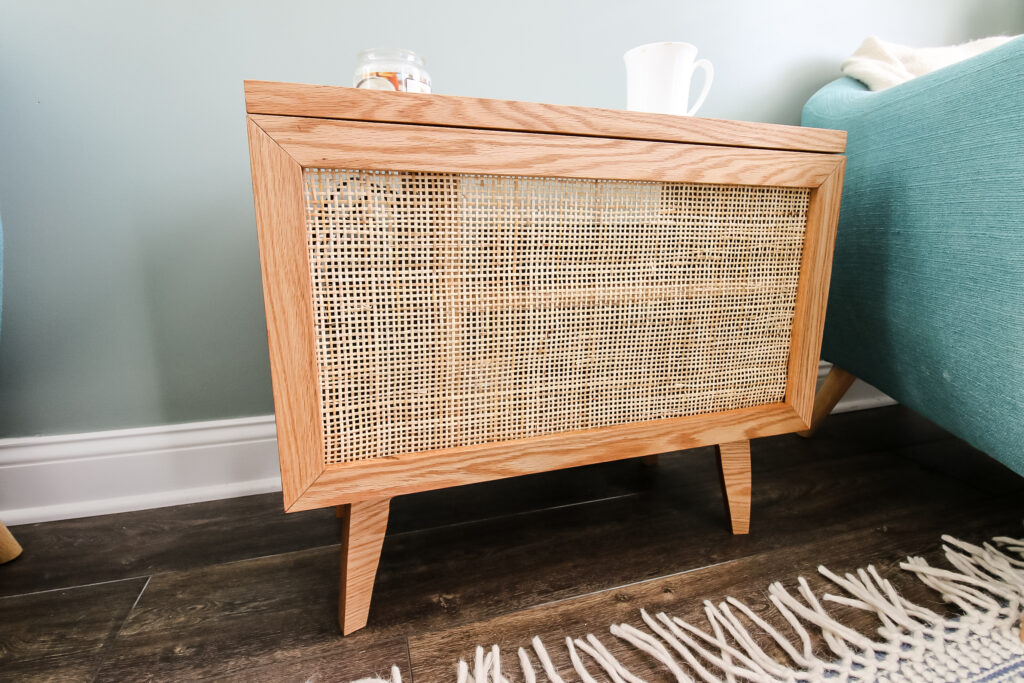
DIY media table plans
We recently purchased the new Samsung Frame TV from Amazon and the whole point of it is that it looks like art on the wall. Therefore, we didn't want wires or boxes visible that would take away from that!
We sold our old massive IKEA Hemnes entertainment center (which we've had since we lived in our condo before we built our own furniture 😭) because we thought that it was competing as a focal point with our new DIY shiplap fireplace and accent wall.
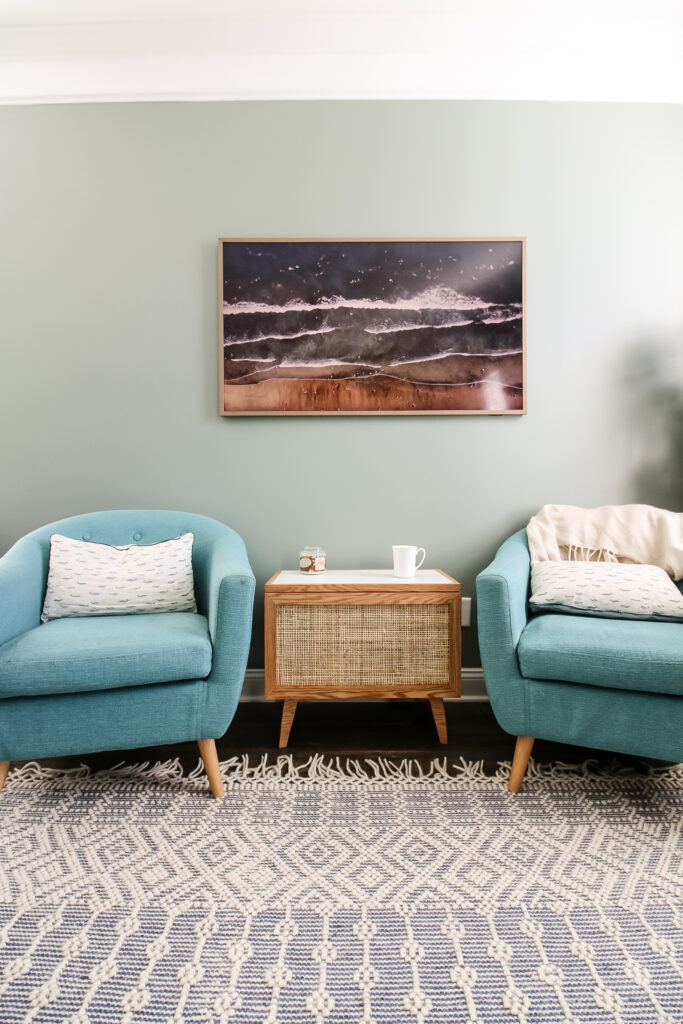
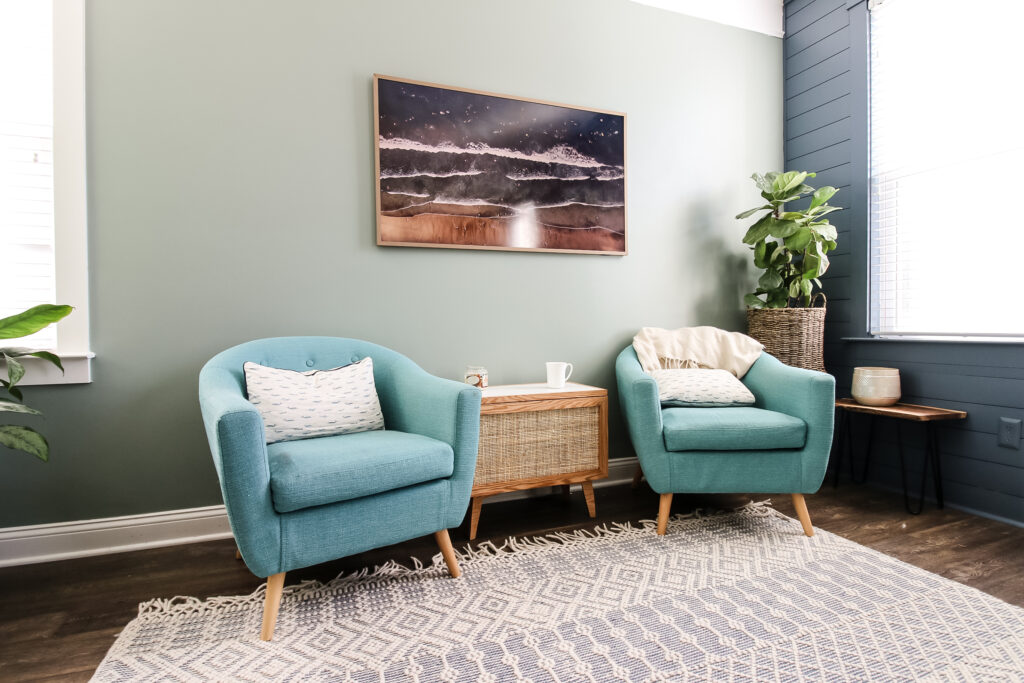
The goal was to go more simple and streamlined on the TV wall, so we bought the Samsung Frame and decided to build this small side table to put between two chairs and double as the media console.
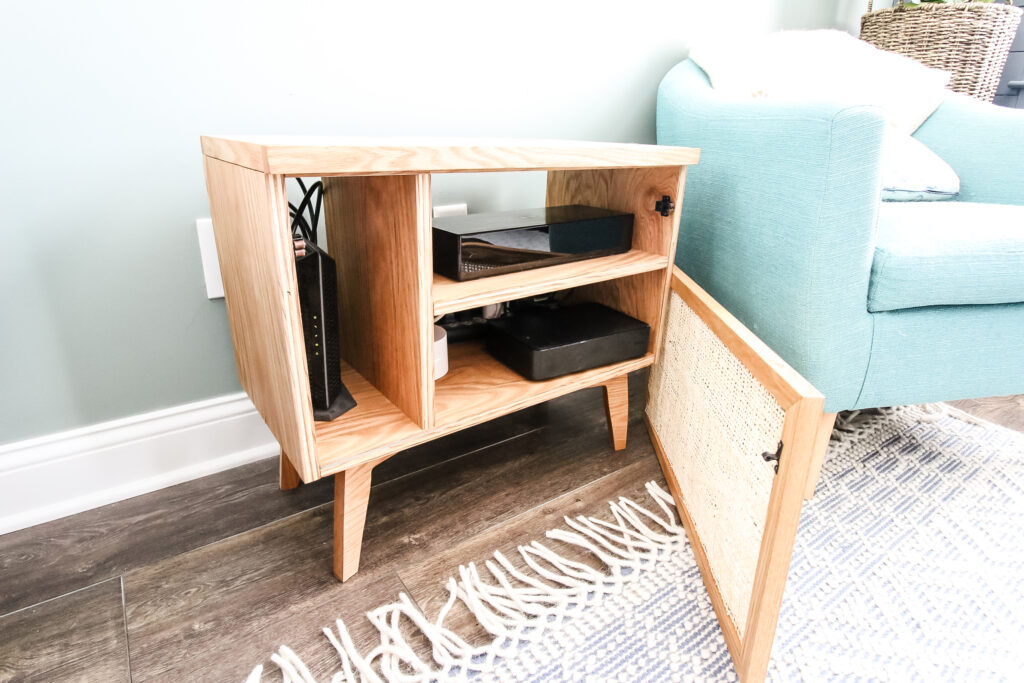
Even though the Frame TV is sleek, we still needed somewhere to store our cable box, the box that comes with the TV, and our cable router. We weren't about to ruin the pretty living room with all these black boxes sitting on a table!
So, we decided to build a table with hidden storage and a cane panel front to allow our remotes to still connect to our boxes, without putting them on display!
This post will show you everything about this side table and how it doubles as a media console.
Love side tables? Here are all of our DIY side table projects!
- DIY side table with arches - woodworking plans
- Upcycled chair into a modern side table
- DIY concrete terrazzo side table
- Media side table with hidden storage and tile top
- DIY Mid Century Modern Side Table - woodworking plans
- Campaign side table makeover
- Side table from counter top scraps
- Our first side table makeover
- DIY River table with epoxy
- Spray paint side table makeover
- Waterfall style slim side table
DIY side table with tile top
This DIY side table is perfect for entertaining and looks beautiful thanks to the tile top.
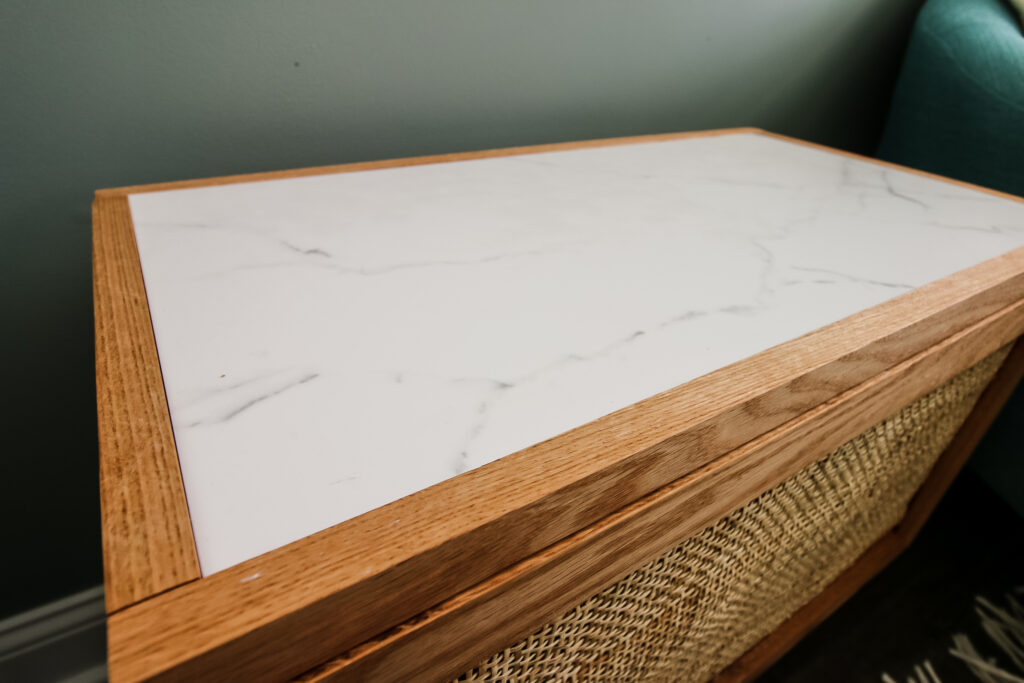
We designed this project with a 12"x24" inset for a piece of tile so that you can have a waterproof place to set a drink, even if there are devices inside.
Hardware stores sell tons of these tiles, so you can pick one in the color or material that best meets your home's style and aesthetic.
We used oak plywood to build the frame of this side table so that it would match the DIY buffet table with fluted doors on the other side of the open gathering space.
It's important to make sure to match tones in a space, whether it's through the colors or types of wood, paint colors, fabrics or anything. You don't want to have everything be the same, but coordinating different efforts is important.
Check out this open concept side table and get free plans for that one too!
This DIY side table is easy to build because of the plywood box, but has a little bit of interest with the tile top.
We did use oak boards around the tile table top because we didn't want plywood edges showing, but you can do the entire project with plywood if you want. We also jazzed this thing up with a little removable front with rattan cane. The rattan helps with allowing the signal from our remote control to work, since we're using this in our living room as our TV console.
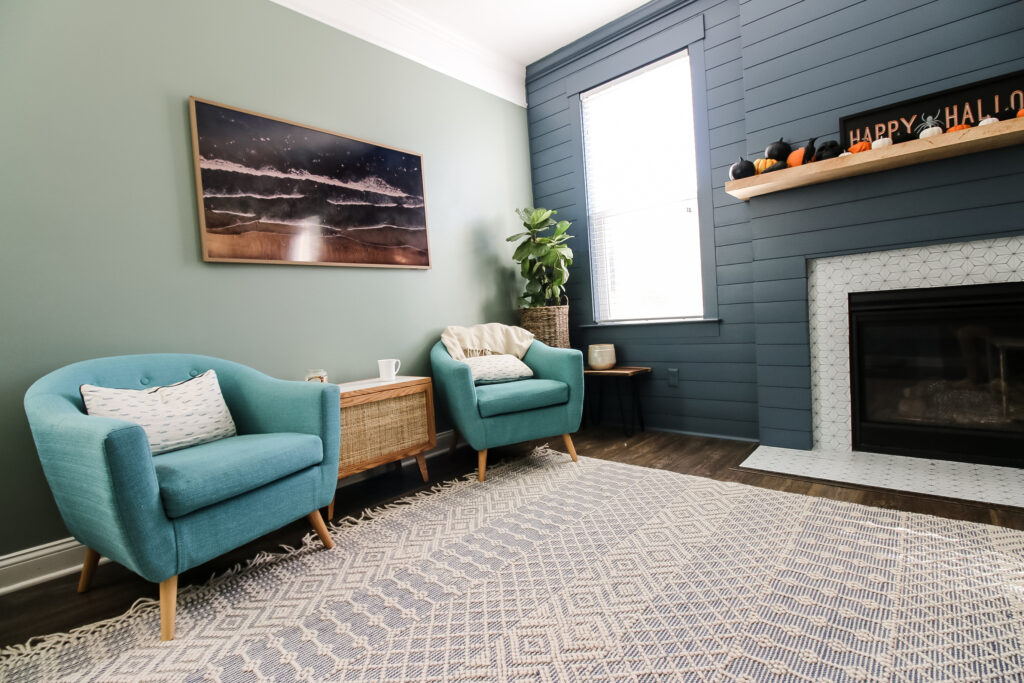
DIY media console
You can also use this project as a beautiful media console.
Depending on the region of the country you live in, you might call this a media table, media cabinet, TV table, media console, media center or any other variation like that.
No matter what you call it, this project is crucial.
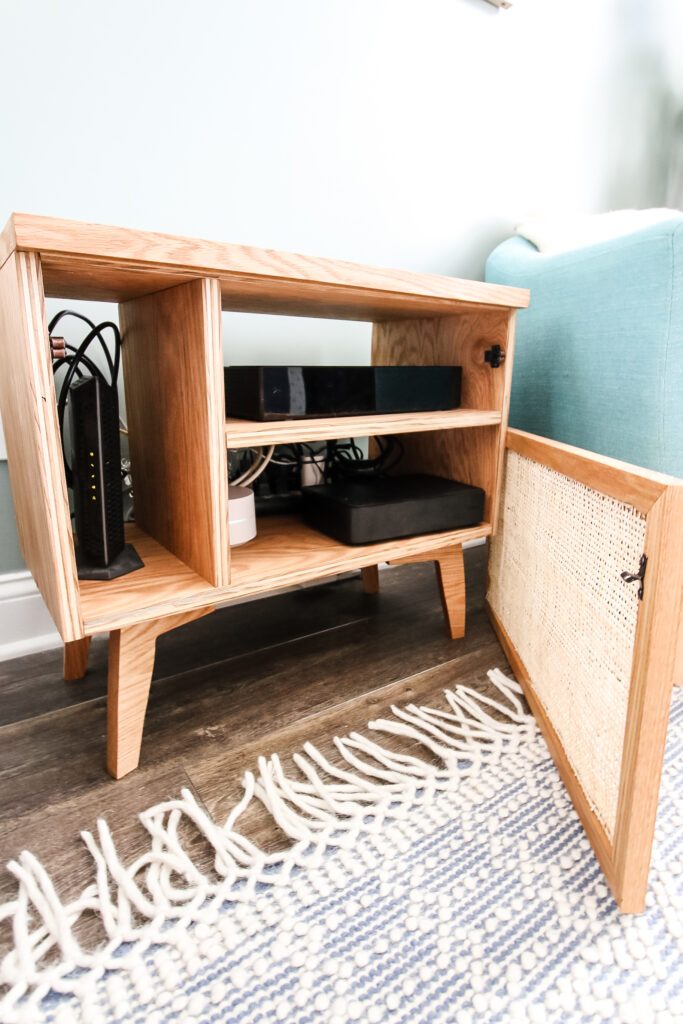
This DIY media console is small and compact and serves as a side table so your guests don't even know what's inside thanks to the hidden door.
It's designed with an open back, dividers and a removable front, specifically for accessing devices.
There is a tall section on the side for internet modems, horizontal shelves if you have a cable box (or in our case the Samsung One Connect box that controls everything for our new TV), or whatever you need.
The removable front lets you access the devices for resetting or anything you need, plus the open back and the rattan front allow for plenty of air flow.
We used to have these huge DIY wooden lanterns on our old entertainment center!
How to build a DIY side table with tile top
We'll give you the general overview here on how to build this DIY side table with a tile top, but make sure you grab the free woodworking plans for yourself.
The downloadable PDF plans will provide you with a material list, cut list and step-by-step instructions with computer images to show you exactly how to replicate this project.
Use the below general steps and photos to help guide you with building your own table!
Tools and materials used to build this side table
- ¾" plywood
- 1x8 common board
- 12"x24" tile
- Double roller catches
- Table saw
- Miter saw
- Scroll saw
- Drill
- Sander
Step One: Build Box
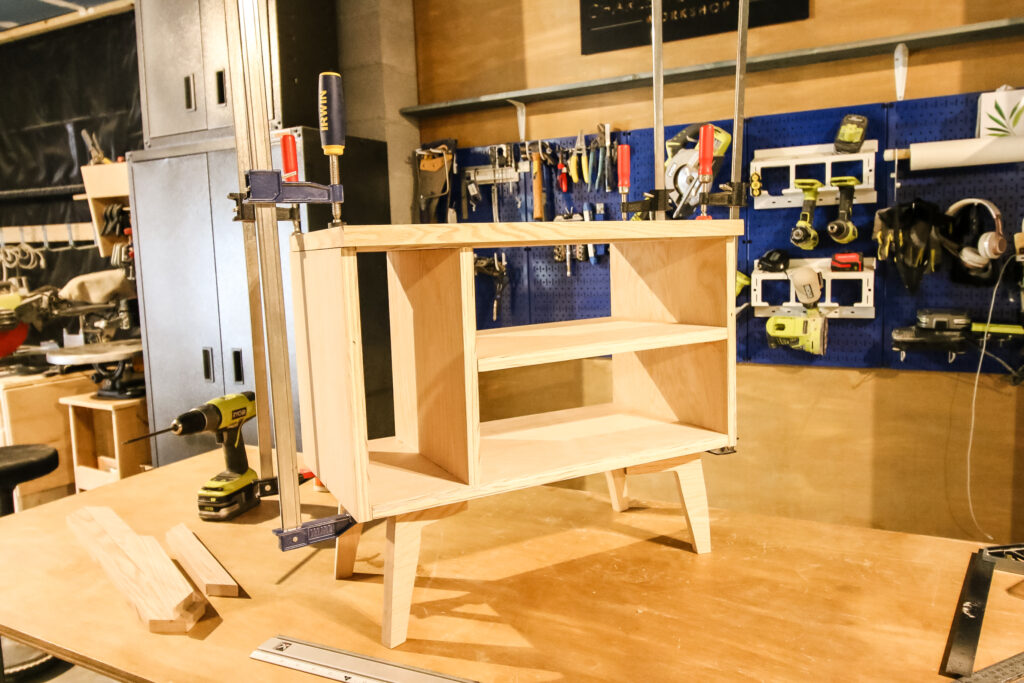
We started by building the main box of the side table. This consisted of a bottom, two sides, and two center support dividers.
We built the box with our electronics in mind, so we have a taller section for our cable modem, then two wider flat sections for our cable box and Samsung box.
If you are building this just as a side table, you could choose to extend the shelf all the way across or center the vertical divider, depending on your needs.
The box was put together with wood glue, pocket hole screws and clamps and is the easiest part of this build.
Learn how to use a Kreg Jig 720 to drill the pocket holes for this project!
Step Two: Cut Legs
For this table, we were going for a midcentury modern look, so we cut out some custom legs that would give it an interesting look.
These legs have several angles and our PDF plans have the exact dimensions of each cut.
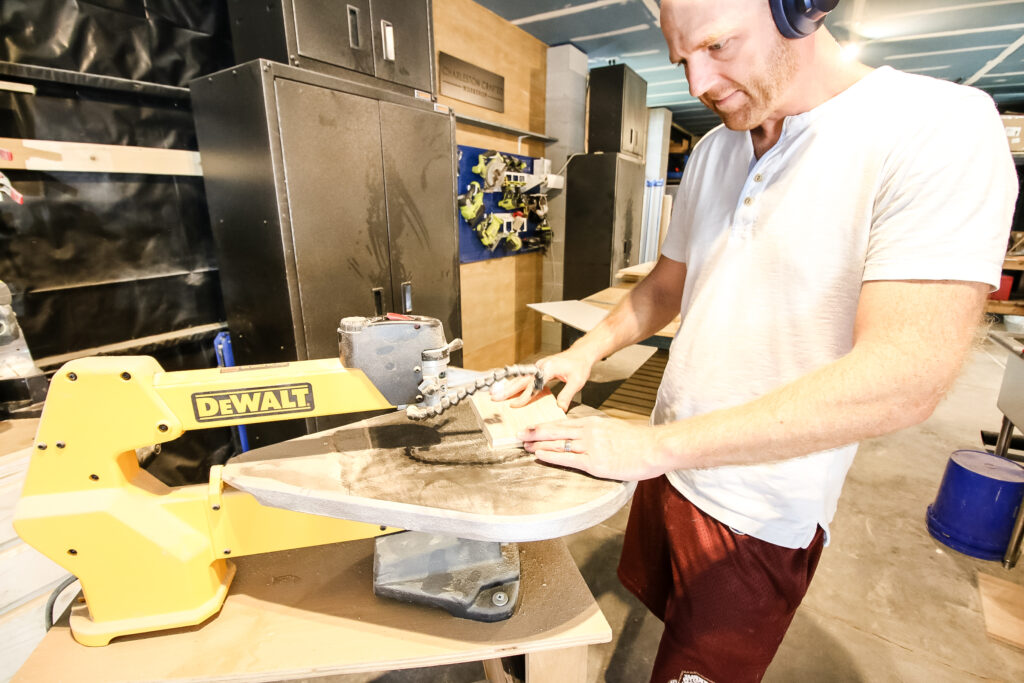
To cut these, we measured everything out, traced lines, then cut them with a scroll saw.
You could also use a jig saw or whatever saw you feel comfortable with.
We used angled legs on this midcentury modern platform bed too, which has free plans!
When the legs were all cut out, these were attached with wood glue and brad nails.
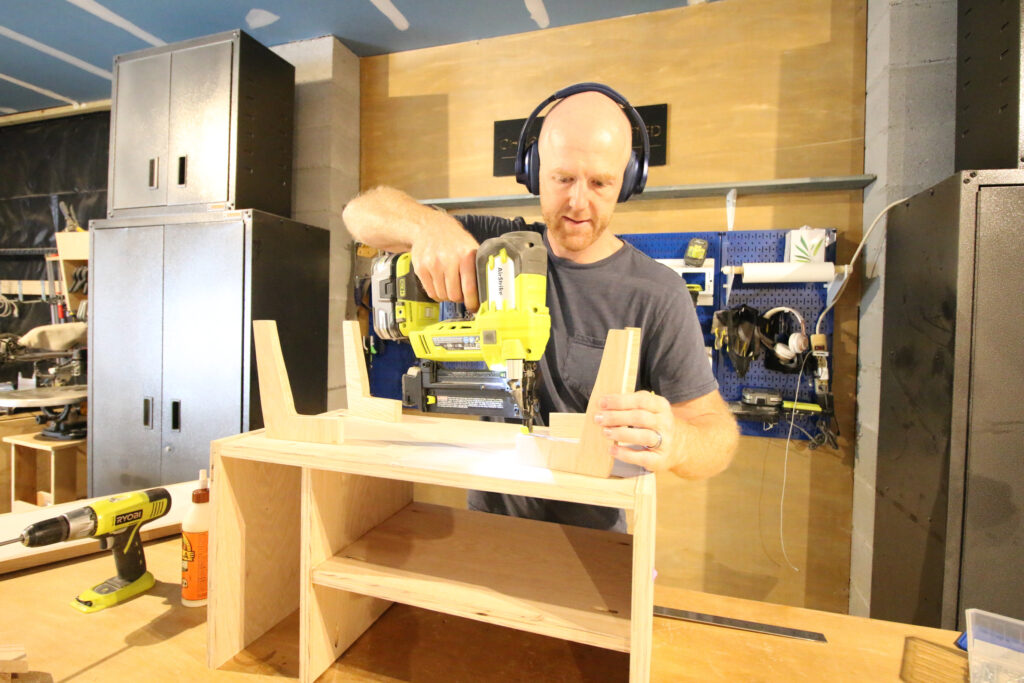
Step Three: Attach Tile Table Top
The most interesting thing about this side table is the tile top.
What's great about a tile top is that there are literally endless options for tile. Whatever fits your vibe, you can use.
We opted for a matte marble tile that doesn't have too much veining. We thought this played off well with the tile stickers we just put over the granite around our fireplace.
This was a 12"x24" tile, but you could use any tile pieces or single tile you want.
Fair warning- turns out that not all 12"x24" tiles are actually 12"x24". Shocker.
We indicate which pieces in the plans need to be adjusted if your tile isn't perfectly sized.
Anyways, the tile is held in place with a piece of plywood as the base and four strips of wood around the outside to make a level surface.
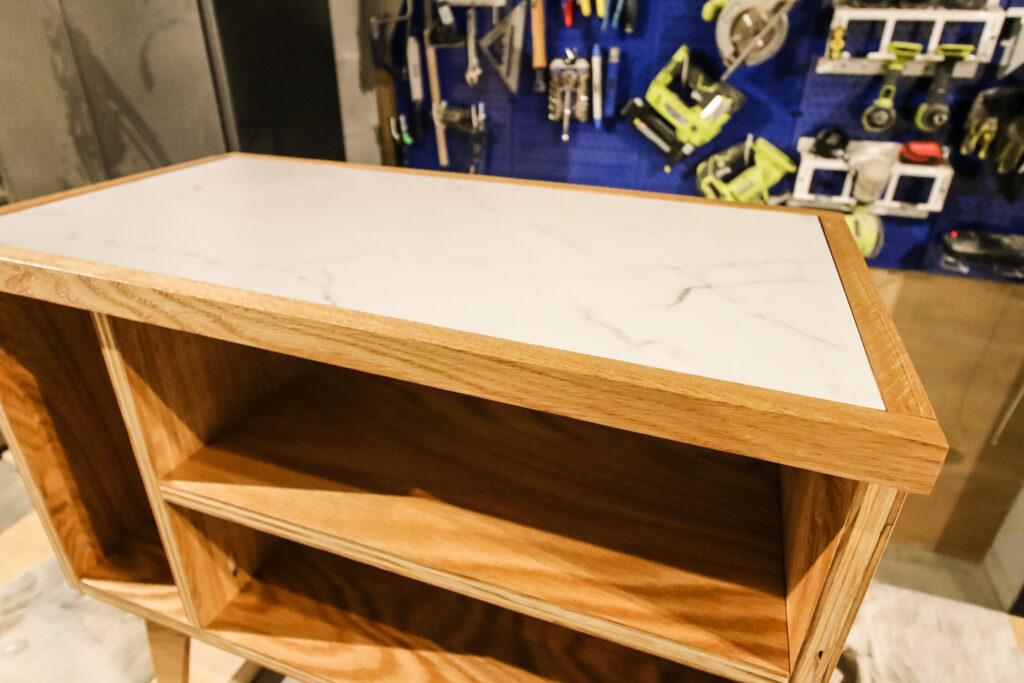
Step Four: Build Door
Another cool aspect of this build is the rattan door that really makes this a unique accent table.
The rattan is also perfect for holding devices because it allows signal to get out and for remotes to work on anything inside.
To build the door, we cut four pieces of trim and glued them together on mitered edges.
We used our new Kreg Benchtop Router Table to carve out grooves on the inner edges of the trim and then stapled the rattan into place.
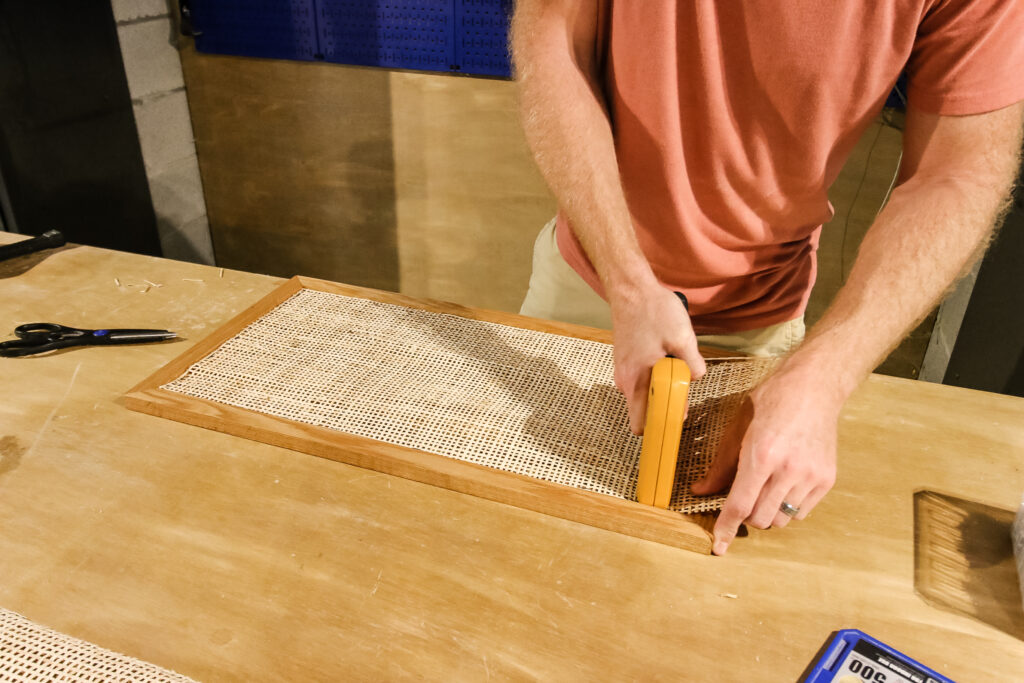
The door gets held into place on the table box using double roller catches.
These are interesting because they snap into place, which means you don't have to have room for a swinging door.
The catches hold the door into place and are also good for around toddlers who can't figure this out as easily as a door.
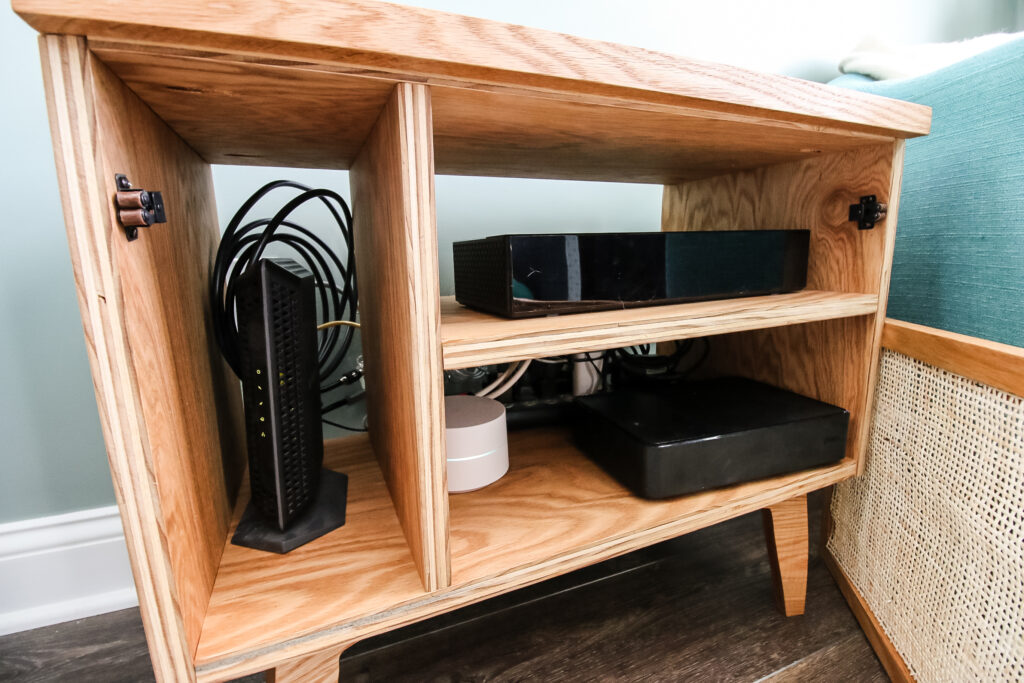
Step Five: Install and Enjoy
Time to move that table into place and enjoy!
We set up all our devices with the cords wrapped up and coming out of the back. Now they all plug in and there's plenty of air flow.
We love the look of this table and the tile makes it extra special!
DIY side table with tile top woodworking plans
As mentioned, make sure you grab our printable PDF woodworking plans for this DIY side table with tile top.
The plans are much more detailed than our post and include everything in a convenient, downloadable, printable format.
You'll get the exact material list, cut list, and step-by-step instructions with computer renderings that will help guide you through building this side table!
Video tutorial
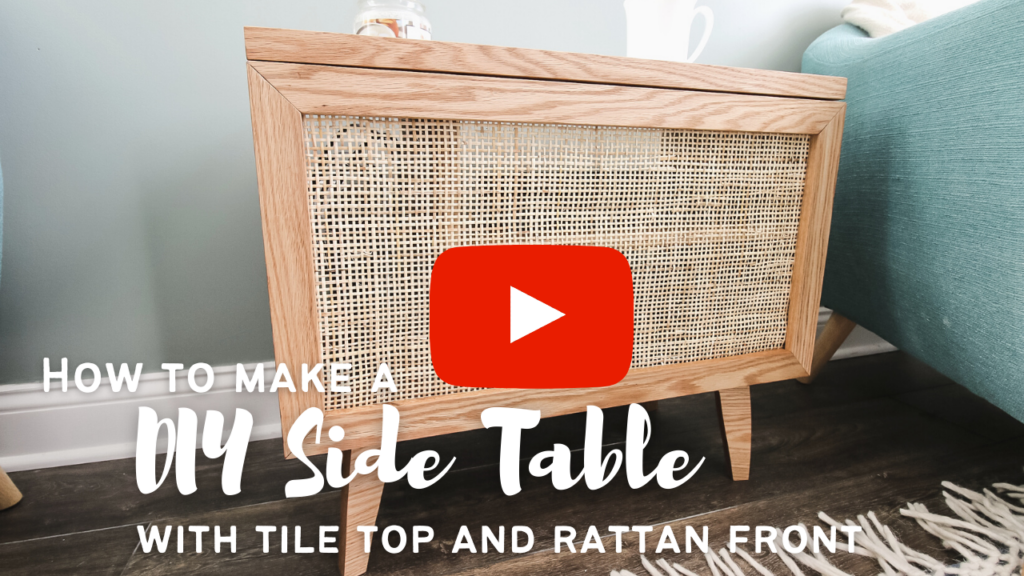
If video tutorials are your thing, we've got one for how we built this side table!
This video will show you some great action shots of how we built this table and how you might be able to customize it for yourself!
Basic woodworking information for every project
Here are some of our most popular woodworking articles!
Shopping for wood:
Woodworking project ideas
- 100+ of the best woodworking project ideas!
- 62 easy beginning woodworking projects
- Woodworking project ideas to make and sell
See all our printable PDF woodworking plans!
Our favorite tools + supplies
- See all our favorite tool reviews
- How to use a Kreg jig
- The ultimate wood stain guide
- The best wood fillers for your project
Remember to also always use safety equipment while woodworking and using tools. Make sure you have proper eye protection, ear protection and a good mask to keep yourself safe.
Looking for something?
We've been doing this since 2012 so we have a LOT of blog posts!
Search stuff like: Ceiling Projects | DIY Plant Stands | Thrift Flips


Hello, I'm Morgan, half of the creative force behind CharlestonCrafted.com! With a passion for DIY that dates back to 2012, I've transformed three homes and now I'm dedicated to helping others craft their dream spaces. Let's turn your house into a home together!


