Working on a woodworking project and wondering do I need to use wood conditioner? Let's learn about wood conditioner and see examples of stained wood with and without prestain conditioner!
We love experimenting with wood stains, and one common question we get is do I need to use wood conditioner?
Honestly, we have very rarely ever used a wood conditioner before staining any of our woodworking projects.
But, we have some woodworking friends who use it every time.
In the interest of our great wood stain experiment, we decided to do a deep dive into wood conditioner pre-stains and see what difference that wood conditioning makes when staining wood projects.
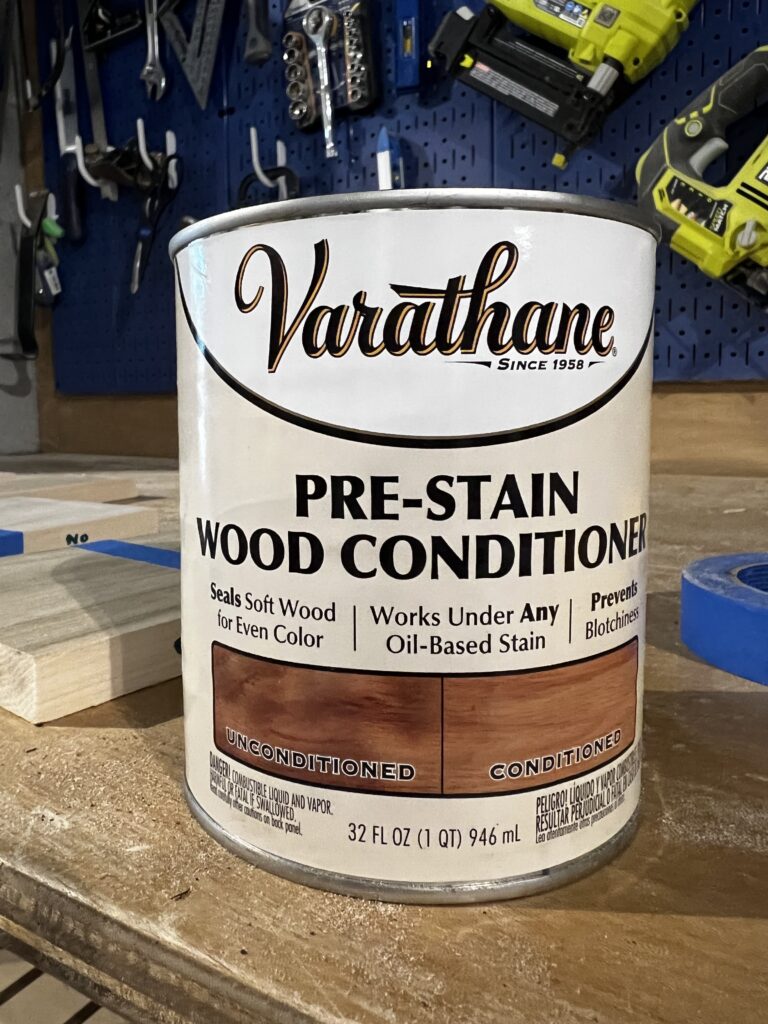
What does wood conditioner do?
Wood conditioner (sometimes called pre-stain) helps wood absorb stains more evenly.
Bare wood has natural variance in the dryness of its surface. Drier spots on the piece of wood will absorb more stain, making them turn darker in color. This can give wood projects the dreaded splotchy finish.
This is particularly prevalent with soft porous woods and less so with hard woods.
Is wood conditioner necessary?
Wood conditioner is not necessary. You can stain perfectly fine without it. However, as you will see with my test pieces below, using a pre stain conditioner results in smoother finishes, especially when using dark wood stain colors on light, soft woods.
What types of wood need a wood conditioner?
Wood conditioner makes the biggest difference on soft woods. These soft woods have more variance in their moisture levels and also absorb more stain in general compared to hardwoods. So, they tend to stain blotchily. Using a wood conditioner will help them take stain more evenly.
Woods that benefit from a wood conditioner the most include:
- pine
- popular
- spruce
- fir
- maple
- alder
- birch
- old wood or old wood furniture that has dried out over many years
What type of stains should wood conditioner work with?
Only use oil based wood conditioner with oil based stains and water based wood conditioners with water based stains.

How to use wood conditioner
You should always follow the instructions on your can of wood conditioner. The general best way to use wood conditioner is:
- Sand your wood with a high grit sandpaper for a smooth finish
- Wipe clean of any dust or debris
- Apply pre stain wood conditioner with a brush or lint free cloth
- After about 1 minute, wipe off any excess or pooling applied wood conditioner
- Let sit for at least 30 minutes
- Apply stain to wood surface as usual
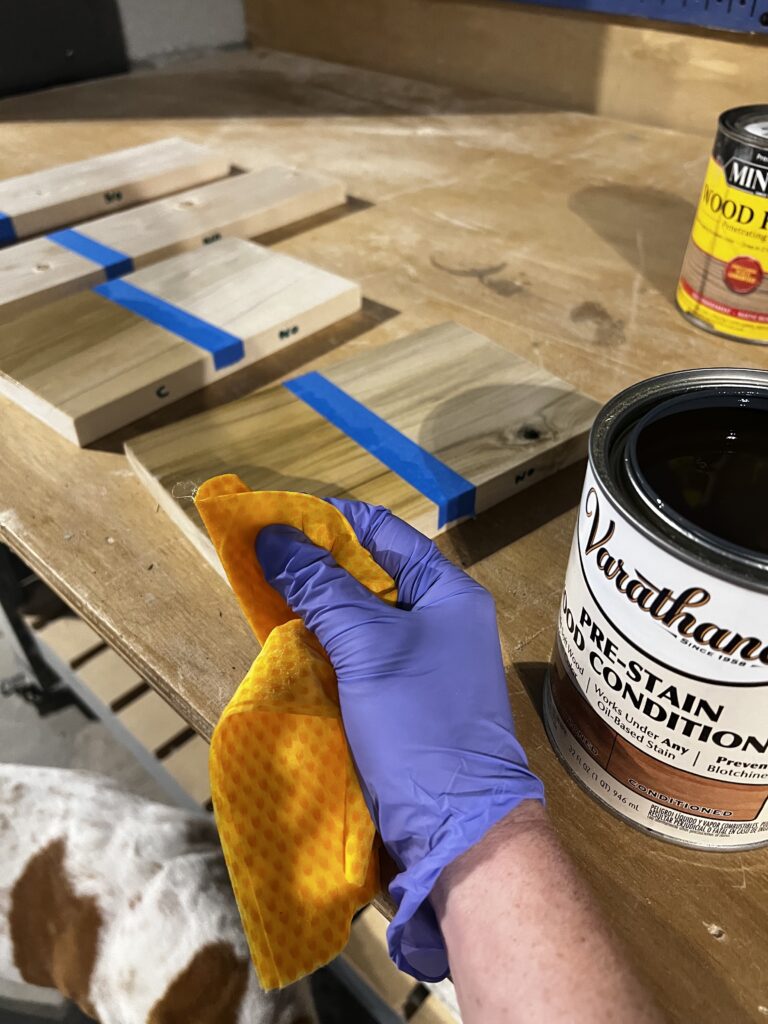
Do you let wood conditioner dry before staining?
You want to let the wood conditioner absorb fully before applying wood stain on top of it.
How long do you let wood conditioner dry before staining?
Wait at least 30 minutes after you apply the conditioner to apply your stain finish. If the conditioner is still too wet, the stain might not absorb properly.
Can wood conditioner be left on too long?
After about 24 hours, your wood conditioner will have fully dried. Hold up a piece of un-conditioned wood from the same sample to compare colors and see. If it has dried, it won't do you any good and you'll need to start over.
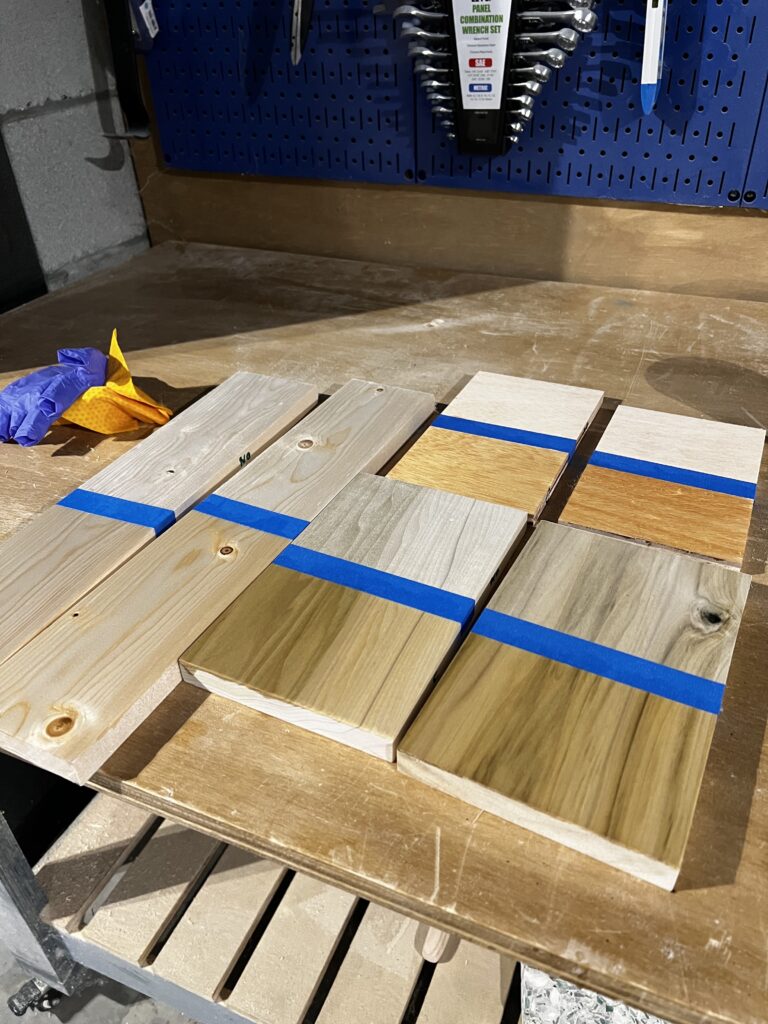
Does wood conditioner change the color of wood?
Yes! Wood conditioner darkens the natural wood tones - kind of like using a wood oil. You can see the picture here of the wood conditioner before stain!
Do you need to sand after applying wood conditioner?
Oil based wood conditioners do not need to be sanded. Water based conditioners, just like any water applied to wood, can raise the grain and benefit from a light sanding between coats.
Can you paint over wood conditioner?
Yes, you can paint over wood conditioner, just let it dry completely (24 hours +) first. You don't need to condition before painting since paint covers all the wood grain.
Wood conditioner substitutes
No pre-stain wood conditioner on hand? You can also use:
- Vegetable oil (¾ cup) + white vinegar (¼ cup)
- Polyurethane (1 part) + Mineral spirit (2 parts)
- Shellac + Denatured alcohol (equal parts)
- Water - some people swear by wetting wood before staining it! Only do this with water based stains, not oil based stains.
To be clear - I haven't tried any of these methods. Test on scrap before committing to your whole woodworking project!
Wood samples with and without wood conditioner
I tested wood conditioner on 3 types of wood with 2 wood stains. This is the wood conditioner that we used.
The lighter wood stain is Minwax Rustic Beige.
The darker wood stain is Minwax Dark Walnut.
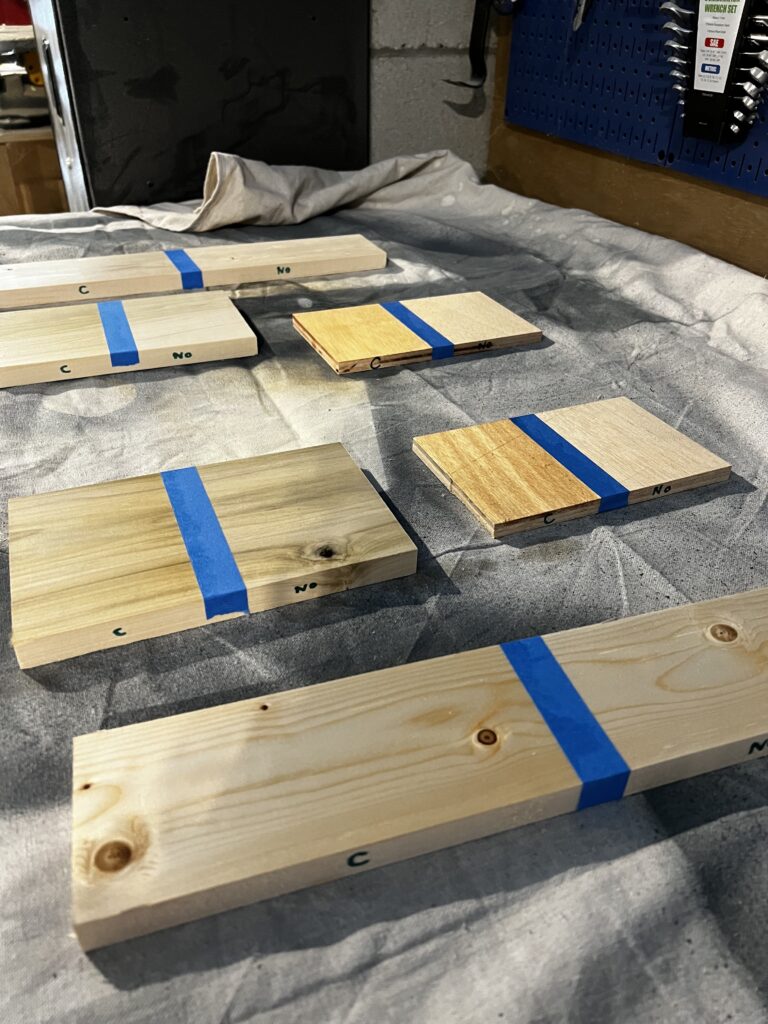
We divided each board in half and used prestain wood conditioner on one half. This way, you can really see the effect of preconditioning wood for staining!
Here are the results!
Stain conditioner + pine wood
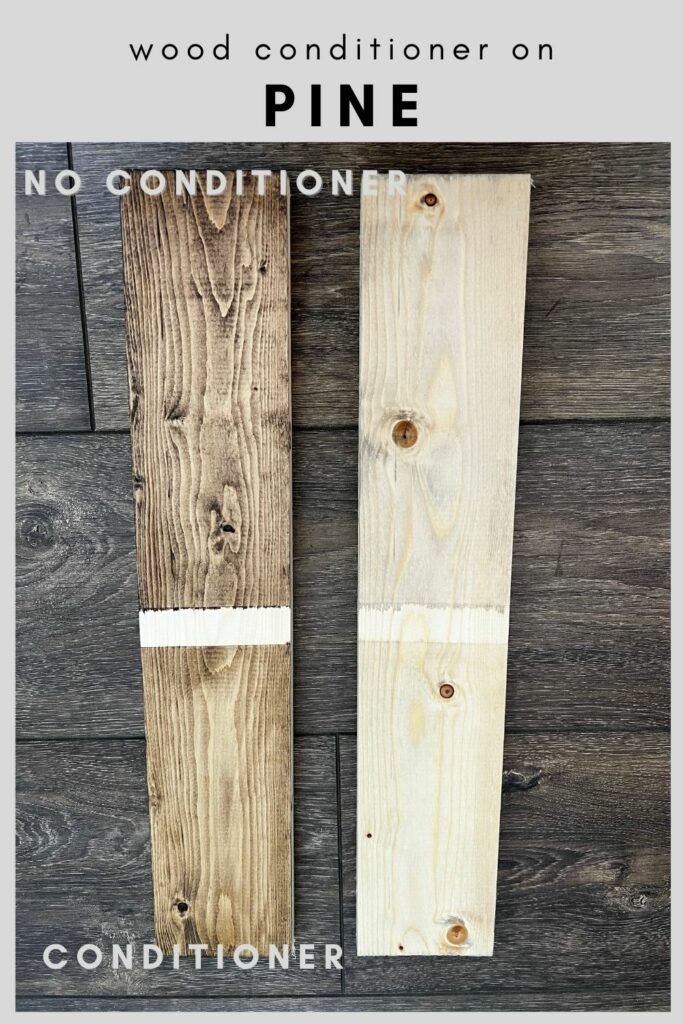
Pine is a soft wood and it tends to take stain more splotchily. Therefore, wood conditioner makes a BIG difference on pine wood.
Pre-stain evens out the tone of the pine for more consistent stain absorption. This is especially evident when staining the wood darker.
If you are staining pine a dark color - definitely use a pre stain wood conditioner!
Stain conditioner + poplar wood
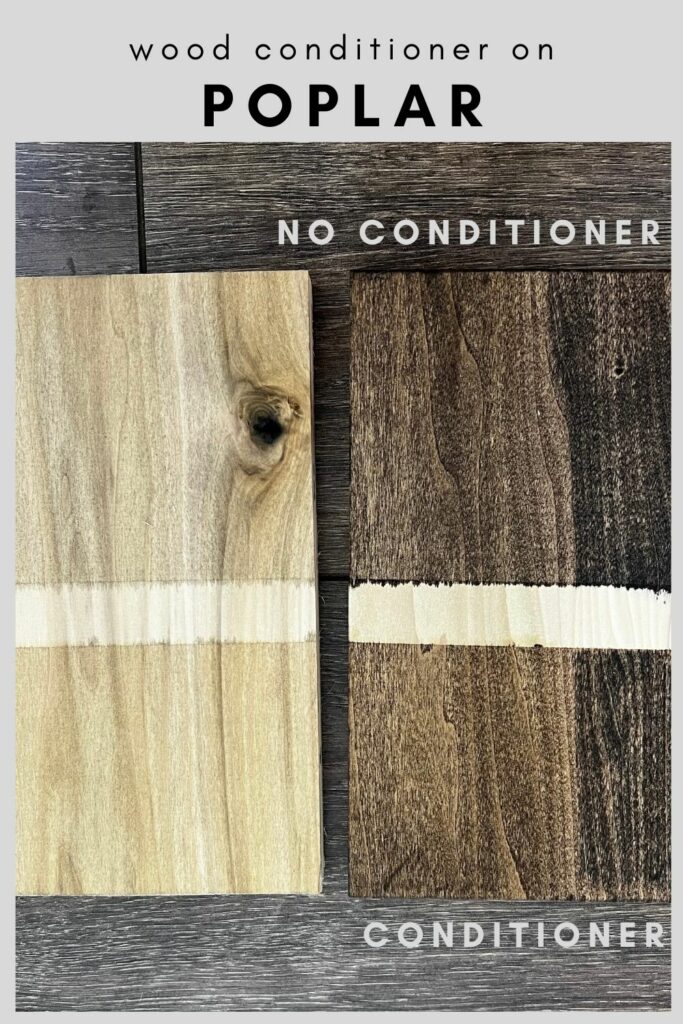
Poplar is a hardwood (though a softer hardwood). There is less of a difference in the absorption in hardwoods.
Wood conditioner makes a minimal difference and it's not worth your time or money to use it on this wood!
Stain conditioner + plywood
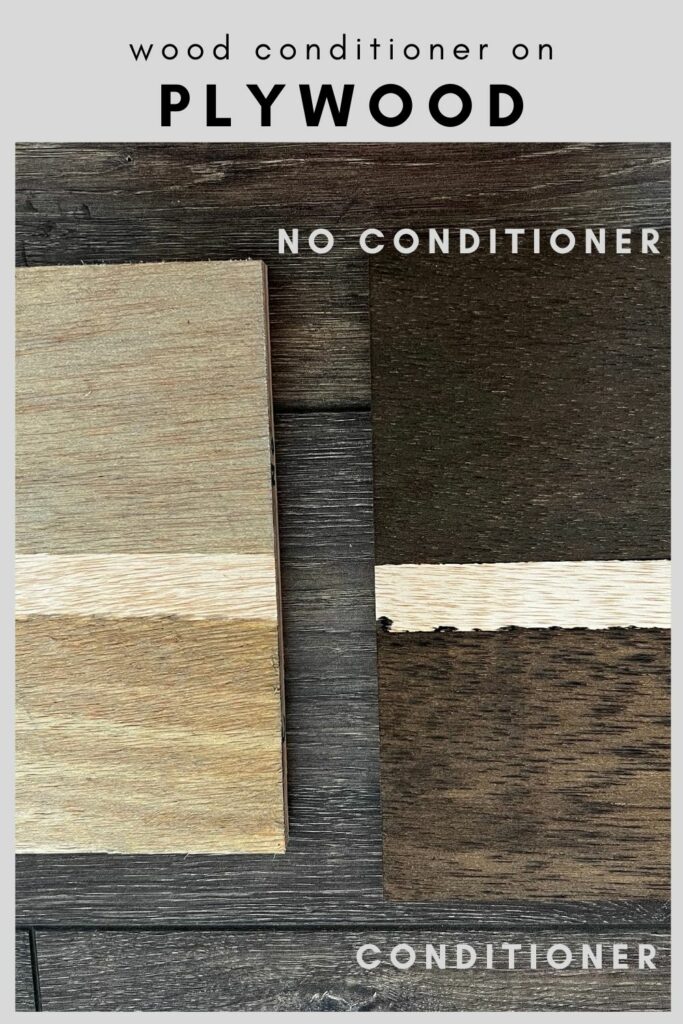
Plywood is a softer wood, though not as soft as pine.
The samples that I used conditioner on are noticeably lighter compared to the raw wood sides. This means that the wood absorbed less pigment - and shows more grain - because it absorbed a bit of the conditioner first.
Neither of these are bad, but I think the conditioned side looks slightly better - and shows off the grain better. I'd condition plywood when possible before staining!
Once your stain has completely dried, don't forget to seal it! Here are our tips for sealing stained wood.
Need to fill a project? Here are our favorite wood fillers compared!
Before you stain, learn about pre-stain wood conditioners and if you should use one!
We tested these ten stains on five different wood species!
Check out our favorite white wood stains and black wood stains and gray wood stains!
Here are our favorite light wood stains + dark wood stains!
Be sure to watch my video on how to open a can of wood stain.
Any more questions about conditioning wood for staining?!
Looking for something?
We've been doing this since 2012 so we have a LOT of blog posts!
Search stuff like: Ceiling Projects | DIY Plant Stands | Thrift Flips


Hello, I'm Morgan, half of the creative force behind CharlestonCrafted.com! With a passion for DIY that dates back to 2012, I've transformed three homes and now I'm dedicated to helping others craft their dream spaces. Let's turn your house into a home together!


