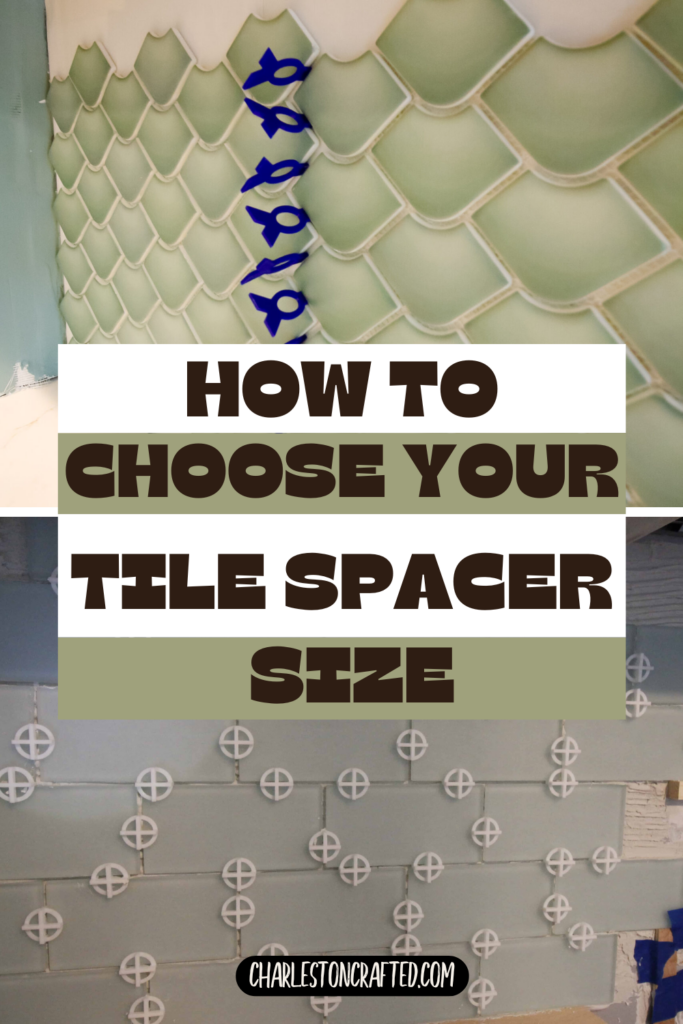
Working on updating your home with new tile in your kitchen or bathroom? Master your tiling project with the right spacer size with our tips for seamless and professional DIY results!
We've been working hard on our most recent kitchen renovation and a big part of any kitchen is the backsplash. Your backsplash is the statement in your kitchen and has to look perfect.
A big part of your backsplash looking perfect is the grout you choose and a big part of the grout looking perfect is whether all the lines are the same size.
When you're hanging your kitchen backsplash or laying tile floors in your bathroom or shower pan, it's important to get the spacing between your tiles even and equal. That's where tile spacers come in.
But it's more than just using tile spacers, it's choosing the right tile spacer size for your project.
Try installing your tile using an adhesive tile mat instead of mortar!
How to choose tile spacer size
Choosing a tile spacer size can be a personal choice, but sometimes it's dictated by the tile you've chosen. Depending on the tile, you may be able to get away with a bigger or smaller grout.
Let's take a look at what we've learned about choosing a tile spacer size for your project!
You won't need tile spacers if you hang peel and stick tile like this one!
What are tile spacers?
Let's back up a bit real quick and talk about what tile spacers actually are. Tile spacers are small pieces of plastic made in different shapes and thicknesses that help you create a defined and repeatable gap for grout on your tile.
Tile spacers can come as flat sticks, T-shaped or cross-shaped pieces, with rings or without. There's a lot of different options. These tile spacers are meant to be put up alongside and in between pieces of your tiles in a backsplash, shower, or floor so that all of the tiles have the same amount of space around them across your project.
You don't want too small of a gap between your tiles so that grout doesn't hold, but you also don't want too big of a gap or the grout can crack and fall out. Tile spacers help you achieve the uniform, perfect look.
You could always choose to paint a tile backsplash instead of hanging one!
How do tile spacers work?
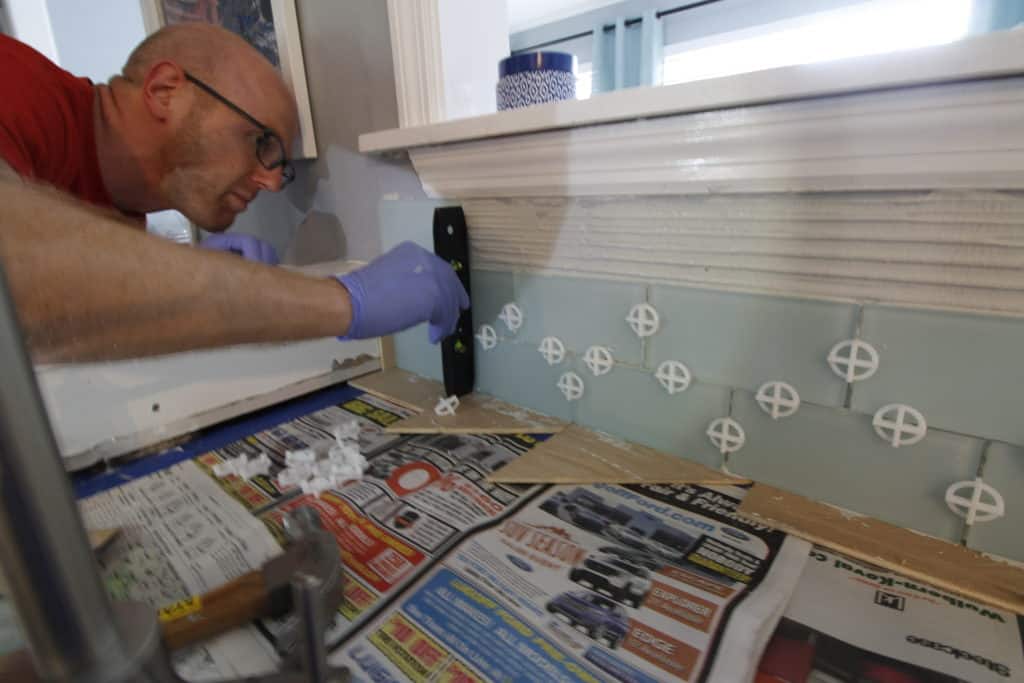
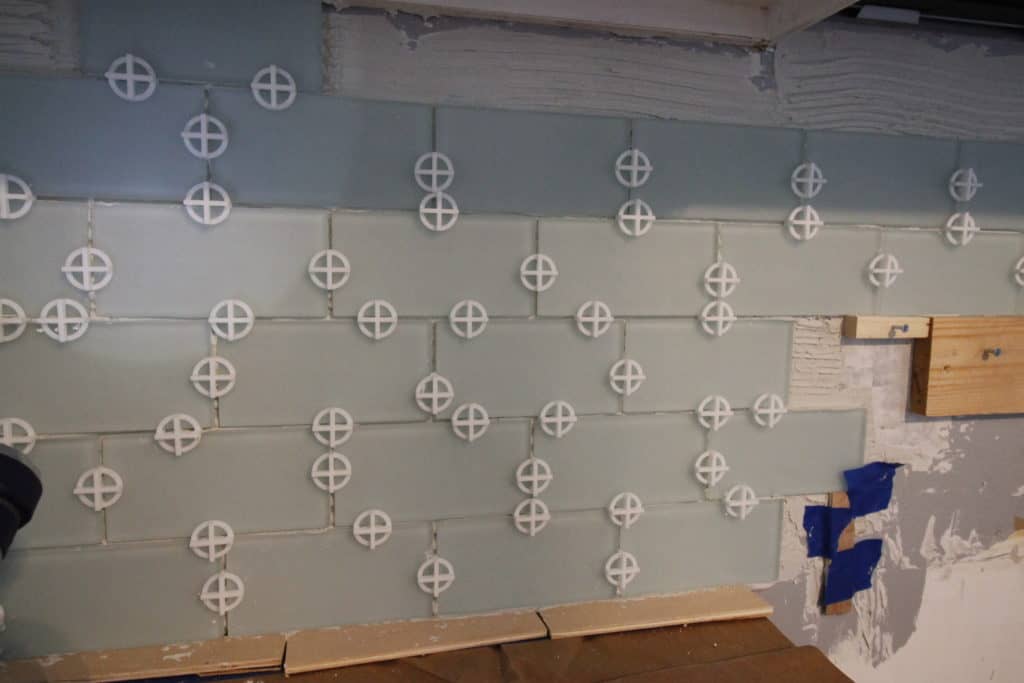
Tile spacers work by creating an even amount of distance between all your tiles in your renovation project. After applying your mortar or adhesive tile paper, start out by placing your first tile or tile sheet in the lower left corner of your project.
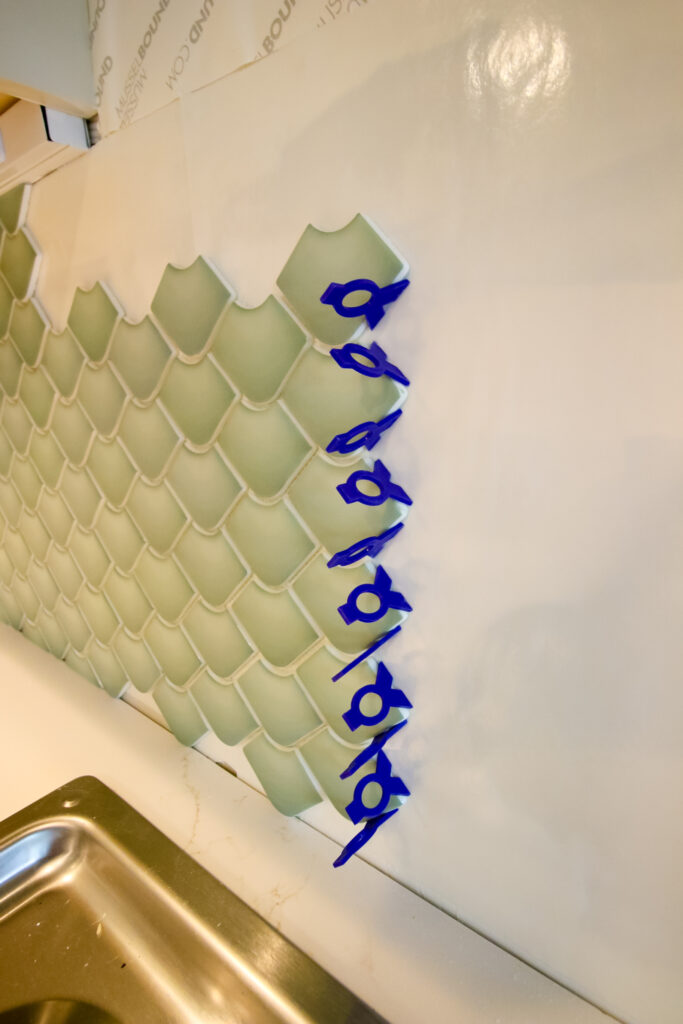
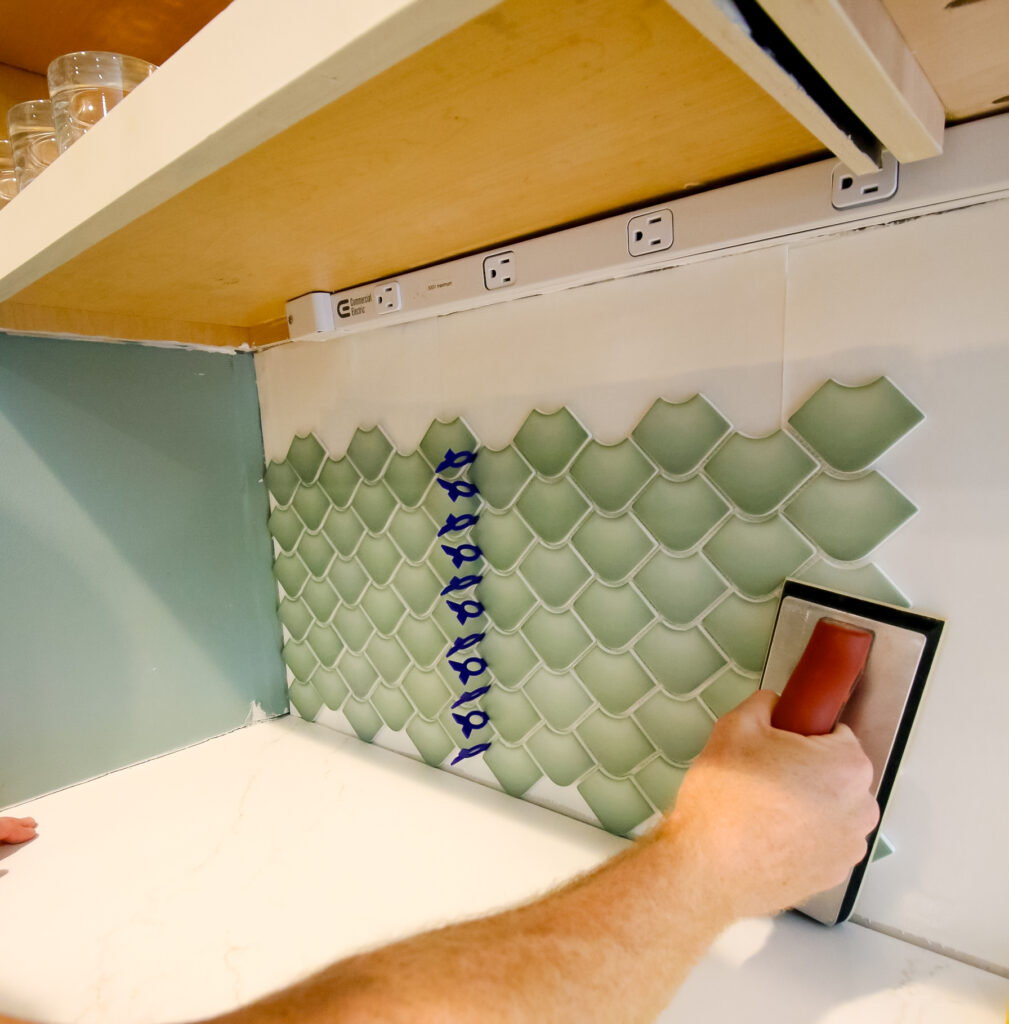
Once you have that tile in place, line the edges with tile spacers. If you're doing a subway tile, place the tile spacers along both sides and in the corner. If you're doing a mosaic tile, place your tile spacers alongside the entire edge of the sheet, including inside and out of each nook of the tile.
Next, place your next sheet right up against the tile spacers without any more space. Repeat this for the next tile or sheet.
For me, I usually leave the tile spacers for the last few in place as I work my way up and to the right, then pull them out and use them a few pieces down the line. You can also leave your spacers in the entire time throughout your project, then remove them at the end. They may be a little stuck in your mortar and some tile spacers are designed to snap off and leave a little bit in the line.
General tile spacer sizes for different sizes of tile
No matter the type of tile you're using, you need to consider the size of the tile you're using. In general, for small pieces of tile, you want to use a thinner tile spacer, whereas for larger pieces of tile, you use a bigger tile spacer.
For instance, if you're using a sleek and modern kitchen backsplash tile, you'll probably want to go with a tile spacer of 1/16" or ⅛" for your grout lines. For big flooring tiles or shower tiles, you will probably want to go with 3/16" or ¼" for your tile spacers to give that thicker grout line.
Also, in general, the more intricate the design, you probably want a smaller grout so that the lines don't take away from the design.
Tile spacer size for subway tile
Choosing a tile spacer size for subway tile is mostly a decision based on how big the tile is. If you're looking at a smaller 2"x4" tile, smaller than that, or even squares, you should opt for a 1/16" or ⅛" tile spacer.
For larger subway tiles, up to like 4"x12", you can get away with a 3/16" tile spacer and grout line.
With any tiles, you can also check to see what the recommended grout line size is for the tile and go with that. But overall, it's a personal preference. I recommend trying a few different sizes to see which you think would look best. Try this on the ground with white background so you can really tell what the grout will look like.
Here's our tips on hanging subway tile!
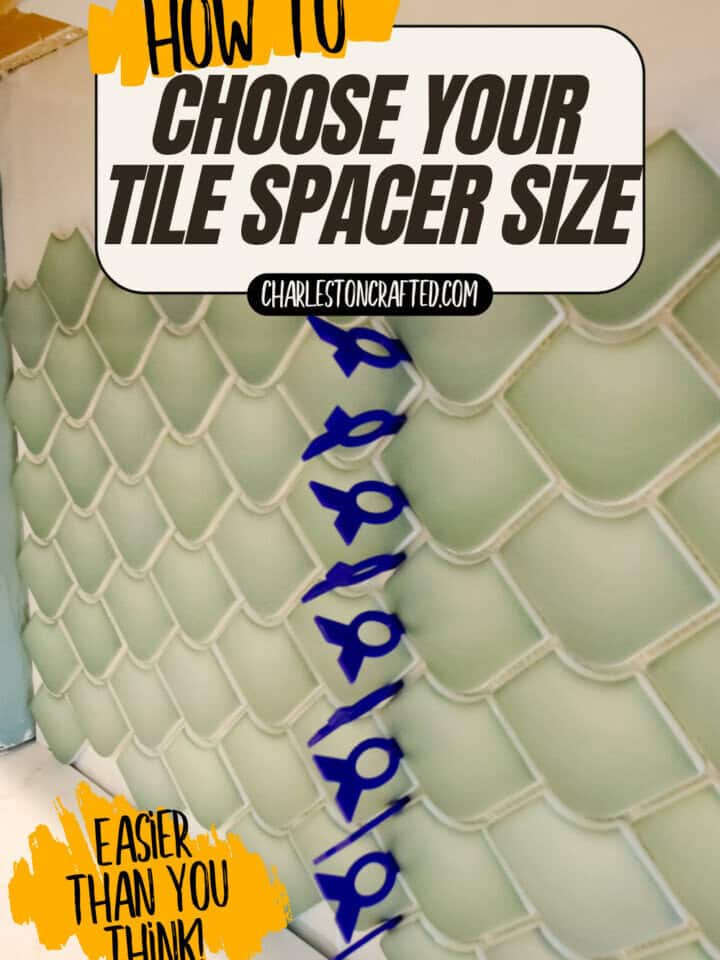
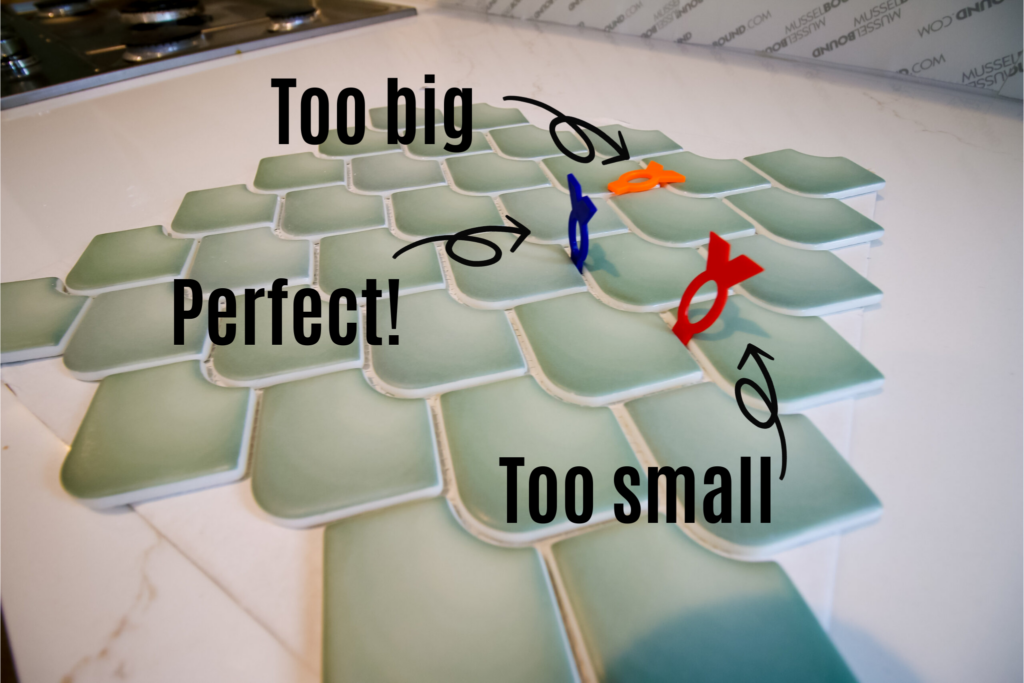
Tile spacer size for mosaic tile
Choosing a tile spacer size for mosaic tile is the easiest choice of any tile options because the decision has already been made for you. The tile spacer and grout line size for a sheet of mosaic tile should be the exact amount of space between each of the tiles in the mosaic.
If the tile doesn't say specifically what the size is, grab a few different tile spacers and try to put them in between two tiles. If the spacer is too small, it will tip over when you let go. If it's too big, it won't even fit between the tiles. Go with the one that holds the tile spacer up perfectly.
Choosing your tile spacers
Overall, you got this. Choosing the tile spacer size for your project is honestly one of the least important decisions or parts of any tiling project. Choosing your tiles and grout color are much more important and actually hanging the tiles is the tough part. But good luck and know that you can do this!

Looking for something?
We've been doing this since 2012 so we have a LOT of blog posts!
Search stuff like: Ceiling Projects | DIY Plant Stands | Thrift Flips

Hey there, I'm Sean, the woodworking enthusiast and builder behind CharlestonCrafted.com! Since 2012, I've been sharing the magic of turning raw materials into beautiful creations. I love teaching others the art and satisfaction of woodworking and DIY. I try to inspire fellow crafters to make something extraordinary out of nothing at all.