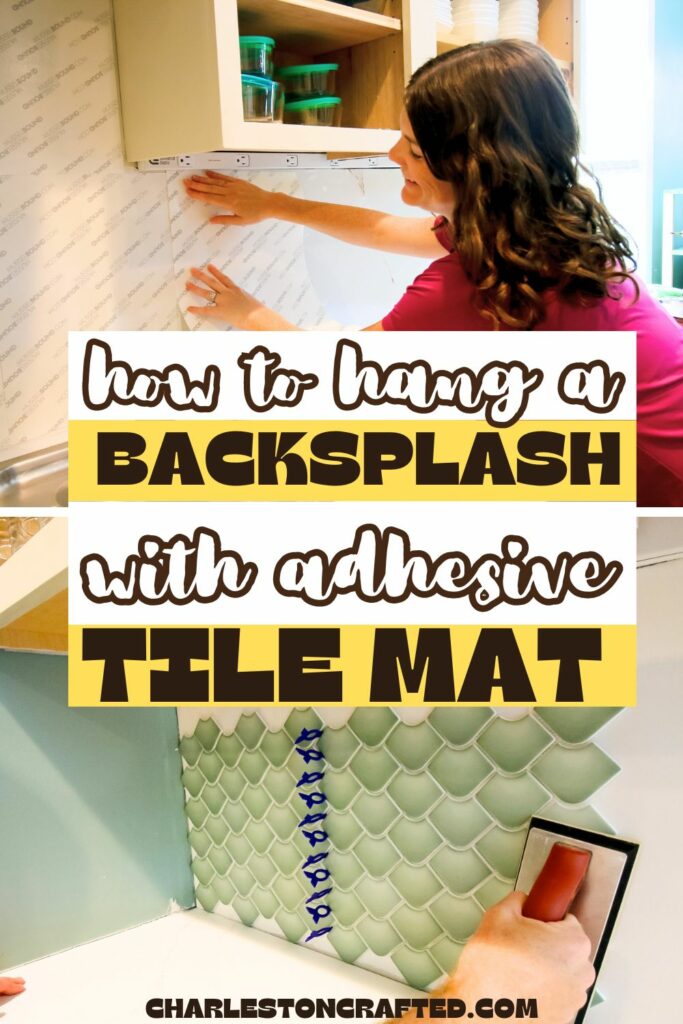
Want to hang a tile backsplash - without the mess? Here's a step by step tutorial of how to hang a backsplash with Musselbound Adhesive Tile Mat.
A tile backsplash is a beautiful focal point - and a functional part of any kitchen.
We've realized while living through this kitchen renovation - the tile backsplash really does serve a purpose! We cook almost every meal at home, and have noticed the bare drywall above our stove becoming speckled with grease spots just in this brief construction time. Whoops!
When we were finally ready to hang the tile - and had childcare for a day so we could tag team it - we decided to experiment with hanging this backsplash with Musselbound Adhesive Tile Mats.
We have previously used peel and stick tile and more traditional mortar to hang a tile backsplash.
This adhesive tile mat is a mix between the two and a way to almost make any tile into peel and stick tile.
We love trying new products, but were also enticed by the idea of this being a super clean, beginner-friendly way to hang a backsplash.
And, we loved the experience.

What is Musselbound Adhesive Tile Mat?
Musselbound is a brand and they make the roll of adhesive tile mat, which we purchased in store at Lowes Home Improvement.
This is basically super large, super strong double sided sticky tape.
You unroll it and press one side into the drywall. Then, you peel the backer and stick your tile in place.
It was legitimately easy to use and super clean. We did still have to grout, but we did not mess with messy mortar.
We loved working with this Tile Mat and definitely recommend it, especially for smaller spaces.
Do note that this tile mat is NOT approved for wet spaces (showers, tubs) or floors. It's for wall tile in spaces like a kitchen or laundry room.
Where to buy Musselbound Adhesive Tile Mat:
How to hang a backsplash with Musselbound Adhesive Tile Mat
Here's how easy it is to hang a tile backsplash using Musselbound peel and stick mat.
Supplies needed:
- Musselbound Adhesive Tile Mat (measure the length you need)
- Tile of choice - here's the tile we used
- Grout + bucket to mix it in + mixer attachment for drill
- Caulk
Tools needed:
- Scissors
- Utility Knife
- Level (laser level if you are using individual tiles)
- Grout float
- Tile spacers in size of choice (some are included with a roll of Musselbound!)
- Tile cutter of choice - this is the cutter we used
- Sponge + bucket to hold water
Steps to hang a backsplash:
STEP 1: Clean
The adhesive mat will only stick to a clean, dry surface. So, you need to clean everything off. Our wall was fresh drywall and still had a light coating of white dust on it. We used a cloth to wipe it very well.
Trust me on this step - we tried to start without really cleaning super well and the adhesive did not stick. You want a super strong hold - take the time to wipe the surface down!
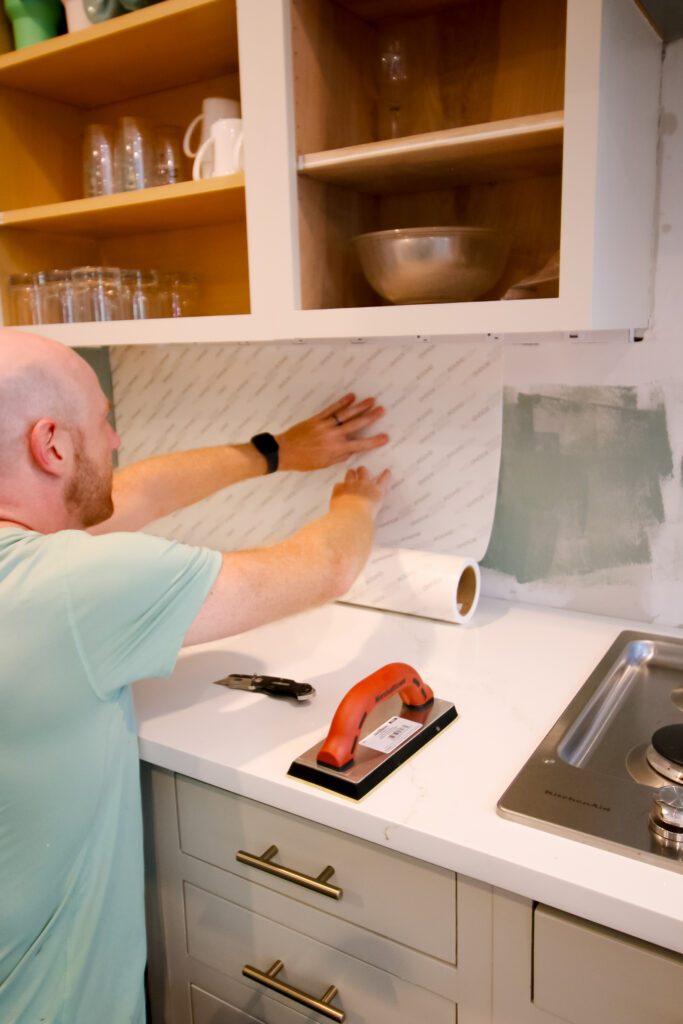
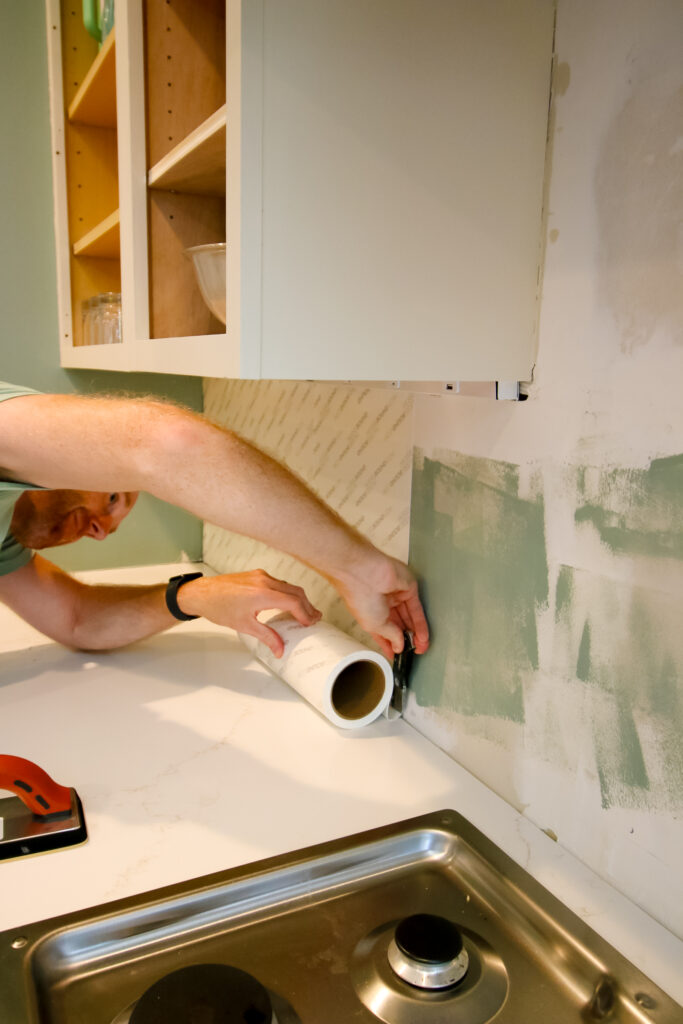
STEP 2: Roll & Stick
Now you are ready to add your adhesive mat! It is important that you run the adhesive in vertical strips (up and down) and not in one long horizontal line across the space. It was designed to go vertically and might not hold up if hung horizontally.
Unroll a little bit of the roll. Align in the top corner of your space, aligning along the top and side as much as possible. Unroll as you line it up down the space. Gently press into place - don't worry about pushing all the way to adhere, yet.
STEP 3: Trim
Use a utility knife to trim at the bottom, along the countertop. We found it easiest to cut about an inch too long, then trim a second time to get it to fit.
When we tried to cut it just right the first time, it always came up short once pushed into place!
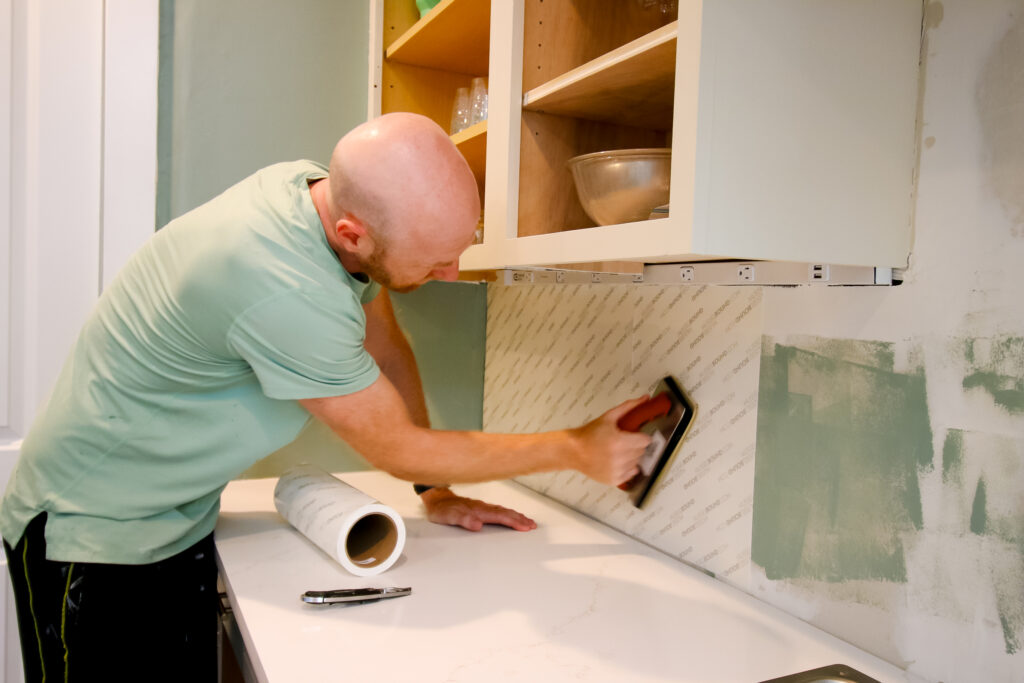
STEP 4: Press
Use your grout float to press the adhesive firmly into place in the wall. Start at the most stuck on side (most likely the top edge) and work your way down and out. This is the best way to avoid trapping air bubbles in the sheet.
Work your way around the sheet, making sure its all pressed in firmly. Then, you are ready to move on to the next strip.
We hung all of our Adhesive Sheets at once, one after the other, so the whole space was prepped and ready to tile. I definitely recommend doing it this way - once you get going, it's easy to slam it out, plus I think giving it more time to sit helps with the hold!
STEP 5: Peel
However, you do not want to peel a section until you are ready to add tile to it. It can start to lose its stickiness as it's exposed to the air.
You can start tiling on a flat edge or anywhere you prefer. If your tile has a design, you may want to start at the center, so that the design appears symmetrical and centered.
Peel just the sheets that you need to to get started. We found it was easiest to use the utility knife to help peel the backing off the sheet.
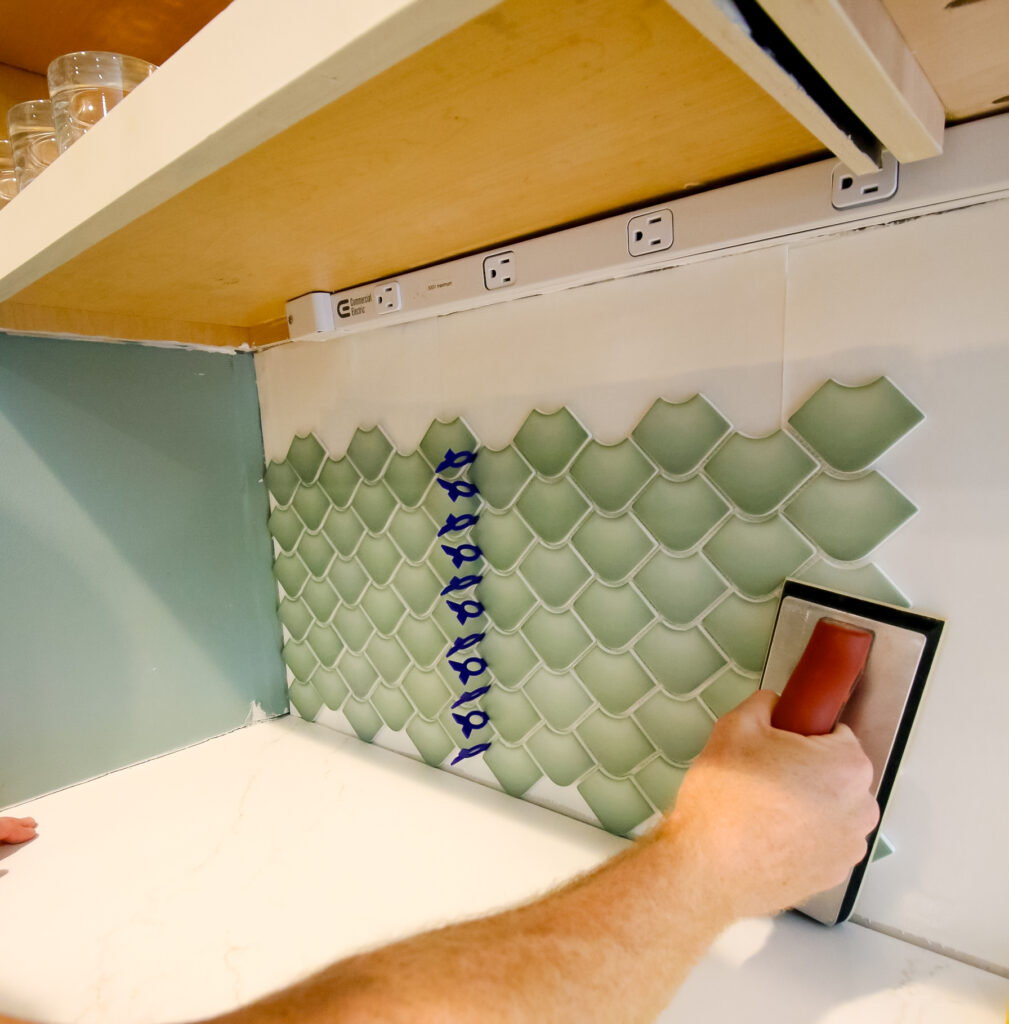
STEP 6: Align + stick tile
Now is the most harrowing part of the process - lining up the tile. While you do have a tiny amount of wiggle room when you first place it on the mat, it's not much, especially if your tile has a backer sheet.
You want to be very careful to line them up as carefully as possible before pressing into the mat.
We found it much easier when working with large sheets of tile to have 2 people - 1 to hold the sheet up and level and the other to align it and press into place.
After your first sheet, you will want to use tile spacers in between the tile sheets or individual tiles. This helps to maintain consistent spacing and is important for a good finished look.
We found that the tile spacers stuck really nicely to the adhesive, making it an easy process.
Plus, since the tiles are "dry" as soon as you press them into place, you can remove the spacers and use them in the next section immediately so you only need a small pack.
Once your tiles are in place, once again use the grout float to firmly press them into the wall.
STEP 7: Add cut tiles
Now, for the actual trickiest portion of the project: cutting tile. Unless your backsplash is magically the perfect size or you're making a grid pattern of rectangular tiles, you will need to cut tiles to fit along the edges.
We did a full 12x12" tile sheet along the bottom, a half sheet (cut with scissors) above that, but still had to fit in along the edges with cut tiles.
The tile cutting itself isn't too hard, but getting the measurements right is a bit tricky. Ideally, you'll have a bit of spare tile so you have some wiggle room.

We used this tile cutter, which works in a 2 step process. You line up the tile along the marked cut line. First, drag the handle to score a line across the tile where you want to cut it. Then, press down on the handle to snap it in half.
As I said, it's easy to do the cutting - not much muscle is required and it's very beginner friendly tool - but the tricky part is just getting the measurements just right.
STEP 8: Repeat
Once you fill in your cut pieces, peel the next section of the adhesive mat and repeat the tile hanging process. Repeat, repeat until you are done.
STEP 9: Grout
A nice thing about the adhesive mat is that you can grout right away. We actually waited a day to grout because we were tired, but you don't have to!
Mix your grout in a bucket following the instructions on your grout bag. We always use unsanded grout to avoid scratching the tile surface.
Dip your grout float into the grout and smear it onto the tile. Come at it from several angles and really work it into the cracks to make sure there are no air bubbles.
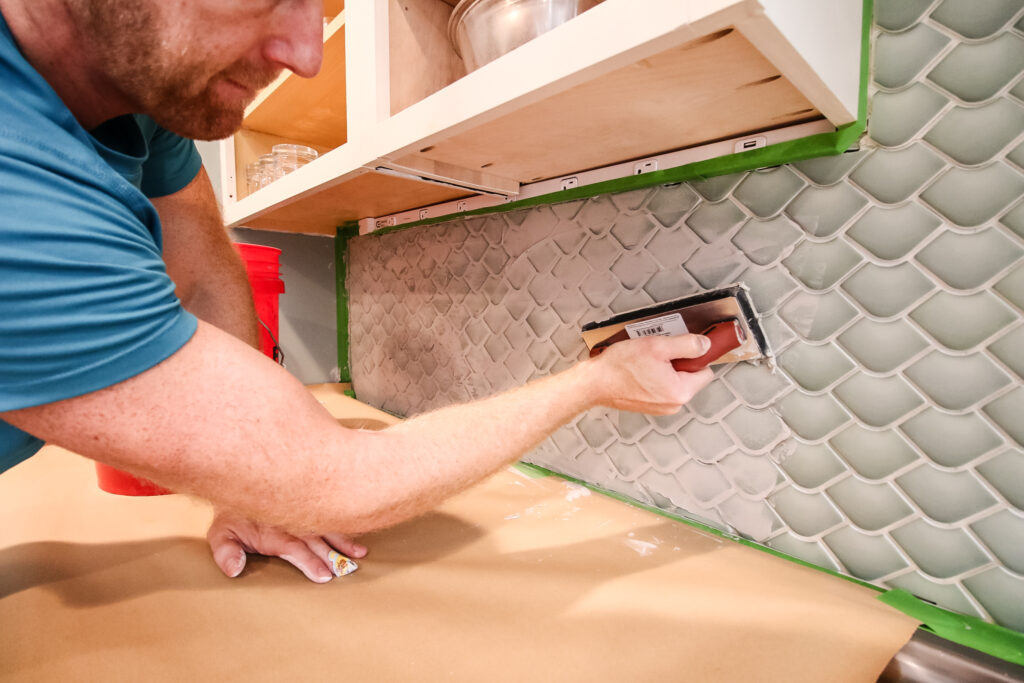
Then, take the long edge of the float and scrape across the tile the remove all excess grout. Repeat on the entire surface.
After scraping off the excess, use a damp sponge to clean the surface of the tile. Rinse your sponge in water often to get it clean.
*note: don't dump grout-y water down the drain. It could dry and cause a clog! We dumped ours outside, often!*
Repeat the wiping over and over with clean water to get the tiles totally clean.
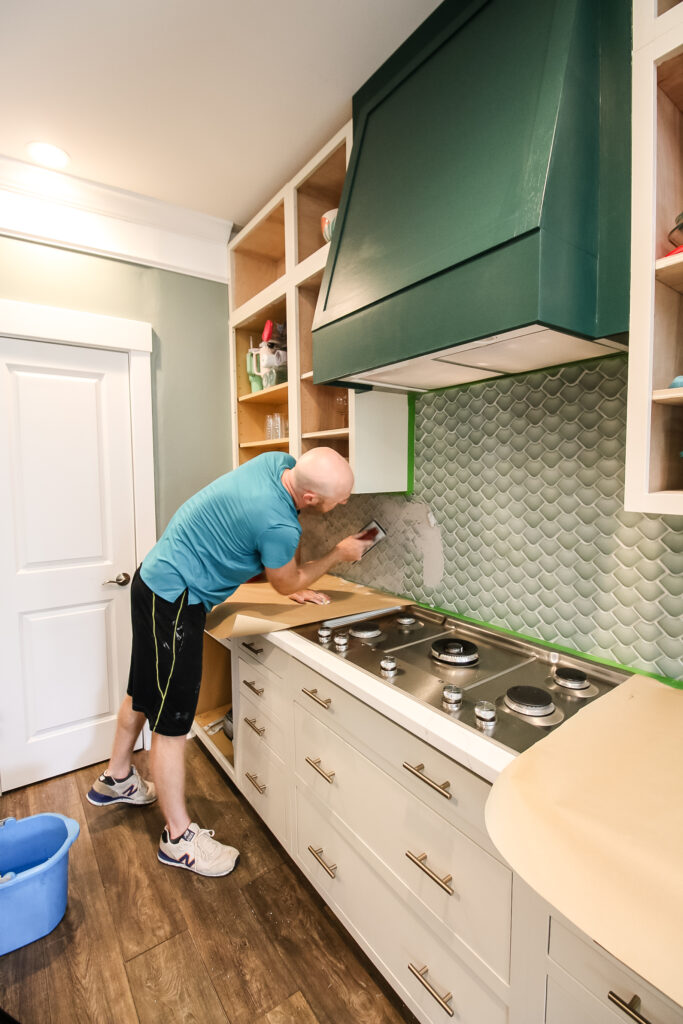
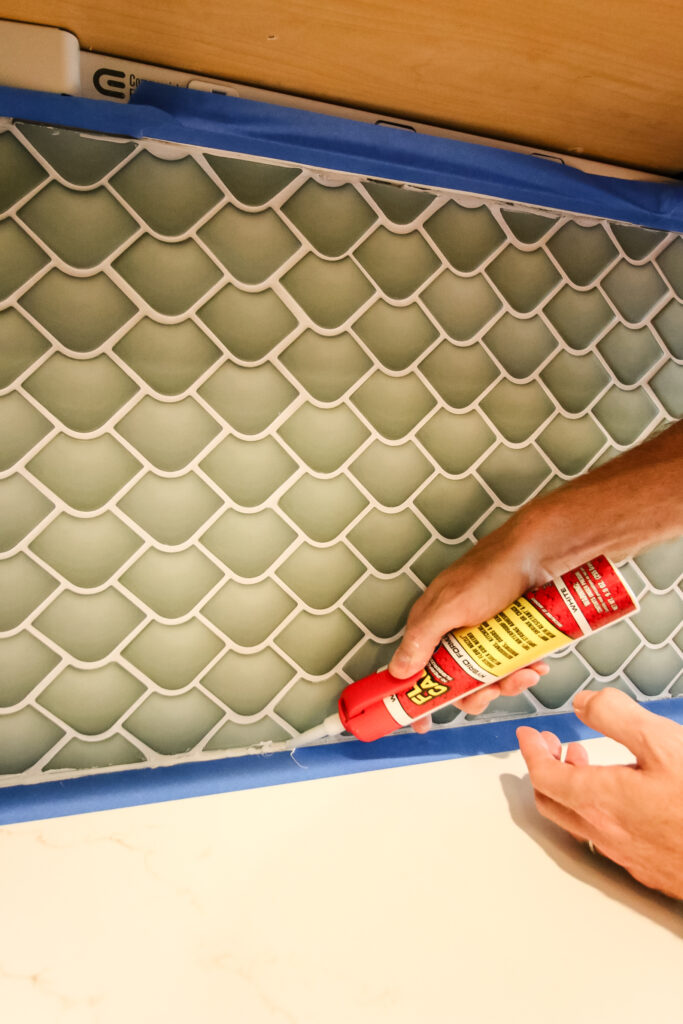
STEP 10: Caulk
Once the grout is dry, you want to caulk the edges. Grout is hard like concrete and has no give. Caulk is more spongey and has a bit of give, so if the wall or tiles slightly shift over time, there won't be cracking.
Apply caulk along the edges such as between the tile edge and drywall, cabinet, or countertop. Use a wet finger to rub the caulk smooth.
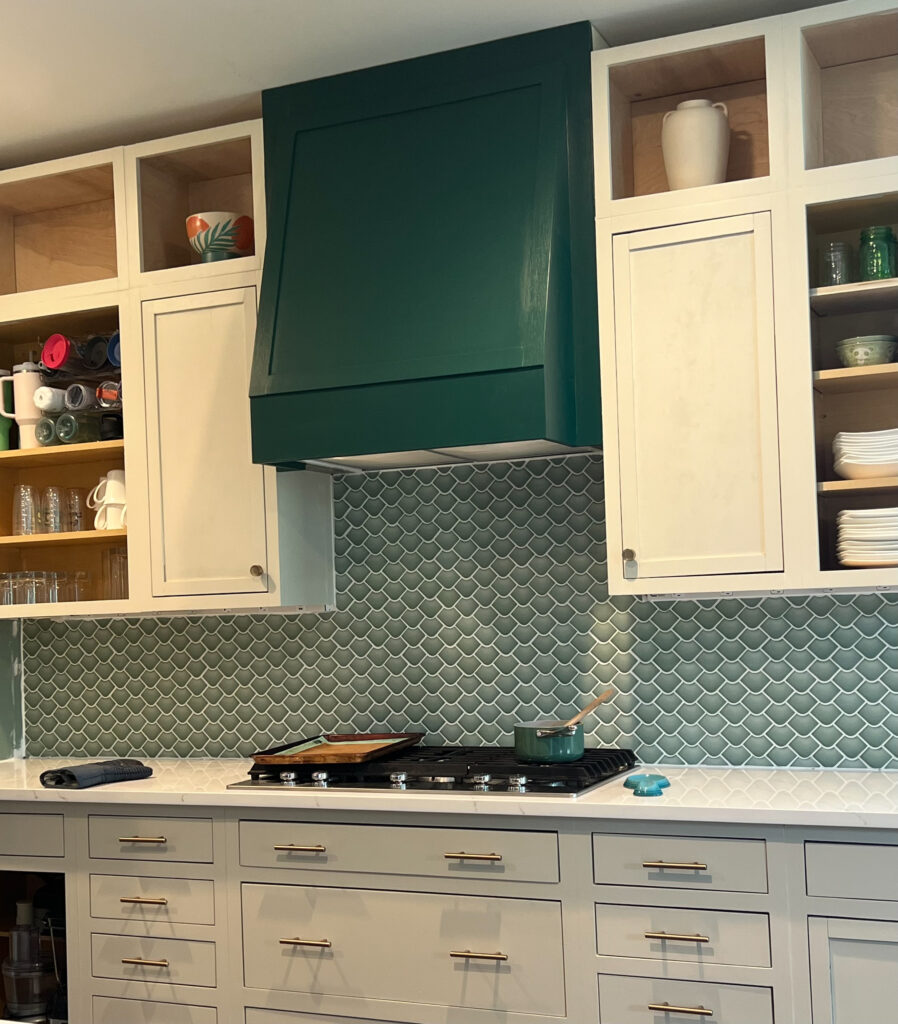
STEP 11: Enjoy!
Once everything is dry, you are good to enjoy your kitchen. If you have a light colored grout, you might want to periodically apply a grout sealant to protect it from staining!
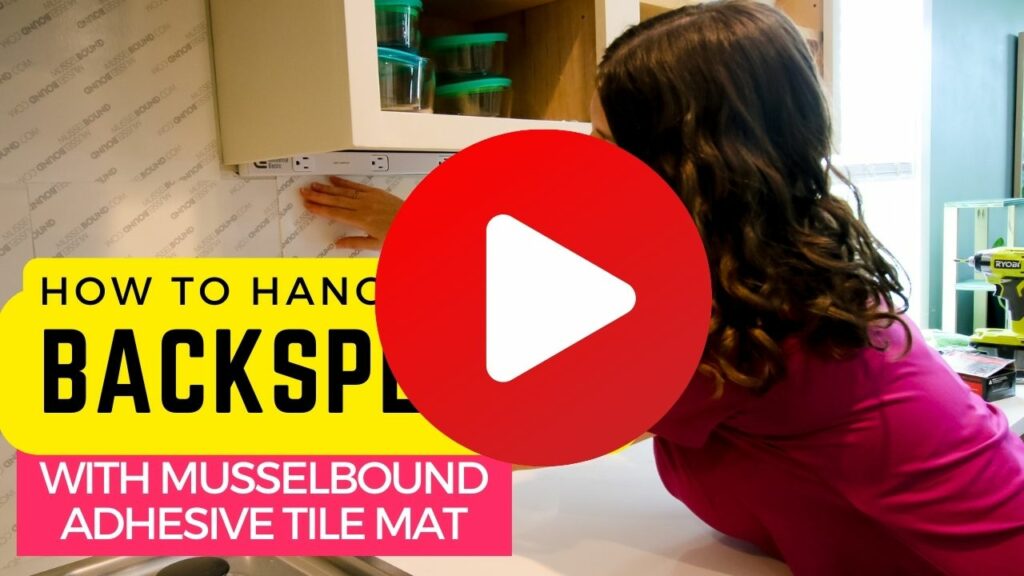
Video Tutorial
Click here or on the video below to see a step by step video of this backsplash hanging process!

Click here to grab our Home Renovation Planner and FINALLY get your next big DIY project organized!

Looking for something?
We've been doing this since 2012 so we have a LOT of blog posts!
Search stuff like: Ceiling Projects | DIY Plant Stands | Thrift Flips

Hello, I'm Morgan, half of the creative force behind CharlestonCrafted.com! With a passion for DIY that dates back to 2012, I've transformed three homes and now I'm dedicated to helping others craft their dream spaces. Let's turn your house into a home together!