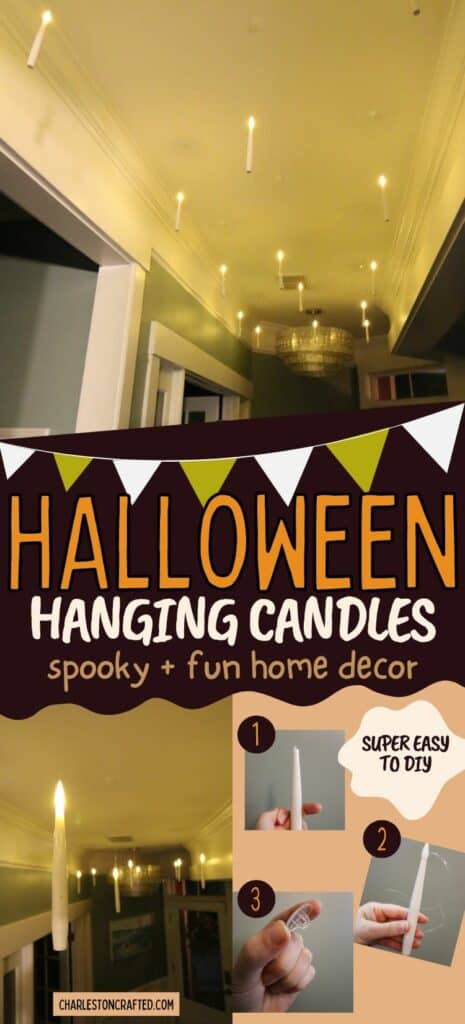
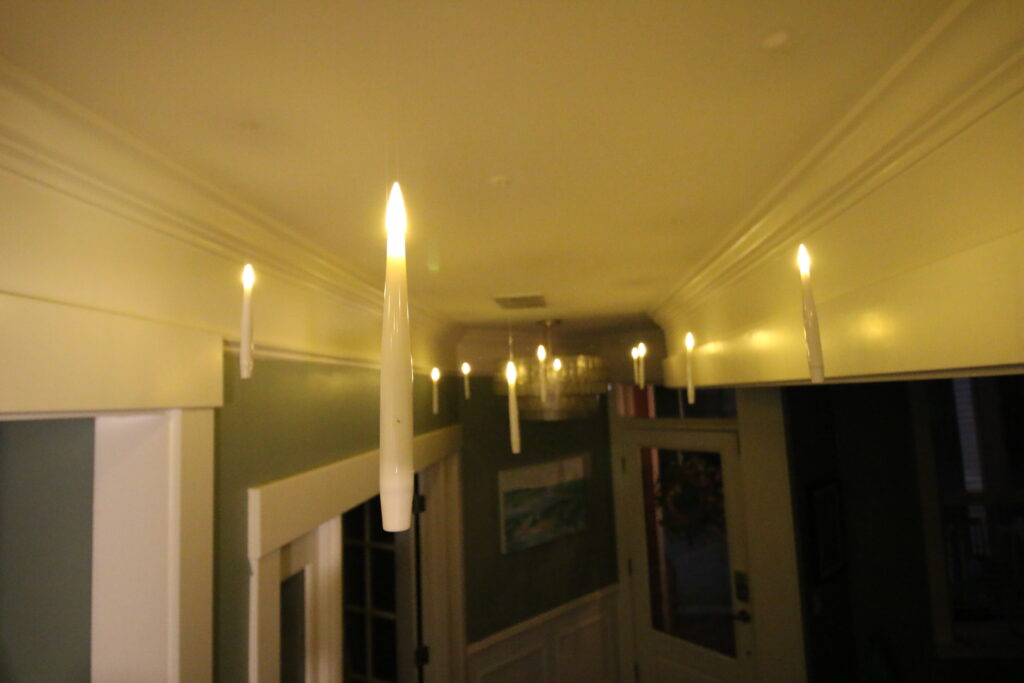
Want to add a spooky vibe to your ceiling? Here's how to hang floating candles for Halloween - the cheapest and easiest way!
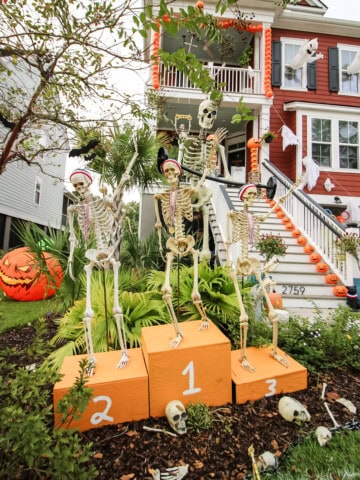
We absolutely love decorating for Halloween and go wild and over-the-top, decorating our front yard and porches for the holiday.
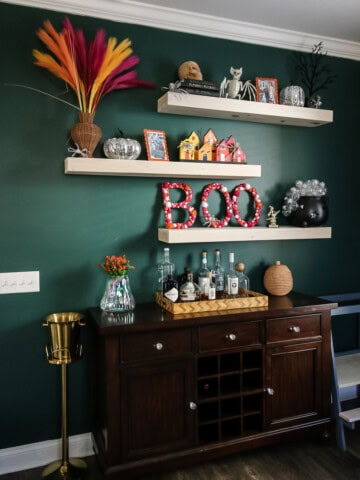
But, this year I decided to do a little bit more indoor Halloween decorating, too. I guess our front yard is full and all of my new crafts need some space!
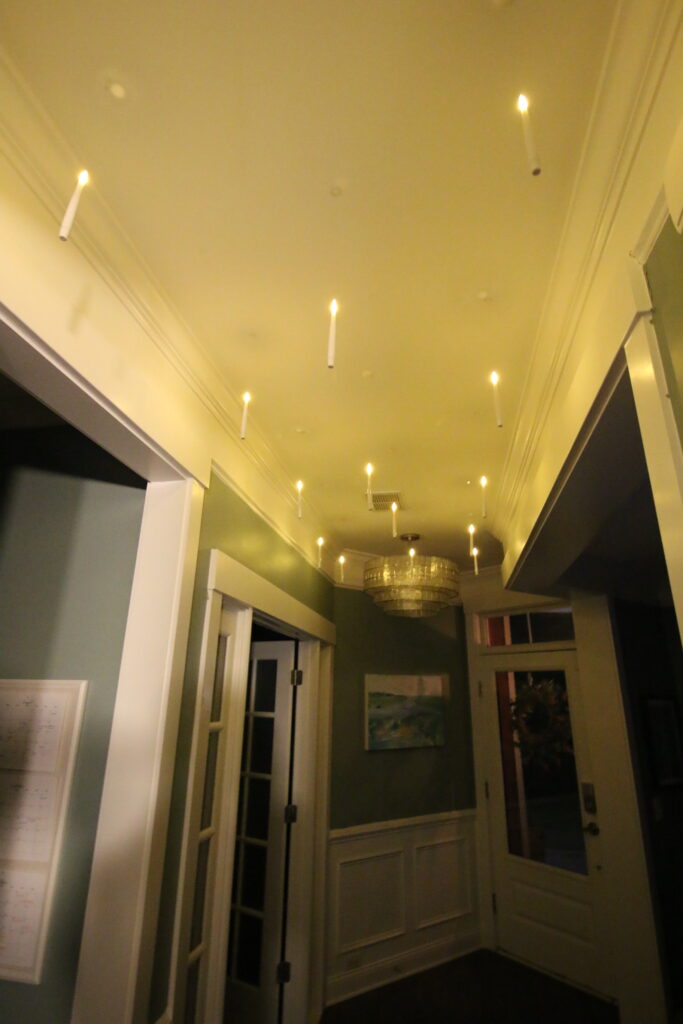
One thing that my son requested was Harry Potter style candles, hanging from the ceiling in our entryway.
I put a lot of research into the best way to do this. There are ways to hand make candles from toilet paper rolls and add battery powered votives.
But, after pricing everything out, I decided it would actually be cheaper and significantly easier to use a premade hanging candle kit.
Here's the kit that we used and how we hung it up for this awesome look in our entryway.
How to hang floating candles for Halloween
Here's how easy it is to give your home the Harry Potter Halloween aesthetic!
Supplies needed:
- Hanging candle kit
- Step ladder
- 21 AAA batteries
NOTE: You can do this with any battery powered candles - but make sure they have a remote control! You would not want to have to crawl up there and turn them on and off by hand. This kit is epic with the magic wand remote!
Steps to make:
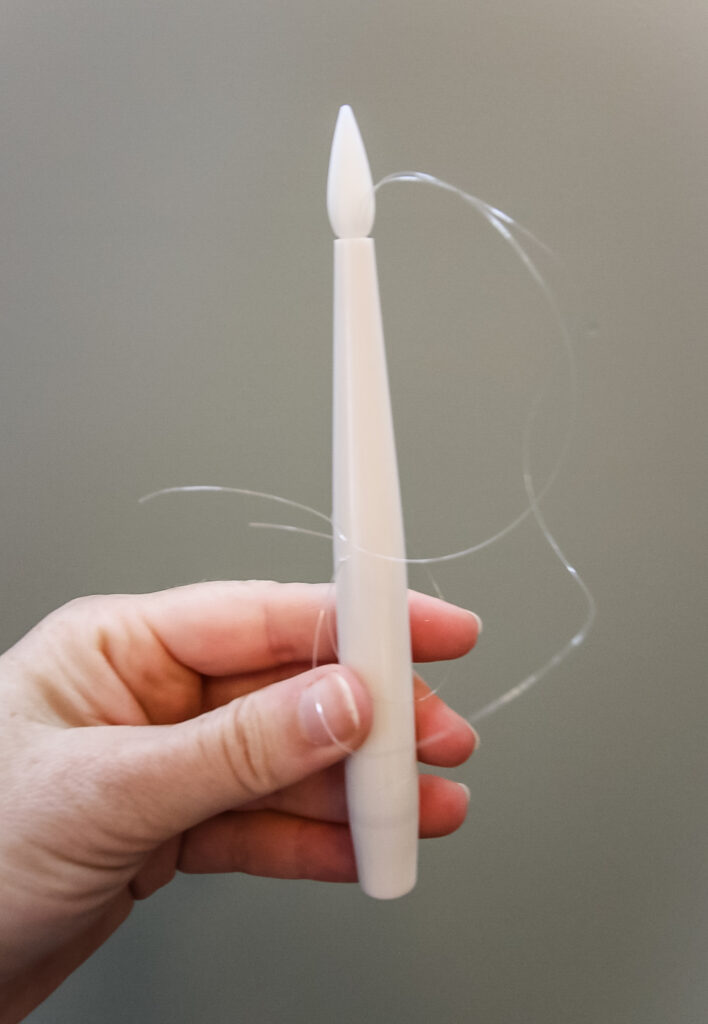
STEP 1: Add the batteries
Unscrew the bottom of each candle and add a battery to each, screw back closed. Repeat repeat!
STEP 2: Add the string loops
Cut a length of string 2x as long as you want the candles to hang down. Fold in half and tie into a loop.
Pull the "wick" plastic cover off the top of the candle. Hook the loop you just tied onto the little light bulb in there, then slide the "wick" back on top. This should hold and be enough support to hang from!
Note: Try to get all your strings the same length so they hang evenly!
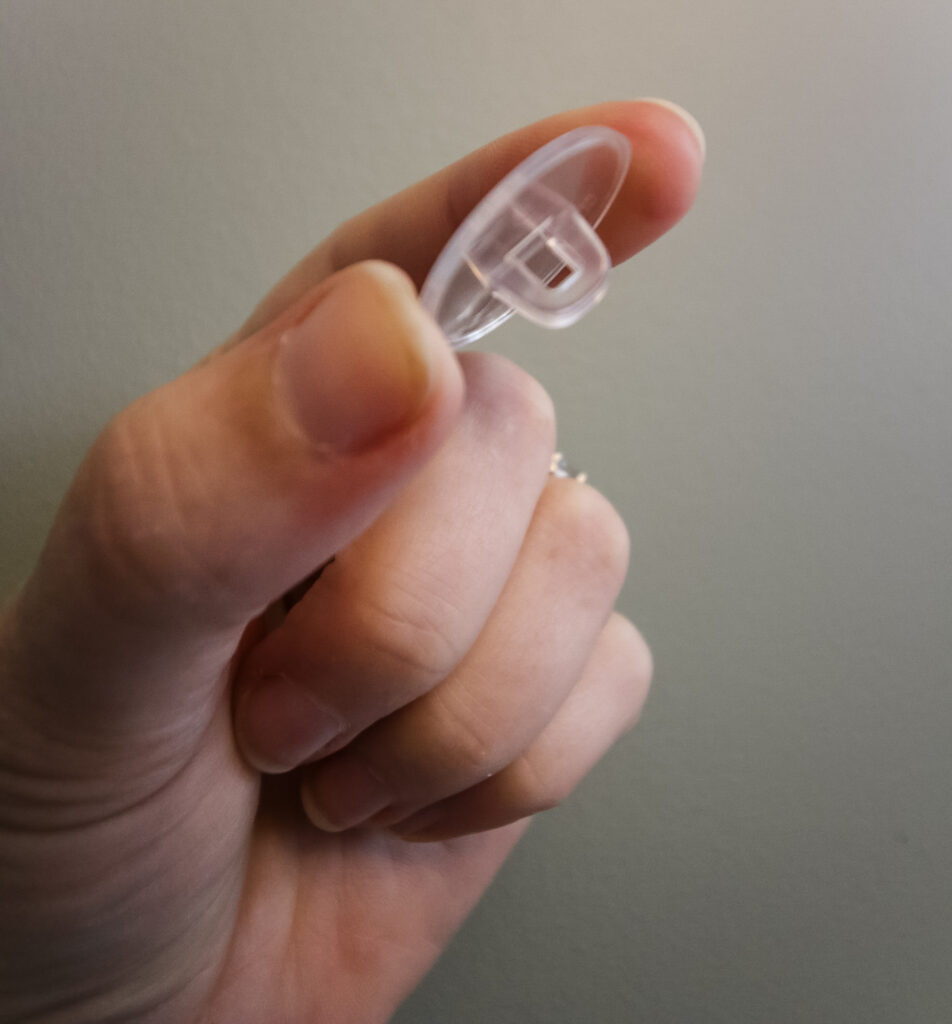
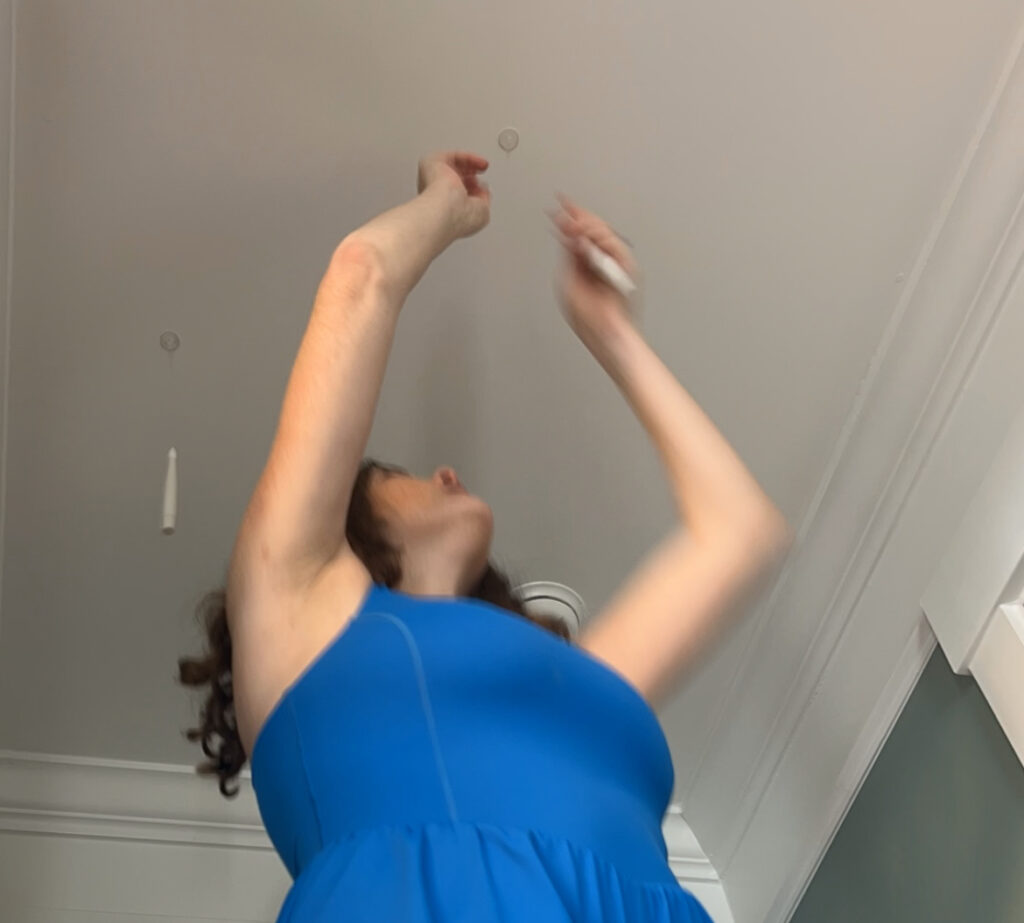
STEP 3: Hang the hooks
Peel and stick your hooks to your ceiling, space them evenly, going back and forth for a full look.
We did our hooks in sets - a row of 2 (one on either side) then a row of 1 centered, then 2, then 1, repeat repeat.
Let the hooks se for 1 hour before hanging anything from them.
TIP: Measure the length of your hall and divide by how many candles you have to be sure you get the spacing right!
STEP 4: Hang the candles
Hang the candles from the hooks. Since my string was looped, I strung the whole loop through the hook, then pulled the candle down through that loop.
If your hooks were more hooks and not loops, you could just slip the string on.
STEP 5: Light and enjoy!
Step back and enjoy the spooky aesthetic!

Any questions about this project?!
Planning a big Halloween?
Be sure to grab our FREE Halloween Decor Planner to get all of your plans organized!


Looking for something?
We've been doing this since 2012 so we have a LOT of blog posts!
Search stuff like: Ceiling Projects | DIY Plant Stands | Thrift Flips

Hey there, I'm Sean, the woodworking enthusiast and builder behind CharlestonCrafted.com! Since 2012, I've been sharing the magic of turning raw materials into beautiful creations. I love teaching others the art and satisfaction of woodworking and DIY. I try to inspire fellow crafters to make something extraordinary out of nothing at all.