Want to add some spooky fun to your Halloween décor? Here’s how to make DIY Bleeding Candles for the ultimate creepy effect!
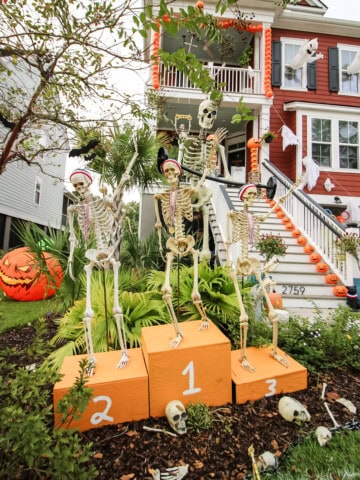
I am all in on decorating for Halloween this year and have been having fun doing a few indoor crafts before our HOA overlords allow us to decorate the yard.
I've been having fun making spooky-themed candles - like these tattooed pillar candles! - and was inspired by something I saw at Walmart for this craft.
Walmart is selling bleeding candlesticks! They drip red wax as they burn, to look like blood.
Honestly, the ones from Walmart are a great price, but I knew I could DIY these and I had a big box of plain white taper candles in our dining room.
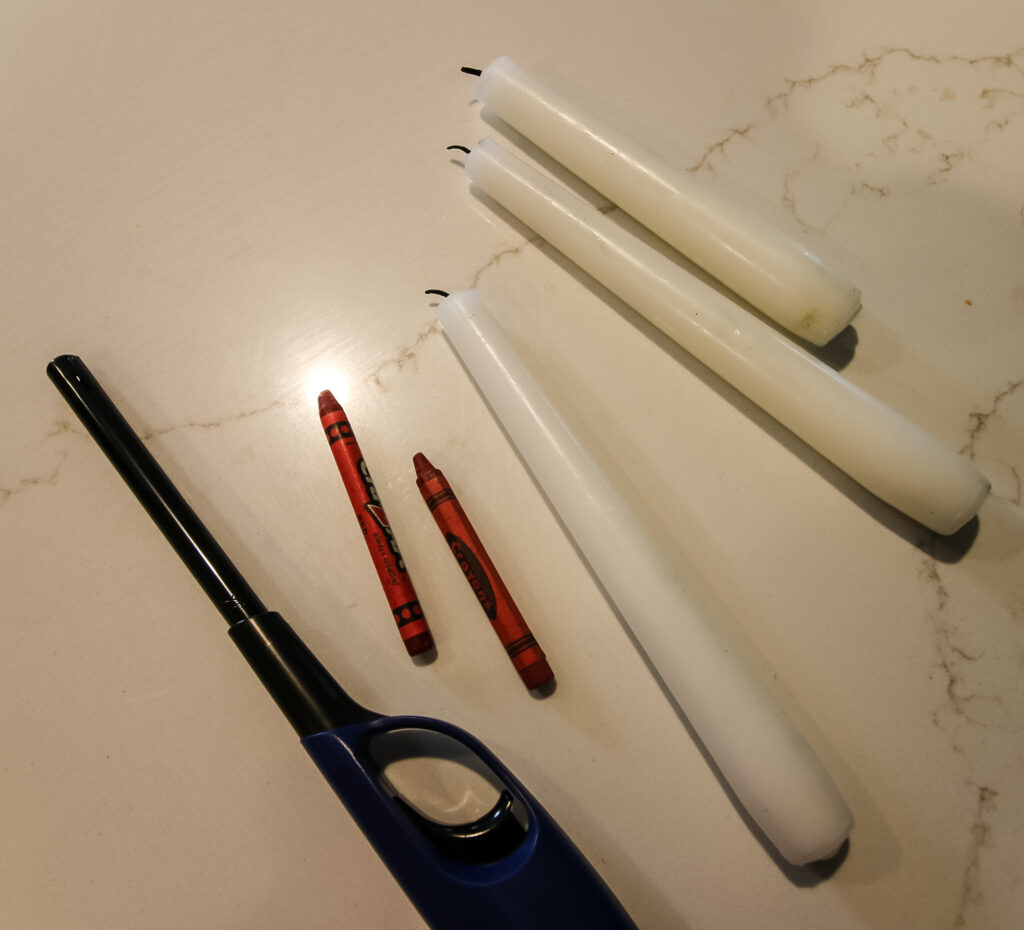
So, this is a craft that I did completely for FREE. You could do it with any candle you have on hand, and just need 1 red crayon and a lighter to get it done.
Keep in mind, the DIY bleeding candles won’t continue to bleed as they burn, so they’re more for display – but they are super simple to make and look fantastic in any Halloween setup!

Safety Warning
Before starting this project, let’s talk safety. You’ll be working with an open flame to melt crayons, which can be dangerous if you’re not careful. Make sure to:
- Move anything flammable out of the way.
- Protect your surfaces by covering them with tin foil or paper.
- Keep kids away from this project – it’s definitely an adults-only craft.
- Use caution with the lighter – hold it carefully and avoid direct contact with the flame to prevent burns.
With that in mind, let’s get started!
How to Make Bleeding Candles for Halloween
Here's how easy it is to make your own bleeding candles!
Supplies needed:
- White or black taper candles
- Red crayons (one or two, depending on how many candles you make)
- Lighter or long match
- Tin foil or thick paper (to protect surfaces)
- Candle holders
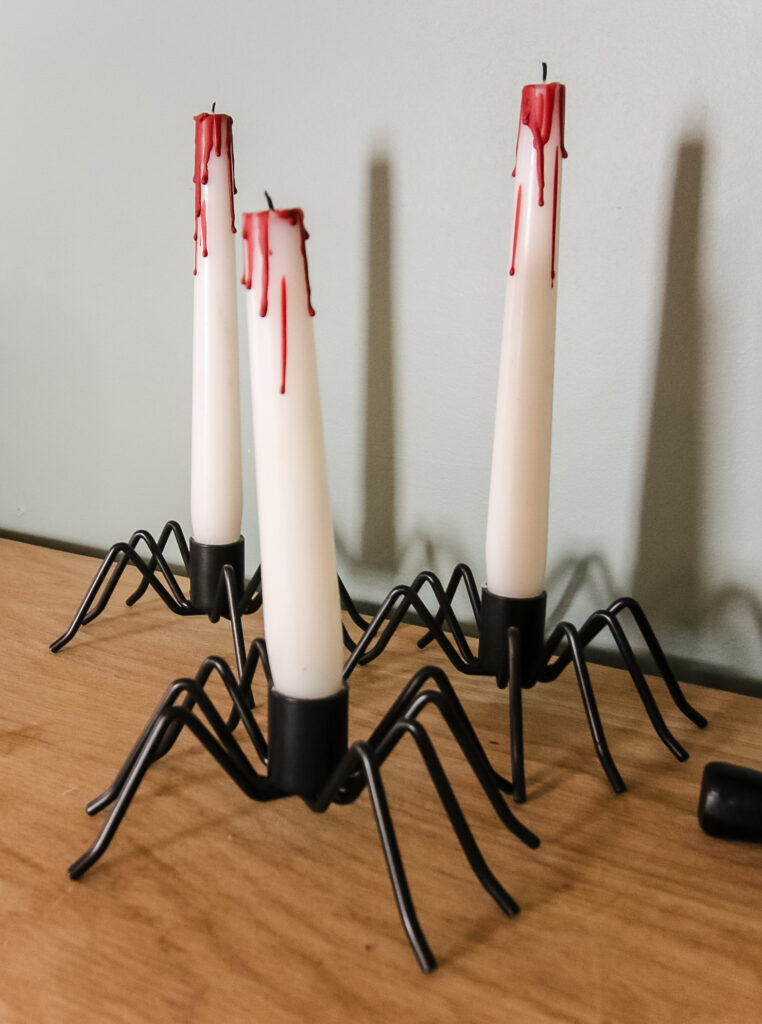
Side note - these are the adorable spider candlestick holders I got. So cute and a great price!
Steps to make it:
STEP 1: Set Up Your Candle
Start by placing your taper candle in a holder. White or black candles work best for this spooky look, but any light-colored candle will do.
Cover the base of the holder with tin foil or thick paper to catch any drips and protect your holder from melting wax.
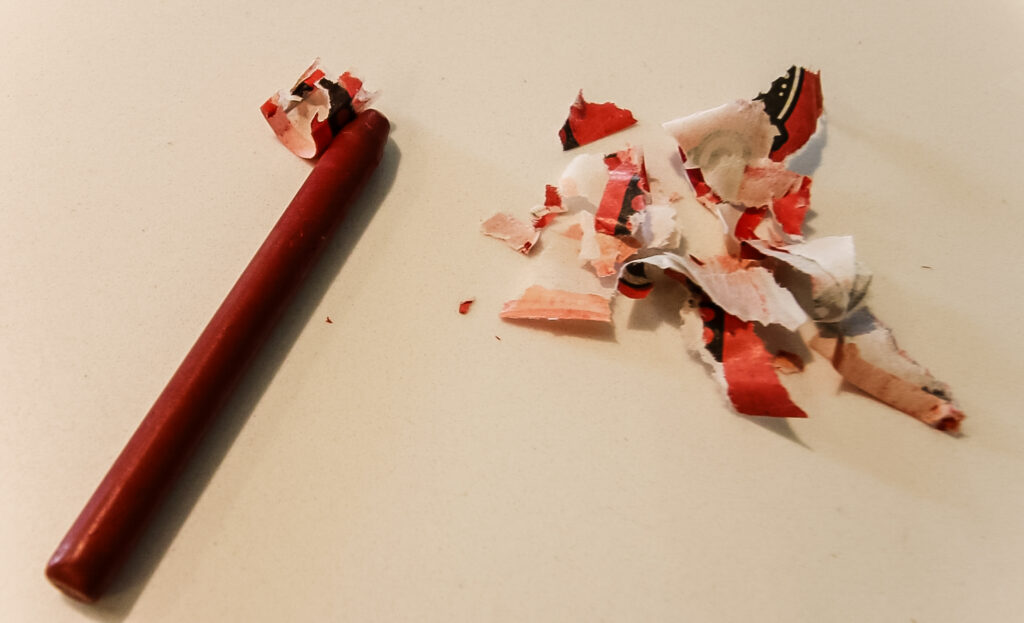
STEP 2: Prepare the Red Crayon
Peel the wrapper off your red crayon, as this will be used to create the “bleeding” effect. The crayon wax will melt into red drips that look like blood pouring down the candle.
Note - I have actually found that cheapo crayon melt easier than Crayola. I like to use free kids meal crayons from restaurants for melting!
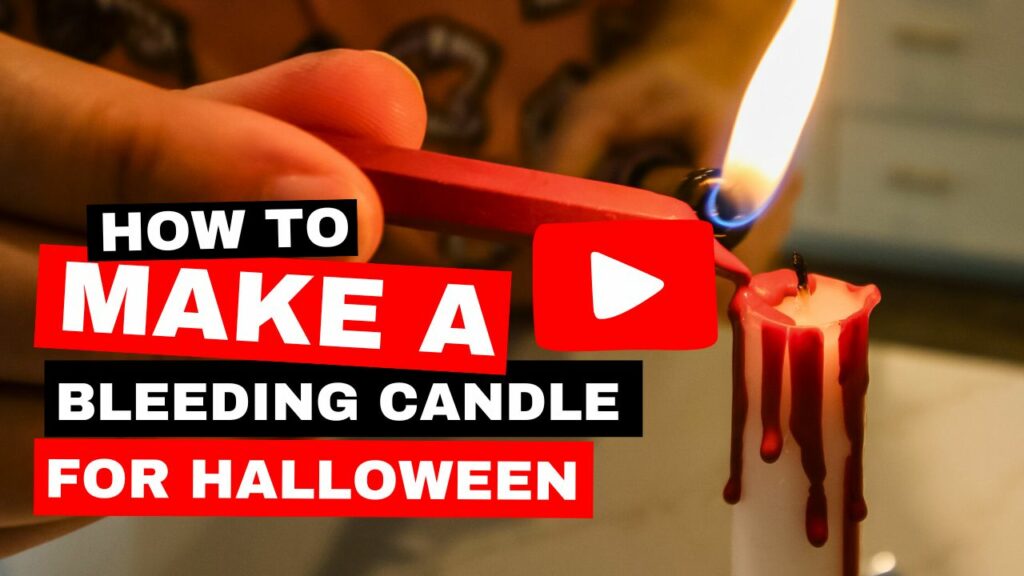
STEP 3: Melt and Drip the Crayon
Here’s where the magic happens. Hold the crayon above the candle and use a long lighter to carefully melt the tip of the crayon.
As the wax melts, it will start to drip down the sides of the candle.
Move the crayon around to cover all sides, letting the wax form uneven drips for a realistic, spooky effect.
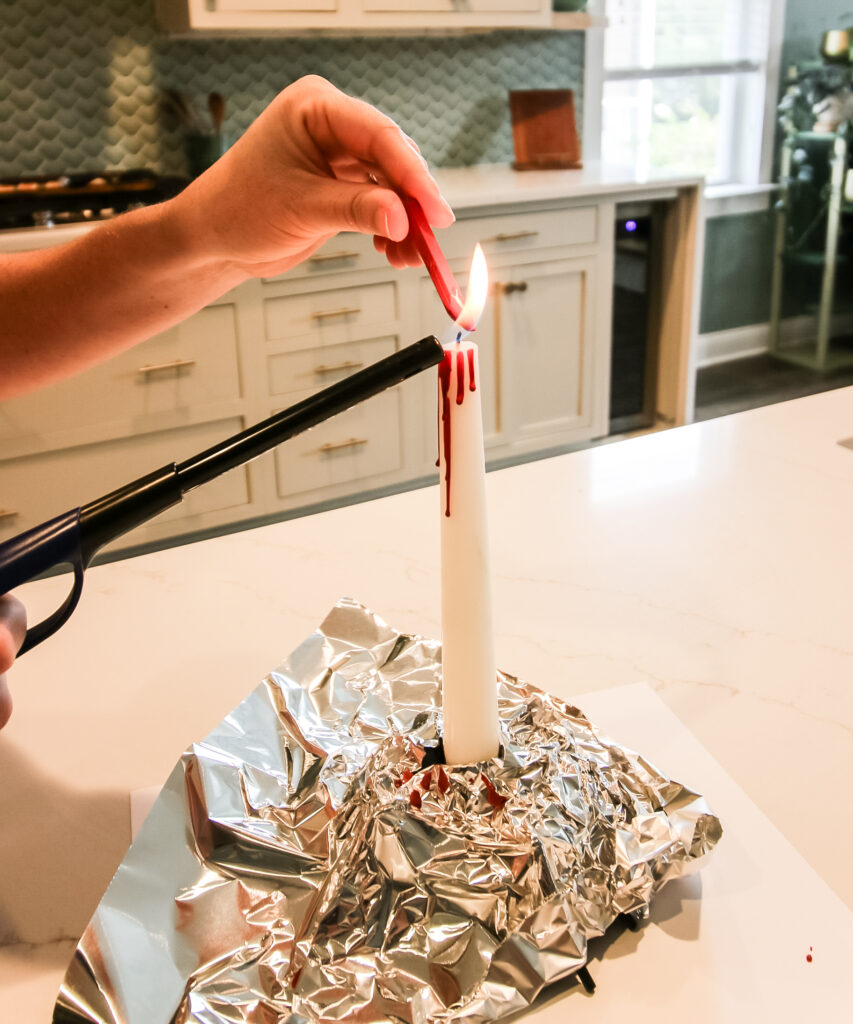
Safety tip: Be very careful when melting the crayon with a lighter. The flame can get hot quickly, so avoid holding the lighter too close to your hand, and keep flammable objects far away.
STEP 4: Add Layers for a Full Effect
For a dramatic, bloody look, repeat the melting and dripping process on different sections of the candle until you’re happy with the amount of red wax.
You can use more than one crayon if needed to cover the entire candle or create more drips.

STEP 5: Repeat for All Candles
Repeat the same process for each candle you’re decorating. The more candles you add, the more intense and spooky the display becomes!
Display Your Bleeding Candles
Once your candles are finished, display them on your mantel, dining table, or wherever you want to add a creepy, haunted touch to your décor. Pair them with cobwebs, skulls, and pumpkins for a full Halloween scene!
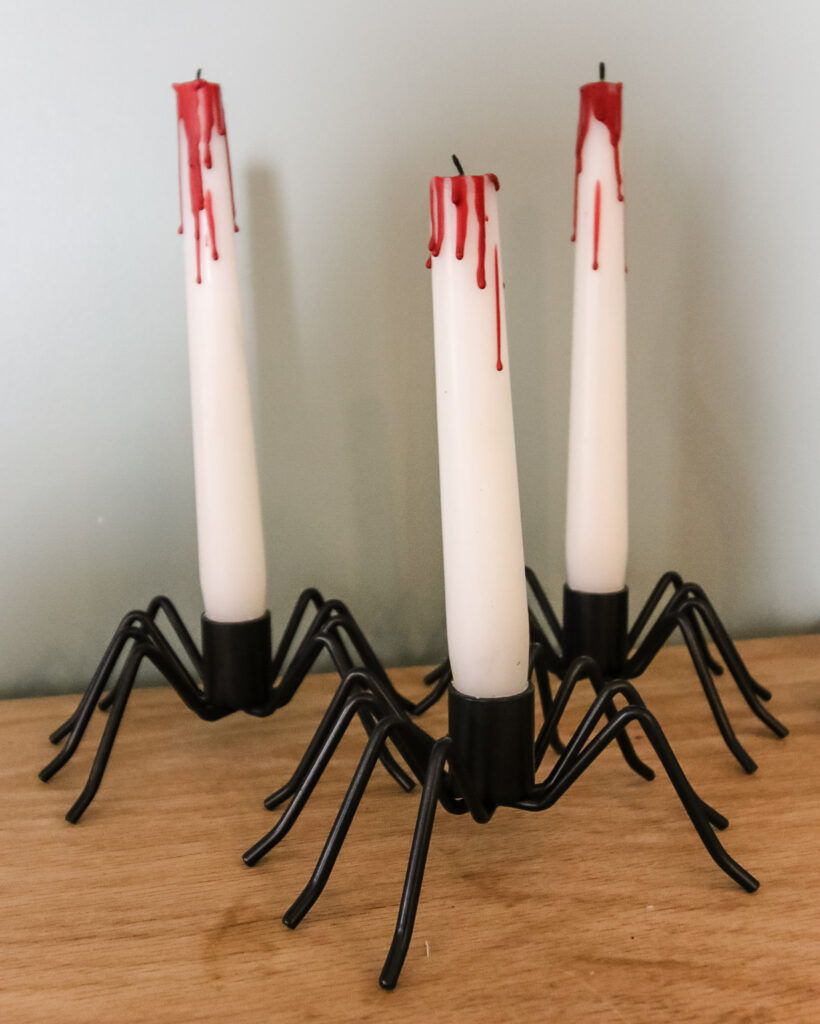
This easy DIY bleeding candle craft will add a spooky and stylish flair to your Halloween decorations.
Best of all, it’s quick, affordable, and sure to impress your guests with its eerie, blood-like drips. Happy haunting!
Video tutorial
Prefer to watch? Click here or the image below to watch my step by step video tutorial!
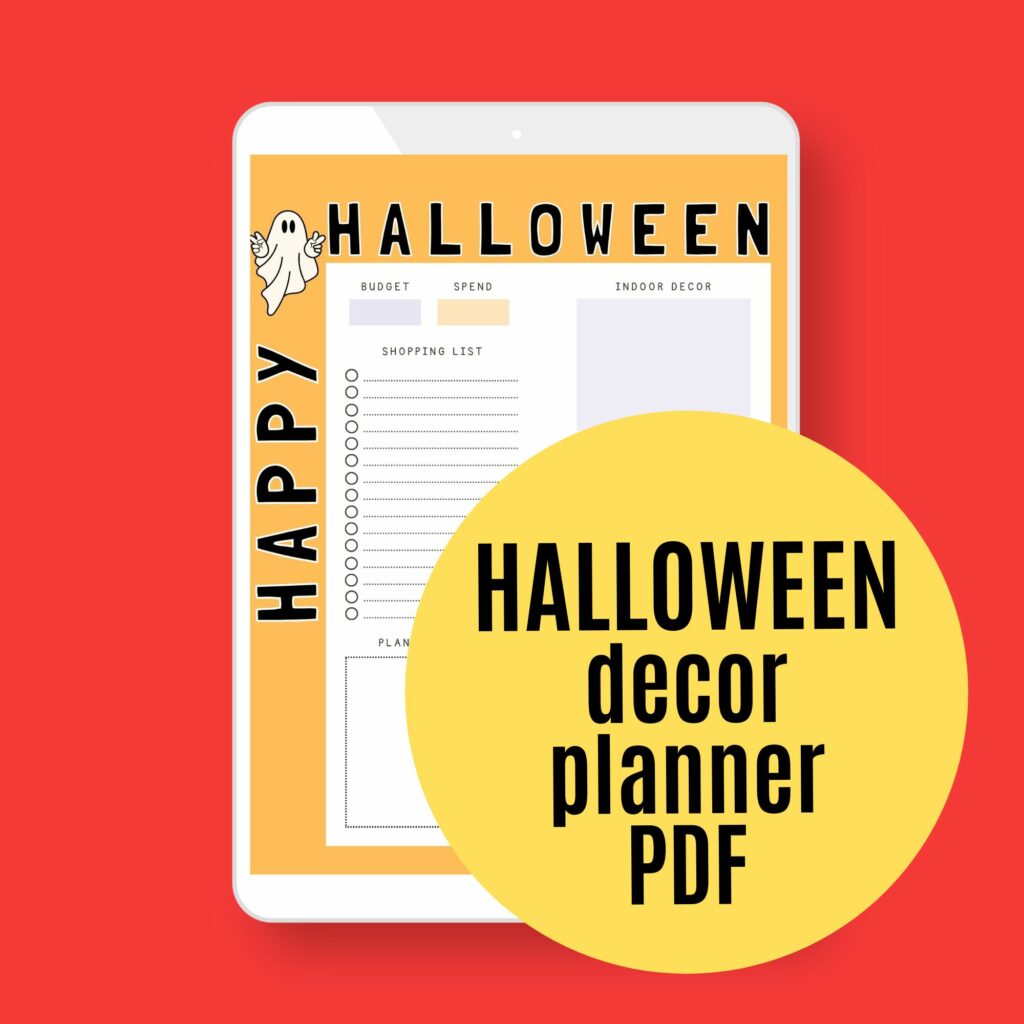
Planning a big Halloween?
Be sure to grab our FREE Halloween Decor Planner to get all of your plans organized!

Looking for something?
We've been doing this since 2012 so we have a LOT of blog posts!
Search stuff like: Ceiling Projects | DIY Plant Stands | Thrift Flips

Hello, I'm Morgan, half of the creative force behind CharlestonCrafted.com! With a passion for DIY that dates back to 2012, I've transformed three homes and now I'm dedicated to helping others craft their dream spaces. Let's turn your house into a home together!