• Skip to primary navigation
  • Skip to main content
  • Skip to primary sidebar
Charleston Crafted
  • DIY
  • Woodworking
  • Popular Posts
  • Blog
  • About
  • Shop
menu icon
go to homepage
  • DIY
  • Woodworking
  • Popular Posts
  • Blog
  • About
  • Shop
search icon
Homepage link
  • DIY
  • Woodworking
  • Popular Posts
  • Blog
  • About
  • Shop
×
Home » Home Projects

How to Replace a Refrigerator Water Reservoir (or what to do if you fridge is leaking on the inside)

Published: Feb 1, 2016 · Modified: Feb 9, 2020 by Morgan · As an Amazon Associate, we earn from qualifying purchases. This site contains affiliate links. ·

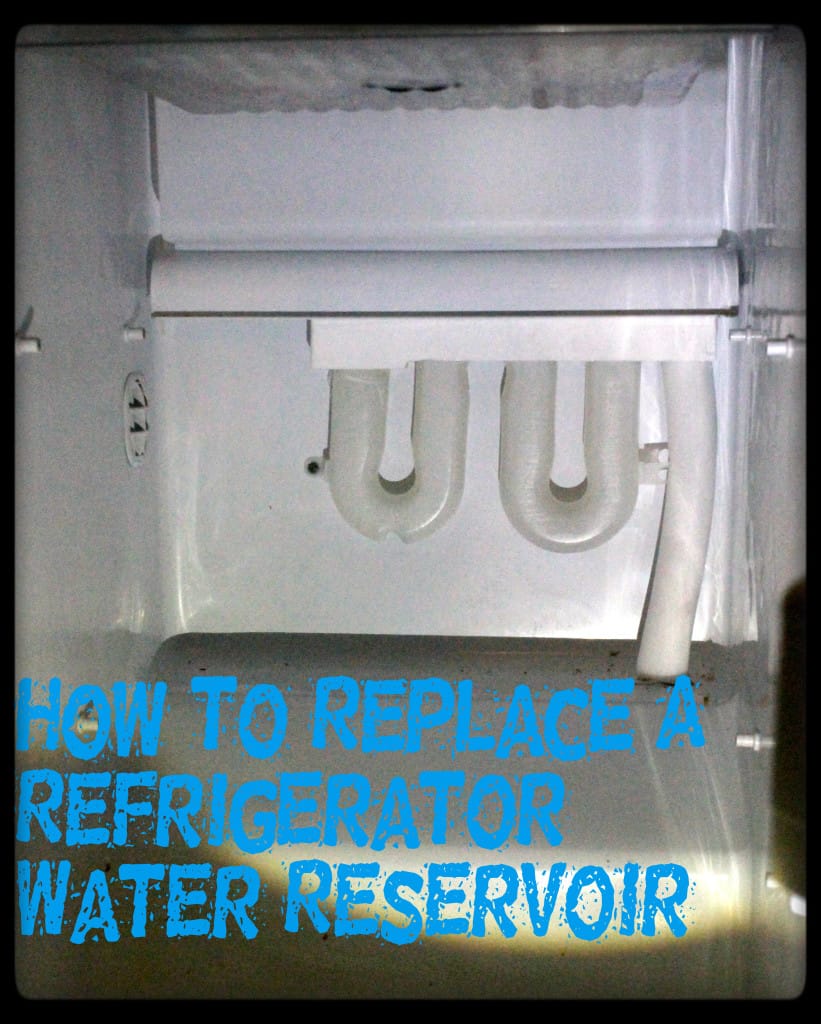
You're thirsty, so you go to the fridge to get a glass of water from the dispenser. You push your glass against the dispenser.... and then nothing comes out. Oh no! Your fridge's water system could have a couple of different problems. In our case, it was a small crack in the refrigerator water reservoir that is inside the fridge. Luckily, it's a pretty simple fix that should take you less than 30 minutes.

How To Replace A Refrigerator Water Reservoir - Charleston Crafted

Before we get started, I apologize for any pictures that don't have the best quality. It's kind of hard to get good pictures when you're using a flashlight in tight places with no power.

First, we had to order the water reservoir that fit our fridge. Luckily, they sell it on Amazon Prime so we had it in two days. First thing first, cut off the power to your fridge and turn off the water supply. Then, remove all the drawers to get to your reservoir.

How To Replace A Refrigerator Water Reservoir - Charleston Crafted

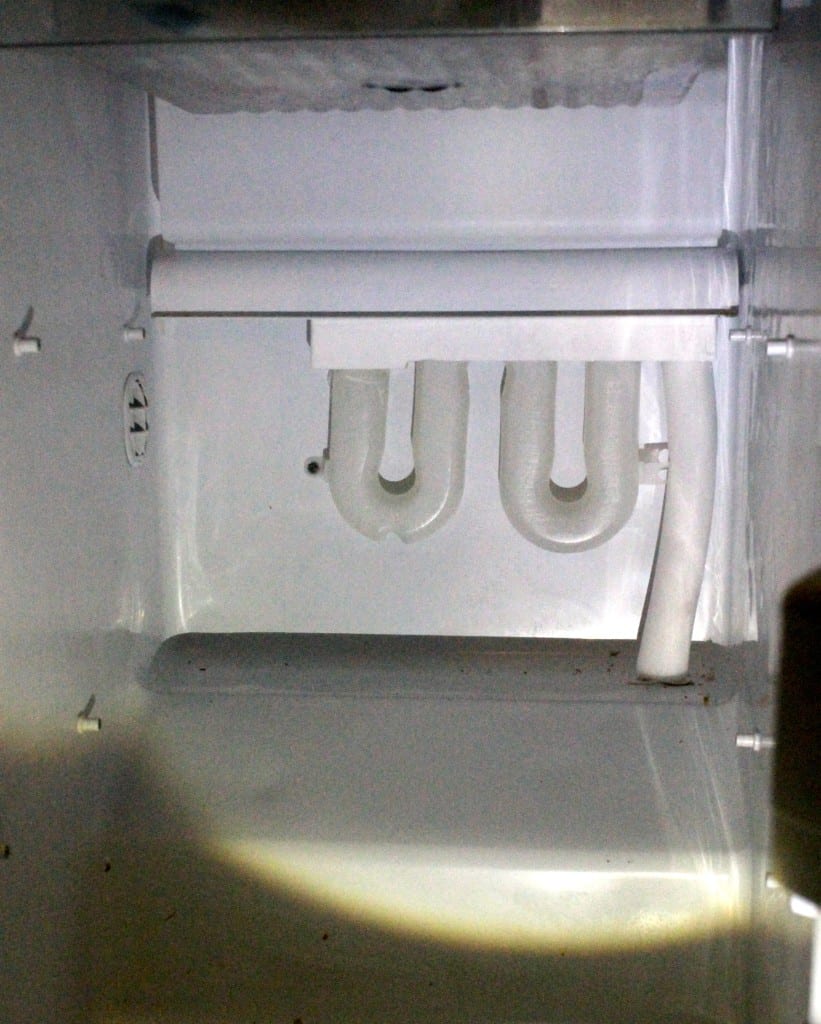
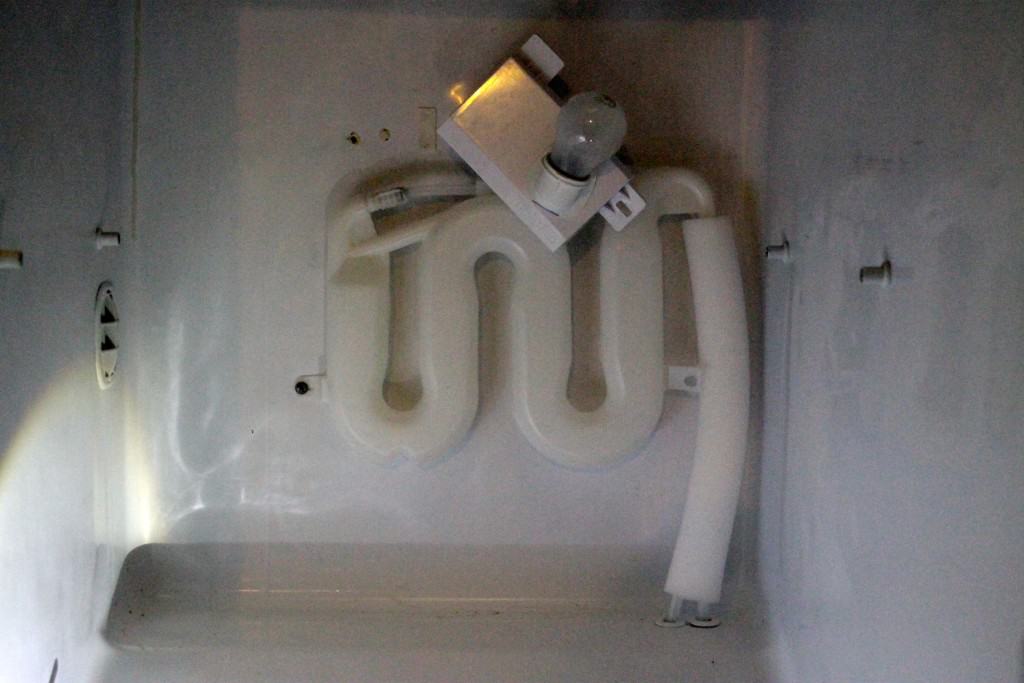
Once you get to the back of your fridge, you may have to remove several covers first. I had to unscrew the light bulb plate, two covers and a piece of styrofoam.

How To Replace A Refrigerator Water Reservoir - Charleston Crafted

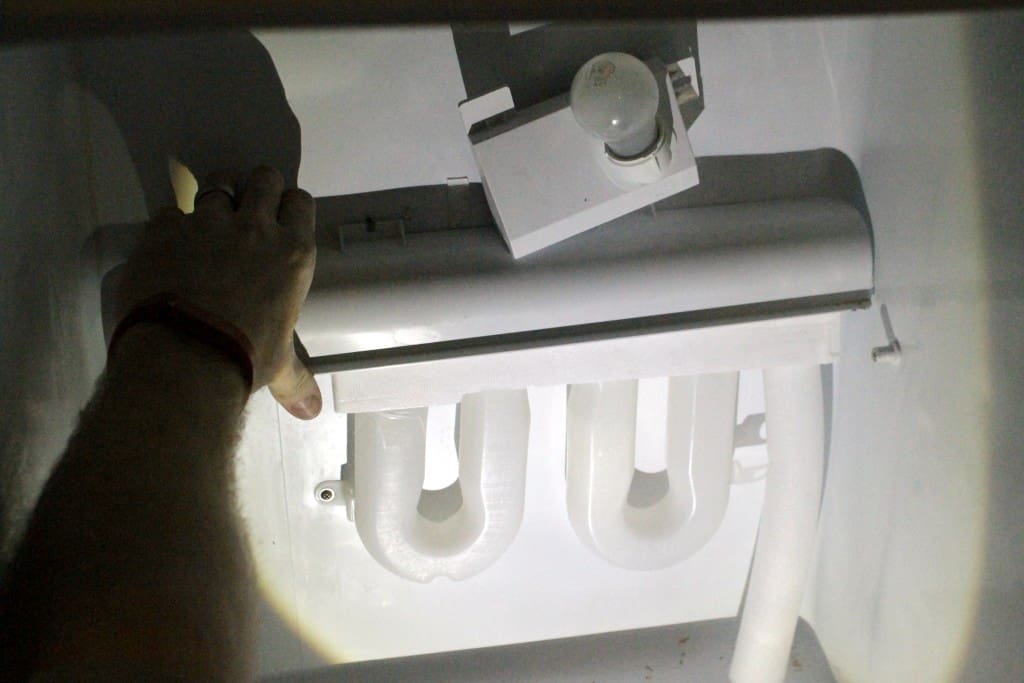
Next, unscrew any screws holding the reservoir in place and then let it dangle.

How To Replace A Refrigerator Water Reservoir - Charleston Crafted

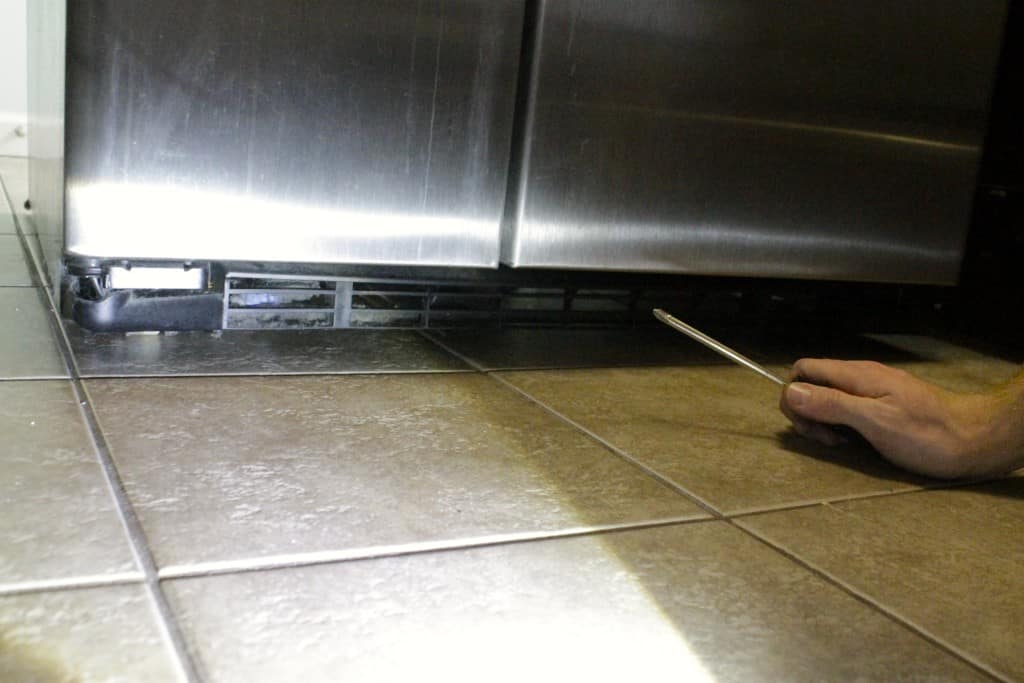
Now it's time to go under your fridge, both in the front and the back. You're going to have to remove the panels from each side, but they should just be a couple of screws that you can get past easy.

How To Replace A Refrigerator Water Reservoir - Charleston Crafted

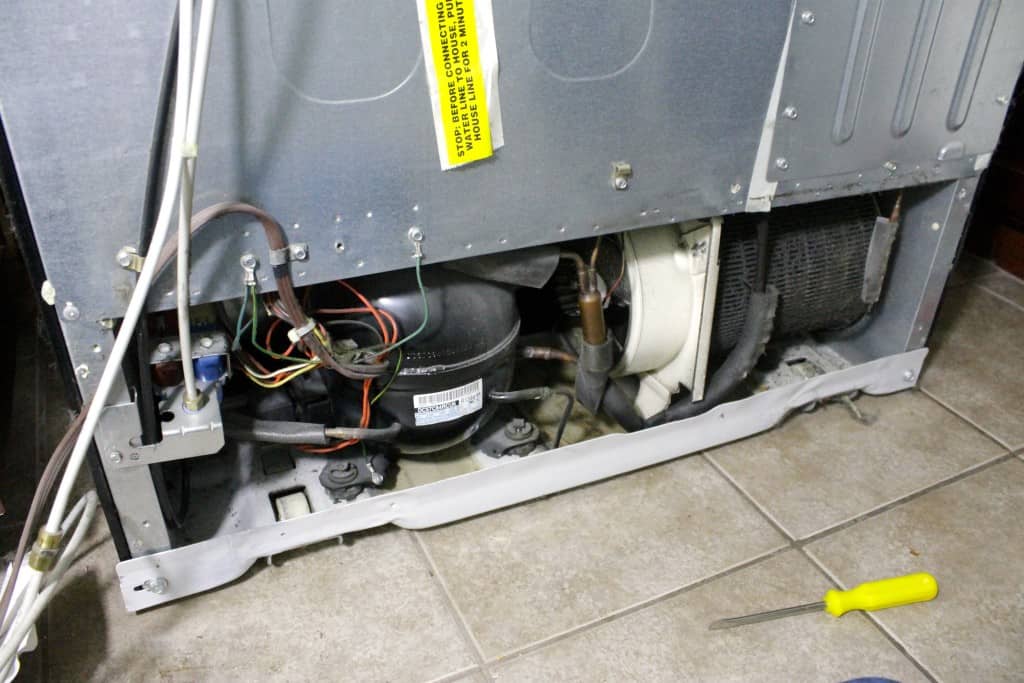
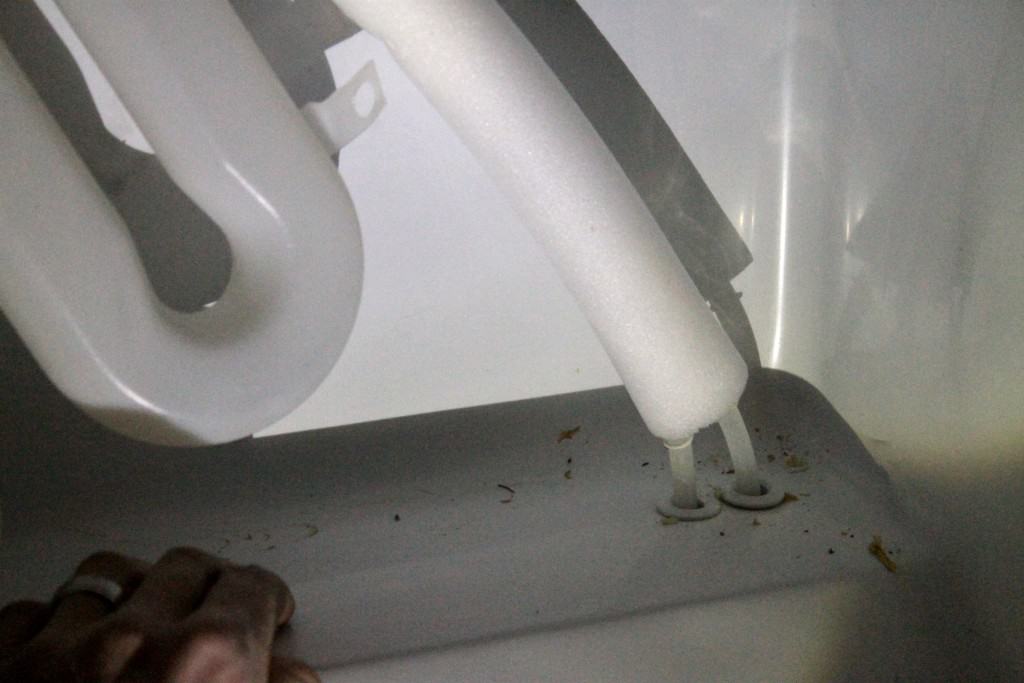
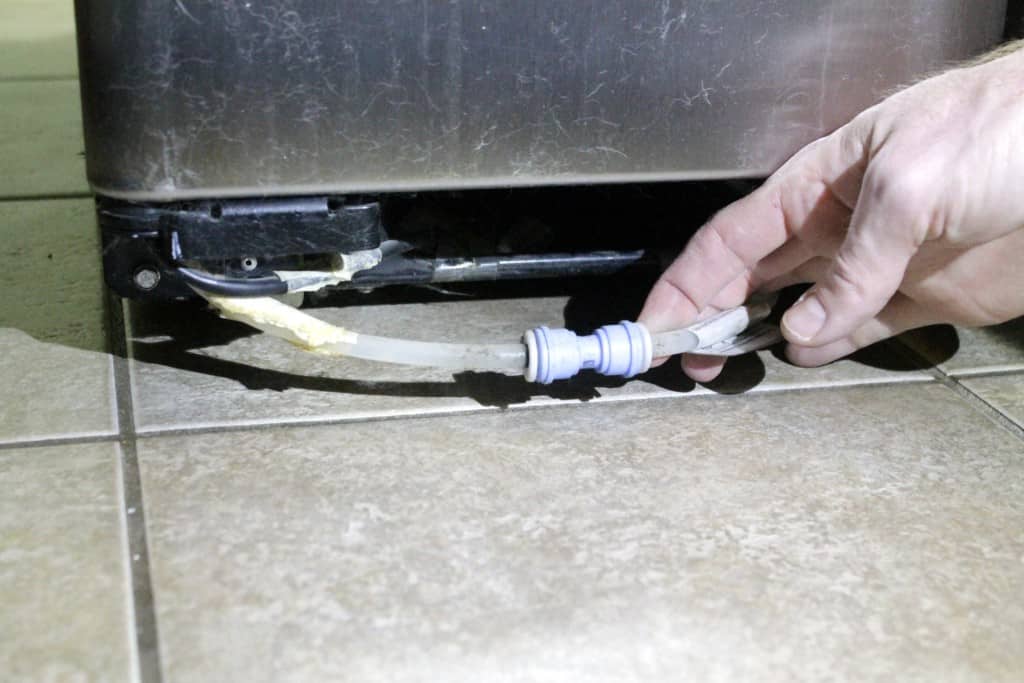
Now you'll see where the water lines connect, probably with a compression union connector. To remove the water line from the connector, push up on the tab and pull the line straight out. There might be a little water that runs out of the line, so just have a towel handy. Do that on both the back and front of the fridge.

How To Replace A Refrigerator Water Reservoir - Charleston Crafted

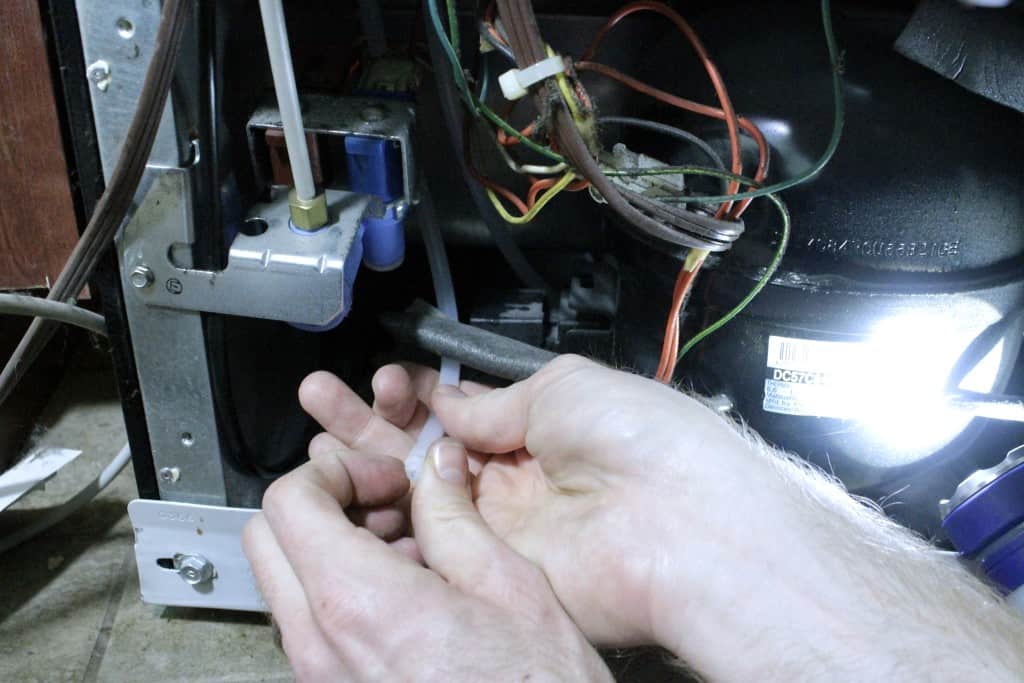
Time to go back in the fridge and pull the reservoir out with the two water lines. Make sure you note which hole the long line goes in and which hole the short line goes in.

Now, feed the tubes from your new reservoir into the appropriate holes and connect the short line to the back and the long line to the front. Make sure to push the new line into the union connector all the way to the black line.

How To Replace A Refrigerator Water Reservoir - Charleston Crafted

Next, go inside the fridge and attach the reservoir to the back wall of the fridge.

How To Replace A Refrigerator Water Reservoir - Charleston Crafted

Now, you might want to test your water before putting the covers and panels back on. Turn your water and power back on and then push your water dispenser. Nothing will come out for a while because the reservoir has to fill up, but you'll see that happening.

Finally, screw all the covers and panels back on and push your fridge back into place.

If these amazing pictures and step-by-step directions aren't how you like to learn DIY, I also made a video that you can check out below that will give you some more detail.

Voila! You just saved yourself a couple hundred bucks from not calling an appliance repair dude!

Charleston Crafted Signature

Follow us on:
Pinterest | Instagram | TikTok | YouTube | Facebook | Amazon Storefront | LTK Shop

Looking for something?

We've been doing this since 2012 so we have a LOT of blog posts!
Search stuff like: Ceiling Projects | DIY Plant Stands | Thrift Flips

Charleston Crafted logo banner
Morgan headshot cropped
Morgan

Hello, I'm Morgan, half of the creative force behind CharlestonCrafted.com! With a passion for DIY that dates back to 2012, I've transformed three homes and now I'm dedicated to helping others craft their dream spaces. Let's turn your house into a home together!

More Home Projects

  • DIY floating corner shelves - Charleston Crafted
    How to make floating corner shelves
  • how to assess your home renovation needs
    How to assess your home renovation needs
  • Top Mistakes to Avoid When Renovating Your Home
    Top Mistakes to Avoid When Renovating Your Home
  • How to create a DIY home renovation plan
    How to create a DIY home renovation plan

Reader Interactions

Trackbacks

  1. Homepage says:
    October 23, 2020 at 4:47 am

    ... [Trackback]

    [...] Read More here: charlestoncrafted.com/how-to-replace-a-refrigerator-water-reservoir-or-what-to-do-if-you-fridge-is-leaking-on-the-inside/ [...]

Primary Sidebar

Charleston Crafted about us image

Hey y'all!

We are Morgan & Sean McBride and we are crafting our home together in Charleston, South Carolina.

More about us

Popular Posts

  • DIY Coffered Ceiling
    DIY Coffered Ceiling
  • How to Make DIY Concrete Pumpkins via Charleston Crafted
    How to Make DIY Concrete Pumpkins
  • How to Make a Cupid's Arrow Valentine's Day Wall Hanging with felt on the Cricut
    How to make a Cupid's Arrow Valentine's Day Wall Hanging
  • Our Tropical Oasis - A backyard Hammock area - Charleston Crafted
    Our Tropical Oasis

Recent Posts

  • how to organize a pantry with zones
    How to Organize Your Pantry in Zones (And Why It’s a Game Changer)
  • Keep outdoor rug from blowing up - Charleston Crafted
    How to keep your outdoor rug in place
  • kitchen design mistakes to avoid
    Kitchen design mistakes to avoid
  • DIY Faux Tropical Window Box That Looks Real (But Won’t Die!)

Privacy Policy

Footer

↑ back to top

Navigation

  • Home
  • Blog
  • Contact Us
  • Terms of Use
  • Disclaimer

Newsletter

  • Sign up for emails and updates
  • Follow us on Instagram
  • Work with Us

Browse by Category

  • Woodworking
  • Home Projects
  • Paint Colors
  • Room Reveals

© 2025 The Charleston Crafted Blog LLC DBA “Charleston Crafted” and “CharlestonCrafted” (also known as N/A) / All Rights Reserved.
Official Website: (Charleston Crafted)
Registered in USA (Co. Reg. No.: 565586)
Address: Charleston, USA 29414, South Carolina
Contact Phone: Not applicable — contact is via email: sean@charlestoncrafted.com

DISCLAIMER: The content on this website is provided for general informational purposes only and is not intended as professional advice. The Charleston Crafted Blog LLC and The Charleston Crafted Blog LLC make no representations or warranties—express or implied—regarding the accuracy, completeness, or suitability of the information contained herein. Any reliance you place on this information is strictly at your own risk. In no event shall The Charleston Crafted Blog LLC or The Charleston Crafted Blog LLC be liable for any loss or damage, including without limitation, indirect or consequential loss or damage, arising from the use or inability to use this website. This website is the official website of The Charleston Crafted Blog LLC.

AFFILIATE DISCLOSURE: This website contains affiliate links. If you click through and make a purchase, we may earn a commission at no extra cost to you.

As an Amazon Associate, I earn from qualifying purchases.

Site Editor: Morgan Smith McBride

Copyright © 2025 Charleston Crafted