Hello and welcome back to the One Room Challenge! We are so excited to be pairing up with a TON of other bloggers to be making over a room in six weeks. We are making over our walk in closet (and the accompanying linen closet!) and are so excited for it!
For the why and the design plan, check out week one here!
Now, I wanted to share with you the incredibly nerdy way that I designed this closet system. Our previous closets in the condo I just designed on paper based on the IKEA system of drawers that I wanted to use. This time I knew that I wanted something 100% custom, so I had to get in there and design it myself.
I am an analyst and I am very type A so I decided to design my closet using Microsoft Excel. The first thing that you need to do is get some measurements. Measure and write down:
- The height from floor to ceiling
- The width from wall to wall
- The height needed for each section of clothing - IE dresses, shirts, pant. Here is what I used:
- Maxi dress: 68"
- Ladies tops: 34"
- Ladies bottoms: 22"
- Dresses: 46"
- Mens shirts: 33"
- Mens pants: 36"
- The width of each item that you currently own (roughly). IE if you own 36" wide of dresses you will need to design differently than if you own 6" of dresses.
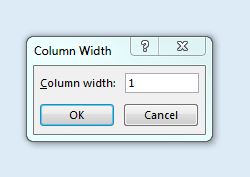
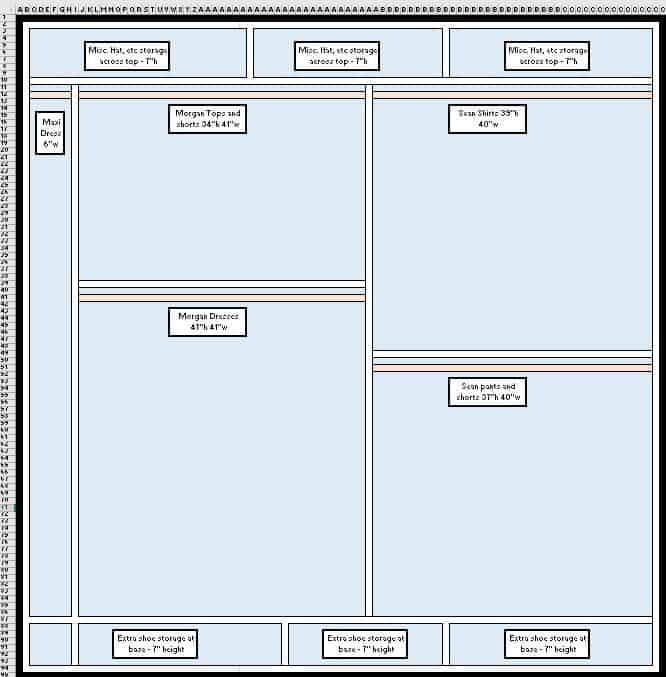
Now open an Excel document. You want to select all, right click, and choose Column Width. Set this to 1. Repeat with the Row Height. Each cell corresponds to one inch.
(Start in cell B2 if you want the black border.) Select the area to be the number of inches wide that your closet is by the number of inches tall. Use your Borders tool to add a thick black border around your selection. This is your closet wall. I skipped one row and column in before doing this so I could make a border of 1 cell of black filled cells to make the border even thicker.
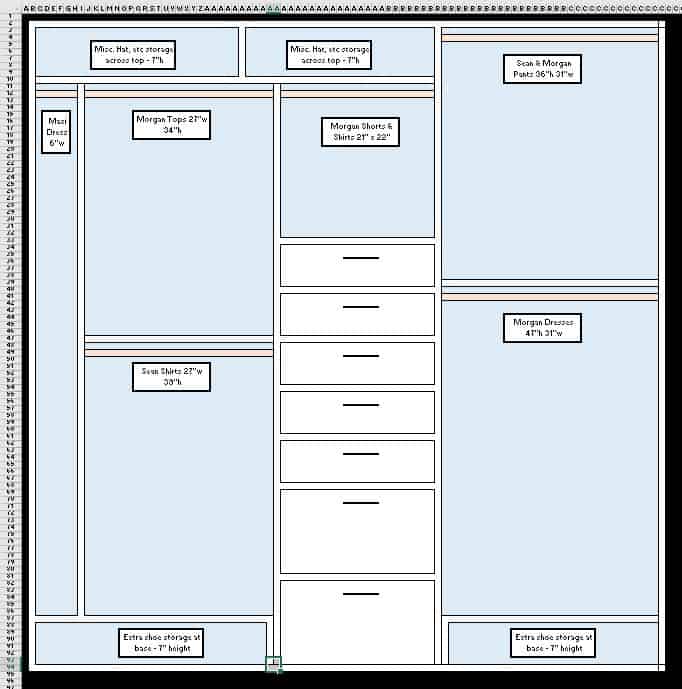
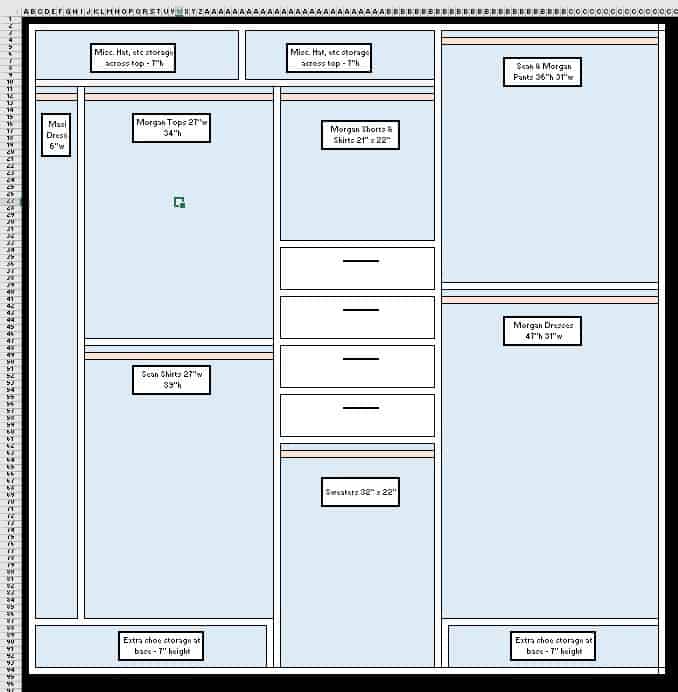
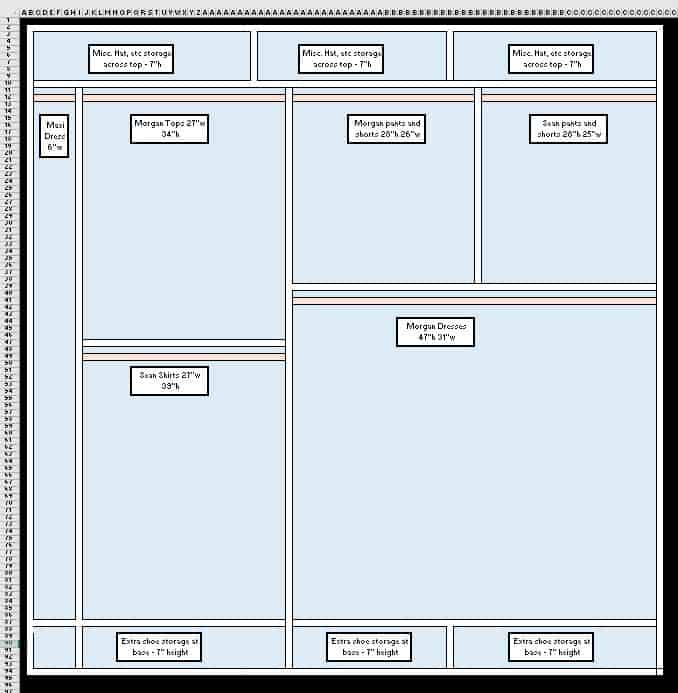
Nos start playing! use your upper, lower, left, and right borders to create lines to separate your space into the appropriate widths and heights. I played around with a few layouts.
At first, I wanted to mimic our condo closet as much as possible. I wanted drawers down the middle. However I quickly realized how much that limited our hanging space.
I tried to minimize the drawers to have more hanging space. We talked about it a bit and decided that since our master bedroom is so big, we have plenty of space for drawer storage out there. We actually already have 3 dressers (our side tables are campaign dressers!) so we wanted to focus entirely on hanging storage in this space.
My last change was to just keep my stuff on one side and Sean's on the other. It's just simpler that way!
I was finally pleased with the design and printed it out to bring home. Sean was able to use these measurements to make shopping and cut lists for the build. I definitely recommend using Excel to design your closet organization system!
 |
|||
 |
 |
 |
 |

Hello, I'm Morgan, half of the creative force behind CharlestonCrafted.com! With a passion for DIY that dates back to 2012, I've transformed three homes and now I'm dedicated to helping others craft their dream spaces. Let's turn your house into a home together!

Jerome Bennett says
This was so awesome! I really never would have thought of using Excel to help me organize my new closets. I especially liked the tip about putting the length of the clothing piece. I'll have to give it a go.