One of the bigger DIY endeavors I'm tackling in preparation of our wedding is sewing table runners for each of the round tables at the reception. I am going for a nautical-meets-preppy navy striped look. We'll pair the runners over navy table cloths with pink floral centerpieces (and coral or mint napkins... eek I can't decide) for a simple but fun look. Here's a peek at the inspiration:
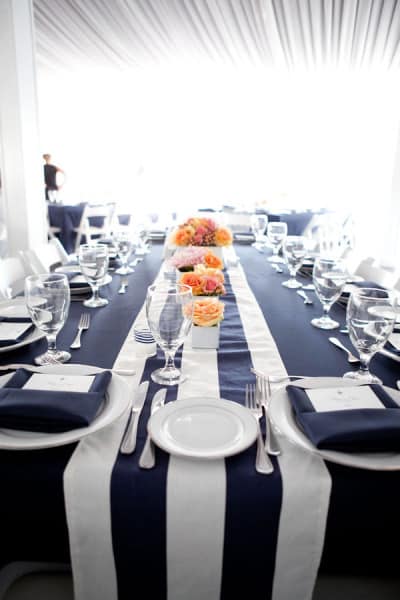
Image via Style Me Pretty // Photo by Shannon Lee Images
We will (probably) rent the navy table cloths (floor length) but I can't find striped runners for rent anywhere at all. I could only find them for sale on Etsy, and for those prices, I knew I could make my own. A luxury of having a year long engagement is being able to do things like sew 30 table runners!
I honestly didn't look at any table runner sewing tutorials because, to me, it seemed straight forward. While I could have no-sewed these suckers without a problem (just like these curtains, basically), that hem tape is actually kind of expensive, at least, it would add up when using as much as I need to. I recently got a new sewing machine and have mastered the straight line. And thats all these runners are - a collection of straight lines.
I started by ordering a small amount of fabric. I got 3 yards of this navy vertical stripe fabric. Be sure to check for coupons online - there's always something you can do for a discount.
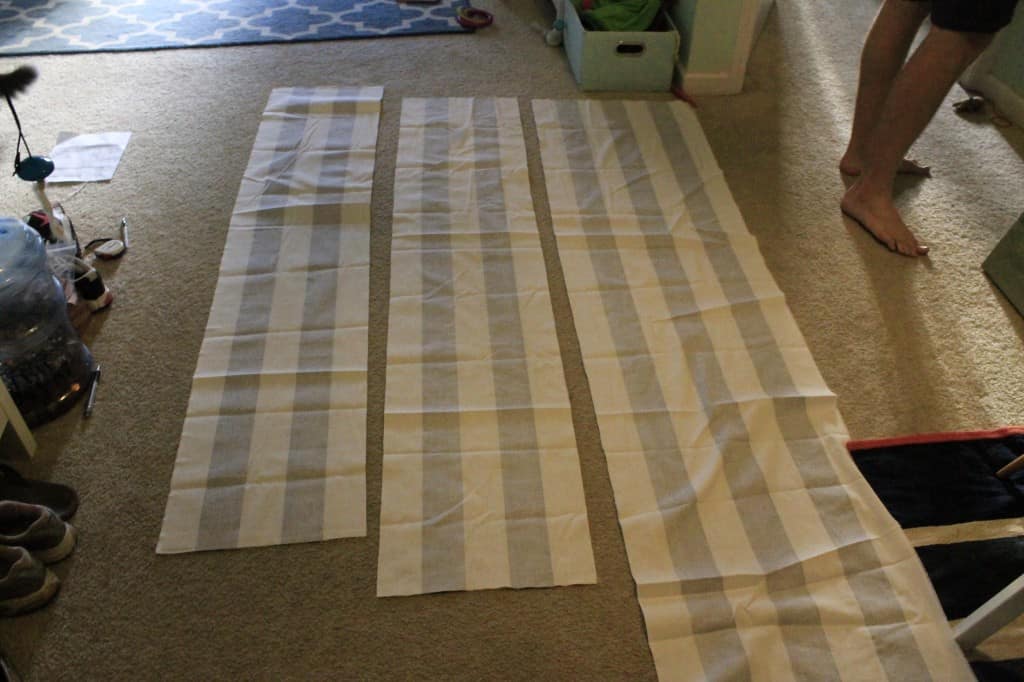
When I was ready to start working on the runners, I rolled out my fabric on the living room floor. This is where math came in. I hate math (yes, I am a CPA that hates math. That's why there's Excel). Luckily, it is one time math. We will have 2 different sized tables - 60" (seat eight, 8 of these) and 48" (seat six, 16 of these). We don't actually know how many tables we will have in total yet, it will depend on RSVPs. But, I know I don't want to be sewing in the month leading up to the wedding, so I'm gonna make the max number of runners now and worry about extras later.
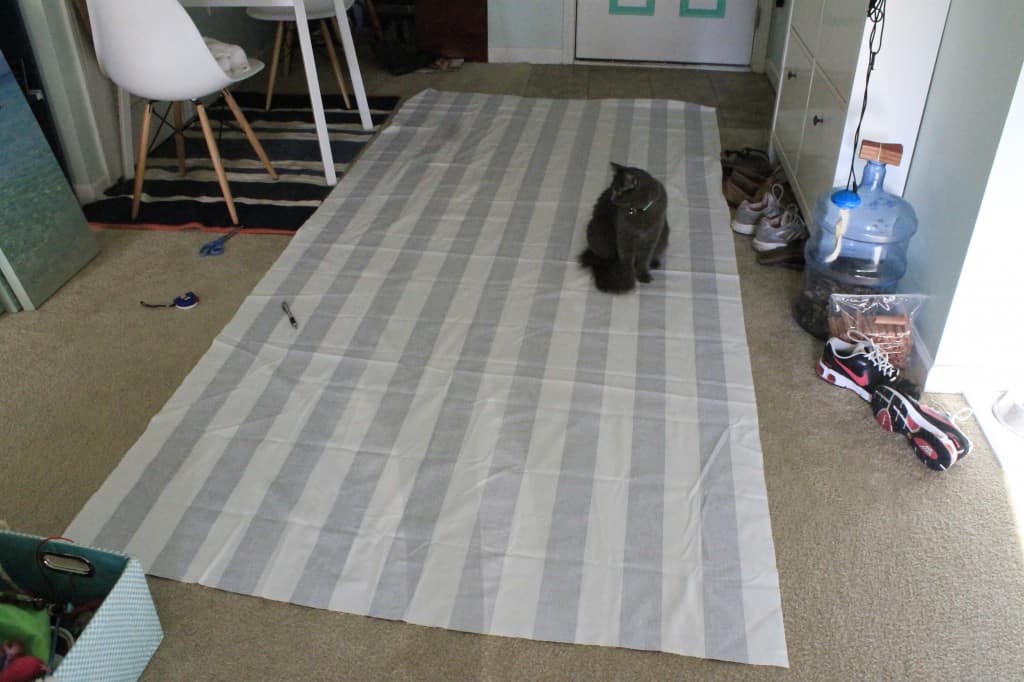
I originally thought I'd do all the runners (regardless of table size) the same width. after examining the fabric, however, we determined that it would really look nice to have a white stripe on the outside of each side of the runner. This would let it POP from the navy and would make it more symmetrical. There were 19 stripes across the width - 10 white and 9 navy. After some *math*, we decided that we could do 2 smaller runners and 1 bigger runner from each width. That means the 48" table would have 3 white stripes (and 2 navy) and the larger 60" tables would have 4 white stripes (and 3 navy). This left us with 2 scrap navy stripes, but I'm sure I'll find a use for them.
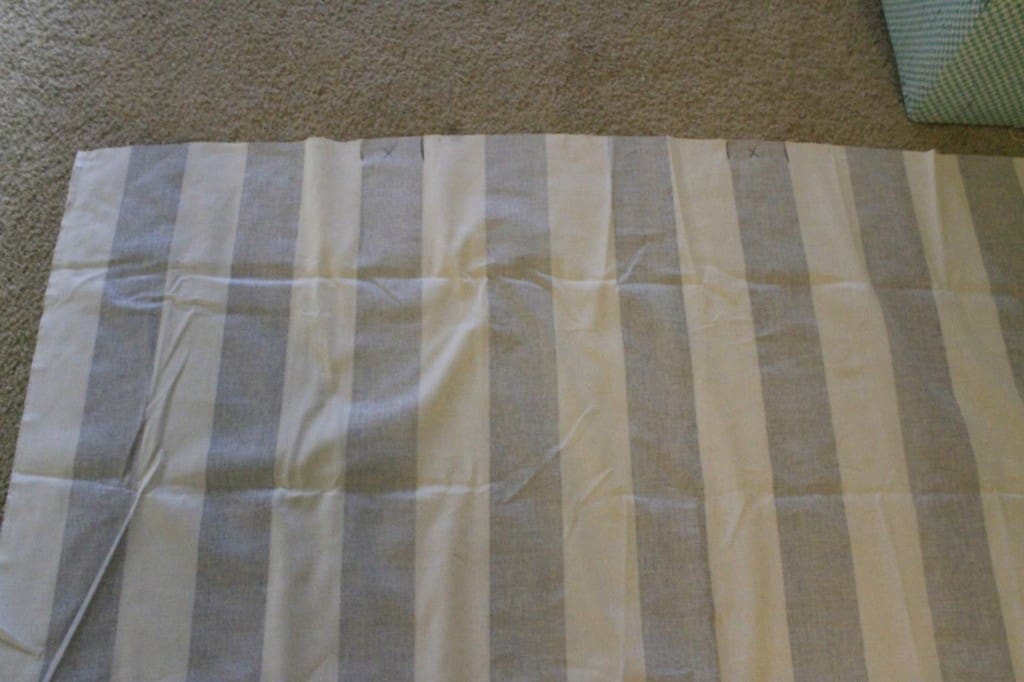
As far as lengths go, I hung things over the edge of our kitchen table until we settled on a 12 inch overhang. I wanted a point on the end, so I'd have 6 inches of straight overhang and 6 inches of point. This means our short tables will be 72 inches long and the longer tables 84 inches long.
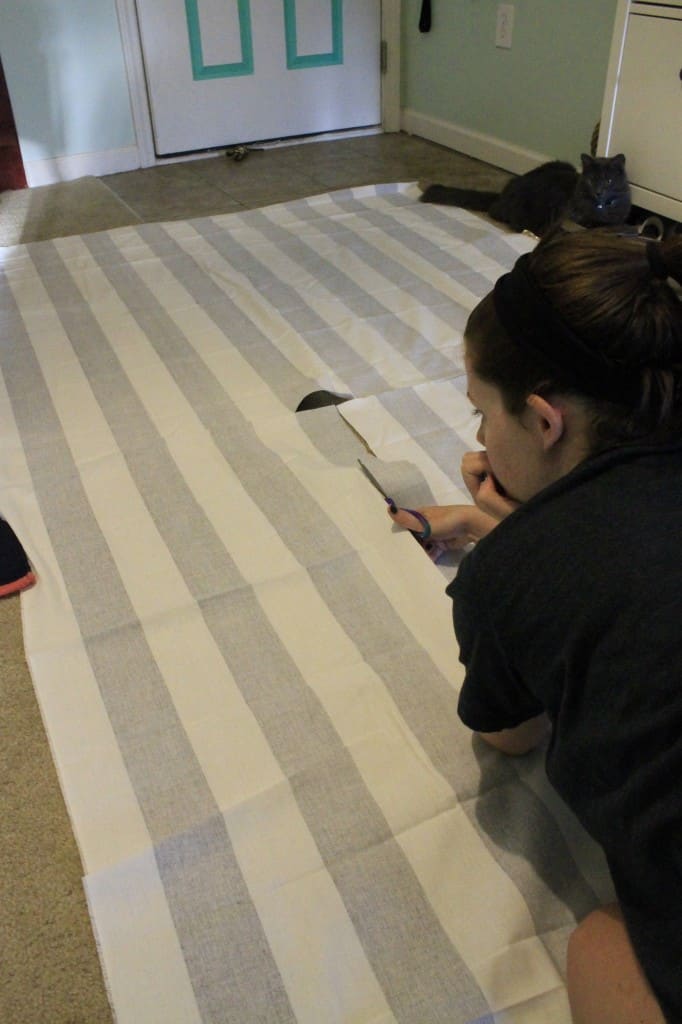
Now we can actually get this project going! Cut out your large rectangles. Stripes make it easy to cut straight lines.
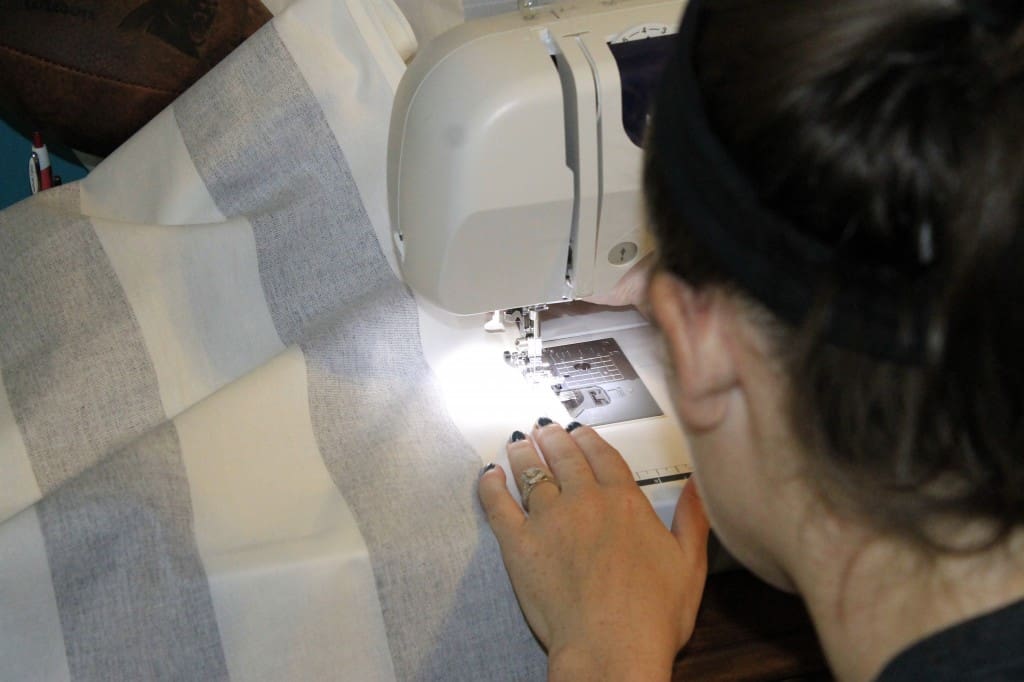
Next comes my least favorite part of any sewing project – the ironing. Give your whole piece of fabric a quick iron to get out any major creases. I knew I was going to be folding it back up for 6 months, so I didn’t get too detailed, but I did try to get it smooth so I’d get straight edges.
Then iron your hem. I aimed for a ¼ inch fold over, then ironed the crease. I was too lazy to measure, and just eyeballed it. It’s close enough to me. Then, fold that crease over another ¼ inch and iron for a neat hem that hides the frayed edge. Do the 2 long sides like this.
Sew each hem with a simple straight stitch. Seriously, 60 seconds a side.
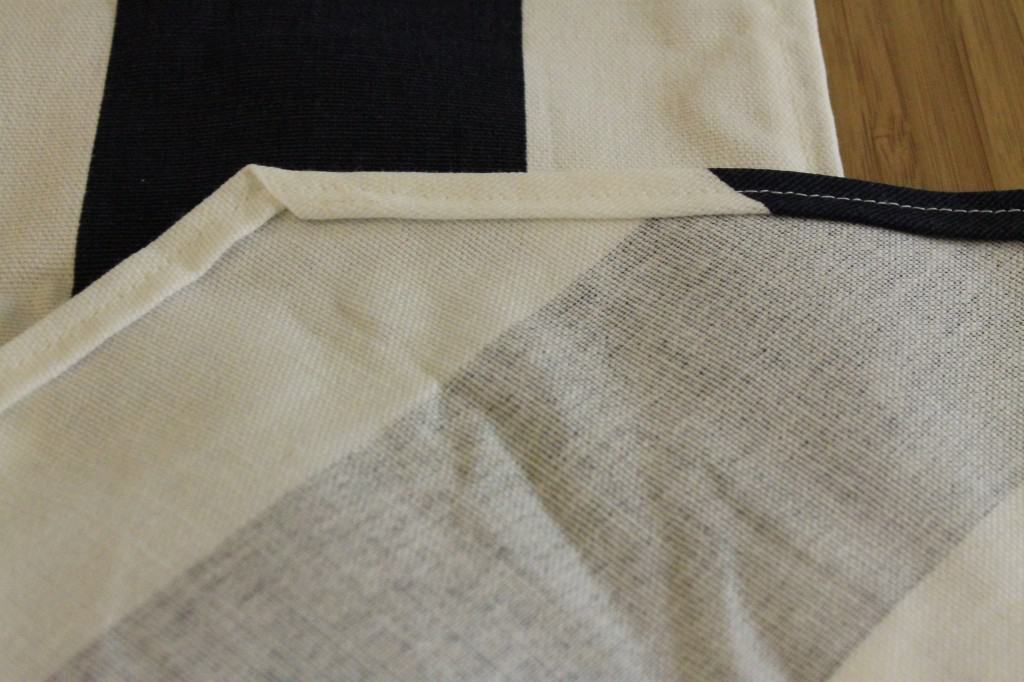
Now comes the slightly complicated part, if you want a pointed tip. Measure 6 inches from the end, and fold yourself a point. Iron this crease.
Trim the fabric so you have only ¼” of excess.
Fold this over again for a clean edge. Iron in place. Don’t burn your fingers!
Now just sew straight lines over the crease. Easy, peasy.
Trim your threads and you are done! Unless, you know, you have 23 more to go.
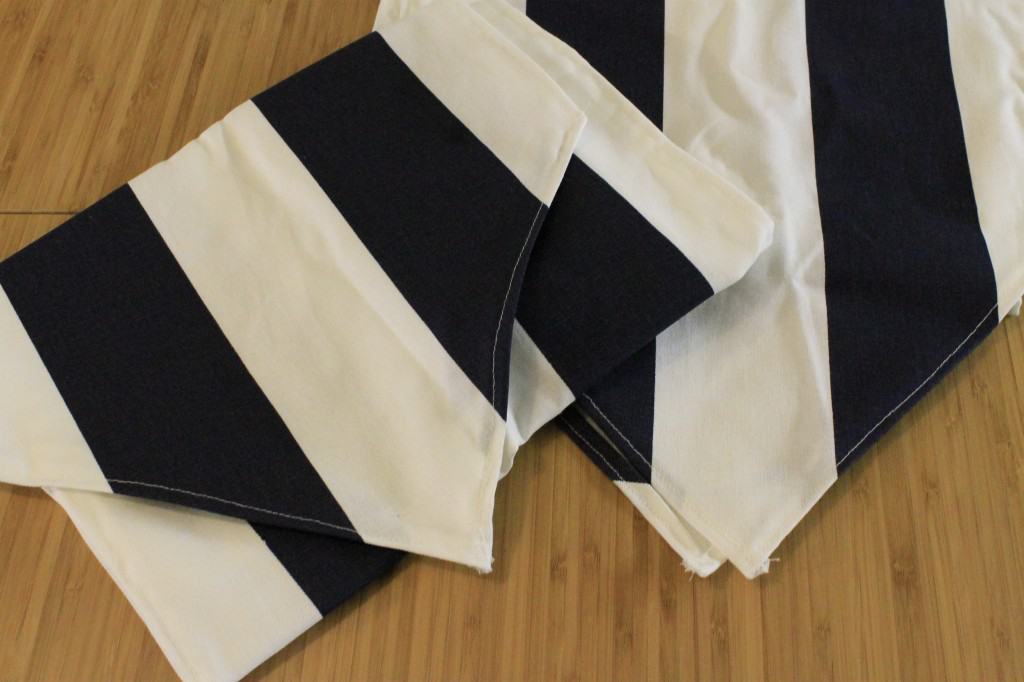
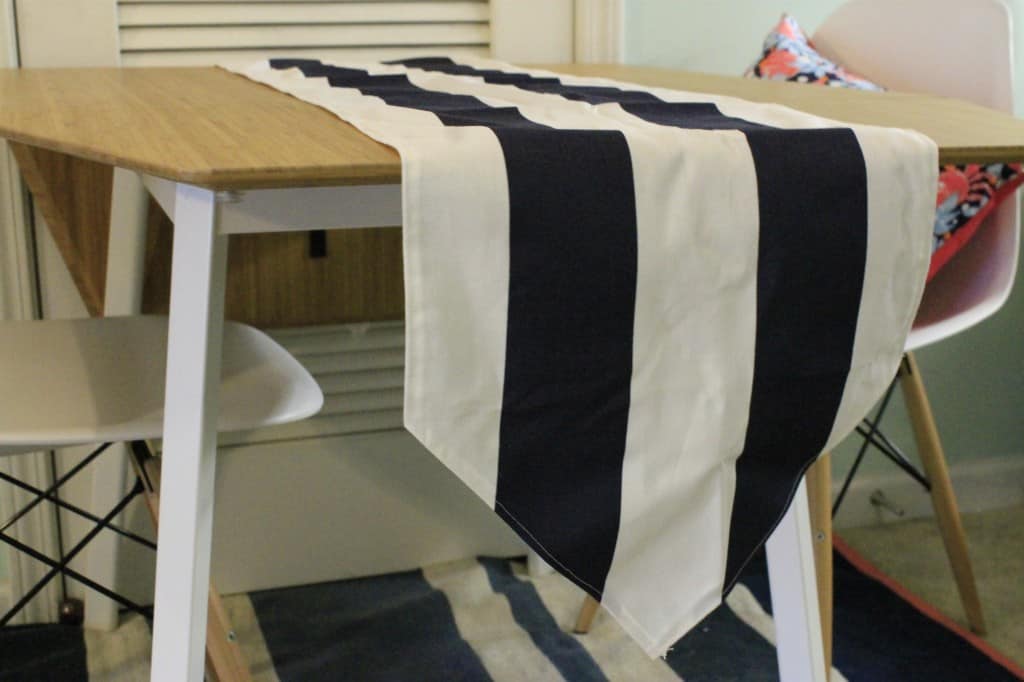
Pretend this one isn't wrinkled as anything. They're going into tupperwares until April, at which point we will iron and steam them to the point of crispness. Also, they photographed rather black, but let me reassure you - they are navy.
These are a decent amount of work, but easy work at least. And the more you do, the more assembly-line style you can get with it. If your sweet fiancé likes to iron, he can even help! 😉
I’m so excited for the impact they will have on my reception!!
Have you sewn any table linens?
 |
|||
| |
|
|
|

Hello, I'm Morgan, half of the creative force behind CharlestonCrafted.com! With a passion for DIY that dates back to 2012, I've transformed three homes and now I'm dedicated to helping others craft their dream spaces. Let's turn your house into a home together!


brittani says
Do you still have these runners and if so, are you selling them?
Sean says
We do. Send me an email at CharlestonCrafted@gmail.com and we can talk. Let me know how many and of which size you are looking for. I have some unused and a lot that are used & washed.